Microsoft Word is integrated into the Microsoft Office suite with the aim of offering each user the necessary tools so that each file created there has the necessary style and focus according to the type of user . From Microsoft Word 2016 to the new Microsoft Word 2019, the development group has focused on integrating a series of practical functions so that we have the necessary tools to manage the data stored there in a much more complete way. One of the most essential tasks is the classification of the data in a Word file. This order has the purpose of presenting the information in a much clearer and readable way for the person..
Microsoft Word 2016 and 2019 are in the ability to sort a text list either from A to Z (ascending) or from Z to A (descending) and TechnoWikis will explain in detail how to achieve this. The process will be done in Microsoft Word 2019 but it is similar in Word 2016.
To stay up to date, remember to subscribe to our YouTube channel! SUBSCRIBE
1. Sort a text list in Microsoft Word 2016 or 2019
Step 1
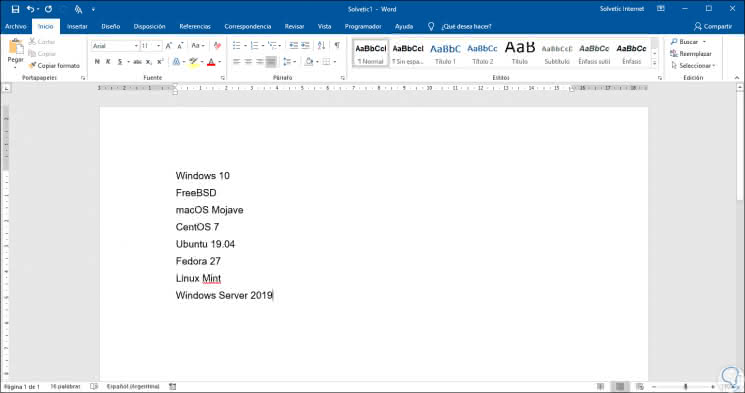
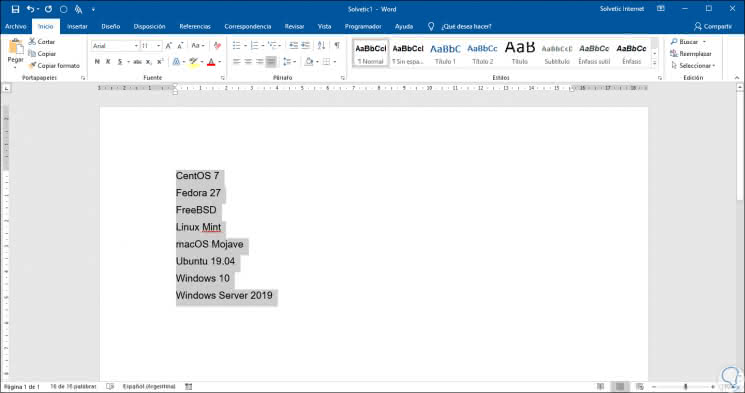
A list in Microsoft Word is nothing more than a series of rows with registered data, for example, we have the following information:
Step 2
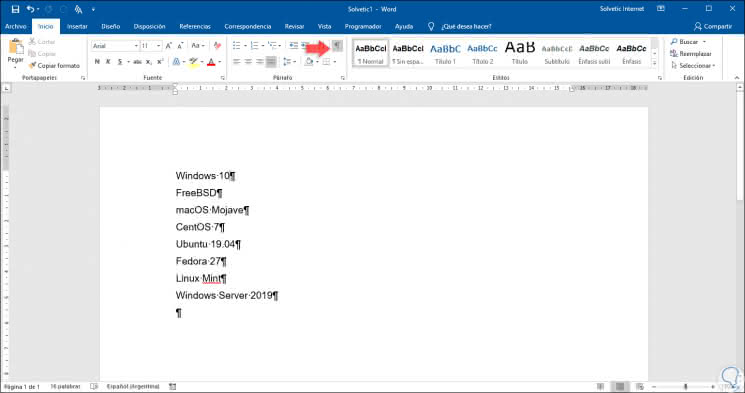
Naturally, when we register several terms they are separated by a space, to verify this we click on the "Show all" icon or using the following key combination and the result will be the following:
+ ( Ctrl + (
Step 3
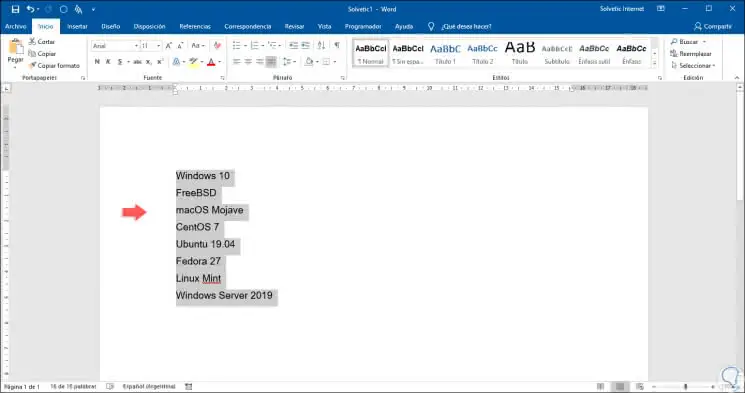
This checks the spaces that exist between the words, we can click again on this icon to hide the paragraph marks and then select the rows with the data in Microsoft Word:
Step 4
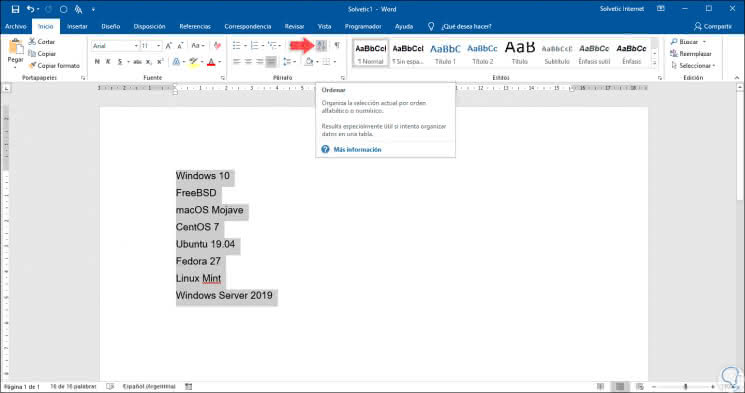
Now we will go to the "Start" menu, group "Paragraph" and there we will find the "Sort" option at the top:
Step 5
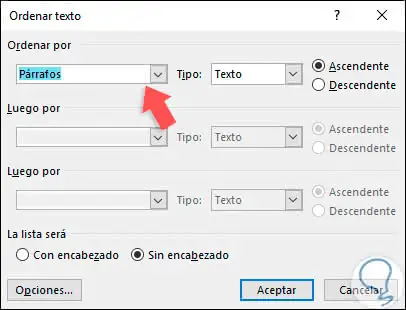
When clicking there, the following window will be displayed:
Step 6
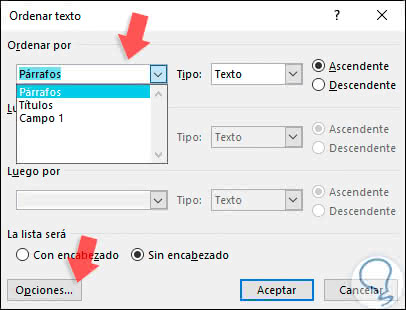
We can see that in the "Sort by" field we have some filter options, these are:
Step 7
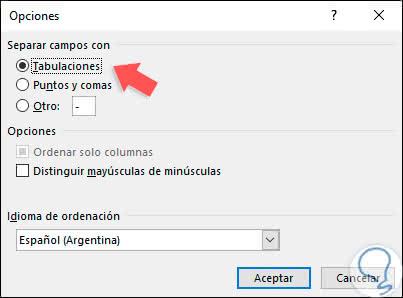
If we click on the "Options" button it will be possible to define variables such as how to separate the fields, the language to be sorted or if the filter distinguishes between lowercase and uppercase:
Step 8
In this case, since the list contains two words separated by space, we must select the option "Tabs".
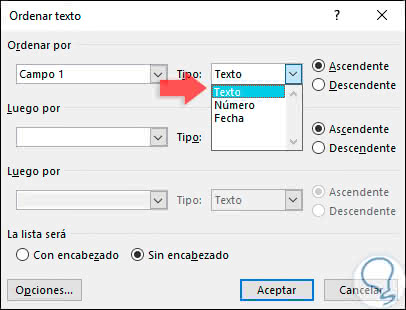
In the field "Sort by" we select Field 1 and then we define the type of data to be filtered, the options integrated in Word 2016 or 2019 are:
Step 9
In the right lateral part it will be possible to select the type of organization, ascending or descending.
In this case we have selected the option "Ascending" and clicking on OK we will see the ordering of the selected data:
2. Sort a numeric list in Microsoft Word 2016 or 2019
The data that we can register in Microsoft Word 2016 or 2019 are varied, one of the most common is the entry of numbers which we can sort ascending or descending with few steps.
Step 1
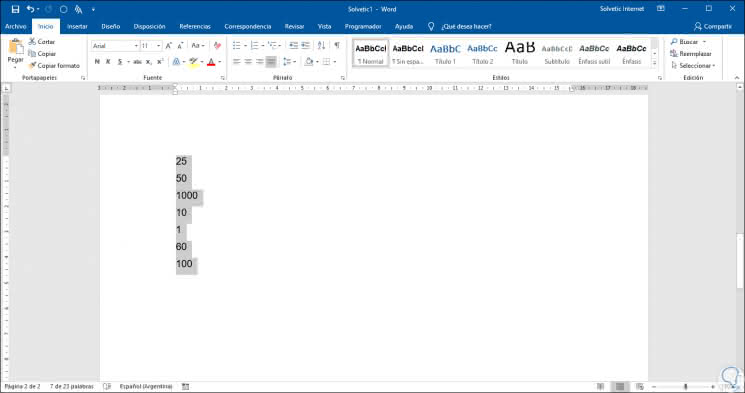
First, we select the list where the numbers are:
Step 2
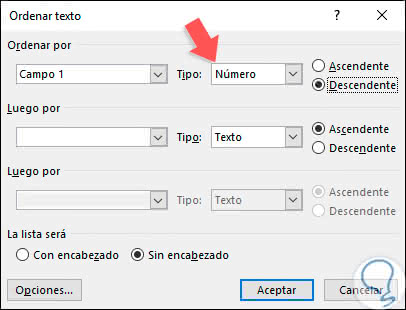
Now we go to the Start menu and in the group "Source" we click on the "Sort" option, there, in the window we will define the following:
- In the "Sort by" field, we will select Field 1
- In the field "Type" we will select the option "Number".
- We define the way in which the data will be ordered, in this case "Descending".
Step 3
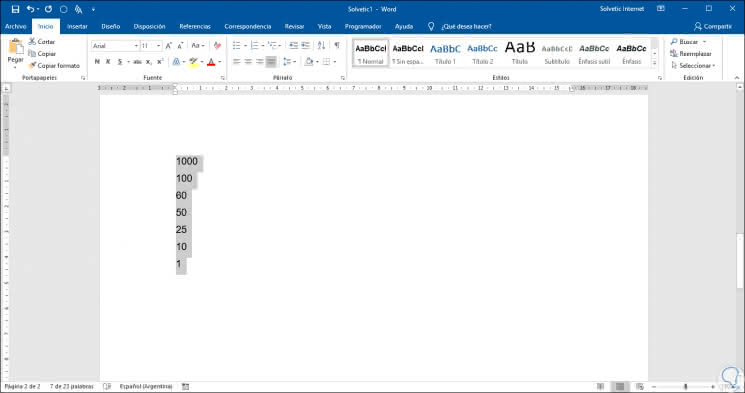
By clicking OK we will see the numbers ordered according to the defined criteria:
3. Sort a list with dates in Microsoft Word 2016 or 2019
Step 1
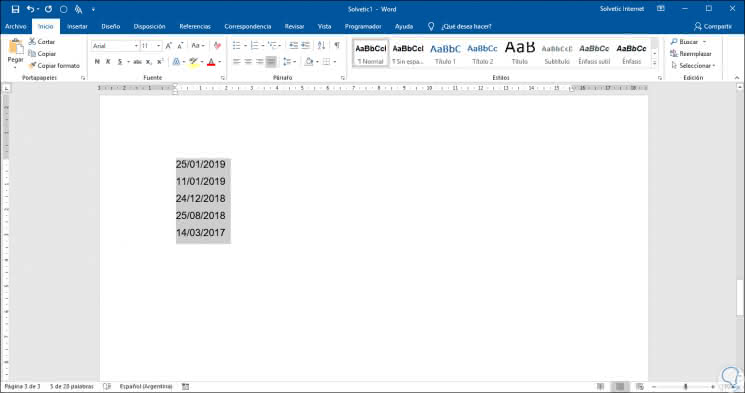
The dates are other data commonly used in Microsoft Word 2016 or 2019 and its ordering is just as simple as in the previous steps, for this we have the following information:
Step 2
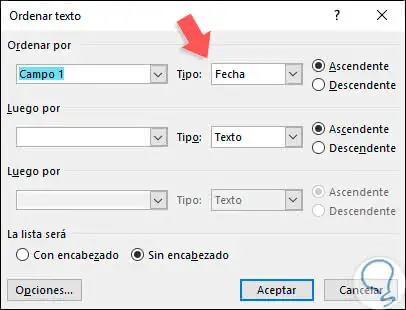
We select the dates and click on the "Sort" button located in the "Source" group of the Start menu and in the expanded window we configure:
- In the "Sort by" field, we will select Field 1.
- In the field "Type" we will select the option "Date".
- We define the way in which the data will be sorted, ascending or descending.
Step 3
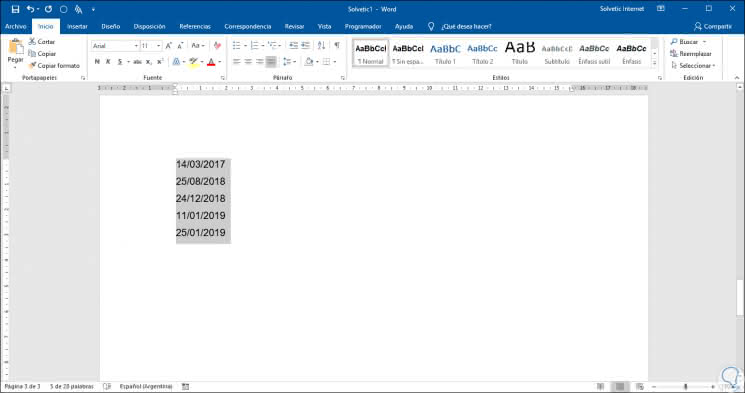
By clicking OK we will see the changes reflected:
4. Sort a table with dates in Microsoft Word 2016 or 2019
The insertion of tables with data is another of the frequent actions that we can perform in Microsoft Word for the presentation of data, these tables can be created manually or copied directly from Microsoft Excel, but independent of the method we have the form to order the data registered there.
Step 1
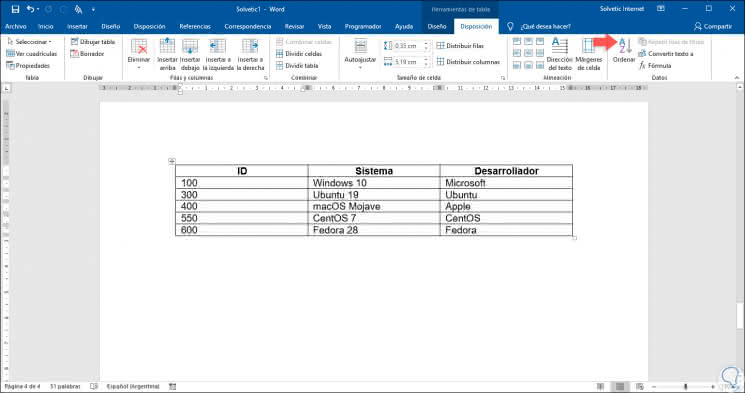
To carry out this process of ordering tables in Microsoft Word, we select some of the cells available there and automatically the "Table Tools" menu will be displayed, there, we will go to the "Layout" tab and in the "Data" group we will find the "Sort" option:
Step 2
In the expanded window we will select the column in which the filter will be applied and automatically Word 2016 or 2019 will determine the type of data of this (number, date or text) and we can apply the desired order:
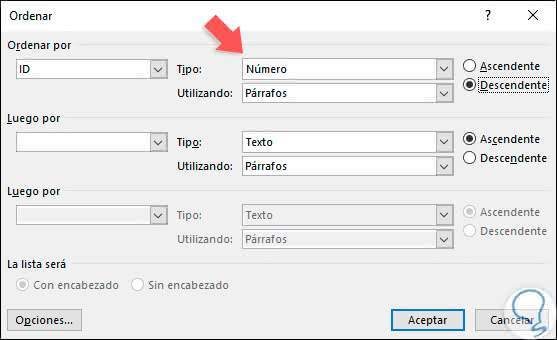
Note
It will be possible to establish various organizational variables by selecting the appropriate options in each field Then by.
Step 3
By clicking OK we will see the results of our ordering:
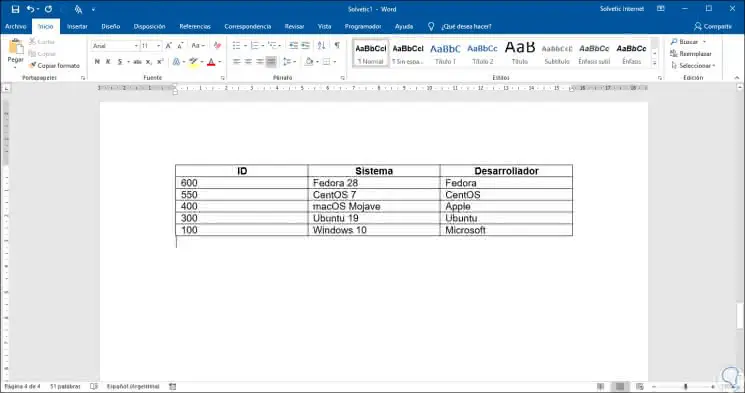
We can verify that the options to organize our data in Microsoft Word are diverse and functional, so we can present the information in a much more coherent and visually organized way..