For none of us it is a secret that Microsoft Word has evolved dramatically both in terms of security and functions and features . That is why Word has become the most popular word processor for common users..
But beyond a word processor, Word is a valuable utility to integrate many objects that in previous versions was not possible, and one of these is the possibility of inserting PDF files into Microsoft Word 2016 or 2019 documents . To perform this action there are different options that we can perform and it is convenient to know the procedure in all to have a greater range of possibilities when performing the action.
For this reason, in this tutorial TechnoWikis will explain different ways to insert PDF into Microsoft Word and apply for versions 2016 or 2019 in the same way..
To keep up, remember to subscribe to our YouTube channel! SUBSCRIBE
1. How to insert a PDF into Microsoft Word using the Object tool
Word integrates a functionality called "object" which allows us to add to the document different elements that will be treated in a special way.
Step 1
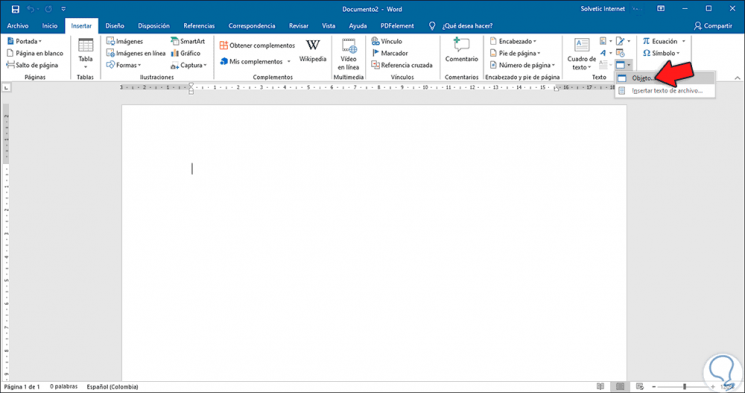
To use this method we will go to the "Insert" menu and in the "Text" group we click on "Object" and again select "Object":
Step 2
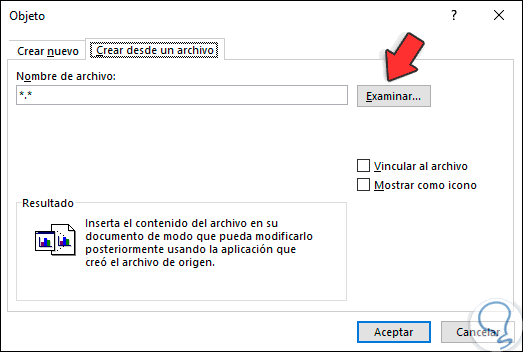
The following window will be displayed and there we will go to the “Create from a file†tab. With this method, it will be possible to adjust file parameters such as changing the position, changing the size or color, as well as controlling the text that fits around the object that we have integrated. In this window we click on the "Browse" button.
Step 3
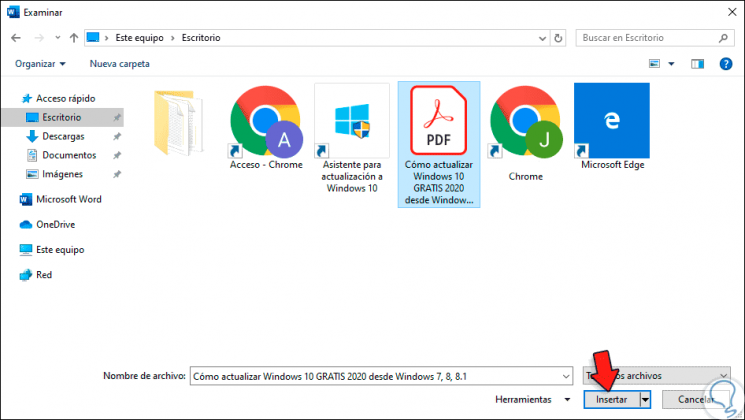
We proceed to search the PDF file. We click on "Insert" so that said PDF file is added as an object in the document.
Step 4
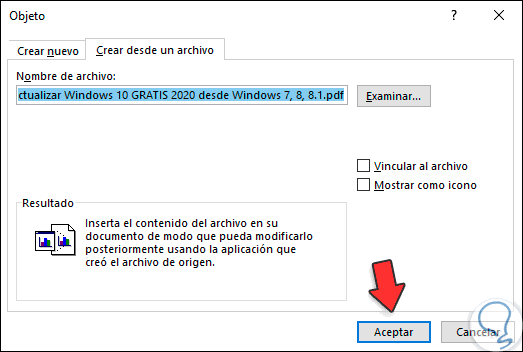
Click on "Accept".
Step 5
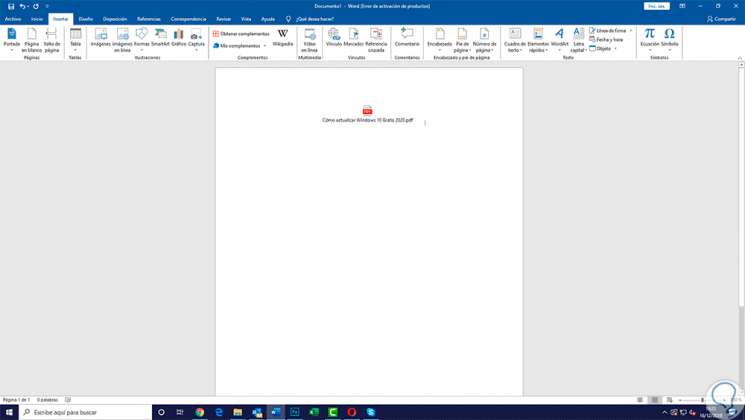
Now we will see the contents of the PDF file in Microsoft Word:
2. How to insert the text of a PDF into Microsoft Word
One possible option is to import part of the text from the PDF file using the Insert Object tool and drop it into the active document, but this method inserts the text without applying the original format or adding graphics created in the PDF file, thus losing the full essence. PDF, but if we only want the text to be available this is a good option.
Step 1
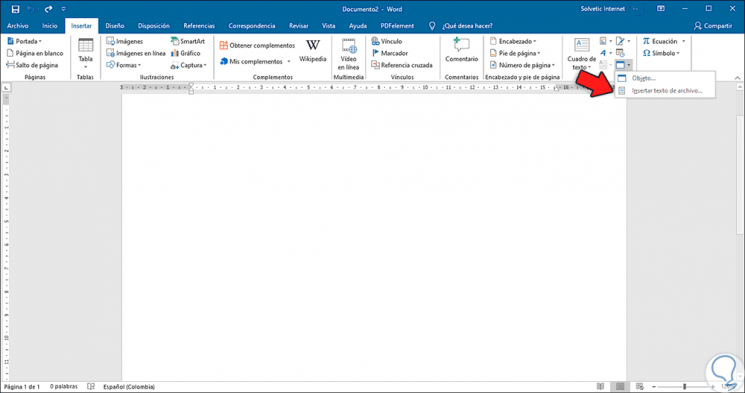
To do this, we place the Word cursor in the document and go to the "Insert" menu and select "Object" in the "Text" group to click again on "Insert file text":
Step 2
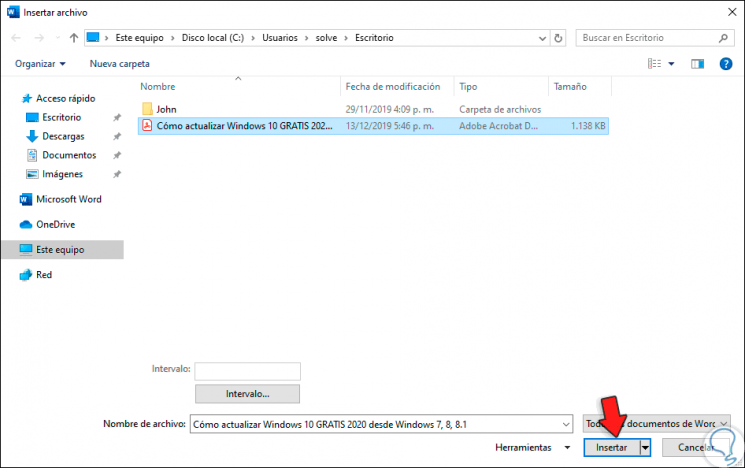
The window where we select the PDF file will be displayed. We click on "Insert".
Step 3
Later we will see the following message. We click "Accept" since this message indicates that it will be created with editing options.

Step 4
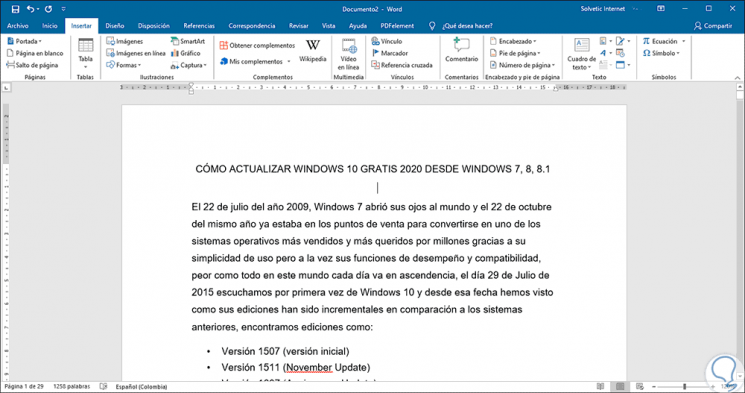
After this we will see the text of the PDF in the Microsoft Word 2016/2019 document:
3. How to insert PDF into Word as a static image
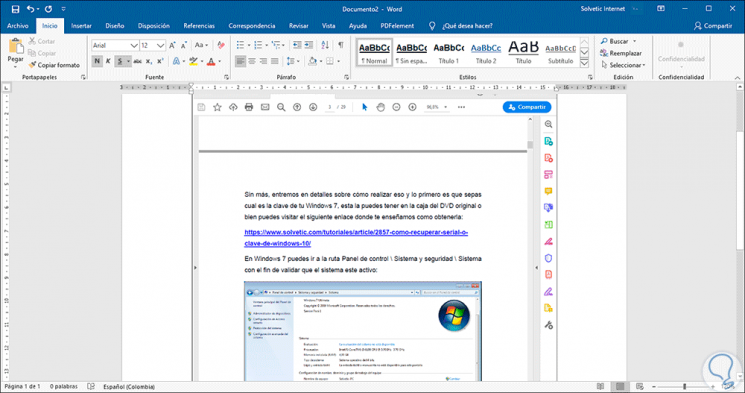
This method allows you to convert the PDF document into a static image and then insert it into the Word 2016/2019 document. This is a value that does not allow you to edit the values ​​of the PDF file as such.
Step 1
For this method we must capture the image of the PDF file using the integrated clipping tool in Windows 10 or one of a third party, then, in Word, we go to the "Insert" menu and in the group "Illustrations" we click on "Images" and We select the image we have captured. We click on "Insert".
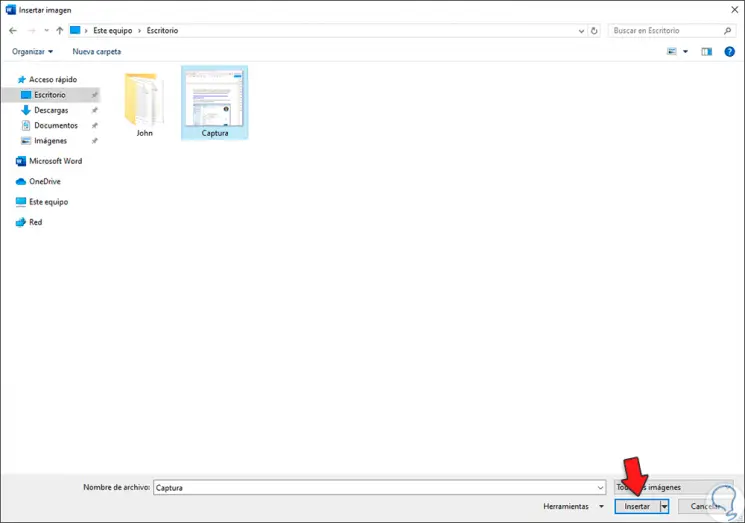
Step 2
We will see the image of the PDF added to the file:
4. How to insert PDF into Word as a static image using an online utility
It is possible to use an online converter to take the PDF file and convert it to a static image, for this we can use one of the following URLs:
SmallPDF
IlovePDF
pdftoimage
PDF2GO
Note
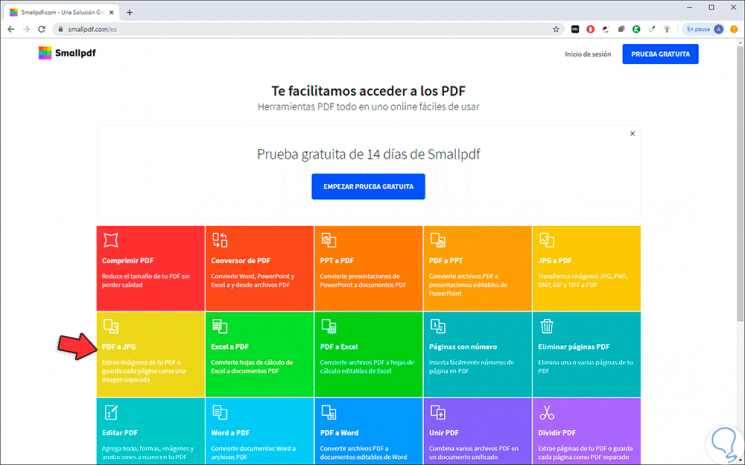
For this example we will use SmallPDF
Step 1
The following environment will be shown. There we click on the “PDF to JPG†option
Step 2
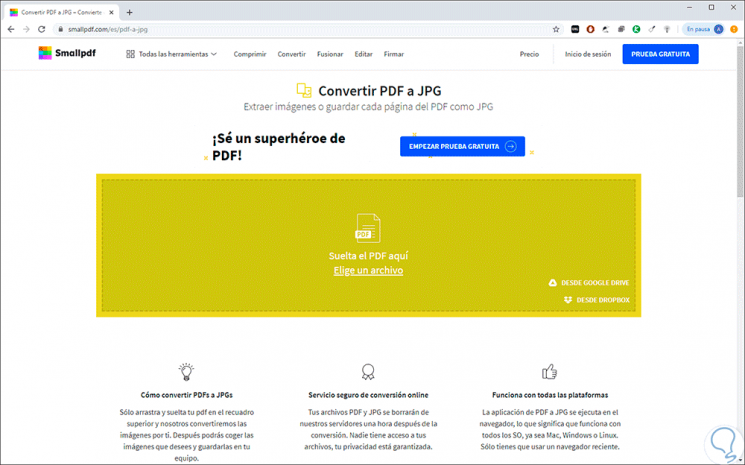
The following will be displayed. There we can drag the PDF file or select it.
Step 3
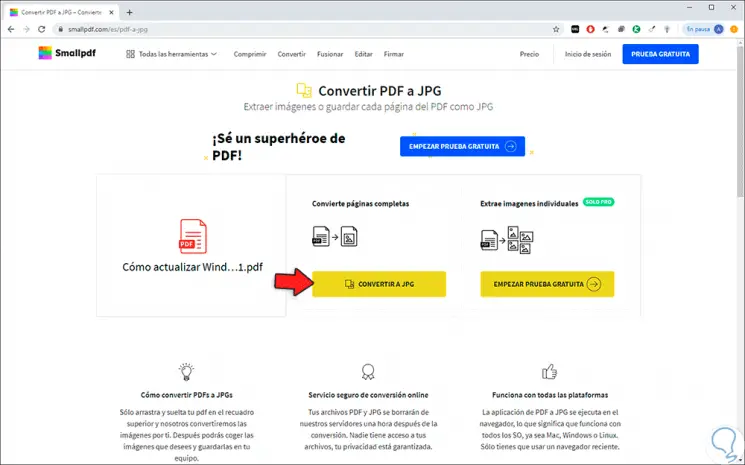
Once it goes up we will see the following. We click on the "Convert to JPG" button.
Step 4
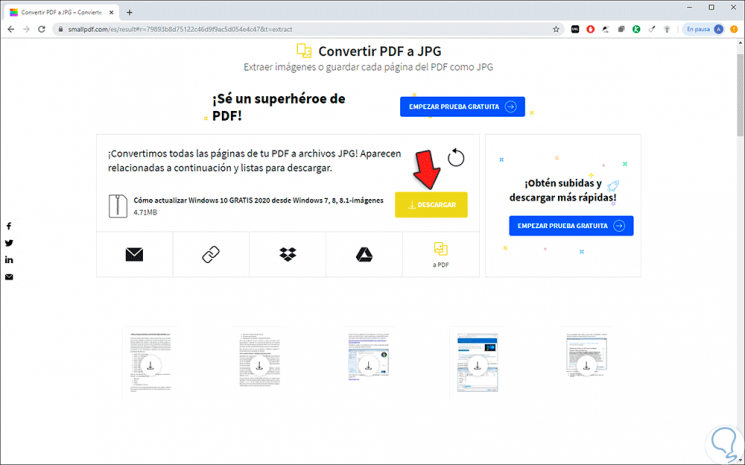
When the conversion is complete we will see the following. We click on "Download".
Step 5
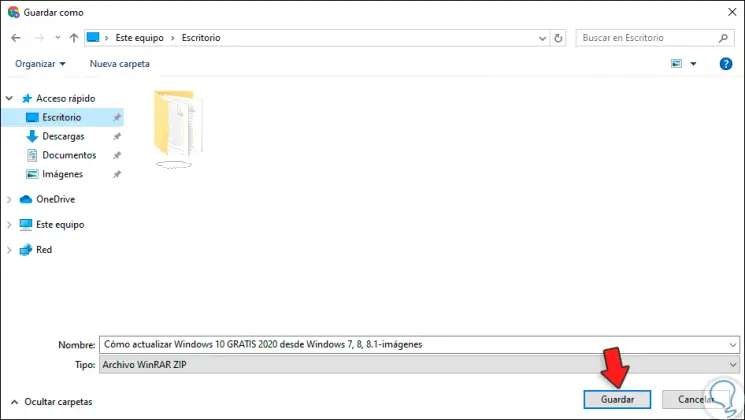
This will be downloaded in compressed format. We click on "Save".
Step 6
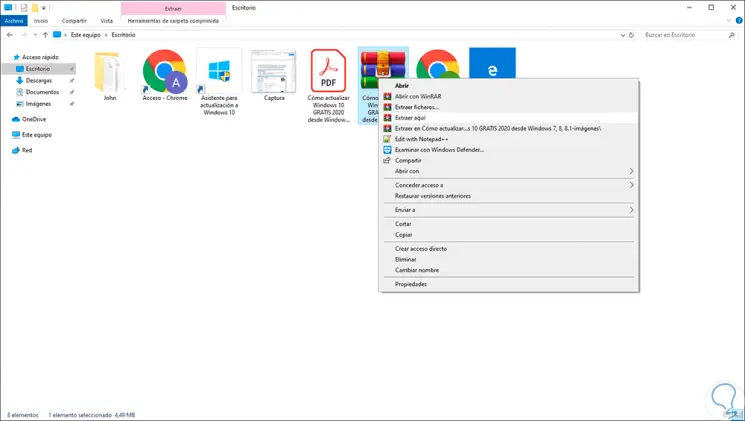
Once downloaded we proceed to extract it by right clicking on it and selecting the appropriate option:
Step 7
With this utility all the images of the PDF will be extracted as we can see:
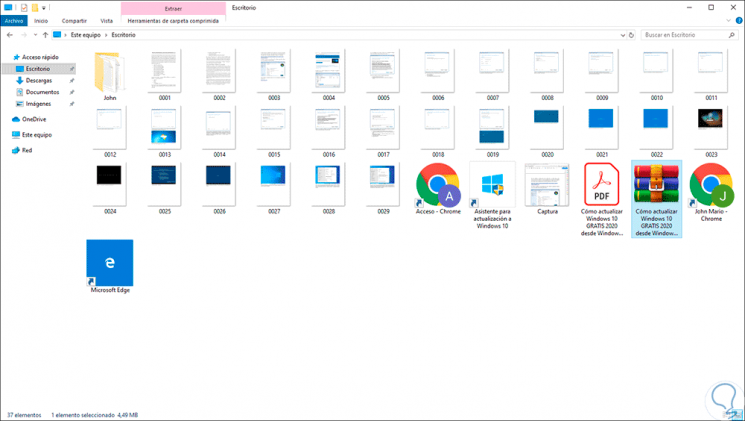
Step 8
After this we go to the Word document and from the "Insert" / "Image" menu we select the desired image to insert:
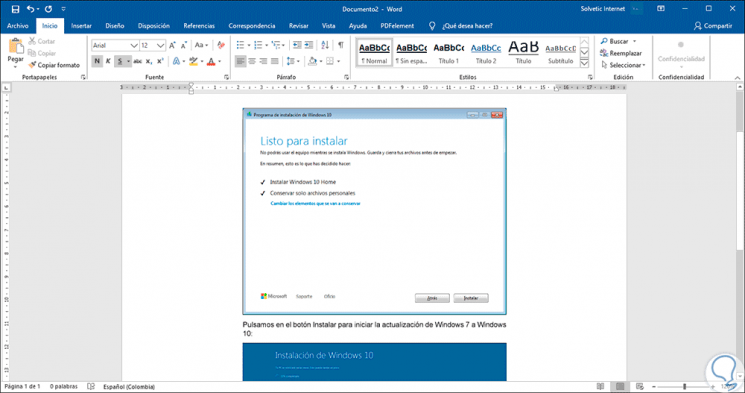
5. How to insert a PDF file as a link
With this method the total PDF file will be inserted but it will only be visible as the first page of the document and this will remain linked to the source file, if we wish we can leave it as a preview or in an icon format.
Step 1
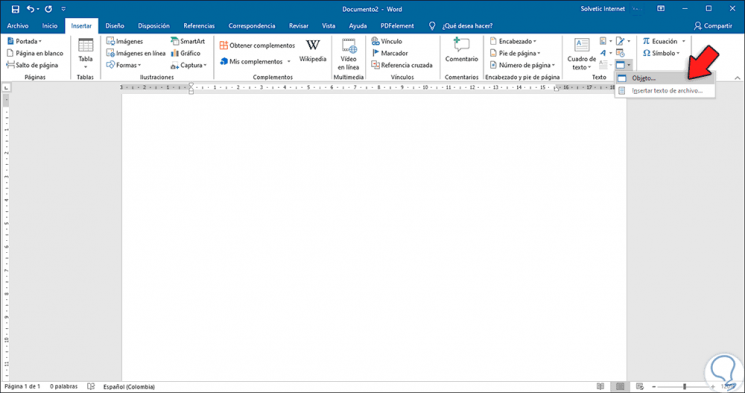
To do this we go back to the "Insert" / "Object" menu:
Step 2
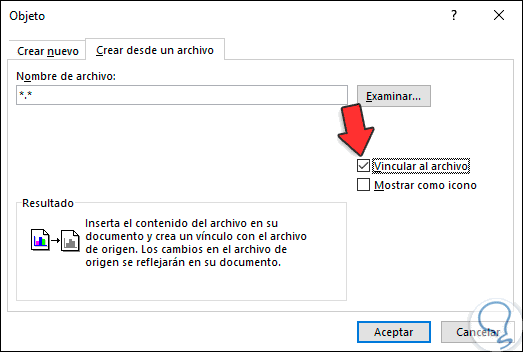
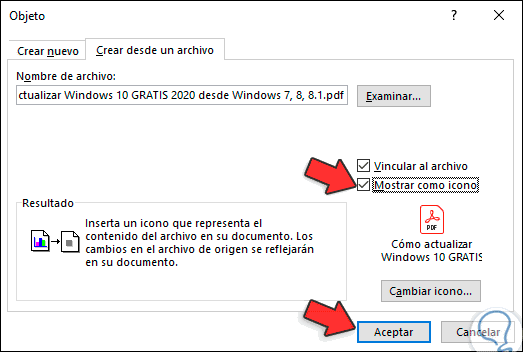
In the displayed window we go to the “Create from a file†tab and there we activate the “Link to file†box:
Step 3
After this we select the PDF and we can activate the “Show as icon†box. Click on "Accept".
Step 4
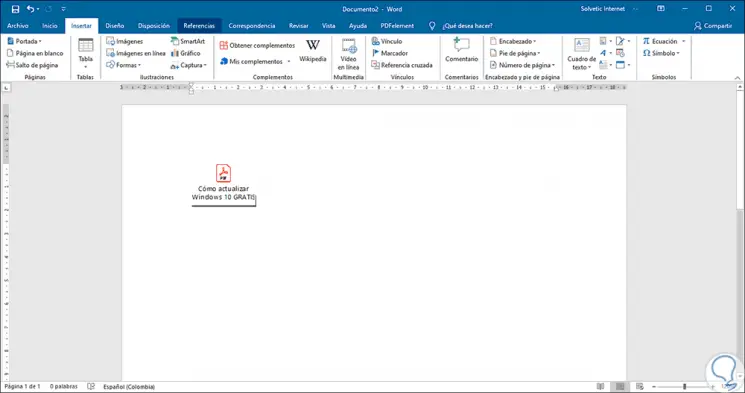
We will see the PDF linked to the Word document:
6. How to copy PDF into Word document 2016/2019
This is a mechanism through which we can select the desired text in the PDF file and then copy it in Microsoft Word.
Step 1
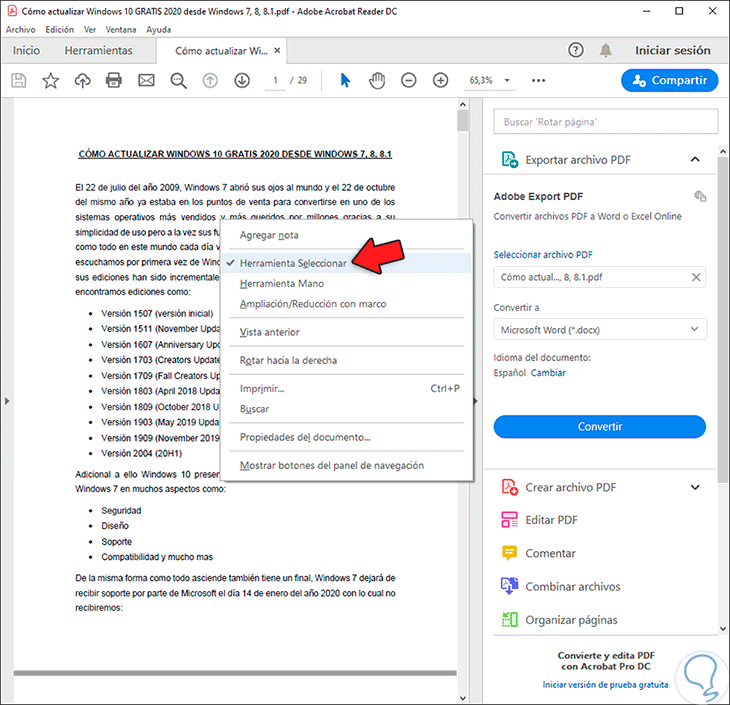
To do this we open the PDF file, right click somewhere and select “Select Toolâ€:
Step 2
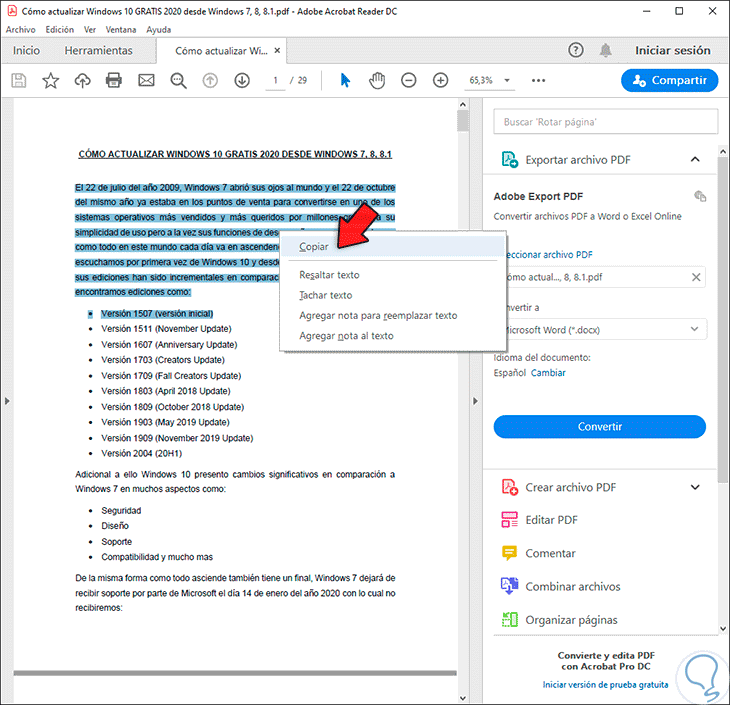
Select the desired text and copy it:
Step 3
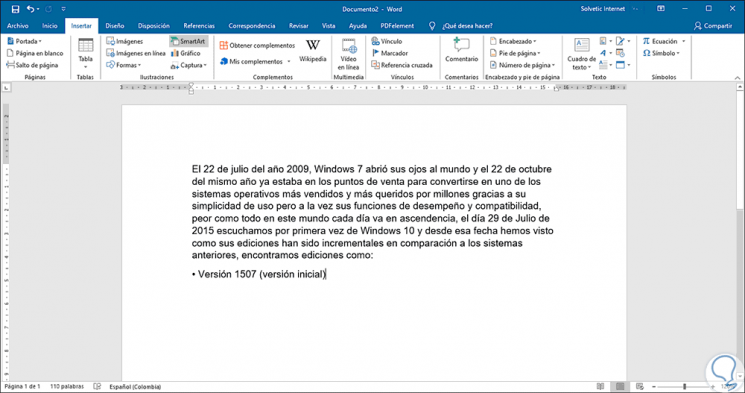
After this we will paste it in Word:
7. How to insert a PDF file into Word using Google Docs
Docs is the equivalent of Microsoft Word, but with some limitations.
Step 1
To use this method we access Google Docs in the following link:
Google Docs
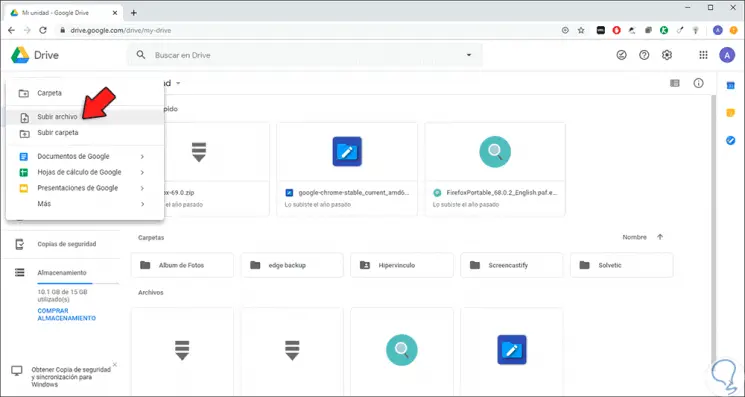
There we click on "New" / "Upload file":
Step 2
Then we select the desired PDF file and once loaded we right click on it and select "Open with" / "Google Documents":

Step 3
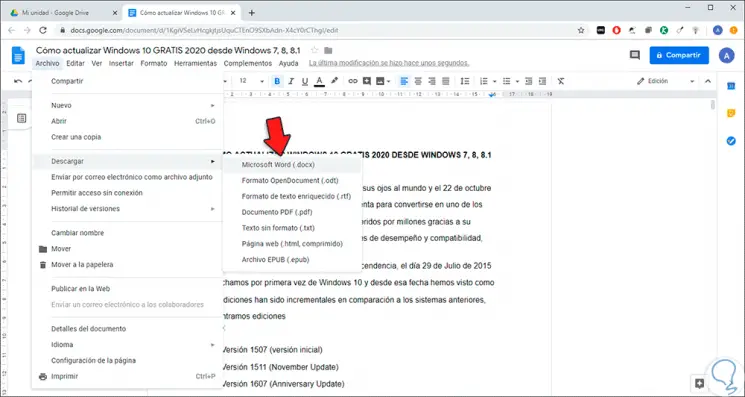
Once opened in Google Docs, we go to the "File" menu and there we select "Download" / "Microsoft Word" (.docx):
This will download the file in Word format and we will be ready to access it in Word 2016 or 2019.
With these options that TechnoWikis has explained to you, it will be possible to insert a PDF file or access its content in Word in a completely functional way.