We always look for the perfect photograph, especially those who seek to have professional book style images. The preparation for this type of conference is complex because in principle to get it right you have to take care of every detail ..
But if the conditions are not the best or the results are not what we expected, we can also resort to the subsequent retouching with Photoshop, that tool capable of working miracles . Today we bring you this tutorial so that a bad day is not a reason for your photographs are not perfect . You can easily improve your face from Photoshop CS6 or CC 2017. Improve your dark circles, lips or look thanks to these tricks.
1. How to remove dark circles, bags or wrinkles with Photoshop CC 2017
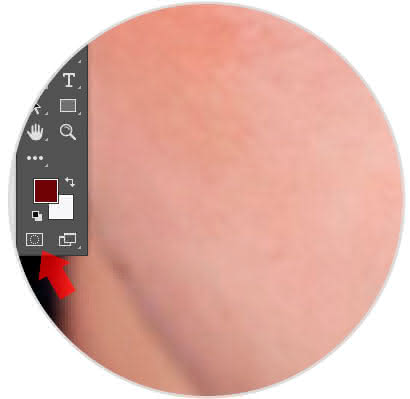
Step 1
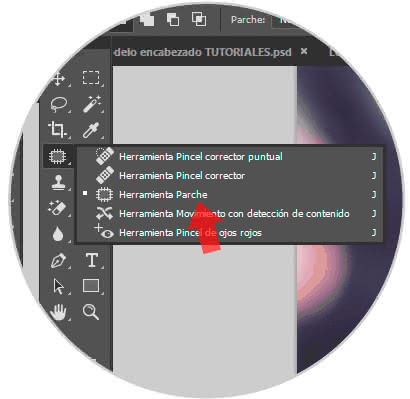
Once we have our image open we will go to the tool "Patch tool" of the tool panel.
Step 2
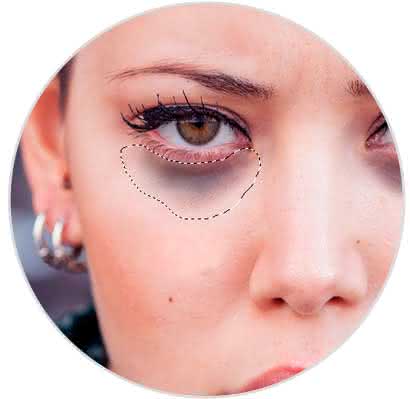
Now we select the area that we want to improve by tracing the contour of the area with the Patch tool.
Step 3
Now we drag that form to an area that has good skin to improve it.

Step 4
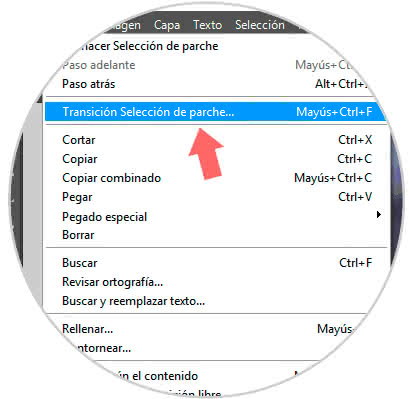
The resulting effect may be a bit exaggerated so let's smooth it out by going to the Edit - Transition Patch Selection path.
Step 4
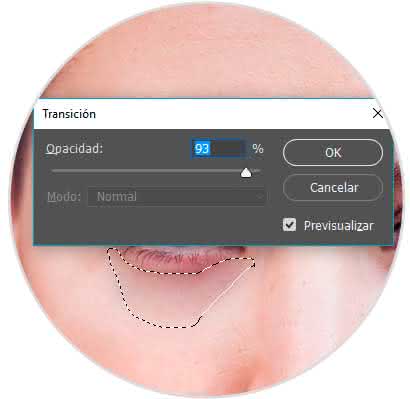
In the window that appears we will adjust the level of Opacity that we want for the effect.
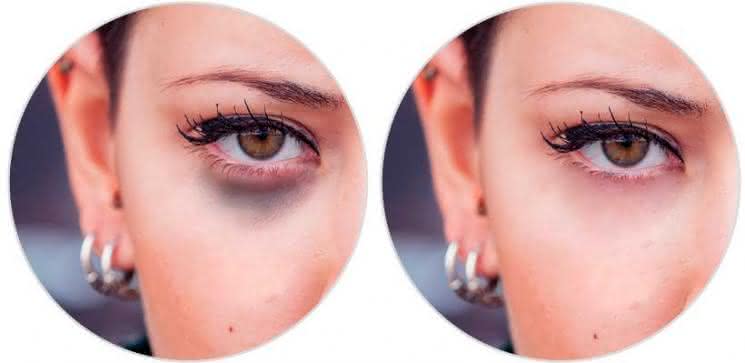
Step 5
We can see the difference before and after applying the effect.
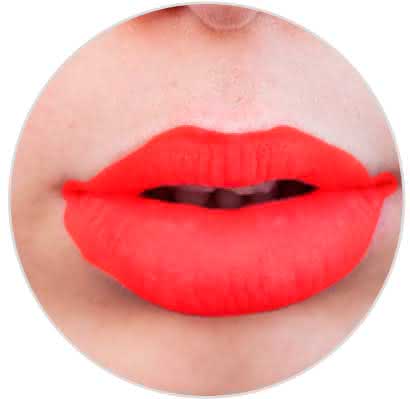
2. How to improve lips with Photoshop CC 2017
We can also improve the color of the lips and even change it with Photoshop.
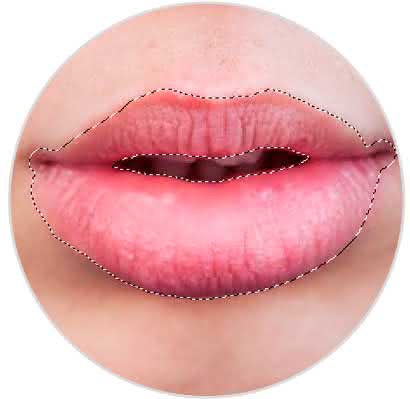
Step 1
We will choose the Quick mask mode for quick and easy lip color editing. To do this, enter the mask mode that you will find in the lower part of your tool window. You can also activate it by pressing the Q key.
Q
Step 2
Now choose the brush tool and set the color black as the front color. You will see that the selection turns red, select what you want to edit from the lips.
Step 3
Press the layer Mask mode again or the letter Q to exit this mode and the selection is applied. Then go to the Selection - Reverse route or the next combination so that only what we are interested in is selected.
Step 4
Once we have our selection we can start editing. For this we will use layers of filling or adjustment, in this case we will use "Levels" and "Hue / Saturation". We will play until we have a result that we like.
Note
If, for example, we have chosen a layer of levels or curves and it is very strong, we can lower its intensity by going to Filter - Defocus - Gaussian defocus.
Step 5
We can see the change by varying the appearance of the lips and improving them.

3. How to improve eyes and look with Photoshop CC 2017
Although there are more complex ways to edit the look, in this case we will continue using a simple and quick method to change the intensity and color of the eyes.
Step 1
To perform this process we will use the Quick Mask tool again. Select this tool from your panel or Q key.
Q
Step 2
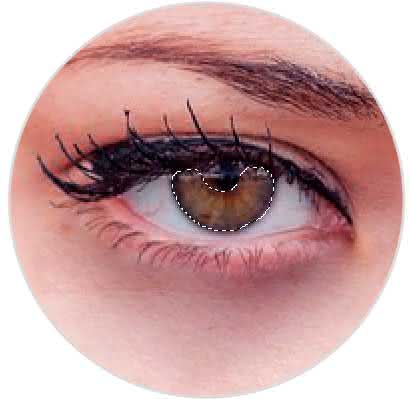
Select in red the part of the iris of the eye to which we will change intensity and color.

Step 3
Deselect the quick mask by pressing Q again and then go to Select Inverse. The area we need will be selected.
Step 4
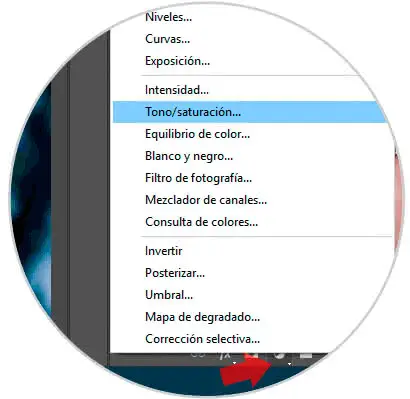
Now create an Adjustment or Fill layer that affects only this selection. You can play with the adjustment of Curves, Levels or Hue / Saturation among others.
Step 5
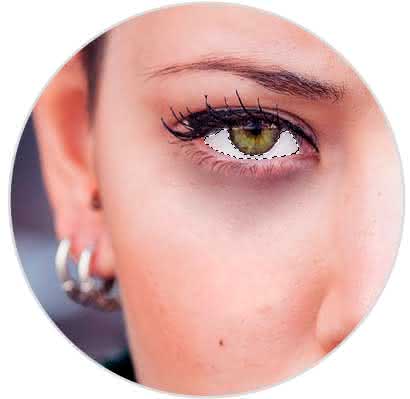
To improve the white of the eyes, repeat the same selection process with the Quick Mask we have seen. Once you have selected it, choose a Brush with a hardness and low Opacity, the front white color and putting the layer in Lighten Mode or Soft Light paints on the selection. Go modifying the Opacity and Fluljo so that the result is not too rough.
Step 6
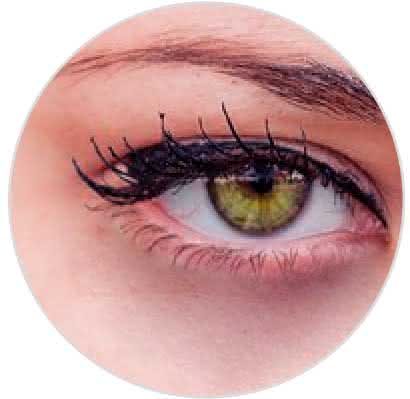
We can see the change if we compare it with the before the look.

Step 7
The adjustments we have made are different and, as always, there are no limits to creativity. You can edit a multitude of more elements that you prefer depending on what you are looking for. Here you can see a before and after end of the photograph.

We also leave you the video tutorial with these options to be able to improve and retouch a face in a simple way..
To stay up to date, remember to subscribe to our YouTube channel! SUBSCRIBE
With these simple tricks you can improve the results of your photographs even more. Any details that you have overlooked during the session may be modified later.