For official documents we usually need some necessary requirements , among them the famous passport photograph. Despite the fact that there are many places where we can go to take these photos, the truth is that sometimes it can be more helpful to create them by ourselves ..
If you are one of those who operate in the world of editing and photography, creating your own ID or ID photos will not be a problem for you. The first thing will be to take our photograph and edit it and then create the print template.
Before carrying out the process of creating our template, we must take into account the following aspects when taking our main photography:
Requirements for passport photography
In each country, the measures they require for their national documents should be consulted. In general we can mention the following:
- It should be a full face front photo that appears with open eyes, natural expression and closed mouth.
- Do not wear sunglasses, hats or the like that hide your face unless they are religious matters.
- Wear normal street clothes.
- The background should be as white as possible and homogeneous.
- Avoid shadows on both the face and the background.
- Try to make the contrast and lighting as natural as possible.
- Photography must be in color.
- The age of the photograph should not exceed 6 months.
- Your head should not be tilted so always look straight ahead.
To see the details of the regulations in force in your country, consult their corresponding requirements..
Note
Both copied and scanned photographs are not valid for card or passport. If they are digital, they must be on quality paper.
This tutorial will teach you how to easily create your own ID or ID photos from Photoshop CC 2017.
To stay up to date, remember to subscribe to our YouTube channel! SUBSCRIBE
How to take passport photos in Photoshop CC 2017
Step 1
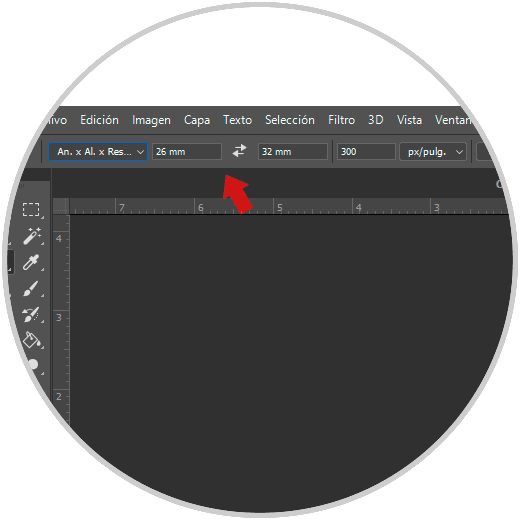
The first thing will be to open our image in Photoshop. Once there we go to the Trim tool. At the top we will select the ratio manually. We will establish 32 mm for height and 26 mm for width with 300 dpi, the standard measurements for these photographs.
Note
If in your country they are different measures, you will only have to change them in this option so that the proportion varies.
Step 2
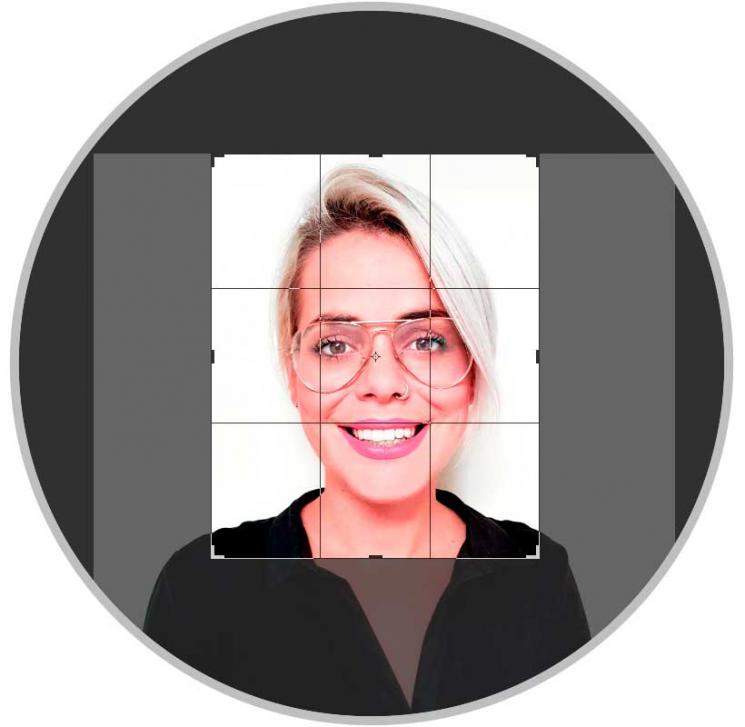
The next thing will be to square our image within this proportion. For this, keep in mind that you must include the cut just on your shoulders and the top where the hair ends. You can move the image within this ratio range.
When adjusting the photo I tried to leave a margin of about 5 mm on the top and sides..
Step 3
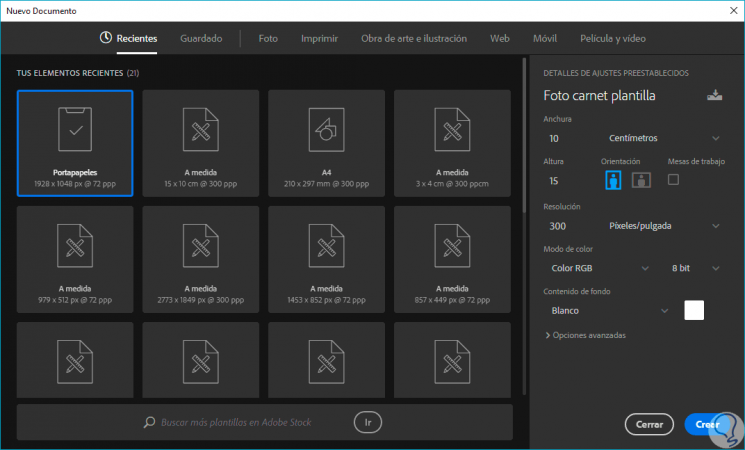
Once we have adjusted our image we create the template where we will have several passport photos ready to print. For this we go to the File> New menu and create a new Project with measurements of 10 x 15 cm and the same resolution used for our image, in this case 300 dpi.
Note
You can create the template horizontally (15 x 10 cm) if you prefer to have 8 copies instead of 12 as in the one we are using vertically.
Step 4
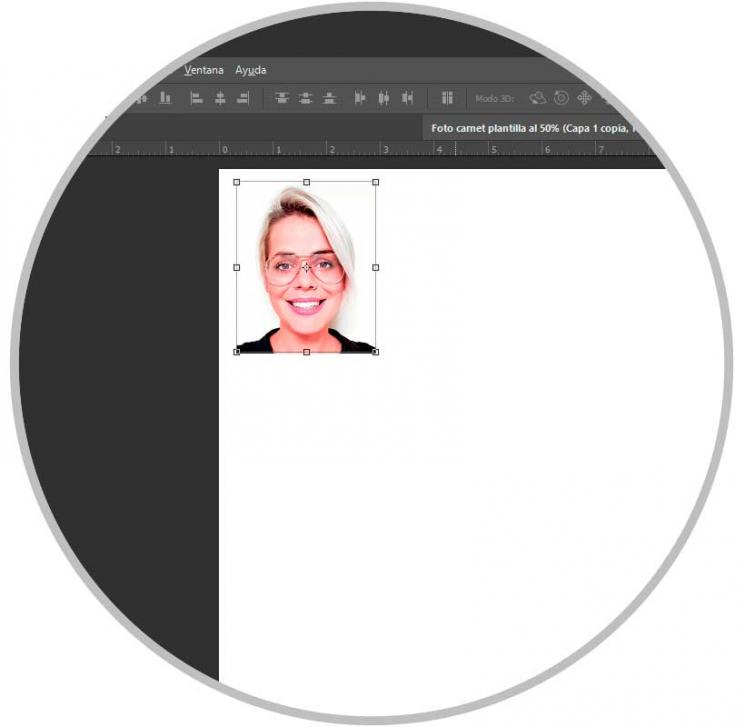
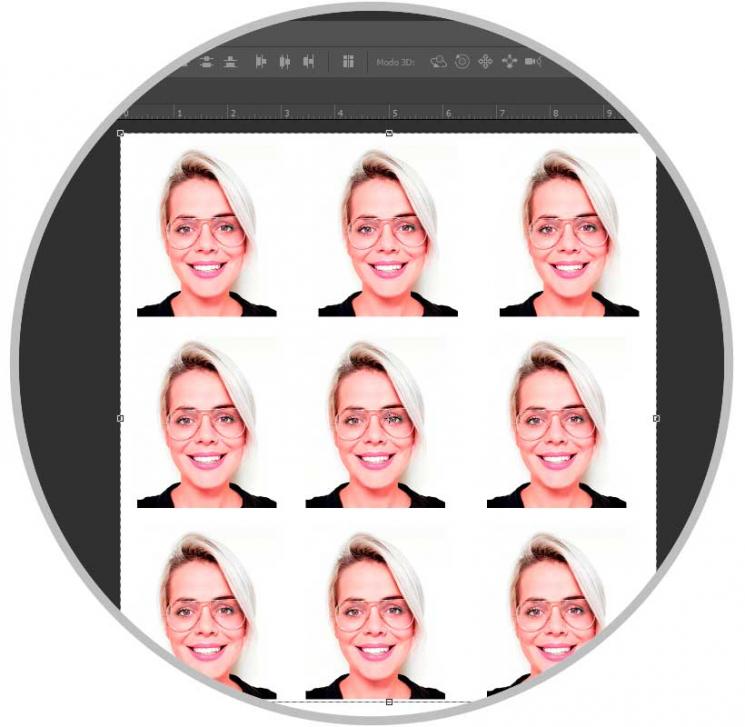
Now we just have to drag our cropped image in the template in such a way that we place it repeatedly.
Step 5
With the following key combination we will copy the layers until we get our base template.
Ctrl + J
Note
When printing, it is important to respect the 10 x 15 cm ratio so as not to alter or disfigure the images.
In this way we can obtain a template with our passport photos. You will only have to follow the recommendations when taking the photograph and then see the measures that are required of you.