Before going with some practical examples, let's see a little the methods of Drag (Drag) and Drop (Drop) that has jQuery UI for us. 1- Draggable method () The draggable method manages the elements of an HTML page that you want to move, this method can be used in two different ways: • $ (selector, context) .draggable (options) • $ (selector, context) .draggable ("action", params) Let's see an example: First we must include the necessary files, a common mistake that is made is to include the jQuery .js UI before jQuery .js, remember that jQuery is the core and jQuery UI are only libraries, plugins, widgets, that without the jQuery they would work. <link rel = "stylesheet" href = "http://code.jquery.com/ui/1.10.3/themes/smoothness/jquery-ui.css" /> <script src = "http://code.jquery.com/jquery-1.9.1.js"> </ script> <script src = "http://code.jquery.com/ui/1.10.3/jquery-ui.js"> </ script> <link rel = "stylesheet" href = "/ resources / demos / style.css" />
We invoke the method: $ (function () { $ ("#draggable") .draggable (); }); And we associate it with the selector that will be the div with the id = "draggable". <div id = "draggable" class = "ui-widget-content"> <p> Drag me around </ p> </ div>
Here is the complete source code: <html lang = "en"> <head> <meta charset = "utf-8" /> <title> jQuery Draggable UI - Default functionality </ title> <link rel = "stylesheet" href = "http://code.jquery.com/ui/1.10.3/themes/smoothness/jquery-ui.css" /> <script src = "http://code.jquery.com/jquery-1.9.1.js"> </ script> <script src = "http://code.jquery.com/ui/1.10.3/jquery-ui.js"> </ script> <link rel = "stylesheet" href = "/ resources / demos / style.css" /> <style> #draggable {width: 150px; height: 150px; Padding: 0.5em; } </ style> <script> $ (function () { $ ("#draggable") .draggable (); }); </ script> </ head> <body> <div id = "draggable" class = "ui-widget-content"> <p> Drag me around </ p> </ div> </ body> </ html> 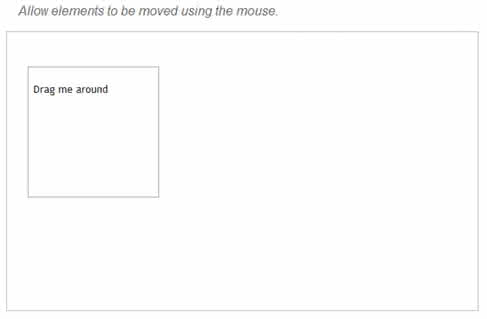
2- Droppable method () The droppable method manages the elements of an HTML page which you want to drop in an area. Like the draggable method, it can be used in two different ways: • $ (selector, context) .droppable (options) • $ (selector, context) .droppable ("action", params) Let's see an example of this: We include the files, add the styles, invoke the methods (here we will use the draggable method equally) followed by the droppable method. Here the source code: <html lang = "en"> <head> <meta charset = "utf-8" /> <title> jQuery UI Droppable - Default functionality </ title> <link rel = "stylesheet" href = "http://code.jquery.com/ui/1.10.3/themes/smoothness/jquery-ui.css" /> <script src = "http://code.jquery.com/jquery-1.9.1.js"> </ script> <script src = "http://code.jquery.com/ui/1.10.3/jquery-ui.js"> </ script> <link rel = "stylesheet" href = "/ resources / demos / style.css" /> <style> #draggable {width: 100px; height: 100px; Padding: 0.5em; float: left; margin: 10px 10px 10px 0; } #droppable {width: 150px; height: 150px; Padding: 0.5em; float: left; margin: 10px; } </ style> <script> $ (function () { $ ("#draggable") .draggable (); $ ("#droppable") .droppable ({ drop: function (event, ui) { $ (this) .addClass ("ui-state-highlight") .find ("p") .html ("Dropped!"); } }); }); </ script> </ head> <body> <div id = "draggable" class = "ui-widget-content"> <p> Drag me to my target </ p> </ div> <div id = "droppable" class = "ui-widget-header"> <p> Drop here </ p> </ div> </ body> </ html> And this would be our exit in the browser: 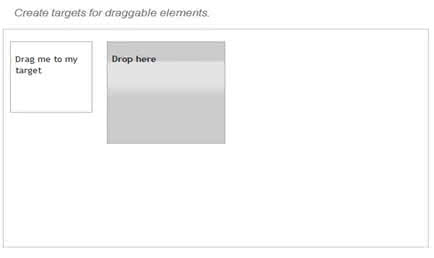
How about we join both concepts in a more complicated example, something like a shopping cart? Let's see: First, we include our files: <link rel = "stylesheet" href = "http://code.jquery.com/ui/1.10.3/themes/smoothness/jquery-ui.css" /> <script src = "http://code.jquery.com/jquery-1.9.1.js"> </ script> <script src = "http://code.jquery.com/ui/1.10.3/jquery-ui.js"> </ script> <link rel = "stylesheet" href = "/ resources / demos / style.css" /
We add some styles for our cart: <style> h1 {padding: .2em; margin: 0; } #products {float: left; width: 500px; margin-right: 2em; } #cart {width: 200px; float: left; margin-top: 1em; } / * style the list to maximize the droppable hitarea * / #cart ol {margin: 0; padding: 1em 0 1em 3em; } </ style> We will use the accordion () method also from the jQuery UI library to make our cart more striking, invoke our methods and associate them with the selectors, in this case we will extend all the functionality of the draggable method to a list: <script> $ (function () { $ ("#catalog") .accordion (); $ ("#catalog li") .draggable ({ appendTo: "body", helper: "clone" }); $ ("#cart ol") .droppable ({ activeClass: "ui-state-default", hoverClass: "ui-state-hover", accept: ": not (.ui-sortable-helper)", drop: function (event, ui) { $ (this) .find (".placeholder") .remove (); $ ("") .text (ui.draggable.text ()) .appendTo (this); } }). sortable ({ items: "li: not (.placeholder)", sort: function () { active / hoverClass options $ (this) .removeClass ("ui-state-default"); } }); }); </ script> And that's how our shopping cart would look: 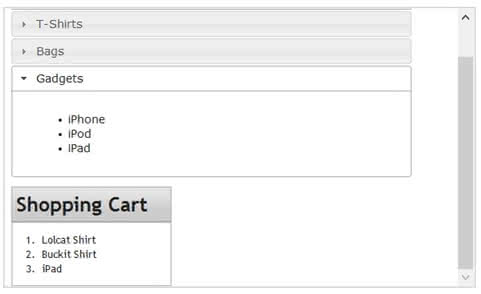
So you can try it here I leave the full source code: <html lang = "en"> <head> <meta charset = "utf-8" /> <title> jQuery UI Droppable - Shopping Cart Demo </ title> <link rel = "stylesheet" href = "http://code.jquery.com/ui/1.10.3/themes/smoothness/jquery-ui.css" /> <script src = "http://code.jquery.com/jquery-1.9.1.js"> </ script> <script src = "http://code.jquery.com/ui/1.10.3/jquery-ui.js"> </ script> <link rel = "stylesheet" href = "/ resources / demos / style.css" /> <style> h1 {padding: .2em; margin: 0; } #products {float: left; width: 500px; margin-right: 2em; } #cart {width: 200px; float: left; margin-top: 1em; } / * style the list to maximize the droppable hitarea * / #cart ol {margin: 0; padding: 1em 0 1em 3em; } </ style> <script> $ (function () { $ ("#catalog") .accordion (); $ ("#catalog li") .draggable ({ appendTo: "body", helper: "clone" }); $ ("#cart ol") .droppable ({ activeClass: "ui-state-default", hoverClass: "ui-state-hover", accept: ": not (.ui-sortable-helper)", drop: function (event, ui) { $ (this) .find (".placeholder") .remove (); $ ("") .text (ui.draggable.text ()) .appendTo (this); } }). sortable ({ items: "li: not (.placeholder)", sort: function () { active / hoverClass options $ (this) .removeClass ("ui-state-default"); } }); }); </ script> </ head> <body> <div id = "products"> <h1 class = "ui-widget-header"> Products </ h1> <div id = "catalog"> <h2> <a href="#"> T-Shirts </a> </ h2> <div> <ul> <li> Lolcat Shirt </ li> <li> Cheezeburger Shirt </ li> <li> Buckit Shirt </ li> </ ul> </ div> <h2> <a href="#"> Bags </a> </ h2> <div> <ul> <li> Zebra Striped </ li> <li> Black Leather </ li> <li> Alligator Leather </ li> </ ul> </ div> <h2> <a href="#"> Gadgets </a> </ h2> <div> <ul> <li> iPhone </ li> <li> iPod </ li> <li> iPad </ li> </ ul> </ div> </ div> </ div> <div id = "cart"> <h1 class = "ui-widget-header"> Shopping Cart </ h1> <div class = "ui-widget-content"> <ol> <li class = "placeholder"> Add your items here </ li> </ ol> </ div> </ div> </ body> </ html>