Windows Defender is the default antivirus for the Windows 10 operating system. This program runs permanently and continuously scans your operating system. This antivirus usually scans your operating system twice a week to make sure that there is no malicious software running.
Related: How to exclude files from your antivirus scan (avoid false alarms in Avast)
That does not mean that it is "off" or "disabled" outside of those scan periods. It not only scans new files on your system, but also proactively removes anything it deems malicious. This means that if you download an executable file, Windows Defender may think it is malicious and delete it before you can even open it in File Explorer..
In this post, we precisely want to show you how to prevent Windows Defender from deleting executable files since they are not always malicious. Windows Defender marks files it considers dangerous and therefore should not be run on your operating system. It is extremely rare that you get a false positive, but it can happen.
You should know that you are taking a big risk when running an application that Windows Defender has marked as dangerous. Therefore, before proceeding, it is advisable to check that the executable file is not malicious..
Having said this, we show you step by step how to prevent Windows Defender from deleting executable files:
How to prevent Windows Defender from deleting executable files automatically in Windows 10.
All executable files that are detected as malicious in Windows Defender will be quarantined and removed from your system. To allow a quarantined file to run on your system,
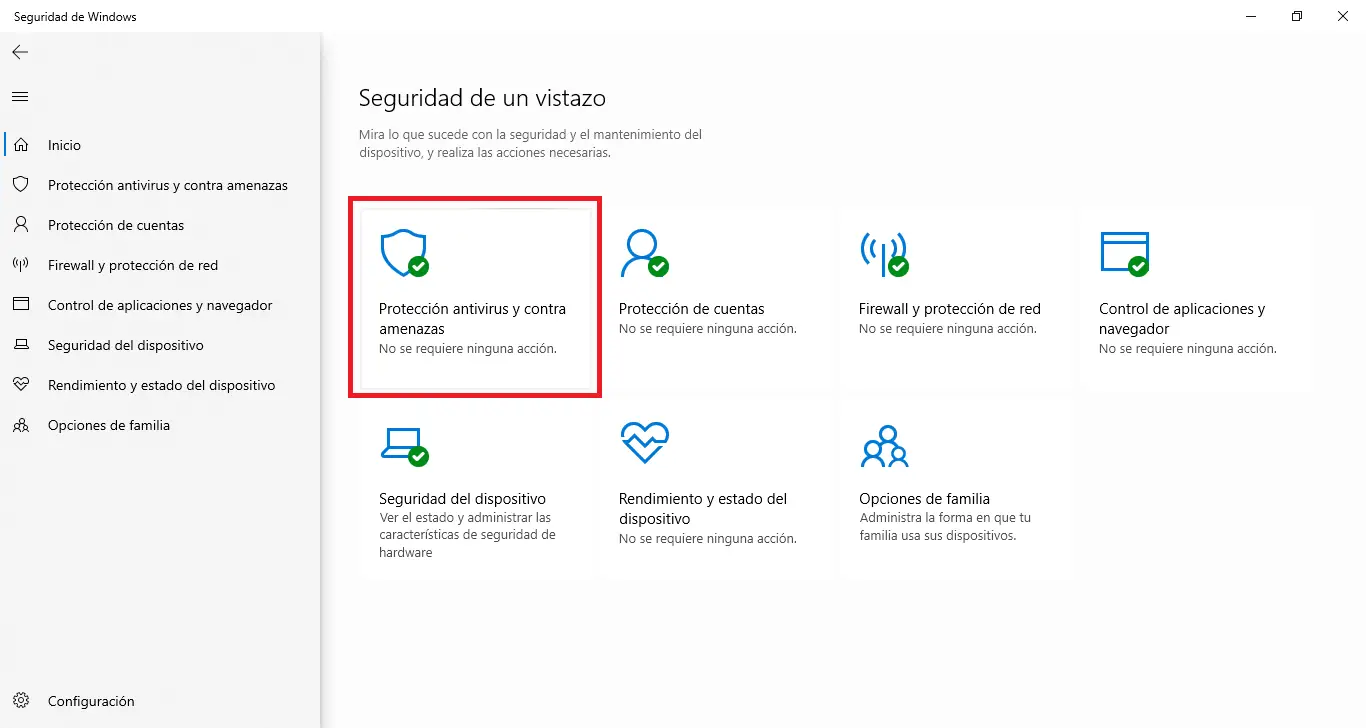
1. Open Windows Defender.
2. Go to Antivirus and Threat Protection
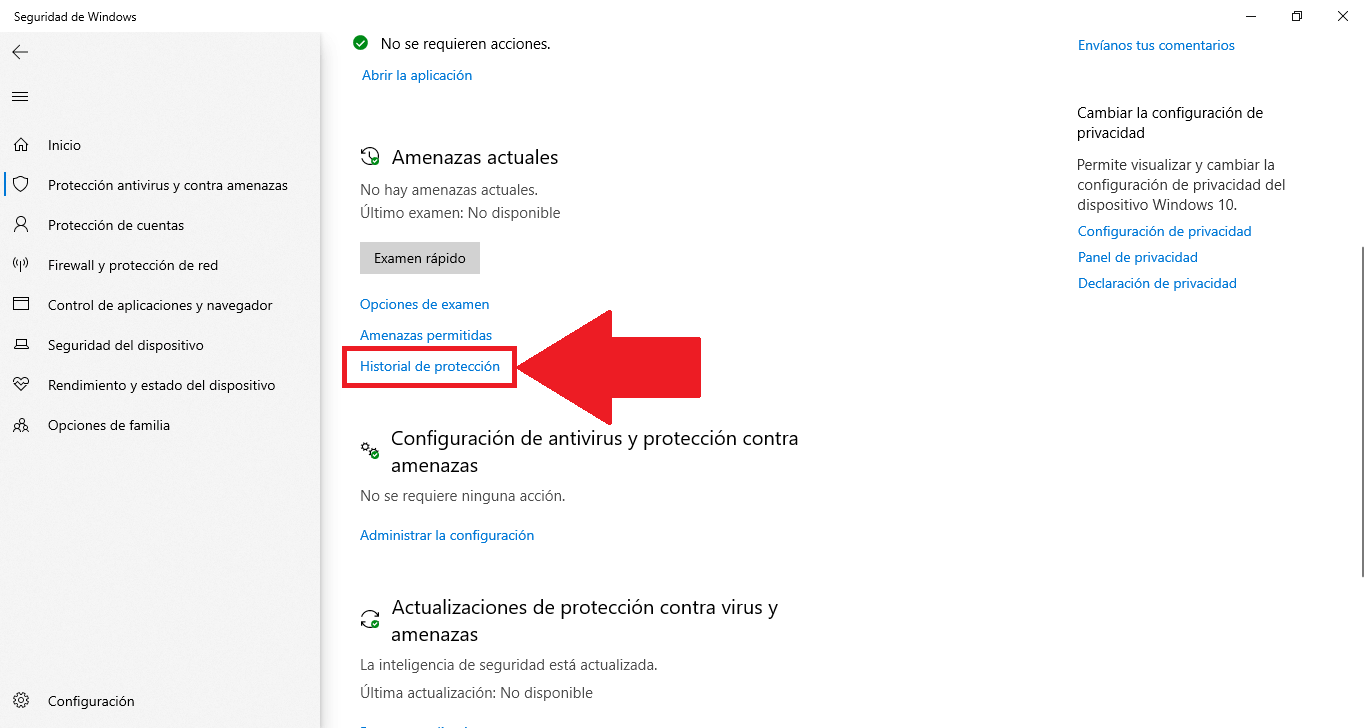
3. Under Current threats you will find the Protection history option
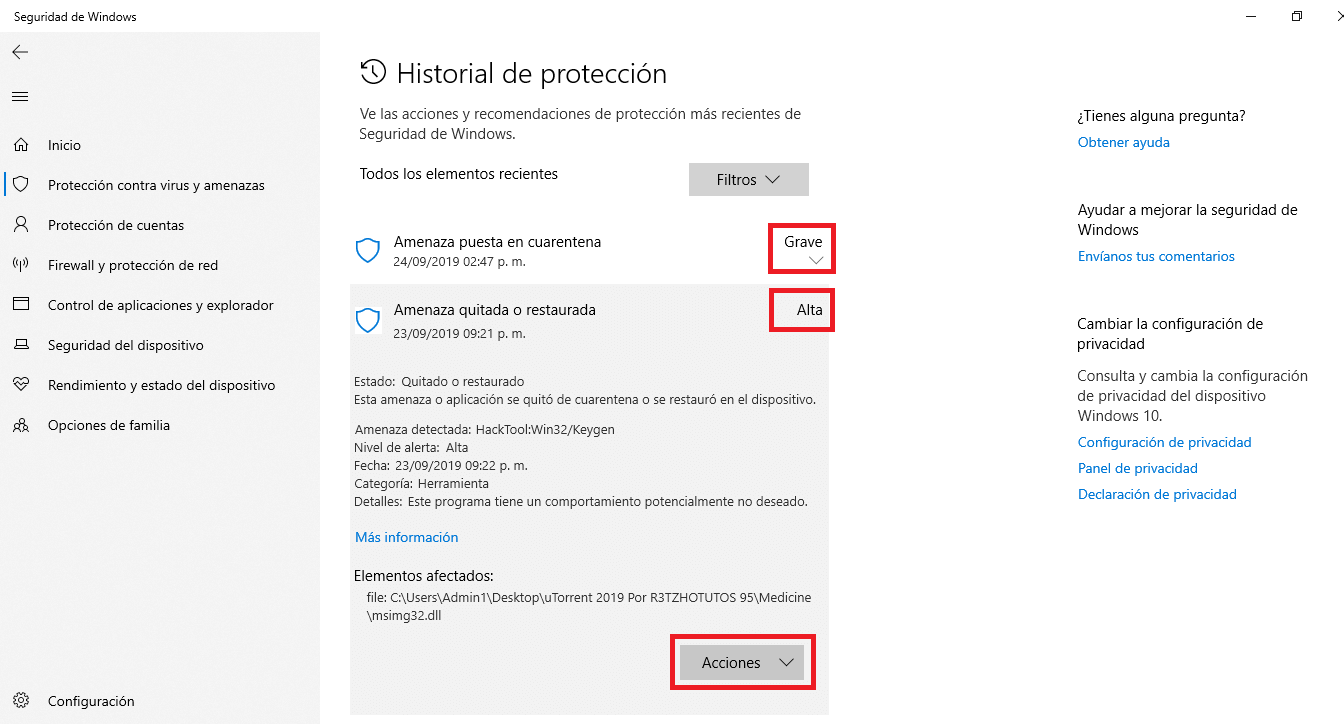
4. After selecting this option, you will find a list of all the threats that Windows Defender has blocked, along with the date and time that the threat was detected and blocked, and the severity of the threat..
5. Click on the threat and you will see the actions taken by Windows Defender, that is, if it quarantined or removed it. You will also see why it was marked, that is, what threat was detected and what file was the one that posed the threat.
6. To allow the file to run, open the Actions drop-down menu and select the option: Allow.
Note: You may need to download the file again. This time, Windows Defender will not automatically block or remove it. Again, remember to be very careful when you decide to ignore Windows Defender warnings.