Computers have become essential work items for many users since thanks to them they can carry out a number of procedures and store different information in a simple way and in the same place. That is why the applications for document management are undoubtedly an indispensable element when it comes to doing a good job..
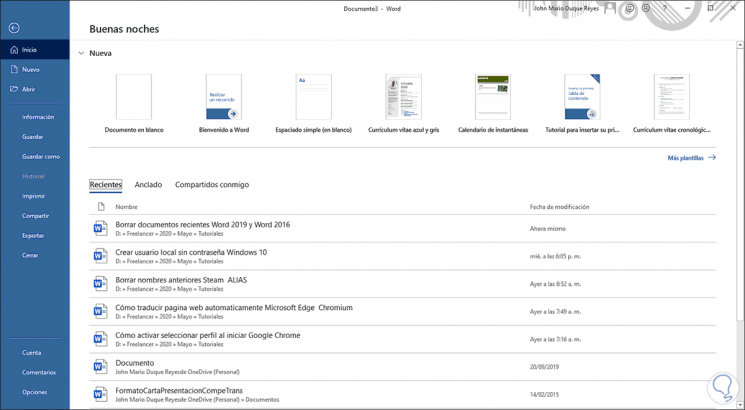
Microsoft Word is part of the Office 2016/2019 suite, being one of the most used text editing programs for all its design, collaboration, security and accessibility features. Right in this last feature we highlight the ability of Word to allow us to access recent files directly from the application:

This avoids that we must go to each of the complete paths where each file is, which can be complex if we do not remember with certainty where each file has been saved. This can be very beneficial if we are working with the same document for several days, since we can quickly access it and all its content.
Although this is a practical functionality, many users may not see it that way they prefer to delete certain files or disable this feature in Microsoft Word to avoid saving all recent files. This may be because for a certain reason you do not want them to appear there, or because the office suite is used by other people, among other reasons. That is why below we show you all the steps you must follow if you want to know how to delete recent documents in Word..
To stay up to date, remember to subscribe to our YouTube channel! SUBSCRIBE
1. How to delete recent files in Microsoft Word
Step 1
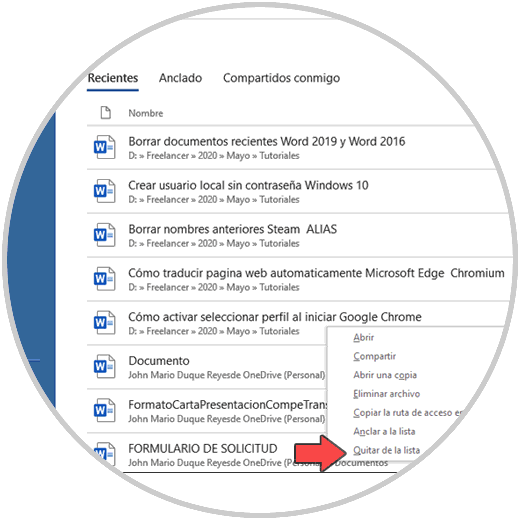
This process applies equally to Word 2016 or 2019. For this we open the Word application and in the first window that we see the recent files will be there, we right-click on the file that we want to delete and we will see the following:

There we have two options to delete the Microsoft Word file:
Delete file
This option will delete the file not only from Microsoft Word but from where it is saved and move it to the trash.
Remove from the list
This option simply takes care of deleting this file from recent ones but does not delete it.
Step 2
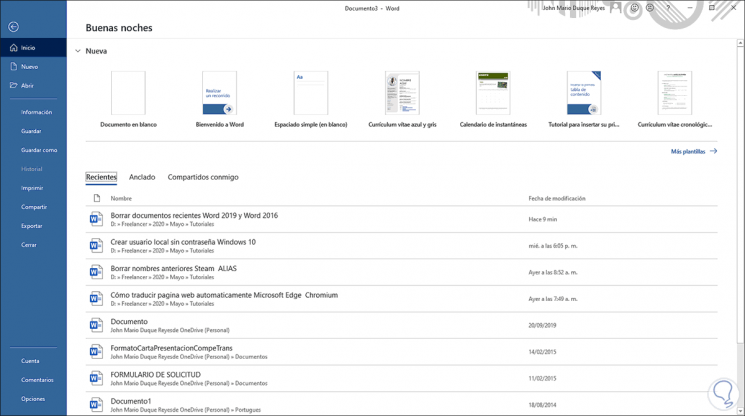
By clicking on “Remove from the list” we can see that said file will be deleted from there:

2. How to disable recent save functionality in Microsoft Word
To avoid doing this every time, we can disable this feature so that we simply won't see any recent files there.
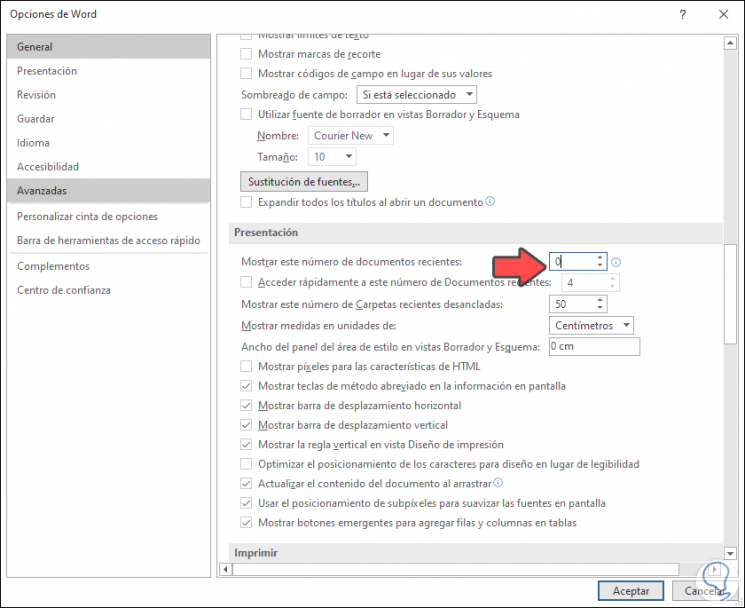
To achieve this we will go to the File - Options menu, in the pop-up window we go to the "Advanced" category and there we go to the "Presentation" section and in the "Show this number of recent documents" field we set its value to zero (0) :

The default value in Microsoft Word is 50 recent files. We save the changes by clicking OK.
With this we can both delete a recent file in Microsoft Word and disable this functionality completely..