There are numerous concepts and tasks to perform when you manage a domain, regardless of the size of the organization, and that is why Microsoft has integrated a wide range of features, roles and services within its business operating system (Windows Server). Each one focused on facilitating the life of the administrator and is not for less, any error or bad configuration can trigger a complete cascade of adverse situations, not only for the person who manages the server, but also for all client computers linked to the domain ..
Speaking of domains, there is a fundamental element when we talk about Windows Server and it is the domain controller (DC-Domain Controller) which has the very delicate task of allowing users and computers access to domain resources by previously validating Your credentials Remember that if a user can access the domain freely without the appropriate permissions we are violating multiple security variables that can cause headaches, so the domain controller will help avoid that situation since as such the domain controller authenticates users and teams so they can join the respective domain.
Nowadays, many companies make use of Windows Server 2008 R2 as their base server where the domain controller is logically but a measure of security and scalability at the level of functions is to be able to migrate said domain controller to Windows Server 2016 which It is a more stable version and with better performance both at the level of roles and performance, in addition to this, migration avoids having to configure everything again since migrating will transfer all roles, FSMO parameters and other changes that the controller has of domain of origin..
TechnoWikis will explain through this tutorial how to migrate a domain controller from Windows Server 2008 R2 to Windows Server 2016 in a functional and safe way, but without complications.
1. How to validate Windows Server 2016 and Server 2008 servers
Step 1
First, we will go to Windows Server 2008 R2 and there we go to the following path:
Step 2
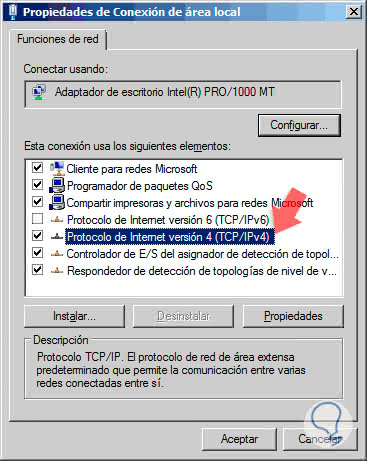
In it, we will right click on the server's network adapter and select Properties, in the pop-up window we activate the line “Internet Protocol version 4 (TCP / IPv4)â€:
Step 3
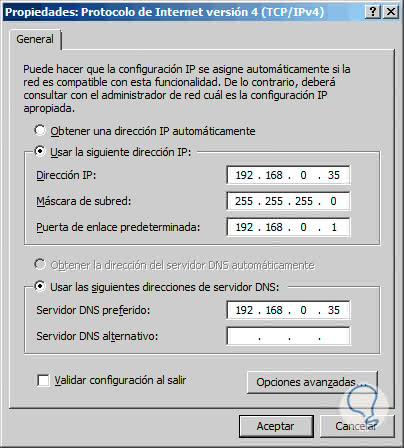
We click on Properties and in the displayed window we activate the “Use the following IP address†box and enter the following:
- Fixed IP address that the Windows Server 2008 R2 server will have
- Subnet Mask (assigned by default)
- In the field "Preferred DNS server" enter the same IP address of the server
Step 4
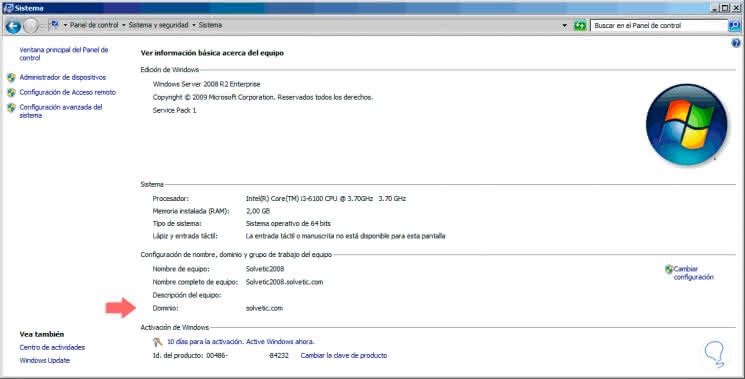
We click OK to save the changes. Now we go to system information to verify that we use Windows Server 2008 R2 and the domain to which the computer is attached:
Step 5
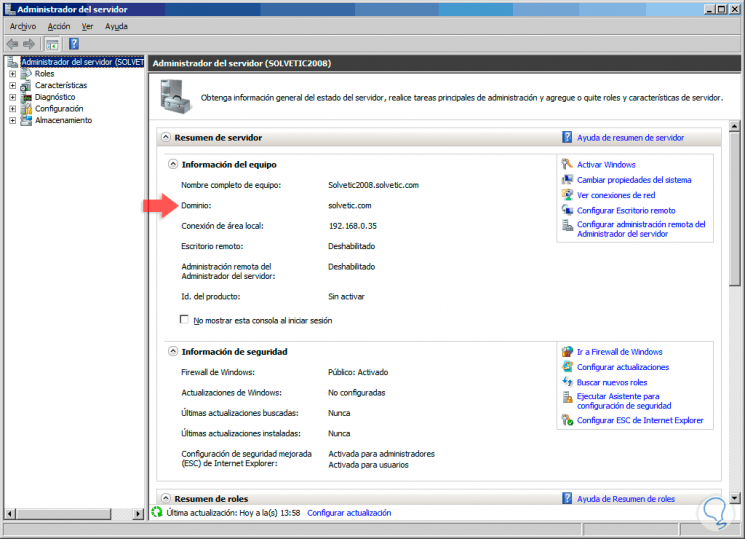
This more detailed information can be obtained in the Server Administrator:
Step 6
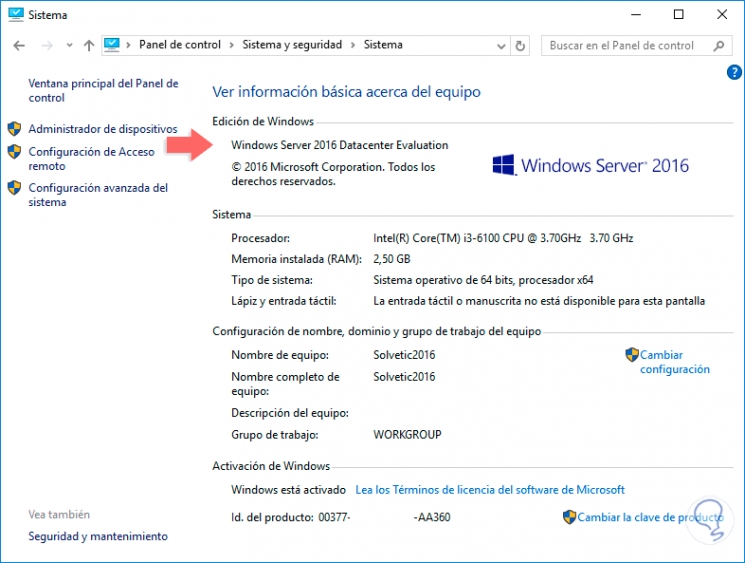
Now we go to the Windows Server 2016 server and in system information we validate the edition used:
Step 7
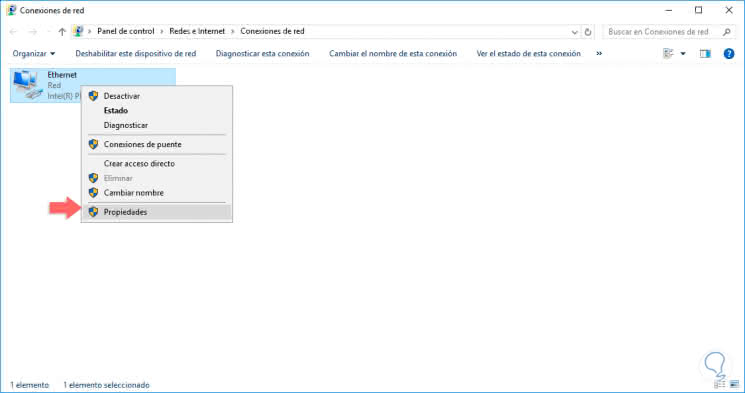
In Windows Server 2016 we access the adapter configuration in the path:
Step 8
We right click on the adapter and select "Properties":
Step 9
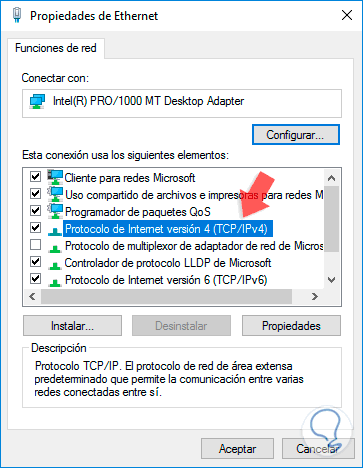
Then we select the line “Internet Protocol version 4 (TCP / IPv4)†and click on Properties:
Step 10
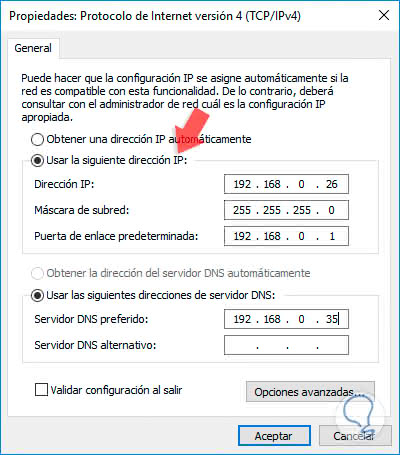
Now we configure the following once we activate the “Use the following IP address†box. Click on OK to apply the changes.
- Fixed IP address of the Windows Server 2016 server
- In the field "Preferred DNS server" we must enter the IP address of the Windows Server 2008 R2 server.

Login Join up!