We know that databases, although they often sound like something terrifying, are actually a series of tables and data that help us keep a much more organized control of information especially if it is in overwhelming amounts or complex sections. That is why good database management will simplify the overall work of this information..
There are several tools to create, edit and manage data so one of the best solutions for this task of data management is PostgreSQL and therefore TechnoWikis will talk in detail about what PostgreSQL is and how to install it in Windows 10 .
What is PostgreSQL?
Since its origins in the year of 1986, PostgreSQL developers have focused on creating PostgreSQL as an object relational database system which is completely open source which in turn, as you might suspect, makes use of the traditional and popular SQL language along with other features that allow you to safely and completely scale each of the workloads associated with the data to work.
PostgreSQL can be run on most current operating systems with full performance, security and integrity.
PostgreSQL features are focused on areas such as application development, protecting data integrity and creating fault tolerant environments, which seeks to maintain data availability..
features
Some of its most outstanding features are:
- PostgreSQL has fulfilled 160 of the 179 mandatory functions for SQL: 2011 in terms of core management.
- At the level of data work, PostgreSQL works with primitive data such as integer, numeric, string, Boolean, structured as a matrix, range, UUID, of documents such as JSON / JSONB, XML, of geometry such as Point, Line, Circle, Polygon and with the option to use custom data.
- It has advanced indexing for the variables GiST, SP-Gist, KNN Gist, GIN, BRIN, coverage indexes, Bloom filters.
- It executes indexing of type B-tree, Multicolumnas, Expresiones and Partial.
- Integrates a modern and dynamic query planner and optimizer.
- You can execute nested transactions.
- Integrates Multi-version concurrency control (MVCC).
- It is possible to perform partitioning of tables.
- Data integrity is handled (UNIQUE, NOT NULL, Primary Keys, Foreign Keys)
- We have the disaster recovery function which allows us to recover the data due to some anomalous situation on the server.
- It has an Advance Writing Registry (WAL)
- It has asynchronous, synchronous and logical replication.
- At the security level it offers various authentication methods such as GSSAPI, SSPI, LDAP, SCRAM-SHA-256, certificate and more options available.
- Integrates a reliable access control system.
- Manages security of columns and rows optimizing the integrity of the recorded data.
- Compatible with PL / PGSQL, Perl, Python and more procedural languages
- It will be possible to connect to other databases or flows that have a standard SQL interface.
- We have multiple extensions to increase the functionality of PostgreSQL.
- Support for international characters.
- Full text search and many more features.
Without further ado we will see how to install PostgreSQL on Windows 10.
1. How to download PostgreSQL
Step 1
For this we must go to the following official link:
PostgreSQL
Step 2
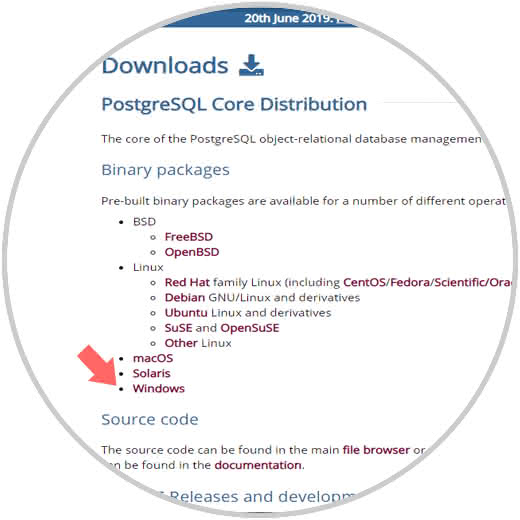
We will see the following. In our case we select Windows.
Step 3
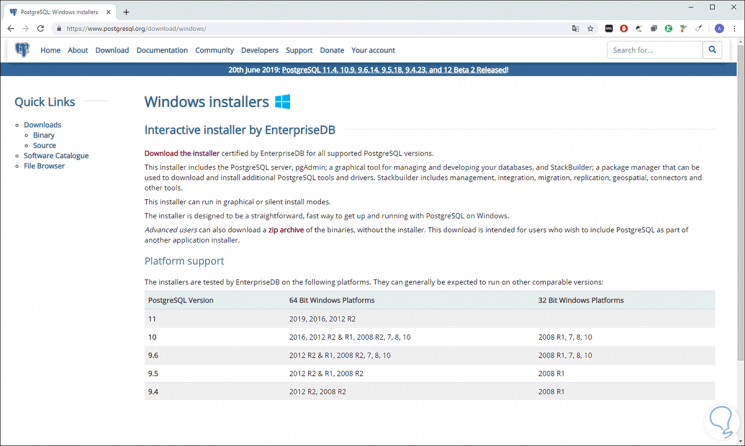
Next we will see the following:
Step 4
There we have the option to download the following:
- Interactive installer by EnterpriseDB (default)
- Graphic installer by BigSQL
Step 5
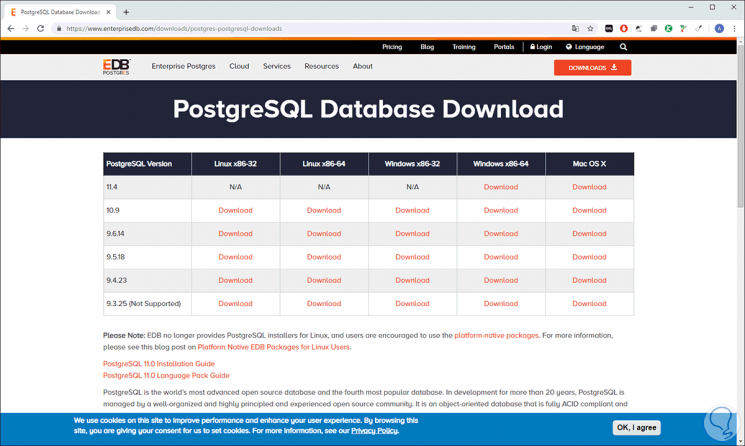
We click on the “Download the installer†line and we will be redirected to the following window where we will see the different download versions available:
Step 6
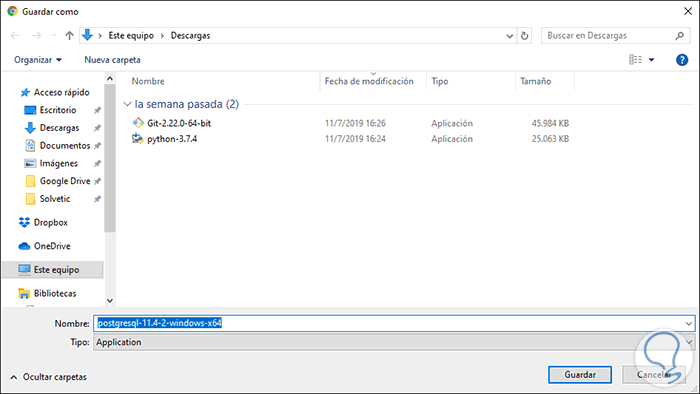
There we check what operating systems are available, in this case we will download PostgreSQL 11.4 for Windows x86-64 and define where the executable will be hosted. Click on Save and wait for the download to finish.
Step 7
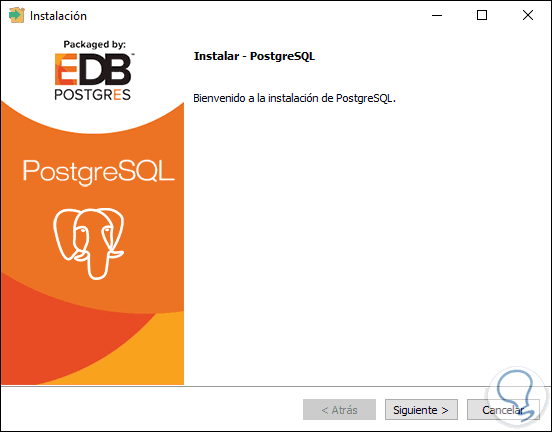
Once the download is finished, we will execute the downloaded file and we will see the following:
Step 8
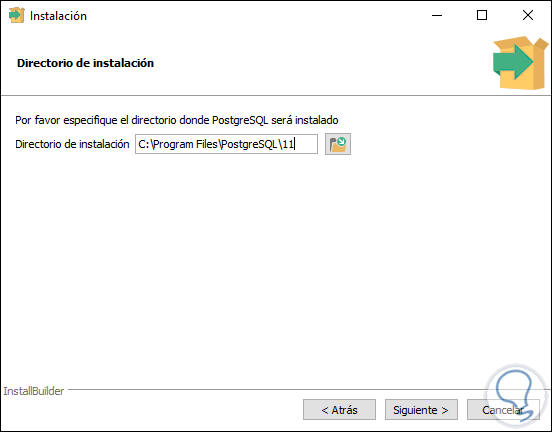
This is the PostgreSQL installation wizard in Windows 10, we click on Next and now we define the directory where it is to be installed, we recommend leaving the default value:
Step 9
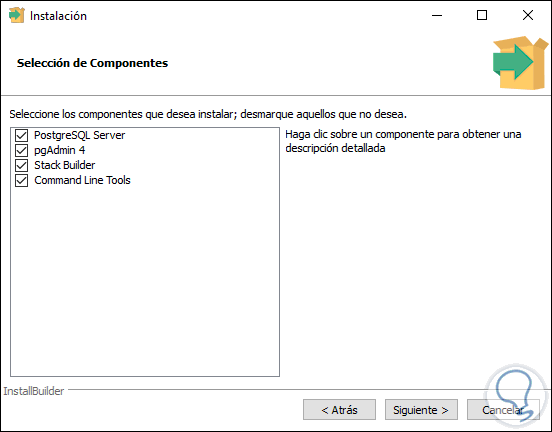
Again we click on Next and in the next window we can define which components have to be installed with PostgreSQL:
Step 10
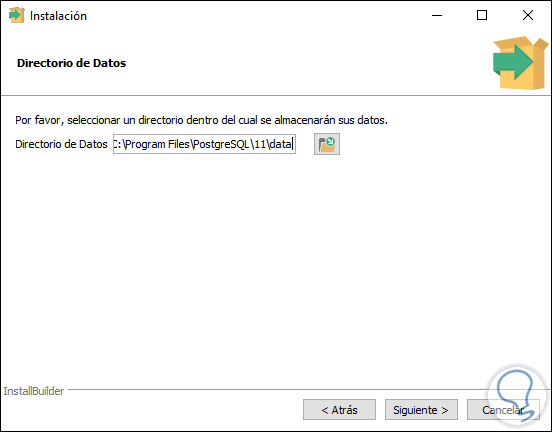
Once selected, we click Next and we can edit the path in which the PostgreSQL data will be hosted:
Step 11
Once this is defined, we click on Next and it is time to assign the password for the PostgreSQL database superuser:
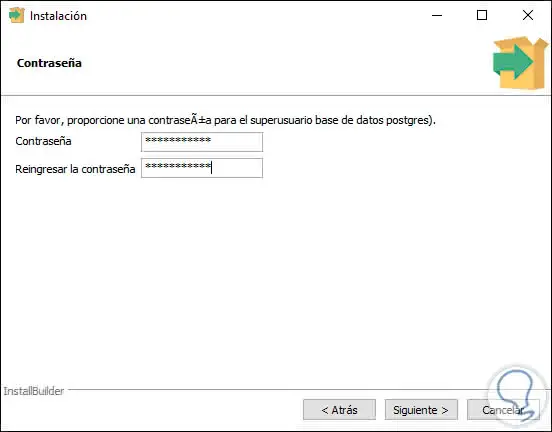
Step 12
Click on Next and in the next window we will leave the default port for PostgreSQL:
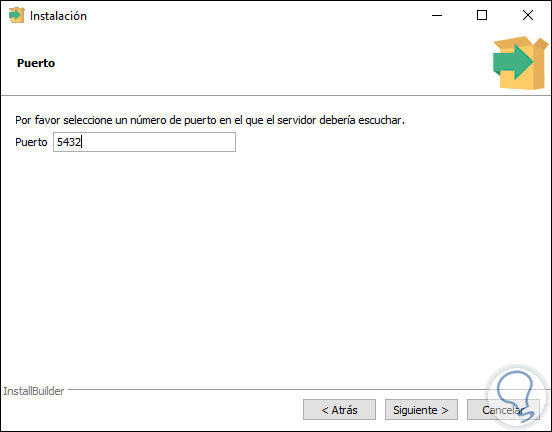
Step 13
We click Next and now we define the regional settings:
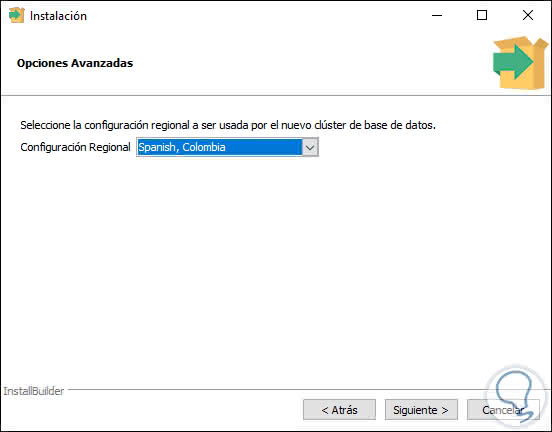
Step 14
Once selected in the following window we will find a summary of the steps we have just executed:
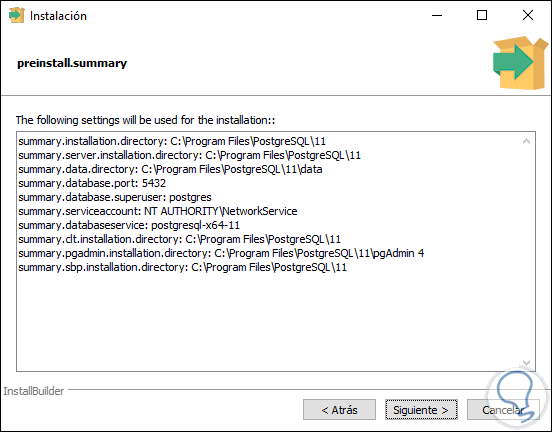
Step 15
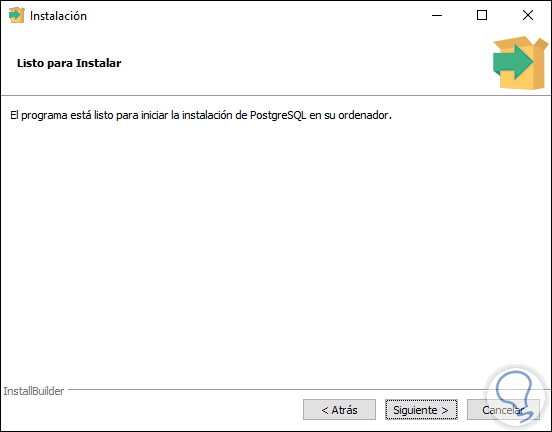
We click Next again and we will see the following message:
Step 16
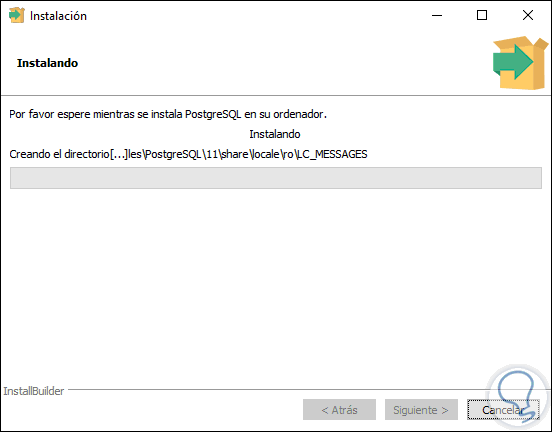
Clicking Next will give way to the PostgreSQL installation process in Windows 10:
Step 17
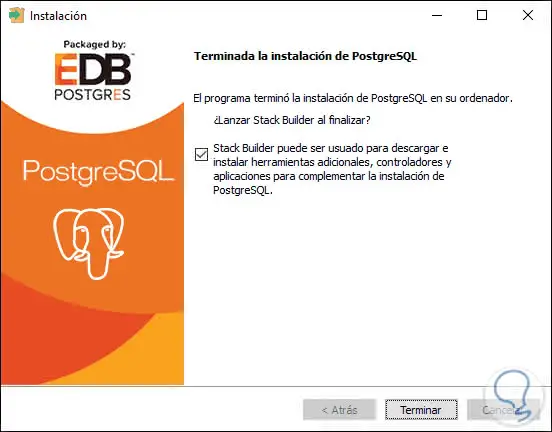
When the installation process is finished we will see the following where we can uncheck the Stack Builder box which allows the download and installation of additional PostgreSQL tools in Windows 10. Now, if you want to see what Stack Builder does leave the box active and clicking on the "Finish" button
Step 18
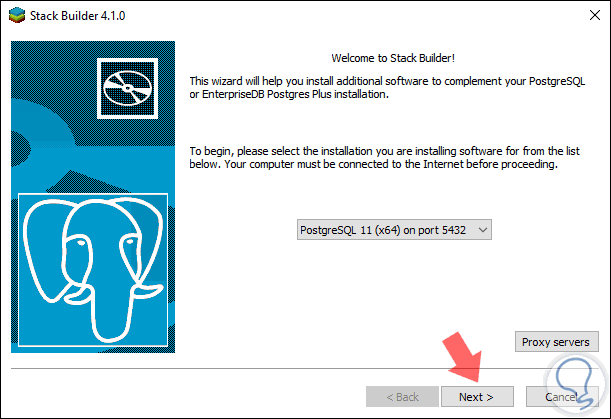
The following will be displayed where we will select the PostgreSQL database that we have recently installed. We click on Next
Step 19
Then it will be possible to select the category to download the associated tools:
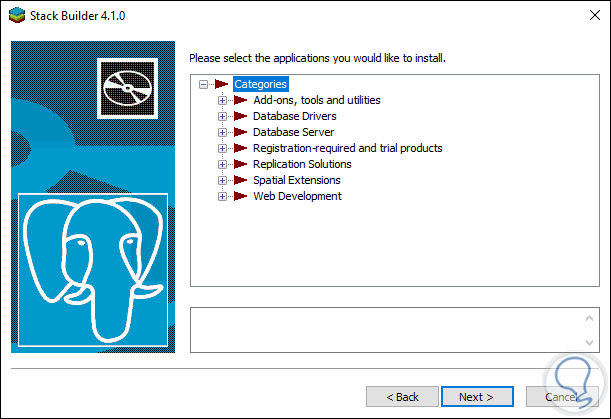
If we do not use this method we can execute it from the Start menu / PostgreSQL 11 / Application Stack Builder..
2. How to access PostgreSQL in Windows 10
Step 1
To access the database we go to the Start / PostgreSQL 11 path and there we click on pgAdmin 4:
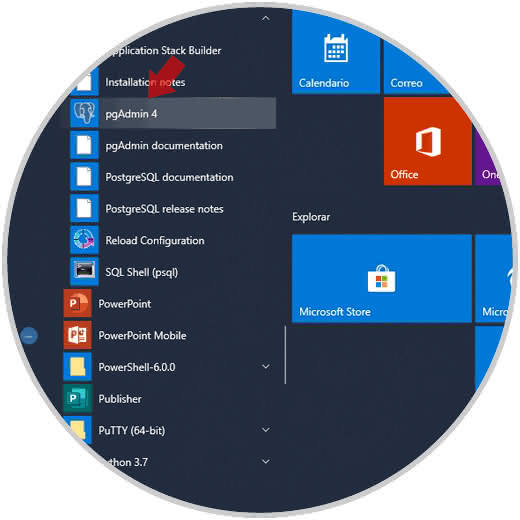
Step 2
The services will be charged:

Step 3
Once this step concludes we access the PostgreSQL 11 console which will be opened in a browser and in the first step we will enter the superuser password assigned in the process explained by TechnoWikis:
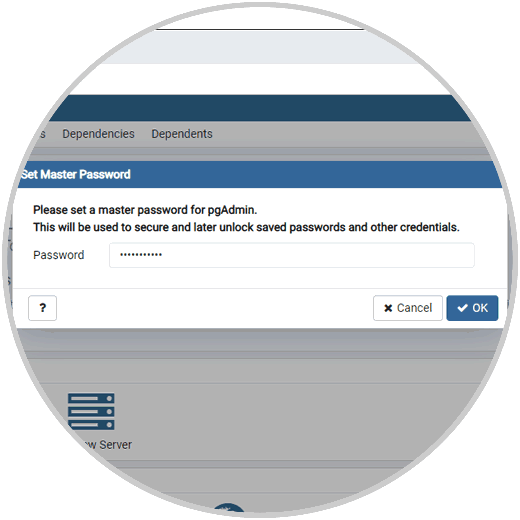
Step 4
Click on OK and this will be the environment of the PostgreSQL console. There we click on the Servers line
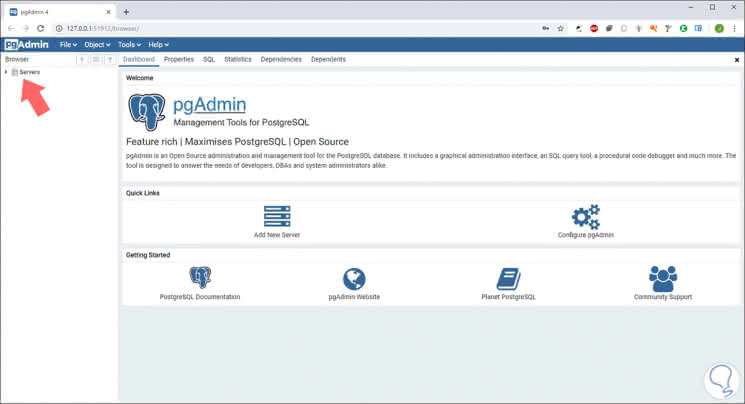
Step 5
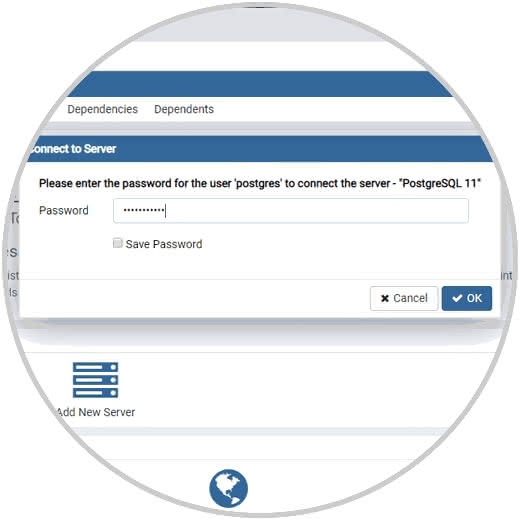
The PostgreSQL database will be displayed and the password will need to be re-entered:
Step 6
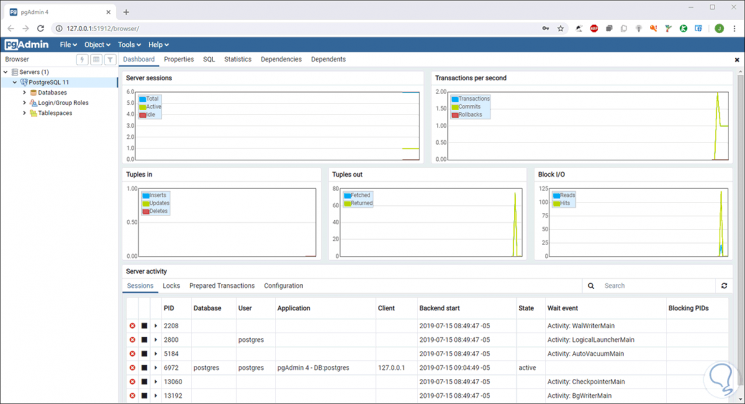
When connecting we will see details of the selected database:
Step 7
As you will see on the left side there are a series of sections, these are:
Databases
In this section it is possible to access configurations such as:
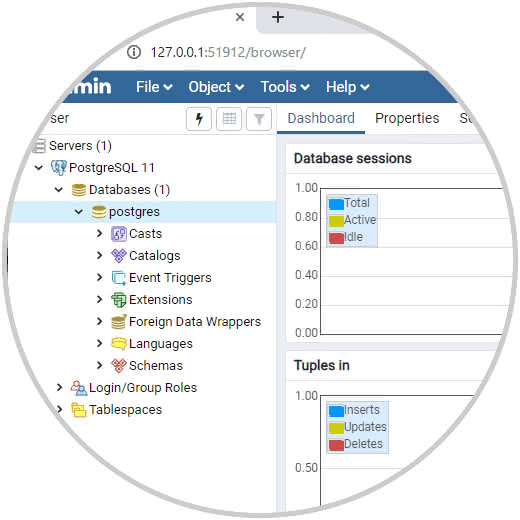
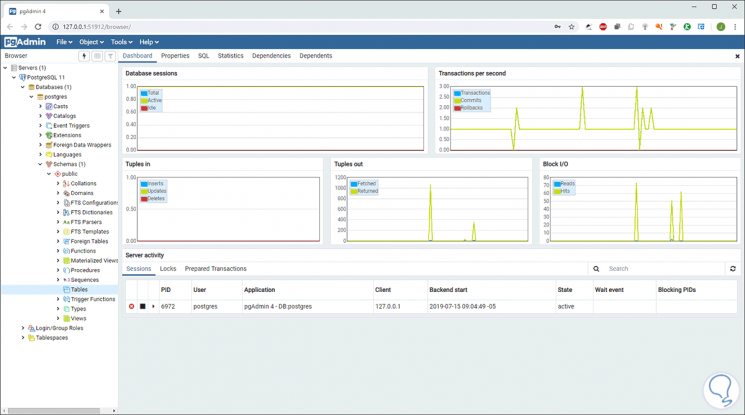
Each of these options handles a range of associated functions:
Login / Group roles
As the name implies, in this section we will be able to see details of the roles of the groups as well as access a log of logins in PostgreSQL:
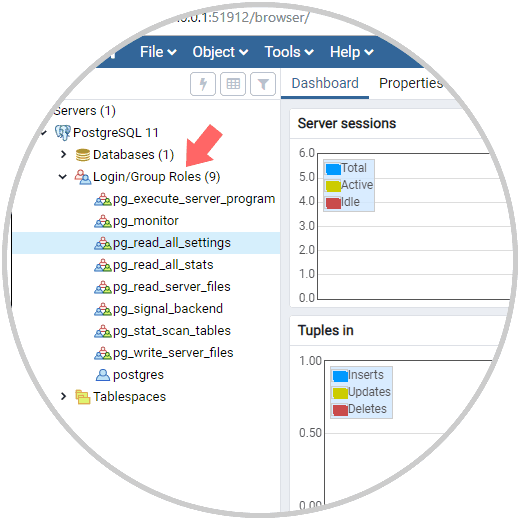
Tablespaces
There we can manage the spaces of the PostgreSQL tables:
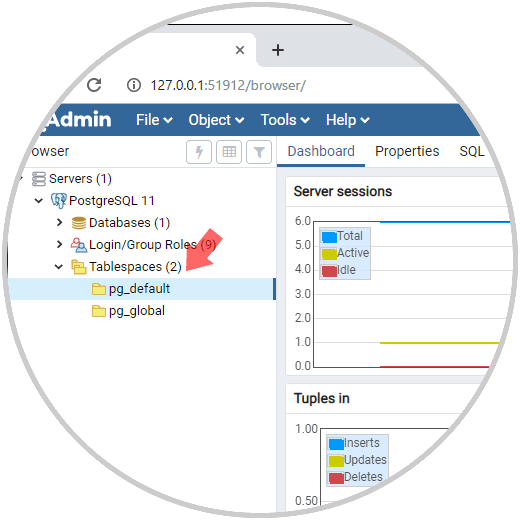
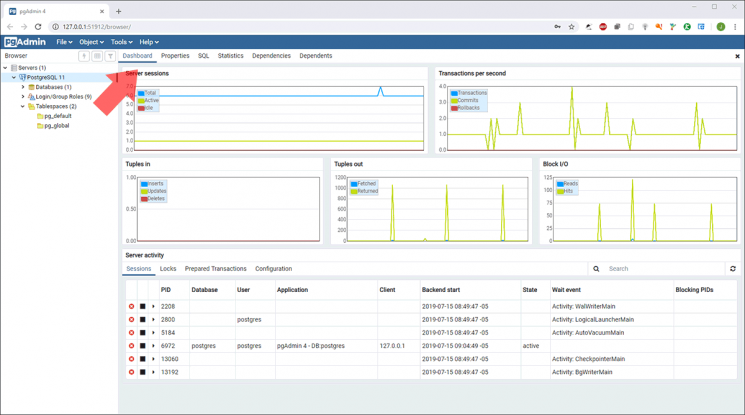
Now, in the center console we can find several tabs such as:
Dashboard
There we handle the general information of the selected parameters:
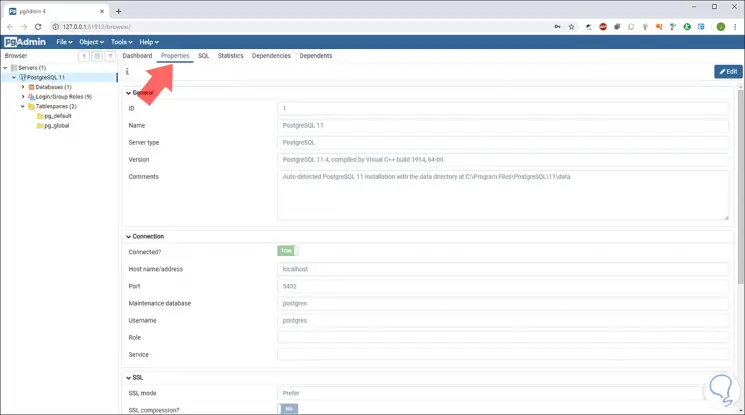
Properties:
Here we find the properties of the selection:
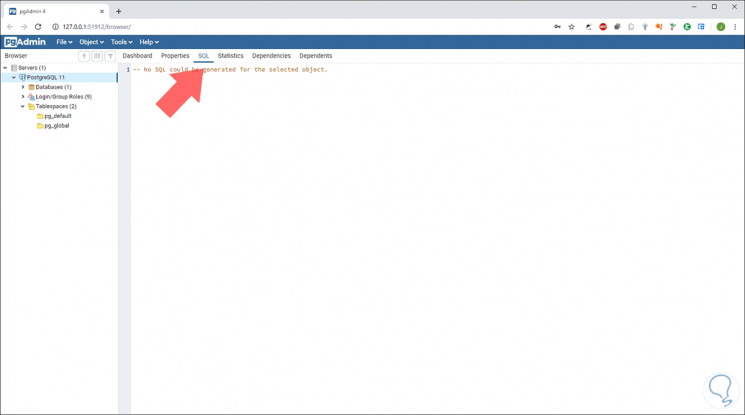
SQL
There we can set the SQL variables and commands to use
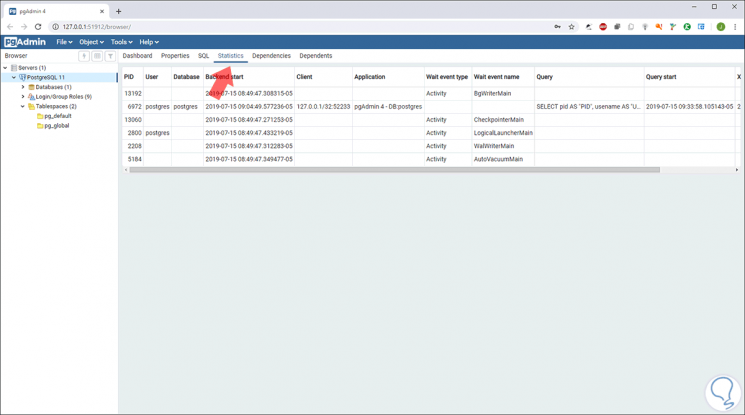
Statistics
As the name says, we access statistics of the selected object:
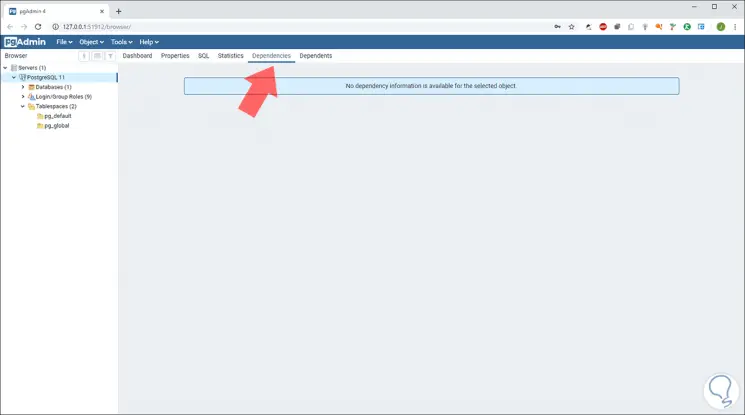
Dependencies / Dependents
Here it is possible to access the services on which PostgreSQL depends or on which they depend directly on the database.
Step 8
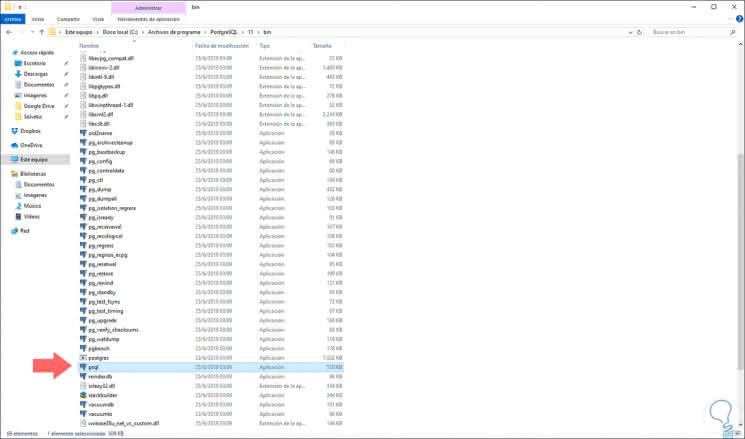
We have noticed that in the SQL tab an error is generated and this is because the command line has not been configured for SQL, for this, we must access the Windows 10 browser and go to the path where PostgreSQL has been installed, in this case is the next:
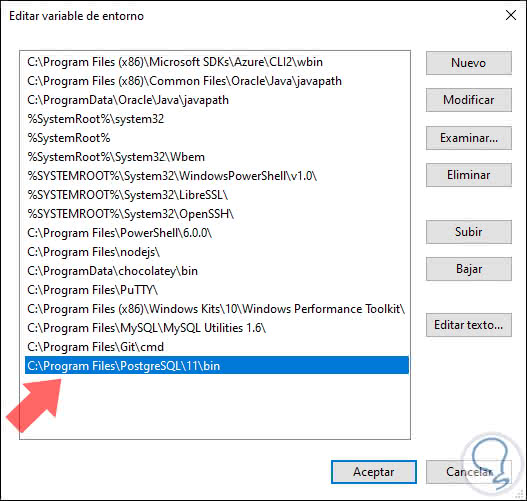
C: \ Program Files \ PostgreSQL \ 11 \ bin
There we must validate that the psql file exists:
Step 9
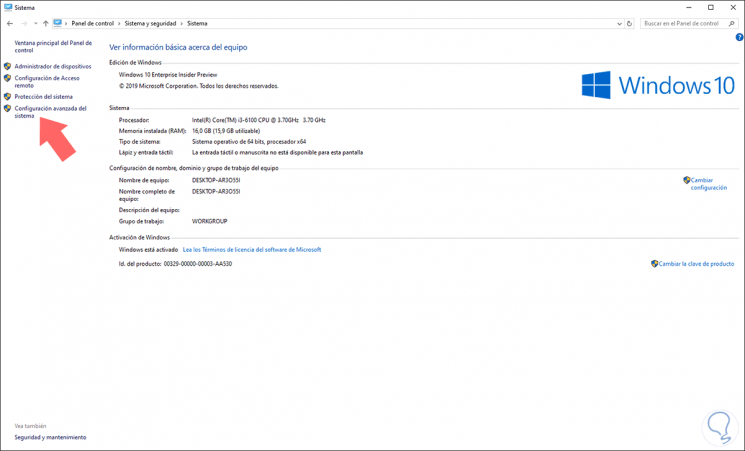
Once validated, we will copy the indicated path (C: \ Program Files \ PostgreSQL \ 11 \ bin), and go to the next path. We click on the “Advanced system configuration†line
Control panel \ System and security \ System
Step 10
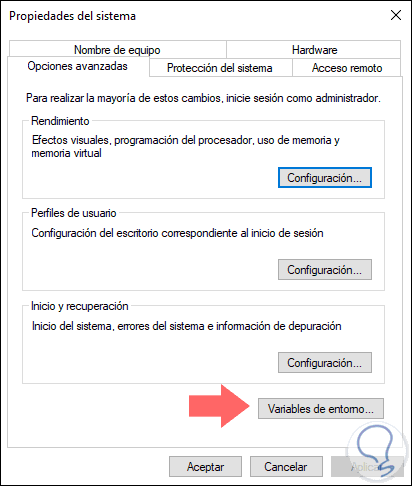
We will see the following. There we click on the "Environment variables" button
Step 11
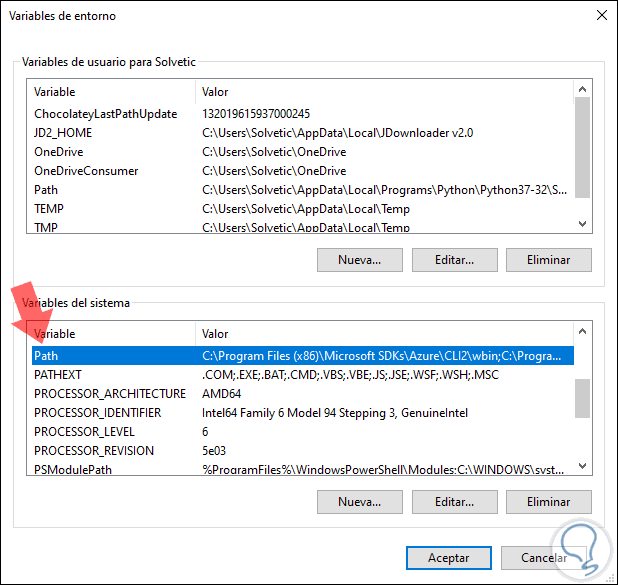
In the pop-up window we will locate the PATH line:
Step 12
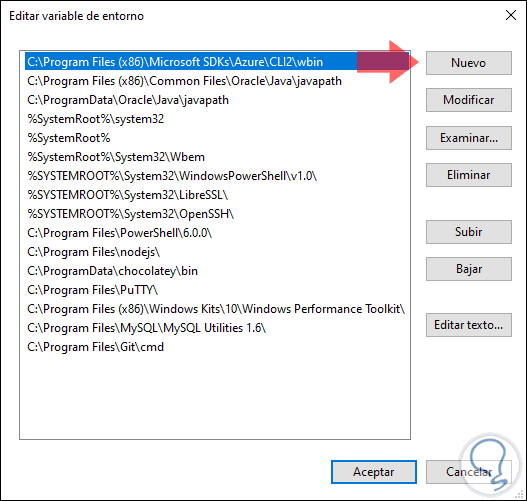
We select it and click on the Edit button and we will see the following:
Step 14
There we click on New and paste the PostgreSQL path:
Step 15
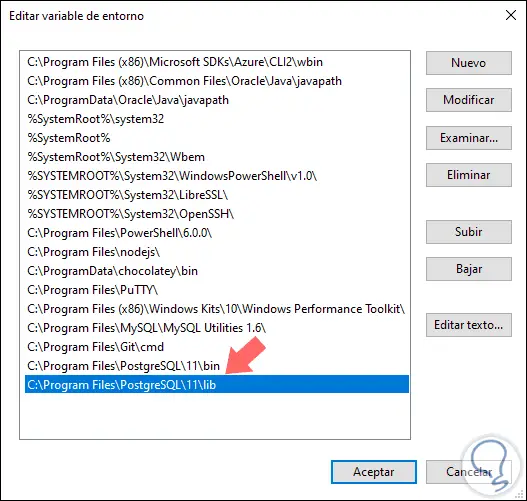
We repeat the process to copy the following line:
C: \ Program Files \ PostgreSQL \ 11 \ lib
Step 16
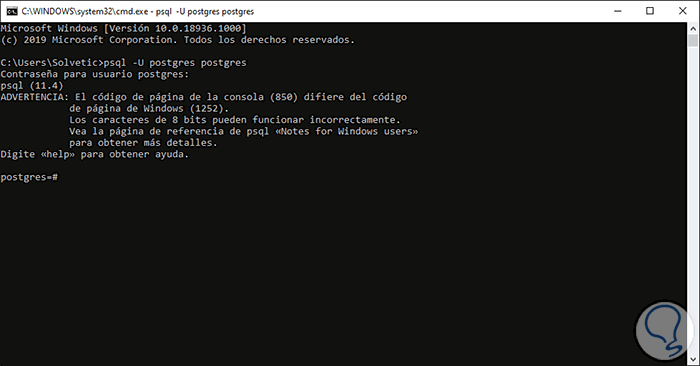
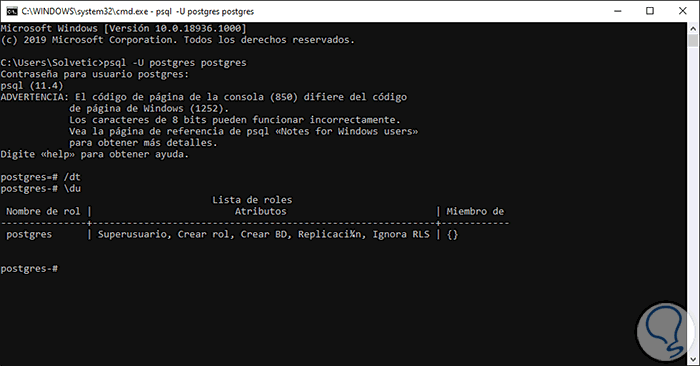
Click on OK in the pop-up windows to save the changes. Next we will go to the command prompt console and execute the following:
psql -U postgres postgres
Step 17
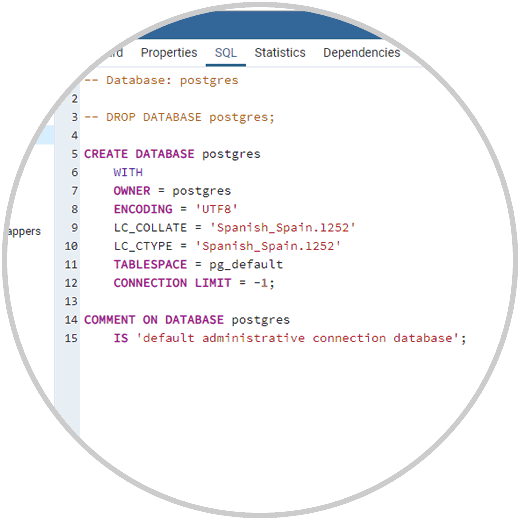
When entering the password we will access the database and if we update the browser we can see that in the SQL tab the SQL connection has already been established:
Step 18
From the console we can execute \ du to see the postgres roles:
TechnoWikis has explained to you in detail how to install PostgreSQL on Windows 10 and thus have an ideal and practical solution for the management, control and administration of data in a secure, dynamic and secure way thanks to PostgreSQL.