Did you know that more than 60% of security flaws in current systems arise from the execution of applications ? If you do not want to be part of that 60% and you are a frequent user of Windows 10, Microsoft has thought of you, and in us, since since its new version 1903 a function called Windows Sandbox has been integrated which will allow us to run programs in isolation without affecting the security of the local computer..
This function that we see or see (if we have not updated our equipment yet) is that they seek to improve the security and integrity of the information we work regardless of the type it is. The reason is that when we download files from the Internet or connect our USB to the computer, we don't know for sure (unless the developer is reliable) the content of its executable. So by double clicking on this we can trigger a series of unpleasant situations.
Therefore, Sandbox activated will act as a shield which keeps the Windows 10 productivity environment isolated and with it it will be possible to know the real content of an executable in that isolated Sandbox environment, in this way if the executable has a virus or threat This will not affect any process, service or original file of our Windows 10..
Sandbox Features
Within the characteristics of Sandbox we find the following:
- Sandbox is equipped with a kernel programmer, an intelligent memory manager and virtual GPU with which it will be possible to carry out all control tasks directly.
- Its environment resembles a new installation of Windows 10, that is, it does not have third-party programs installed.
- It can be run in Windows 10 Pro or Enterprise editions (Windows 10 Home is not supported).
- The use of a VHD (Virtual Hard Disk) is not required for global use.
- Every action we take there automatically will be eliminated when we close Sandbox thus increasing security.
Hardware requirement for SandBox
To fully test Sandbox you must have the following hardware:
- Have a 64-bit architecture.
- Use Windows 10 Pro or Windows 10 Enterprise.
- Enable virtualization capabilities in BIOS or UEFI.
- Have 1 GB of free disk space.
- Have at least 2 CPU cores.
- Our RAM must be at least 4 GB.
Next we will see how we can activate or deactivate Sandbox in Windows 10 and be able to test the execution of unreliable or unsafe programs.
1. How to enable Windows Sandbox in Windows 10
By default this feature is not enabled in Windows 10 so we must activate it first to be able to test applications that we are not sure, so it is more than essential to have virtualization enabled on the physical equipment, for this we have two alternatives.
In case of installing Sandbox on a physical computer, we will enable virtualization capabilities directly in the BIOS or UEFI..
Step 1
On the contrary, if we are installing Sandbox in a virtual machine, to enable nested virtualization we will run the following PowerShell cmdlet:
Set-VMProcessor -VMName <VM Name> -ExposeVirtualizationExtensions $ true
Step 2
After this we are ready to activate Sandbox in Windows 10, for this we will use the following key combination and execute the following:
+ R
appwiz.cpl
Step 3
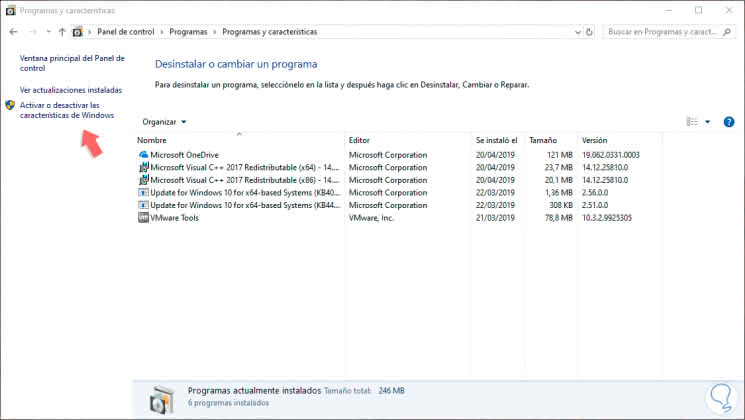
We will be redirected to the following window:
Step 4
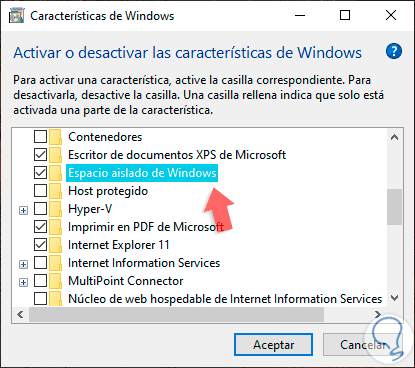
There we will click on the “Activate or deactivate Windows features†line located on the left side and in the pop-up window we will locate the “Isolated Windows Space†line:
Step 5
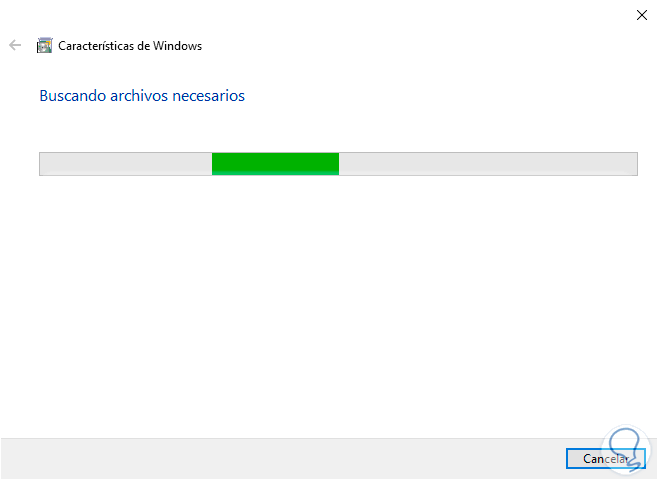
Check that box and click on OK to start Windows 10 to enable the process:
Step 6
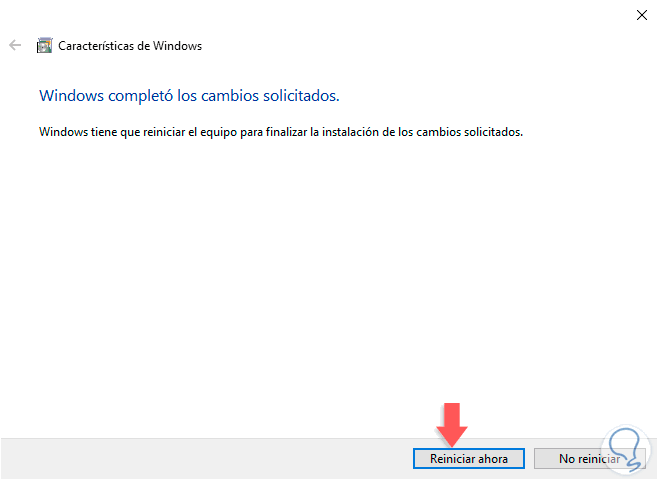
When this process ends we will see the following:
Step 7
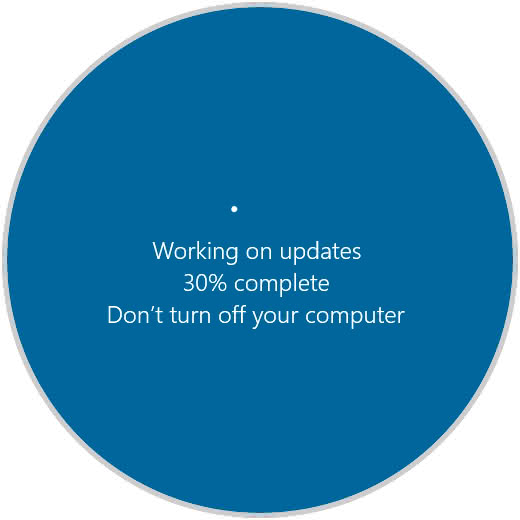
As we can see, in order for Sandbox to be fully executed, we must restart the system where we observe that the configuration process is carried out:
2. Run trusted unsecured applications by accessing Sandbox in Windows 10
Step 1
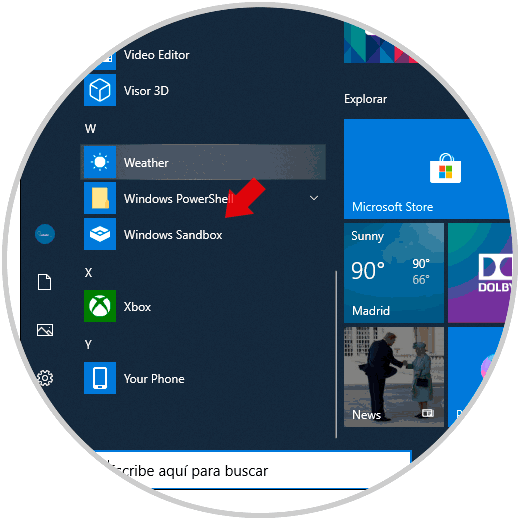
Once the system restarts we can access Sandbox from the Start menu:
Step 2
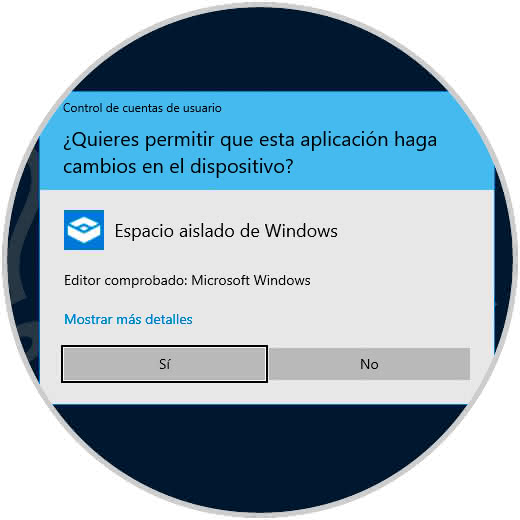
Clicking on Windows Sandbox will display the UAC warning which we must accept:
Step 3
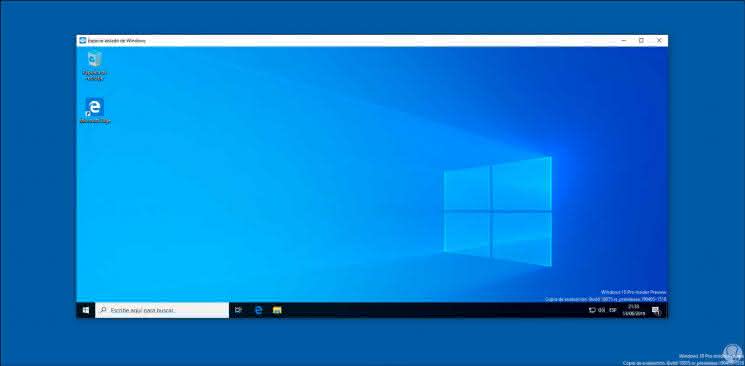
Once Sandbox is loaded this will be the environment we will see in Windows 10:
Step 4
We can note that Sandbox uses a space independent of the physical system and uses the same version of local Windows. Now, to know the integrity of our applications, let's copy it directly to the Sandbox environment:
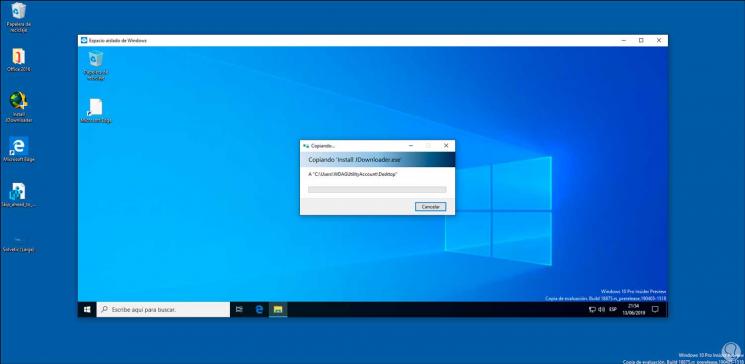
Step 5
Once copied, we can execute it to start the installation process:
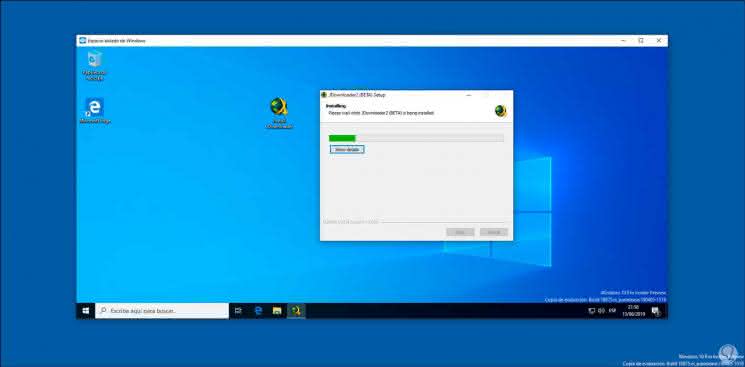
Step 6
As we mentioned at the beginning, when the Sandbox environment is closed, everything we have done will be lost in order to optimize security:
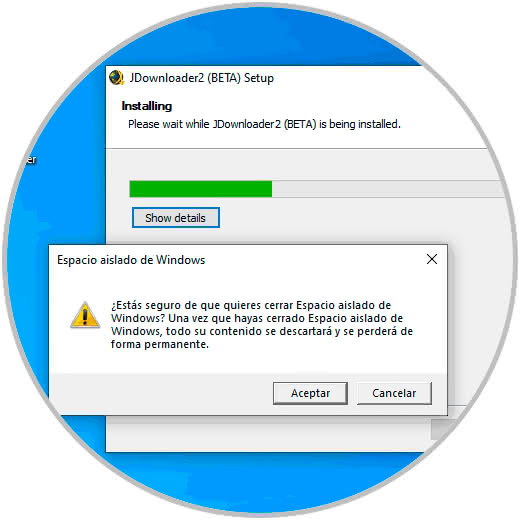
Thanks to the integration of Sandbox we have a practical utility to know in detail the reliability and security of an application before it is installed on the real Windows 10 computer.