NVIDIA was born in 1993 with the aim of having a great presence in the world of video games , music and images at the time when great horizons were seen in the field. At the time of its founding there were 26 manufacturers of graphics chips and it would almost triple three years later. In 2006, NVIDIA would be the only one that would be operating individually. After years in the market, NVIDIA has achieved a multitude of agreements to improve its technology by receiving recognition awards. Today, NVIDIA is one of the leaders in the field of computer graphics ..
NVIDIA contains a multitude of options when it comes to working with your hardware, a Control Panel that allows us to optimize our screens and your options so that what we receive through the screen is the best for us. The worst comes when that NVIDIA Control Panel issues problems and is not even suddenly accessible. That is why this collection of possible reasons can help us solve it in Windows 10.
We also leave you the video tutorial so you can follow the following NVIDIA Control Panel solutions in Windows 10..
To keep up, remember to subscribe to our YouTube channel! SUBSCRIBE
1. Restart the NVIDIA process from the Control Panel in Windows 10
We will restart the NVIDIA process in case it is failing.
Step 1
We open the Task Manager from here:
Step 2
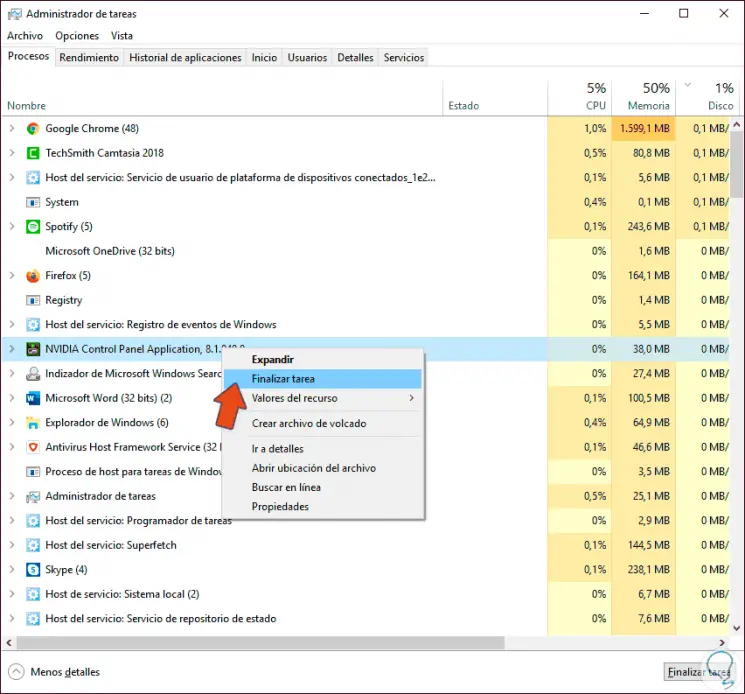
Now we right click on the NVIDIA Control Panel process and click on “Finish Taskâ€. Now we try to reopen the Control Panel from the taskbar or where we have access to the NVIDIA Control Panel.
2. Update the NVIDIA drivers in Windows 10
Step 1
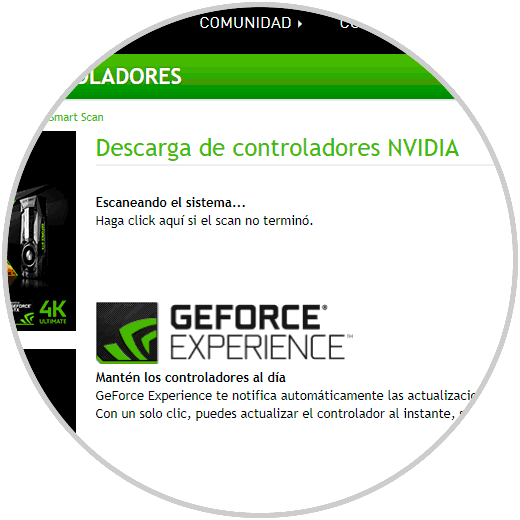
We will access the following link so that the scanner of the official NVIDIA website detects the drivers.
NVIDIA Smart Scan
Step 2
Then, the drivers will appear to be downloaded from the official website and you can install them.
3. Check and restart the NVIDIA service is running on Windows 10
Just as our system needs general services to function properly, NVIDIA requires that its services are running well for it to function fully. If this is not the case, it is likely that errors such as not opening the control panel. This control panel requires two services that must be running. We can also stop the service if it is running and restart it. To verify it we will do the following:
Step 1
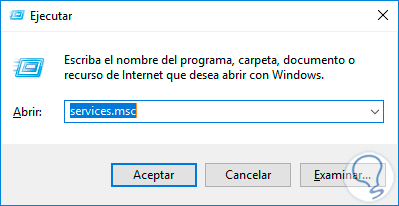
Press the following key combination and execute the services.msc command in the Run window
+ R
Step 2
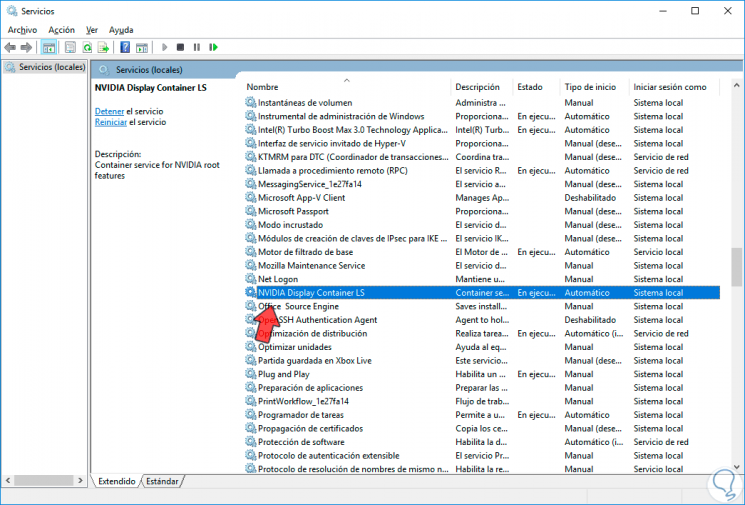
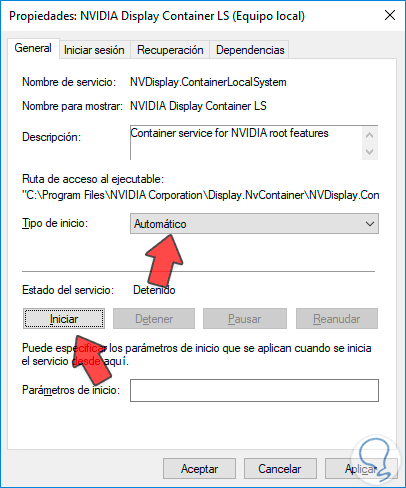
In the services window we will look for the one called “Nvidia Display Container LS†and double click on it.
Step 3
In the next window we will have to choose the "Automatic" option in "Start Type" and then click "Start" if the button is active. If it is not it is because it is already running. You would have to do the same with the “Nvidia Network Service Container†service.
4. Open NVIDIA from exe file in Windows 10
It is possible that the shortcut you have to open the control panel is damaged so we will check this by opening the panel from the downloaded file.
Step 1
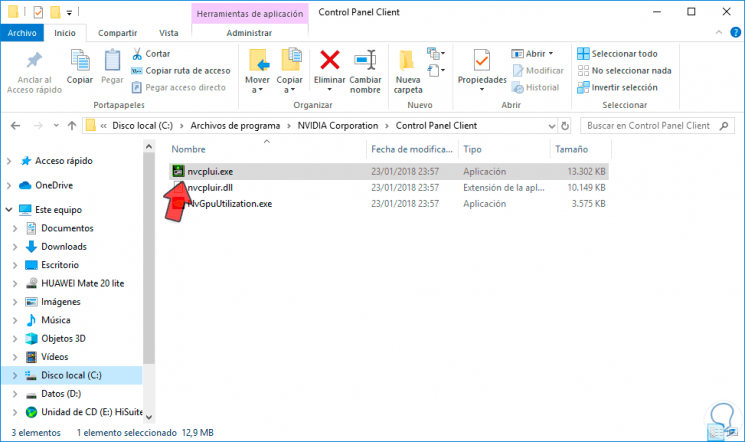
Normally the path to access the location of the NVIDIA control panel exe file will be as follows:
C: \ Program Files \ NVIDIA Corporation \ Control Panel Client
Step 2
Here we will see the file nvcplui.exe, double click on it to open the Control Panel.
Note
Right click on this file and select "Send to - desktop" to create a new Control Panel shortcut.
5. Disable quick start in Windows 10
The quick start is a function that helps Windows 10 start faster compared to previous versions. But it can also give problems, including with the NVIDIA Panel. To deactivate it we will do the following:
Step 1
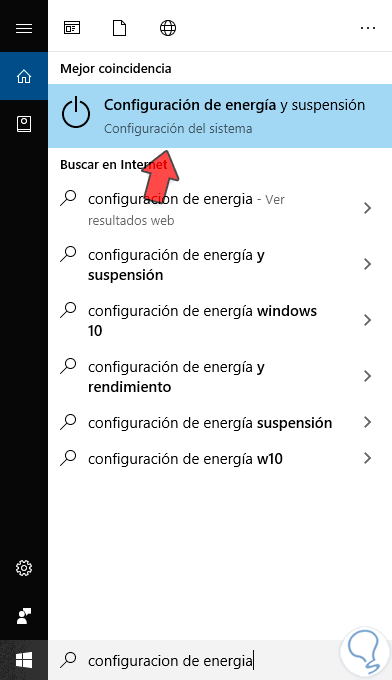
From the Windows 10 search engine access the "Power and suspension settings"
Step 2
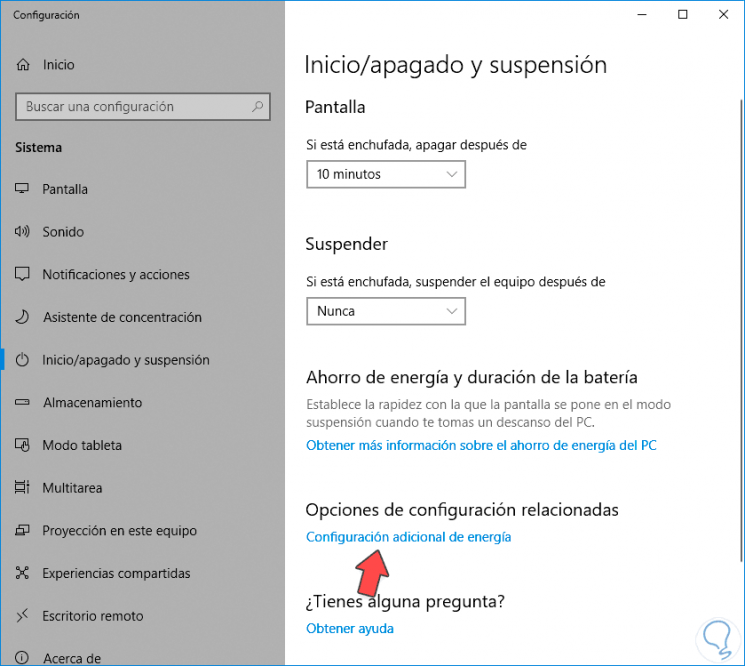
Within the “Start / shutdown and suspend†section, we enter “Additional power settings.
Step 3
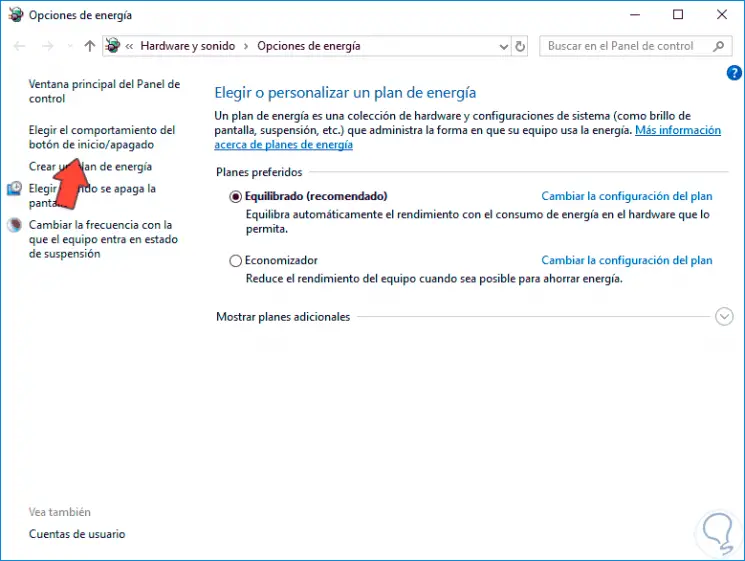
Here we click on the option “Choose the behavior of the start / shutdown button.
Step 4
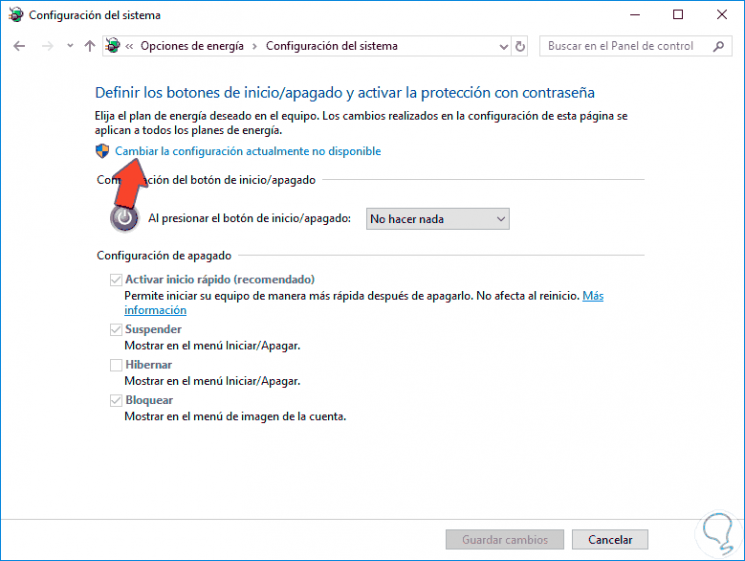
Click on the option "Change settings currently unavailable"
Step 5
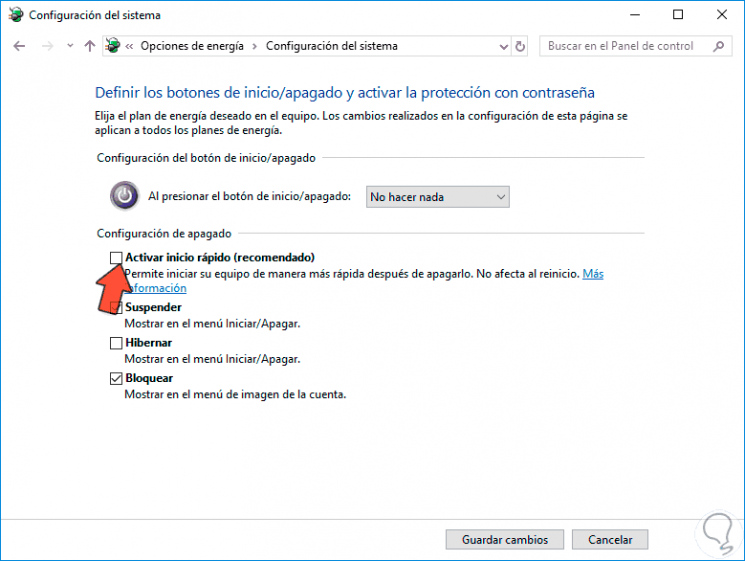
Here we can deactivate Windows 10 Quick Start. After that, test the operation of your NVIDIA panel.
6. Verify that the NVIDIA Control Panel is active in Windows 10
Sometimes you cannot enter the NVIDIA panel because it is hidden by some software and you cannot locate it. To relocate we will do the following:
Step 1
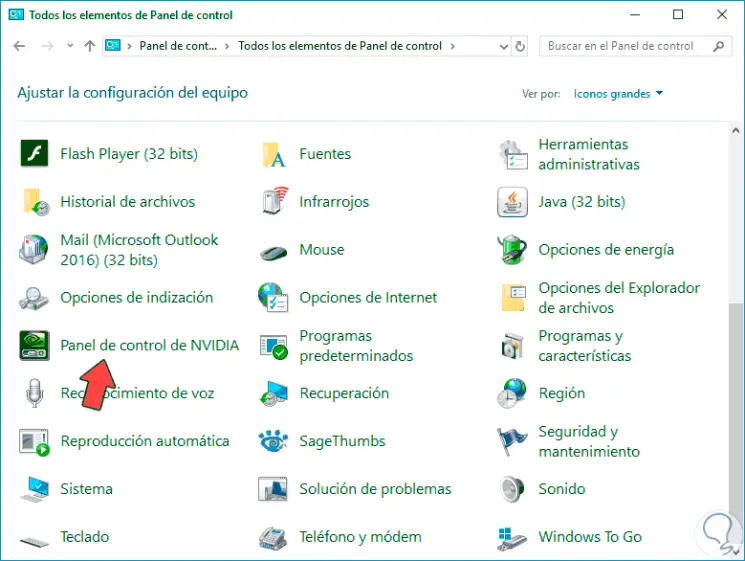
We open the Control Panel from here:
Step 1
Here we locate the NVIDIA Control Panel and click on it.
Step 1
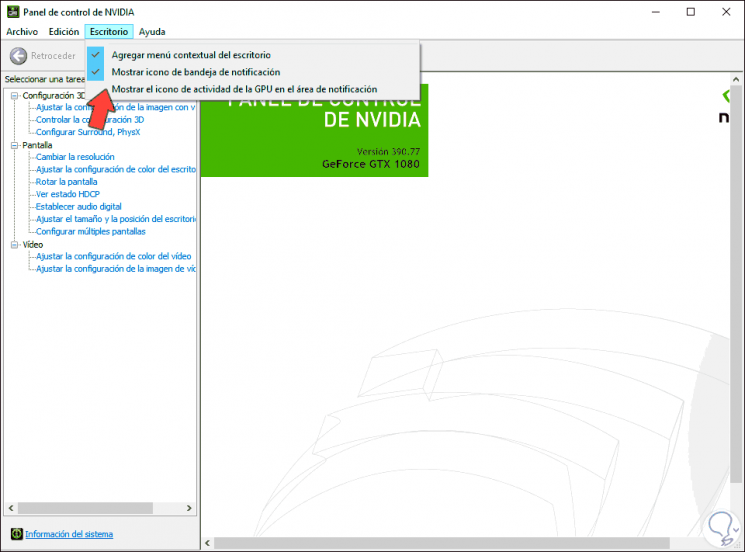
Inside the Panel we will go to the top and activate in “Desktop†the option of “Add desktop context menu†and “Show icon in notification trayâ€.
7. Verify antivirus and Windows Defender in Windows 10
There is also the possibility that our virus analysis system or Windows Defender itself is preventing the execution of the NVIDIA control panel because it detects it as harmful to our system. This happens many times with third-party software and although it is not always synonymous with danger, it is fine to analyze them. Depending on the antivirus you have, you will have to verify that you have NVIDIA allowed programs as with Windows Defender.
Exclude program in Windows 10
In this way we will have different possibilities to be able to repair that we cannot open our NVIDIA Control Panel in Windows 10.