The graphics cards vary a lot depending on the model and manufacturer behind it and from there we can see the different options available. In this case, NVIDIA cards are one of the best valued on the market and offer a wide range of possibilities when configuring your options..
The NVIDIA graphics includes a control panel from which we will have different options that make the most out of our games. Here we will find visual and processing improvements that will help us enhance our gaming experience. Today we will see the main options to configure NVIDIA Control Panel for games.
To stay up to date, remember to subscribe to our YouTube channel! SUBSCRIBE
1. Configure 3D on NVIDIA card
We are going to see different settings with which you gain more FPS in games.
Step 1
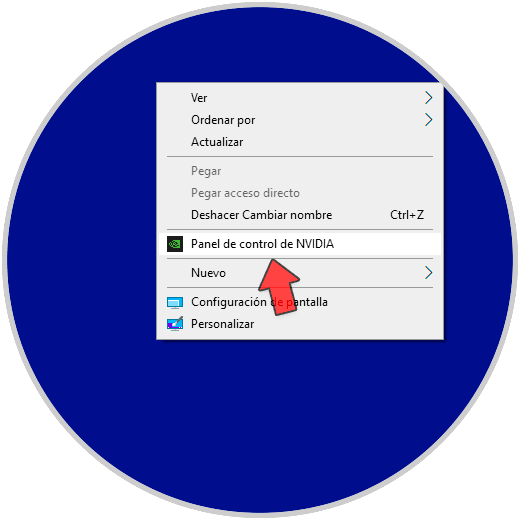
The first thing we will do is enter the NVIDIA Control Panel. You can open it from the Windows 10 desktop by clicking on an empty space and clicking on "NVIDIA Control Panel"
Note
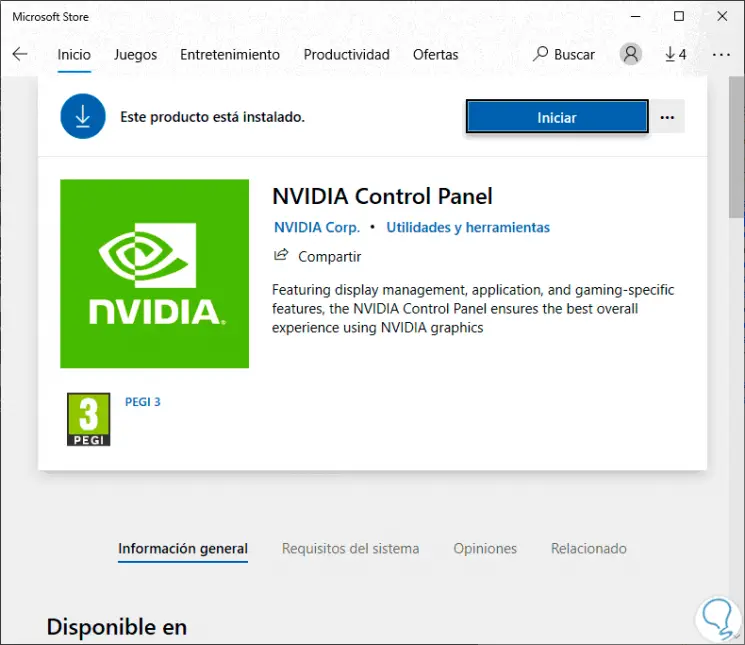
If you don't have the NVIDIA Control Panel installed, you can download it from the Microsoft Store:
Step 2
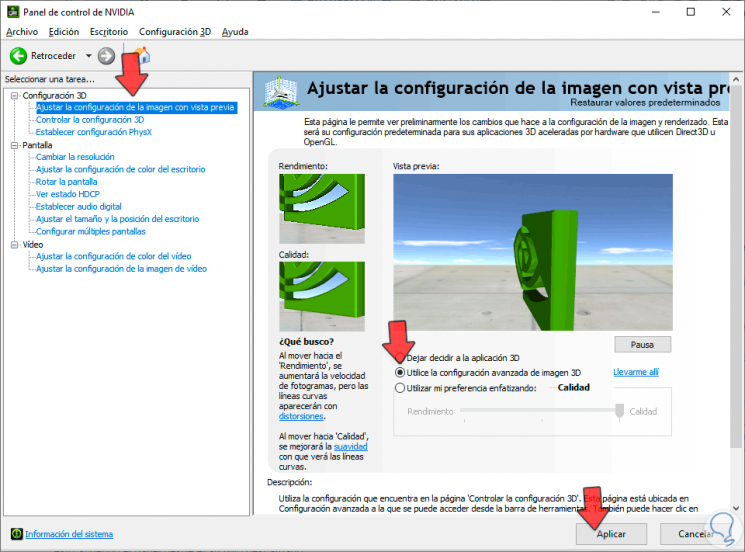
Now inside the NVIDIA Control Panel we will go to the "Adjust image settings with preview" section. Here we will choose to activate the option "Use advanced 3D image settings". Save the changes with "Apply".
Step 3
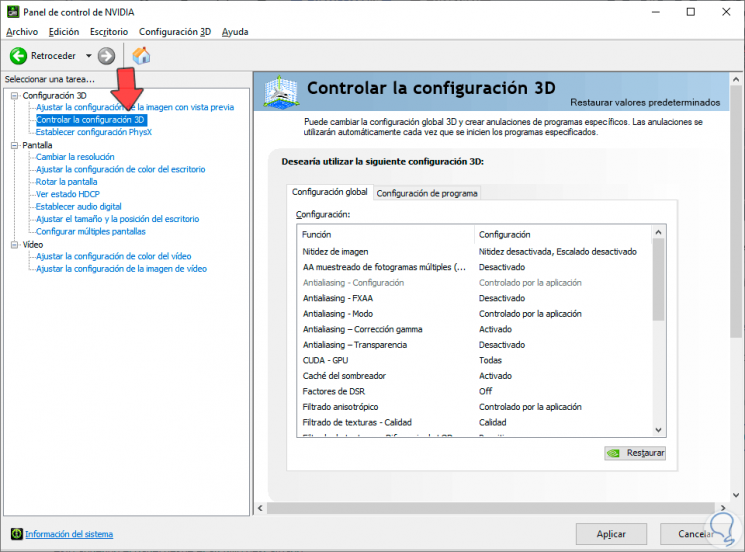
Now we will enter the option "Control 3D settings". Here we will see a panel with different options that we will configure.
Step 4
You have to choose the following options:
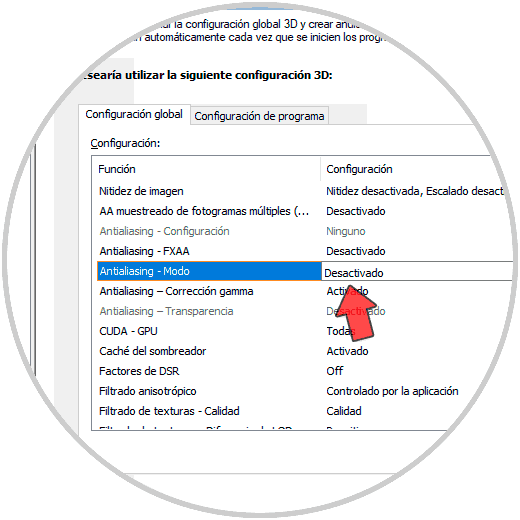
Antialasing- Mode
This option is related to the correction of the saw effect. Here we will choose the option "Deactivated". If we prefer that each game decides the type of antialasing we will choose "Controlled by the application" and if we want it to be controlled by the NVIDIA panel we will choose "Override any application configuration". The latter would mean that it would be the same technology applied to all games.
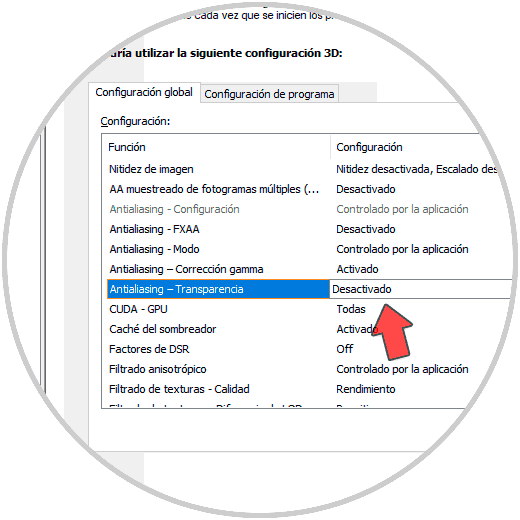
Antialasing- Transparency
It does not affect the visual mode but it could help to gain some more FPS so we are going to deactivate it.
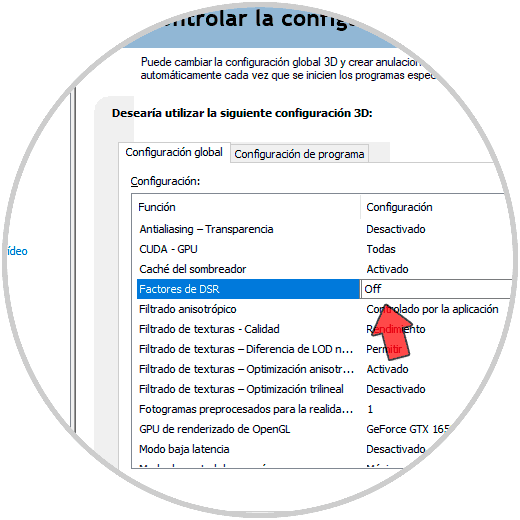
DSR factors
This option consists of the well-known 4K upscaling that was talked about in some consoles since it is not a real resolution. It consists of increasing our native resolution through software. This improves visually, but lowers performance so, if we don't have any graphics left over, it is best to disable it:
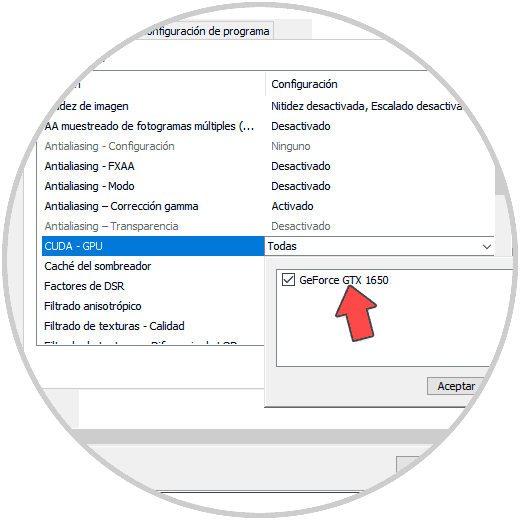
CUDA -GPU
This option is very important for performance. It is important that it is in "All" and in the CUDA GPU configuration we are going to make sure that we have our NVIDIA graphics available and activate them. In addition, this option improves performance by making the graphics work more and freeing up the processor.
Low latency mode
If we have reaction problems, for example, between the time we move the mouse and the game reacts, we can activate this Low Latency mode and the graph will try to solve those problems.
If you don't have these types of errors, you can disable the option.
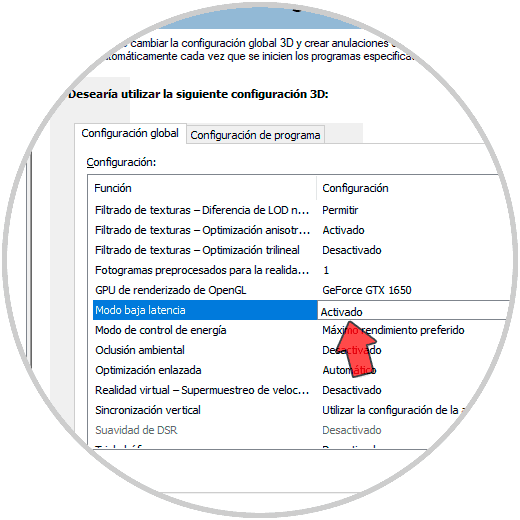
OpenGL rendering GPU
Here we will choose our NVIDIA card.
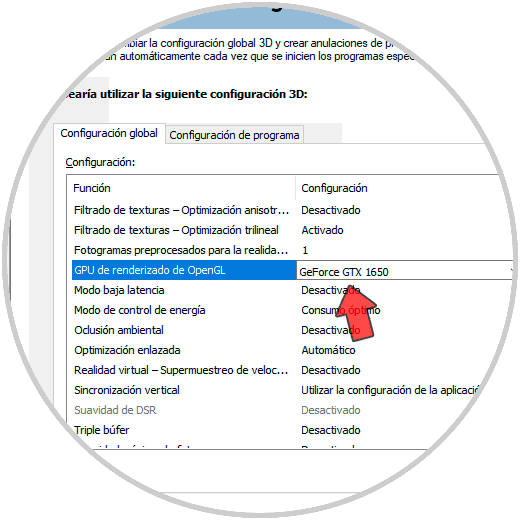
Power control mode
Within this option we will choose "Maximum preferred performance". It does not mean that it always runs at maximum power, but if you need higher FPS on your screen, it will help the software to have this option active so that the GPU can achieve it. The power supply will be controlling the maximum possible load that is needed.
This option is also recommended if we have an overclocked GPU..
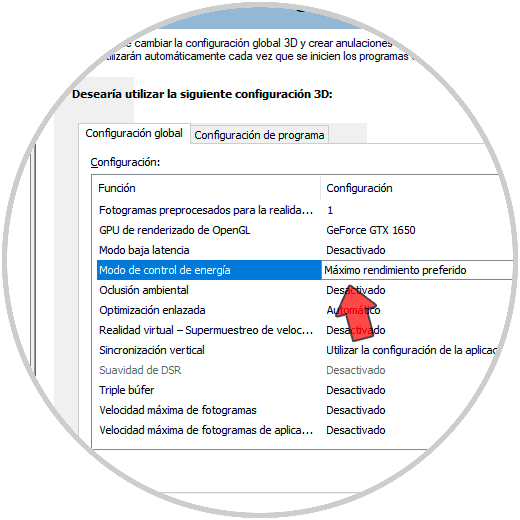
Texture filtering - Quality
Here we are going to choose the option of "Performance" or "High performance" to increase performance.
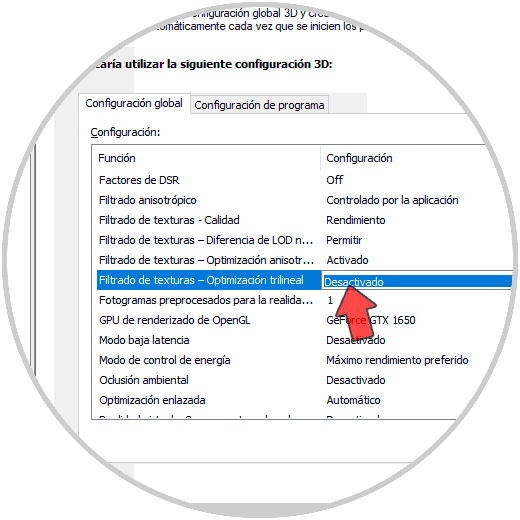
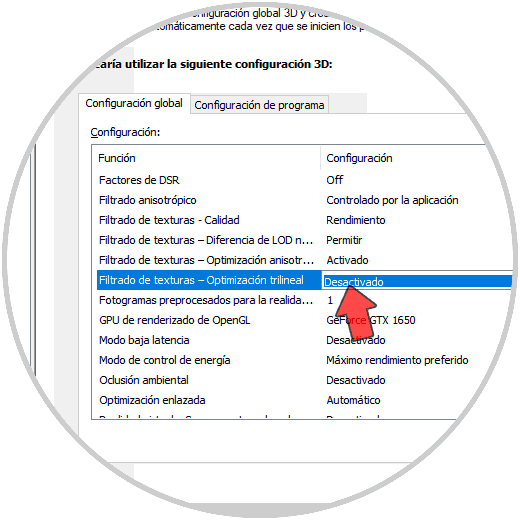
Texture Filtering - Trilinear Optimization
In this case we will choose that this option is deactivated.
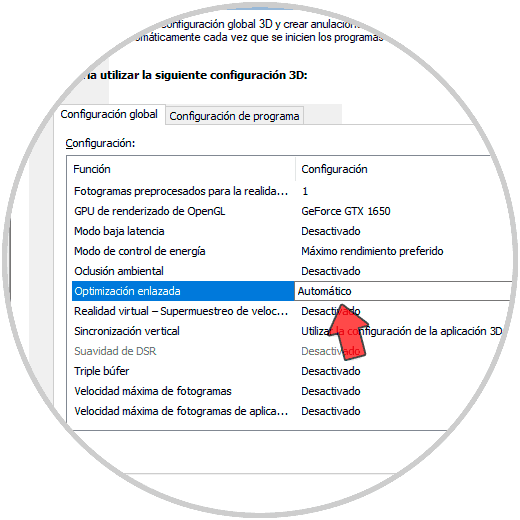
Linked optimization
Here we can leave it on "Auto" or disable it.
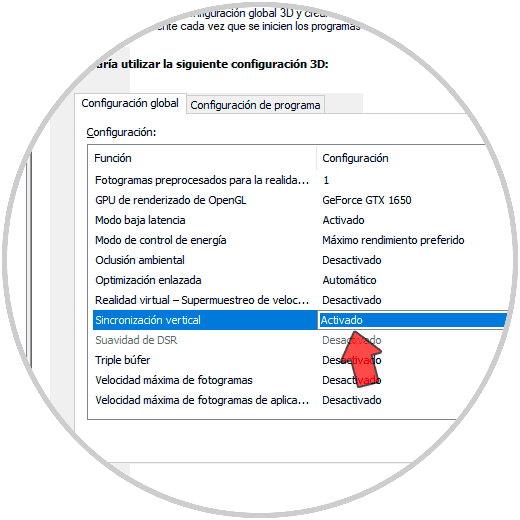
Vertical Sync
This is one of the main problems that we find in games and that is why it is important to use a monitor and not a TV to play since the response times are higher in the latter.
In this case, this option is important that we have this option activated and it is highly recommended to have a monitor with G-SYNC technology to free the GPU of load while also gaining a lot of FPS.
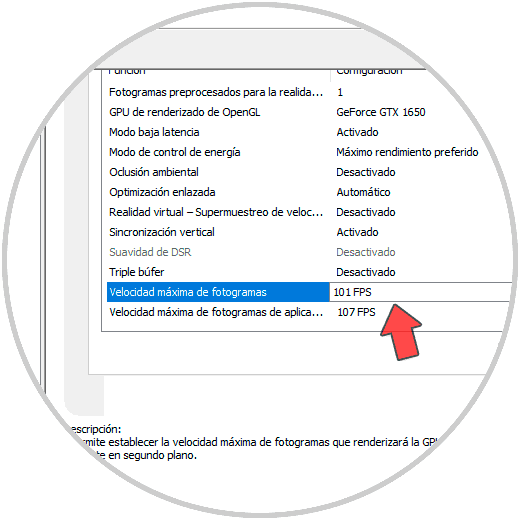
Frame rate
Here we can limit the number of frames that the CPU prepares before the GPU processes them. If it has high values, it can end up affecting the latency in addition to the life of our graph.
Step 5
Once you make these changes, click on "Apply" to save the changes.
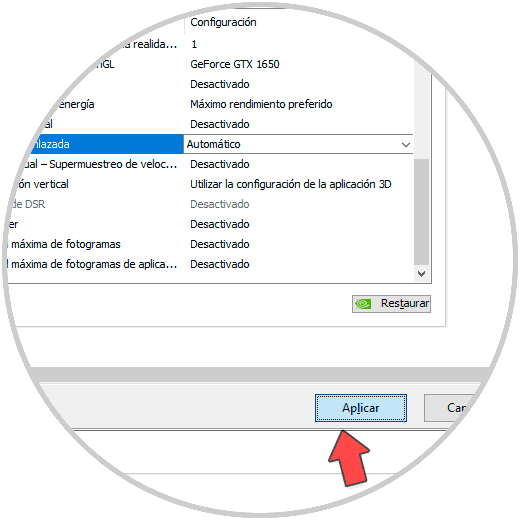
Step 6
If at any time you make a mistake in the configuration or want to leave it by default, you can click on "Restore".
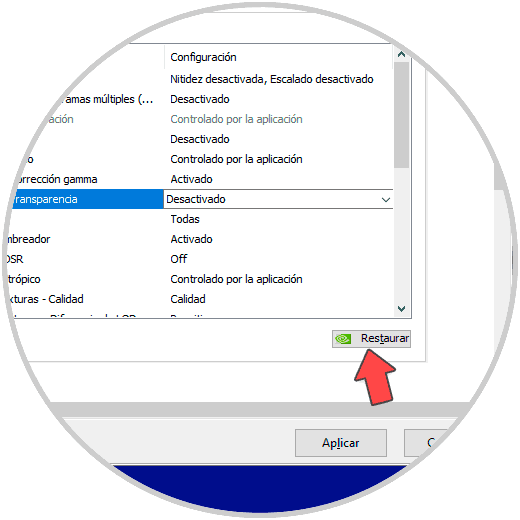
Step 7
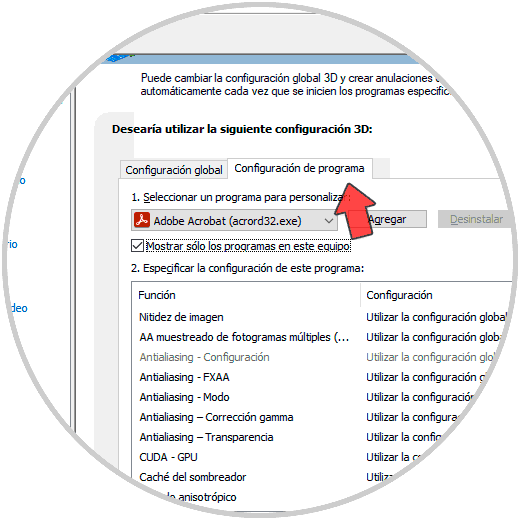
It is also interesting to know that we can apply different specific configurations for applications or games that we choose and that are not general configurations. To do this, click on the "Program Settings" tab and choose what we want to configure.
2. Configure PhysX NVIDIA
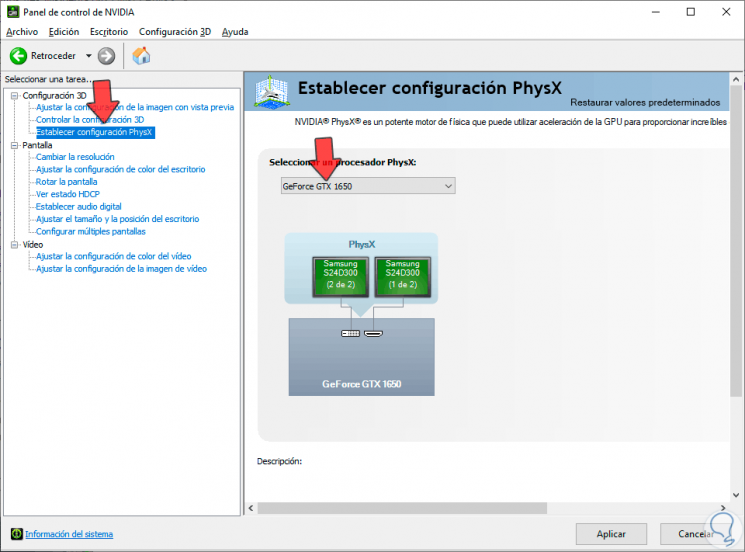
PhysX is a multi-threaded engine that enables games to act through physical calculations and enables objects in video games to act more similarly to how they would in real life. PhysX was created for hardware acceleration by applying physical effects to games and greatly enhancing the realism in games.
To activate it we will do the following. In this case, we will enter the general section of “Establish PhysX configuration. Here we will choose our NVIDIA graphics
3 . Configure display on NVIDIA card
Step 1
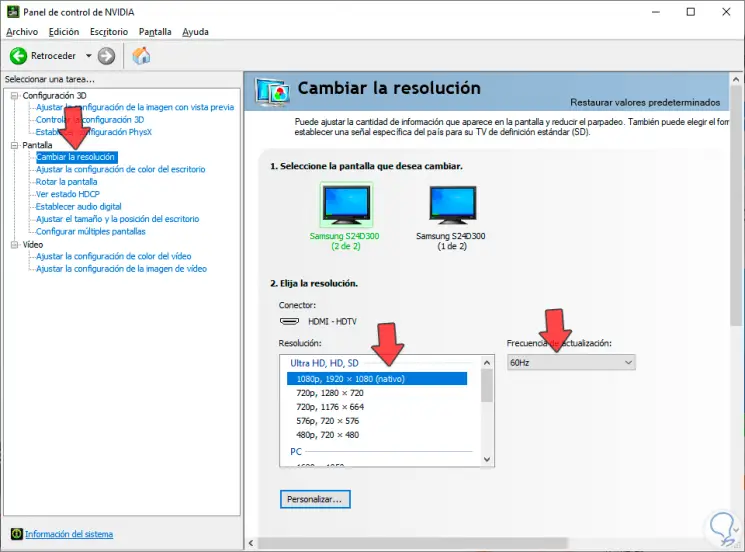
We will enter the category of "Screen" and within we will choose "Change the resolution". Here we can choose the resolution we want for our monitor, as well as the frequency.
Step 2
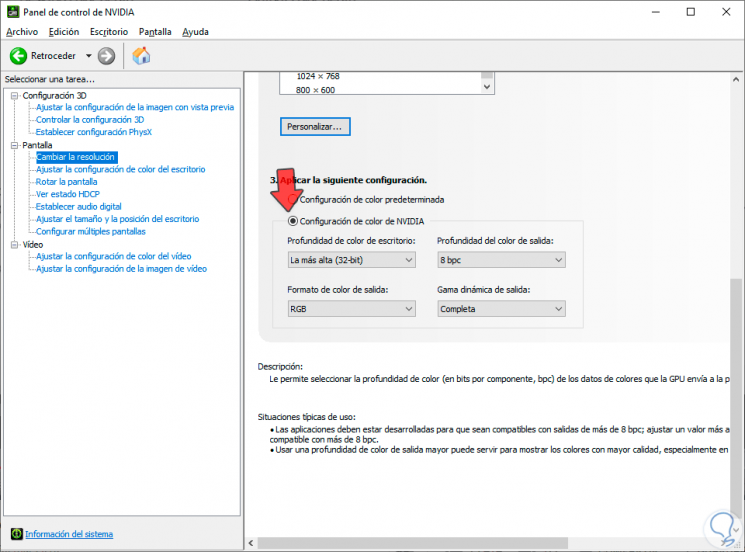
Now scroll down and turn on the "NVIDIA Color Settings" option.
Here the configuration that we will have is interesting depending on the monitor. In this way we can choose the "Desktop color depth" that we have maximum, the "Output dynamic range" or the "Output color format"
Once you apply the changes you will see interesting changes on your PC desktop in terms of the image you are seeing.
Note
Remember that if you have multiple monitors you will have to configure each one.
With these NVIDIA Control Panel settings we can have a higher performance configuration in games thanks to NVIDIA and the best visual result available..