DNS (Domain Name System) is the network mechanism through which the IUP address of our computer is translated into domain names and vice versa, this allows that when we access a website we directly enter its name and not 192.168.xxx.xxxx anymore It would be really complex to know all the IP addresses of the sites we visit..
The DNS Windows 10 is key in the process of web connectivity and if this were to fail for some reason find simply delays or errors in everything related to web browsing, or if the DNS provider saturates access errors found. That is why many times the solution is to change the DNS IP address on our computer and problem fixed, but which address to assign ?, if you do not know the answer, TechnoWikis will help you find it.
First of all, we must know the current IP address of our DNS in Windows 10 and for this we open the console the command prompt and there we execute the following:
ipconfig / all
In our network adapter we will go to the line "DNS Servers" and there we find the current DNS IP:
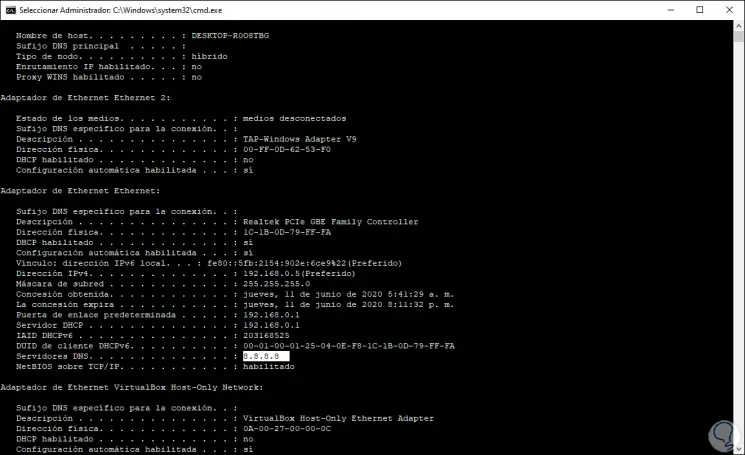
Next we will see how to have fast DNS and with DNS navigate faster..
To stay up to date, remember to subscribe to our YouTube channel! SUBSCRIBE
Faster Internet DNS with DNS Jumper
Now we are going to use a utility called DNS Jumper which we find available at the following link:
DNS Jumper
DNS Jumper Features
DNS Jumper is a small utility that helps us determine the best DNS for our computer, but also allows:
- Allows blocking of unsuitable websites by offering to select a secure DNS server
- Allows you to back up and restore current DNS settings
- Allows switching to globally more secure DNS servers
- Supports simply changing IPv4 and IPv6 DNS settings
- Runs an automatic check of all listed DNS response times in order to validate the fastest available
- It is possible to speed up web browsing by using a faster DNS server
- Supports CMD (command line)
- It has the function to clear and empty the DNS cache
- Integrates the Turbo Resolve function with which the DNS will be faster
DNS is free and portable which avoids making local installations on the hard disk.
Step 1
Once downloaded we must extract the compressed file:
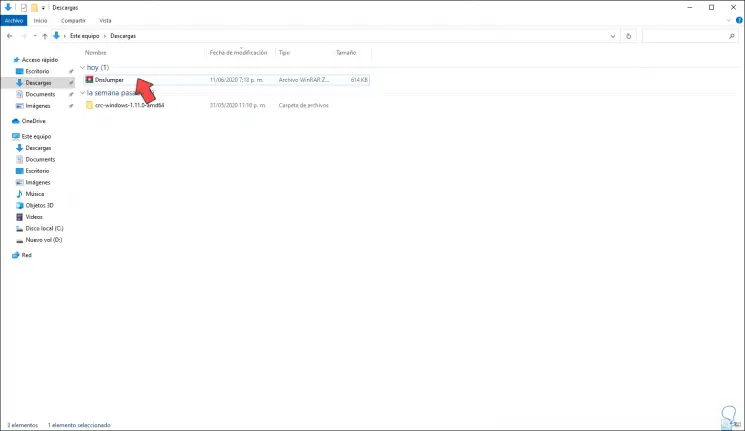
Step 2
We extract the content and we will see the following:
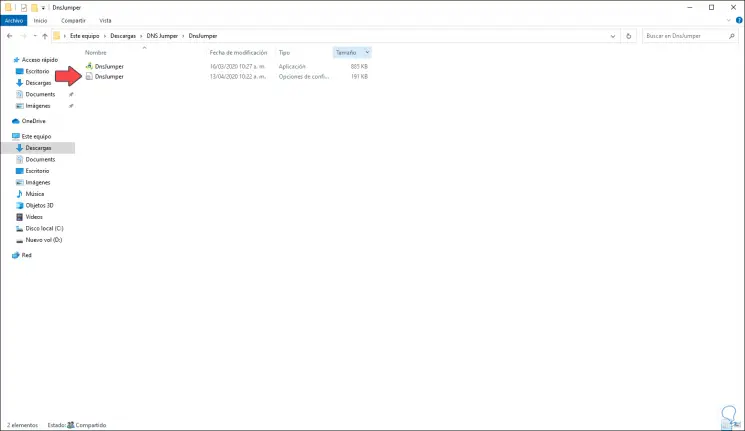
Step 3
We right click on the application file and select "Run as administrator":
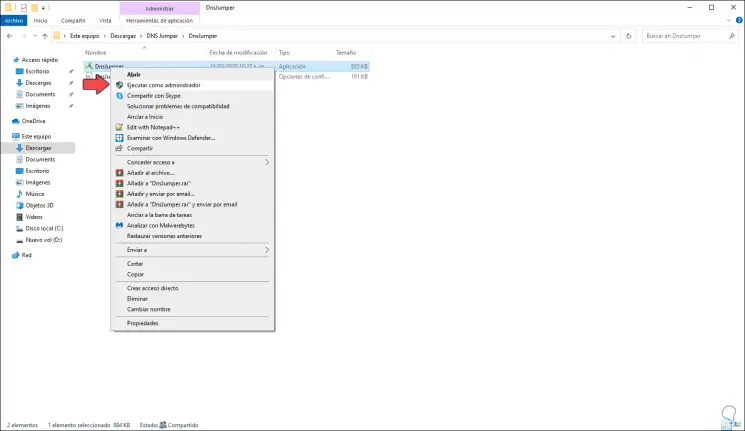
Step 4
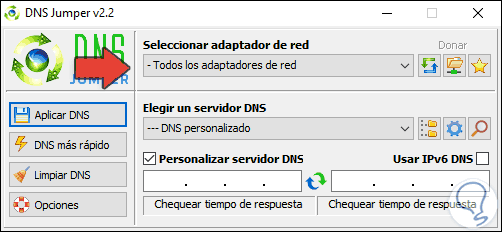
When executing it we will see the following:
Step 5
First, we select the current adapter of the team and this is where the DNS will be configured:
Step 6
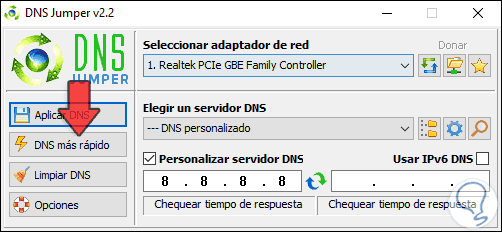
Now we click on the "faster DNS" button so that the utility detects this DNS based on the selected adapter, the following list will be generated:
Step 7
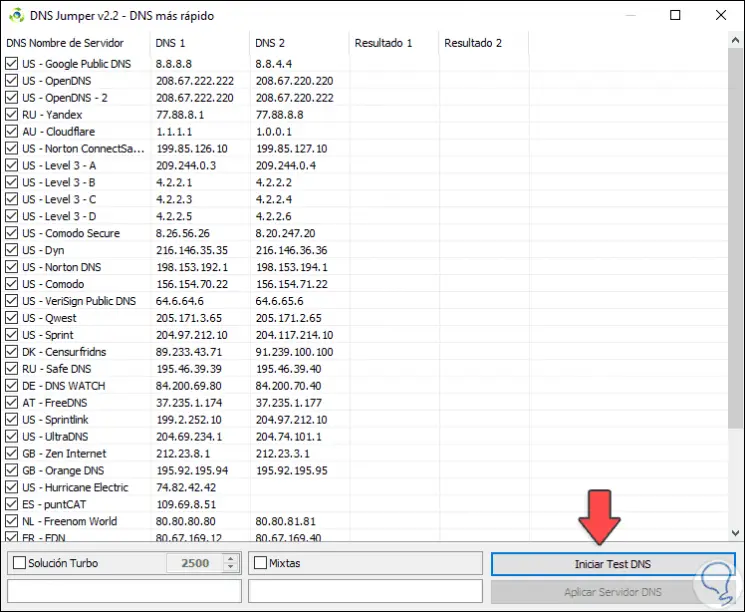
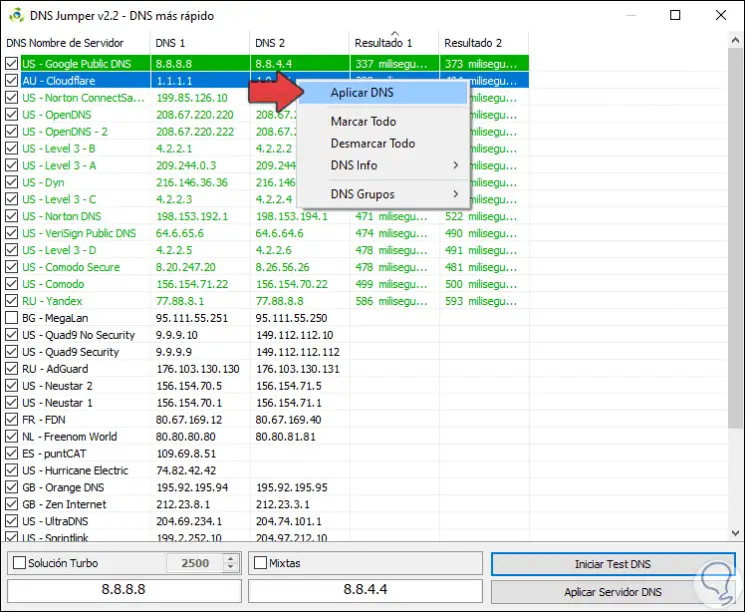
There we find the name of the server, as well as the IP of the primary and secondary DNS, we click on "Start DNS Test" to see the speeds of each of these DNS:
Step 8
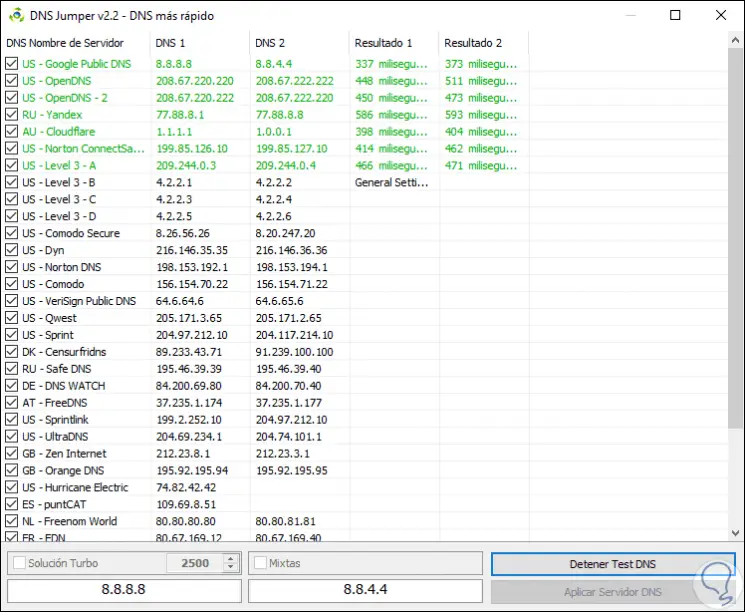
We can stop the test at any time. If we find a DNS that is with a good speed we click on it and in the displayed list select "Apply DNS":
Step 9
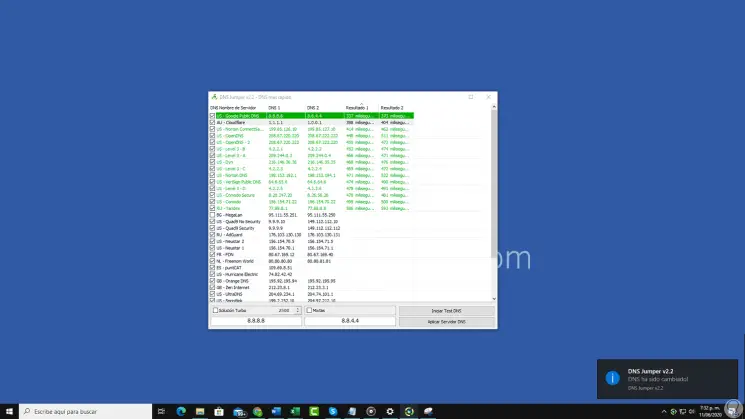
When doing this we will see an alert that the change has been correct in the System Notification Center:
Step 10
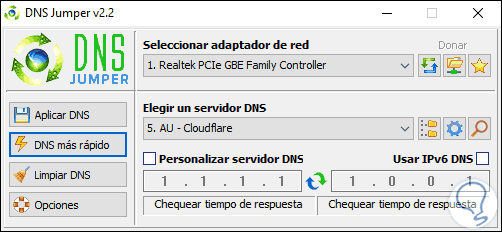
When we return to DNS Jumper we will see both the DNS server and the assigned IP:
Step 11
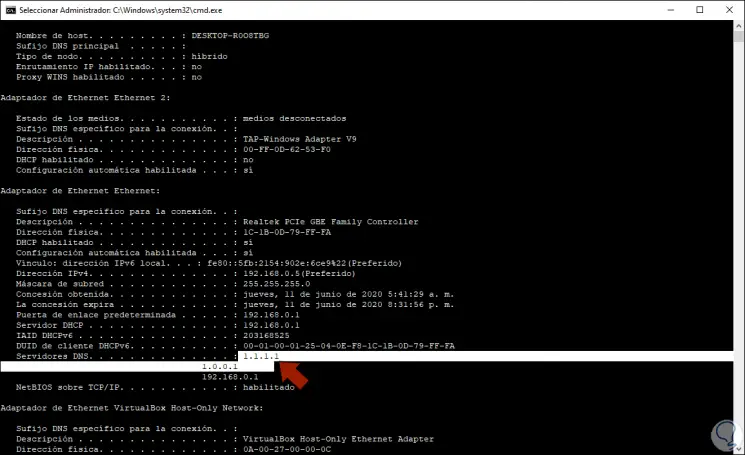
Back at the command prompt we can run "ipconfig / all" again and validate the new established DNS server:
Thanks to this utility we will significantly improve the speed of access to the network..