Windows 10 is a dynamic system through which different tools are delivered to the end user so that they have the best alternatives to manage the tasks there and one of the most used is to make use of the Screen clippings application which allows us to capture both the Current window, as well as the full screen or a free area and then save it locally or share it with other users..
Screen clippings allow us to share custom images of certain parts of our screen without the need for the other person to be in front. In addition, we do not have to stick to the usual global screenshot that captures everything on the screen, with the clippings we choose the area we want to select and store as an image . Imagine you find something interesting on a website, but you just want to show a part to another user, well, the cuts will help you get it.
So that you always have the Clippings utility handy, this tutorial will show you how to open the utility and also how to create a shortcut that allows you to quickly open the tool in Windows 10..
1. How to open Screen Crop in Windows 10
Step 1
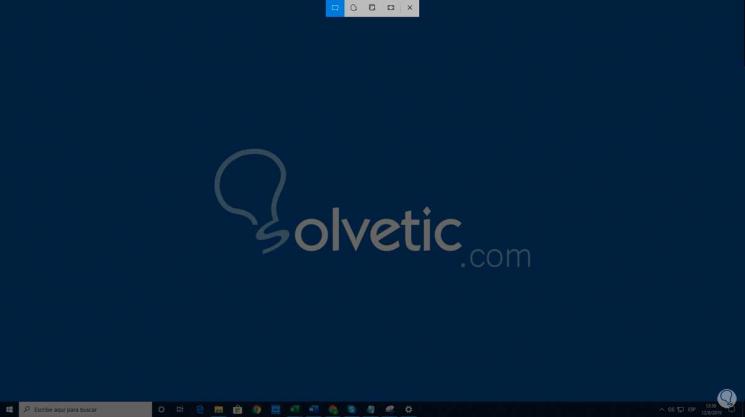
Screen trimming looks like this:
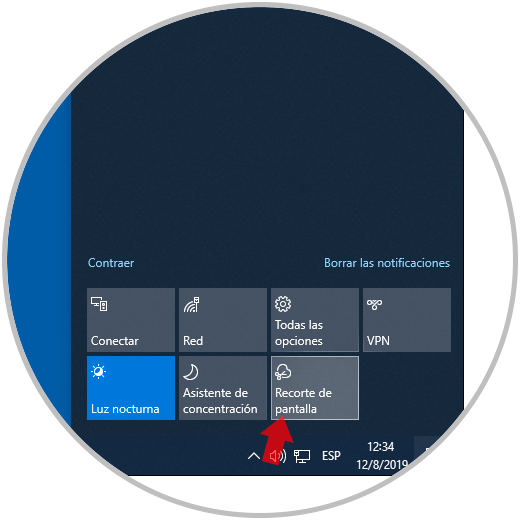
Step 2
To access this utility we can use the following key combination or go directly to the Action Center and select “Screen Clippingâ€:
+ Shift + S Ctrl + Shift + S
2. Create a shortcut to Screen Crop in Windows 10
But a more practical and useful option will be to create a shortcut to the tool which will open it with just a double click, TechnoWikis will explain how to achieve this in your Windows 10.
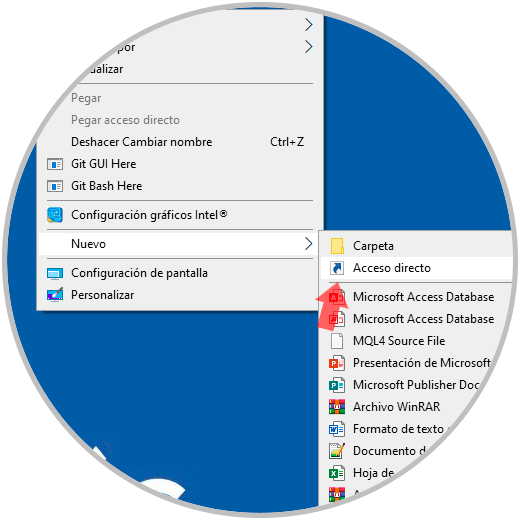
Step 1
To do this we right click somewhere free on the desktop and there we select New / Shortcut:
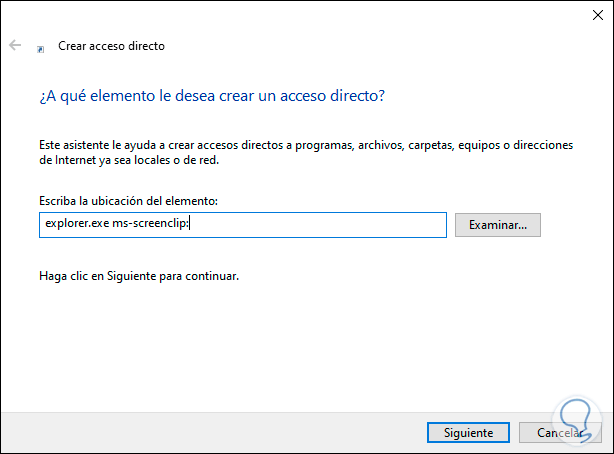
Step 2
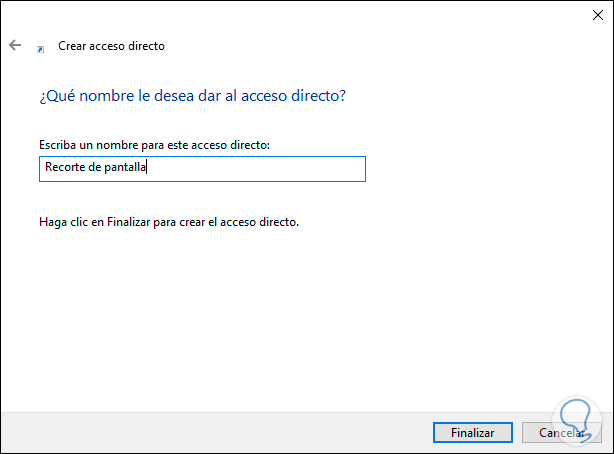
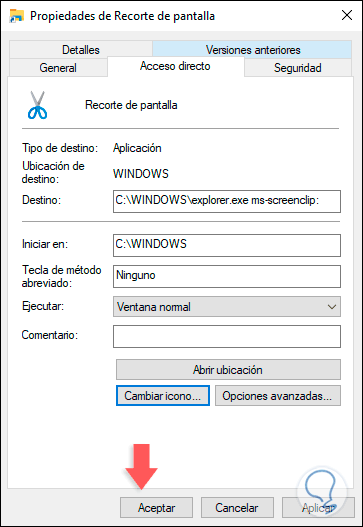
In the displayed window we enter the following:
explorer.exe ms-screenclip:
Step 3
We click Next and assign the desired name for the shortcut. Click on "Finish" to complete the creation of it.
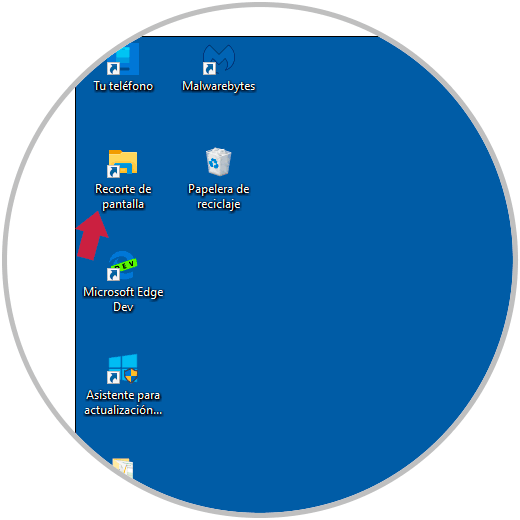
Step 4
We can see that the access is created with its default values ​​on the Windows 10 desktop:
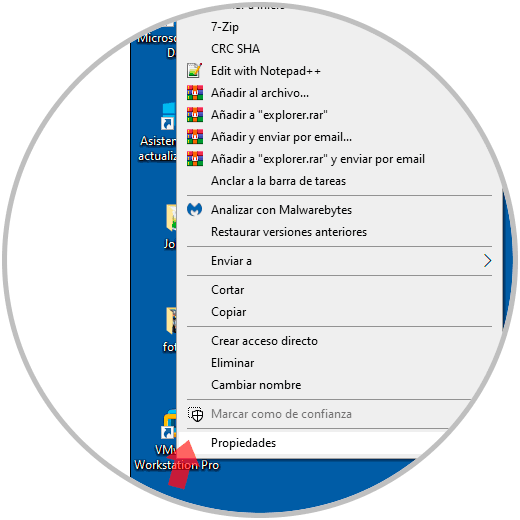
Step 5
To change its icon we right click on the shortcut and select Properties:
Step 6
In the pop-up window we go to the "Shortcut" tab:
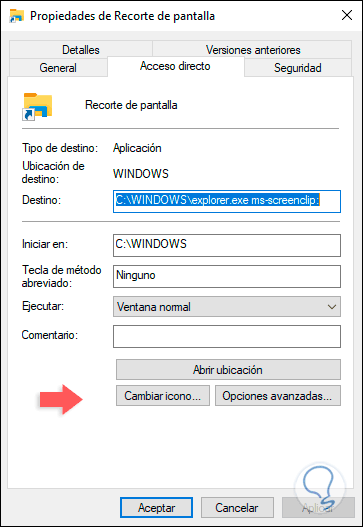
Step 7
We click on the "Change icon" button and in the "Search for icons in this file" path we go to the address c: \ windows \ system32 \ shell32.dll:
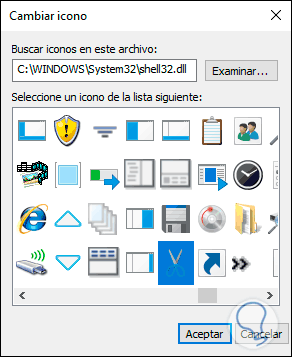
Step 8
There we select the scissors icon and click OK, we can see that it is automatically applied in the preview:
Step 9
Click on Apply and Accept and now we will have the new icon on the desktop. There we double click on it and we will be ready to use the Screen Crop utility and capture what we want in Windows 10.
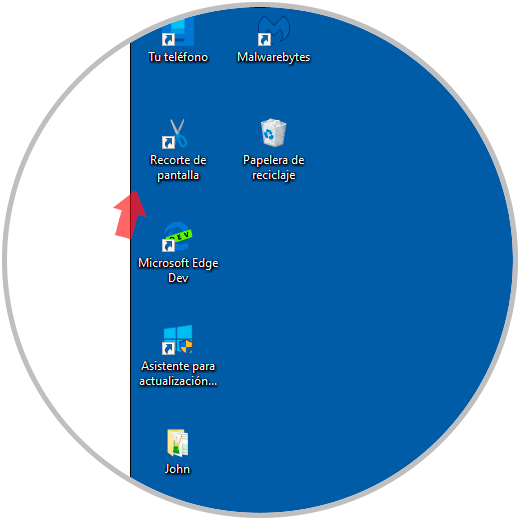
In this way we can make a shortcut to the screen capture or clipping tool in Windows 10 and thus have an image of the part that interests us always at hand.