A segment that has high growth in the IT world is development, in which a high percentage is represented by developers, who in turn handle the entire web aspect as one of the pillars of their work and tasks, in this type of web environments one of the applications that is ideal to implement and use is Nginx .
Nginx (engine x), was developed as an HTTP proxy server, a mail proxy server or a TCP / UDP proxy server where all the functions and services of web management are scalable depending on the type of organization and development to be used.
characteristics
Among all the features of Nginx we find and highlight:
- It has a modular architecture design.
- Integrates load balancing and fault tolerance functionality to optimize availability
- Has accelerated caching support for FastCGI, uwsgi, SCGI and memcached servers
- Supports PUT, DELETE, MKCOL, COPY and MOVE methods
- We have an accelerated reverse proxy with caching
- Nginx geolocation is IP based
- Within Nginx filters have been integrated for better management such as gzipping, byte ranges, XSLT, SSI and more.
- Can manage name-based and IP-based virtual servers
- Compatible with POP3 authentication methods: USER / PASS, APOP, AUTH
- LOGIN / PLAIN / CRAM-MD5, IMAP: LOGIN, AUTH LOGIN / PLAIN / CRAM-MD5, and SMTP: AUTH LOGIN / PLAIN / CRAM-MD5
- Supports SSL, STARTTLS and STLS
- You can validate HTTP references
- Accepts filters (FreeBSD 4.1+, NetBSD 5.0+) and support for TCP_DEFER_ACCEPT (Linux 2.4+)
Let's see how to install Nginx in Ubuntu 20.10 and have one of the best solutions for web management.
1. Install Nginx on Ubuntu 20.10
Step 1
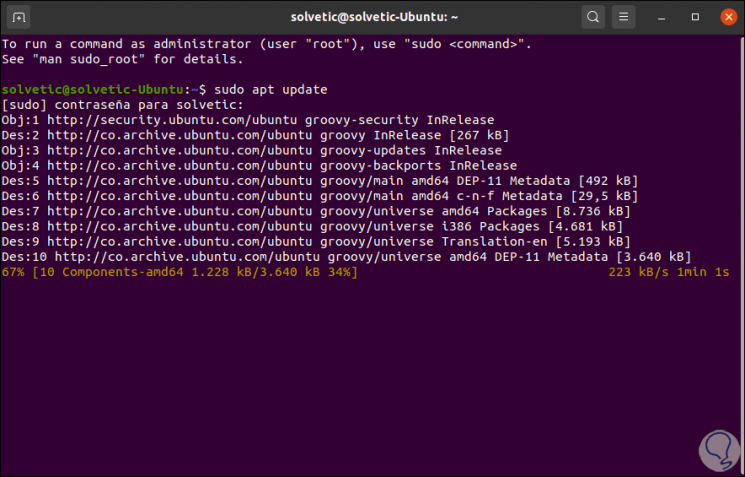
The first step to take will be to update the packages and system repositories, for this we execute:
sudo apt update
Step 2
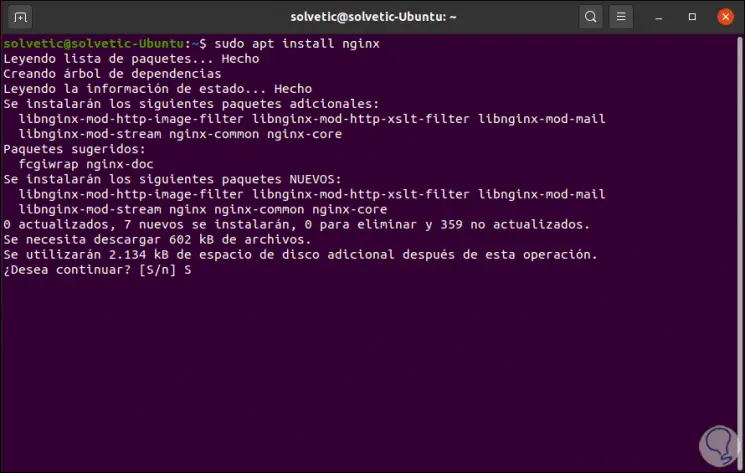
After this we proceed to install Nginx in Ubuntu 20.10 with the following command:
sudo apt install nginx
Step 3
We enter the letter S to confirm the download and installation of Nginx:
Step 4
After this we are going to start the Nginx service, as well as see its current status in Ubuntu 20.10:
sudo systemctl start nginxsudo systemctl status nginx
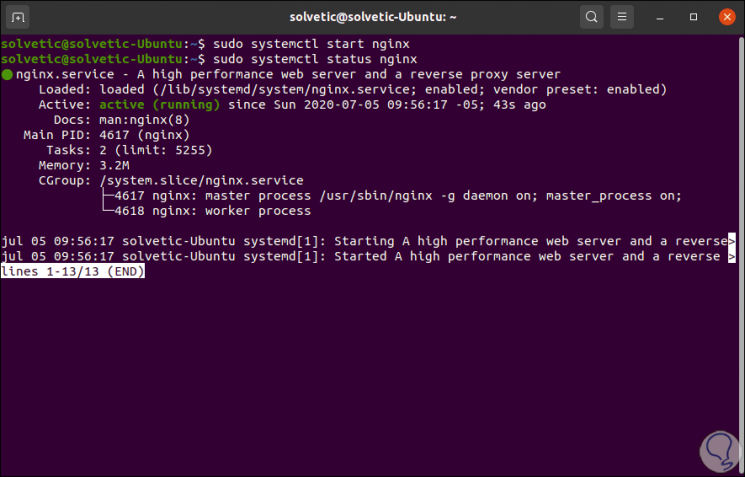
As we can see, its status is “active (running)”, that is, everything is correct.
Step 5
To check which version of Nginx has been installed we run:
sudo dpkg -l nginx
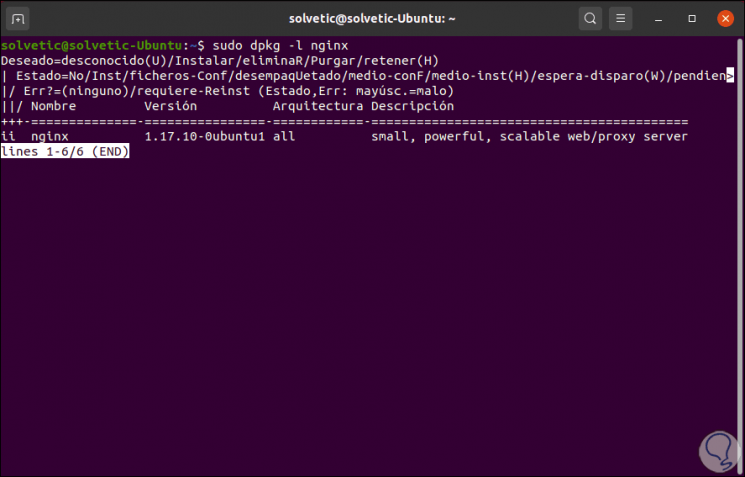
In this case we have Nginx 1.17.10.
2. Firewall settings in Ubuntu 20.10
Step 1
Being a platform where web processes will be managed, it is necessary that we authorize the service in the system firewall to allow connections, there are 3 profiles in Nginx that are:
- Nginx Full: open ports 80 and 443 (for SSL / TLS encryption)
- Nginx HTTP: open port 80 (for unencrypted web traffic)
- Nginx HTTPS: open port 443 (for SSL / TLS encryption)
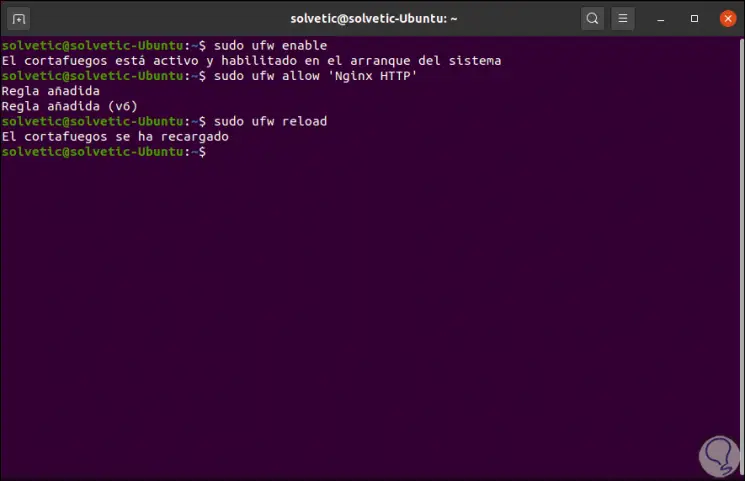
In this case we will run the following in Ubuntu 20.10:
sudo ufw enable (enables the firewall) sudo ufw allow 'Nginx HTTP' (enables the profile indicated in the firewall) sudo ufw reload (reloads the commands)
Step 2
Now we check the status of the firewall:
sudo ufw status
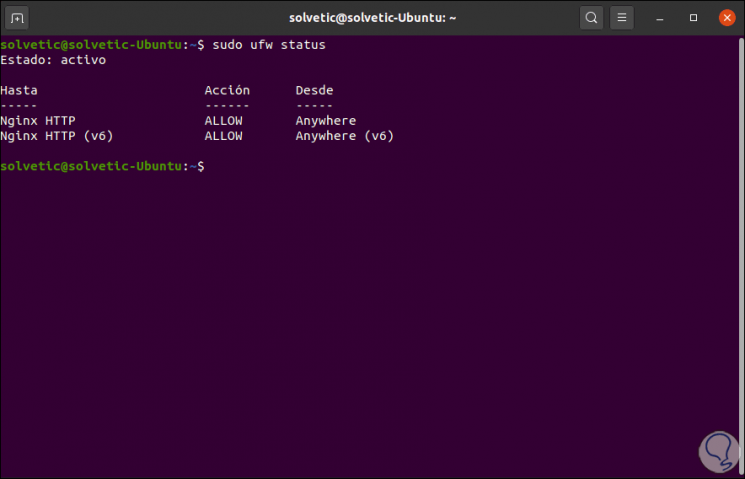
We can see that the requested rule has been added.
3. Nginx validation in Ubuntu 20.10
Step 1
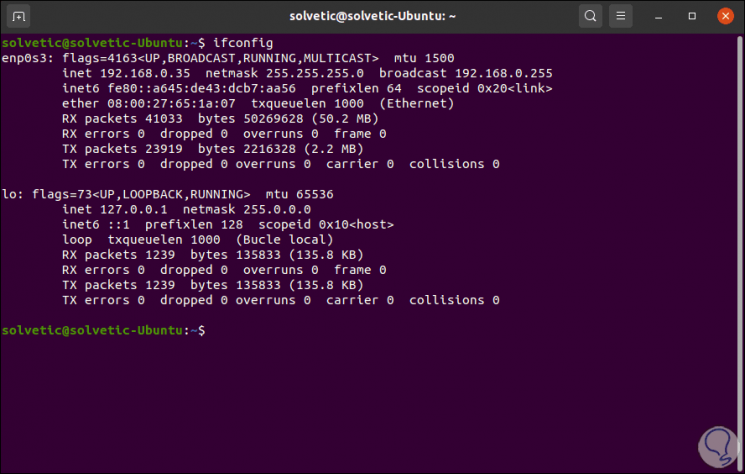
It is time to know the IP address of the server, for this we execute the following:
ifconfig
Step 2
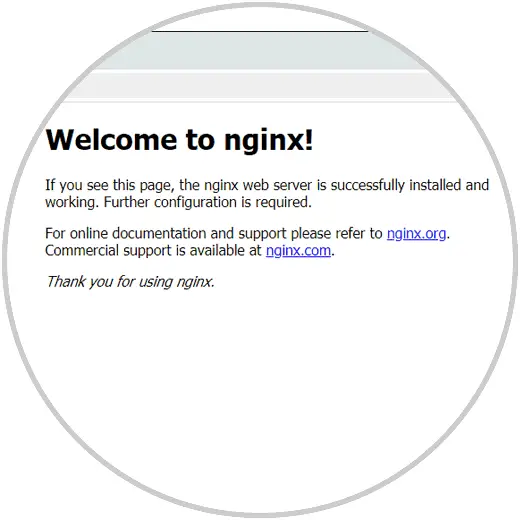
With the known IP address, we will go to some external or internal browser and execute the following:
http: // IP-computer or domain
We will see the following:
4. Manage Nginx in Ubuntu 20.10
Step 1
Once Nginx has been installed correctly, we can perform certain actions on it, the first and most basic are to manage the service:
sudo systemctl stop nginx (stops the Nginx service) sudo systemctl start nginx (starts the Nginx service) sudo systemctl enable nginx (configures the Nginx service at Ubuntu startup) sudo systemctl restart nginx (restarts the Nginx service) sudo systemctl reload nginx ( reload the Nginx service)
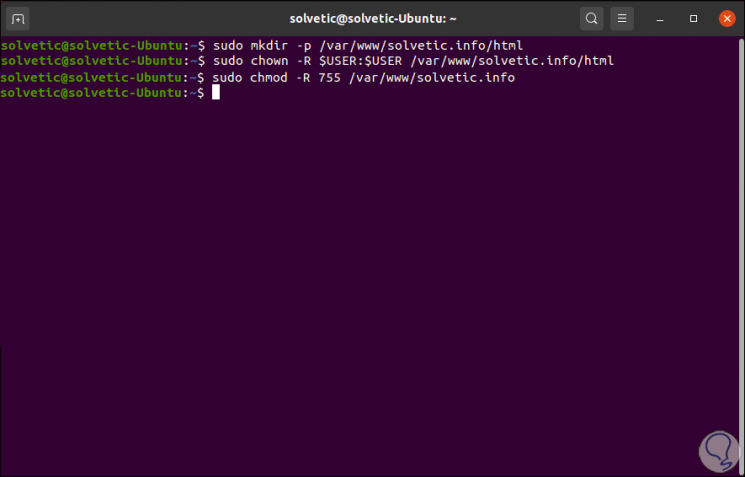
In case we want to host various sites on the Ubuntu 20.10 server, TechnoWikis recommends you create and configure an Nginx server block, by default, Nginx is configured with the server block where the web content is hosted in the / var / www directory / html.
Step 2
To carry out this process we are going to create the directory:
sudo mkdir -p /var/www/technowikis.info/html
Then we assign the property of this:
sudo chown -R $ USER: $ USER /var/www/technowikis.info/html
Step 3
Then we are going to assign directory permissions which allows the owner to have all the permissions (read, write and execute):
sudo chmod -R 755 /var/www/technowikis.info
Step 4
Inside the domain directory, we are going to create an index.html file, this file will contain the web content of the domain that the developer or user wants:
sudo nano /var/www/technowikis.info/html/index.html
There we enter the content to display:
<html> <head> <title> Welcome to TechnoWikis! </title> </head> <body> <h1> TechnoWikis is the meeting point for professionals and technology lovers </h1> </body> </ html>

We save the changes with the Ctrl + O keys and exit the editor with the Ctrl + X keys.
Step 5
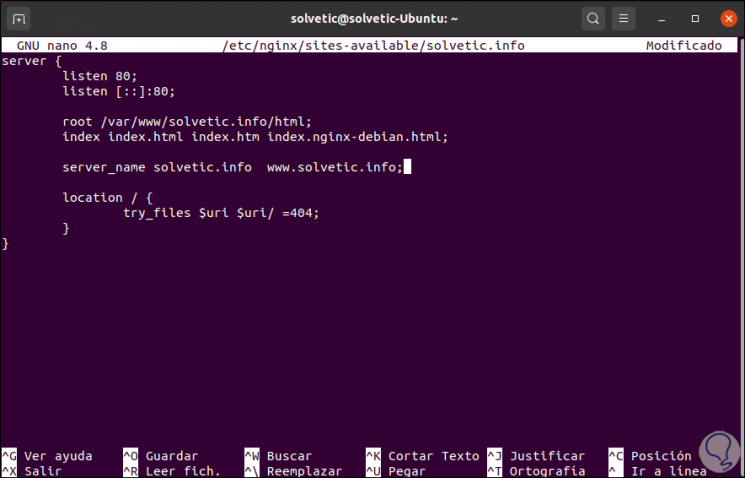
In order for the Nginx web server to deliver the content we have created, we are going to assign a server block with the appropriate directives, we will create the new block like so:
sudo nano /etc/nginx/sites-available/technowikis.info
Step 6
There we enter the following:
server {listen 80; listen [::]: 80; root /var/www/technowikis.info/html; index index.html index.htm index.nginx-debian.html; server_name technowikis.info www.technowikis.info; location / {try_files $ uri $ uri / = 404; }}
We save the changes with Ctrl + O and exit with Ctrl + X.
Step 7
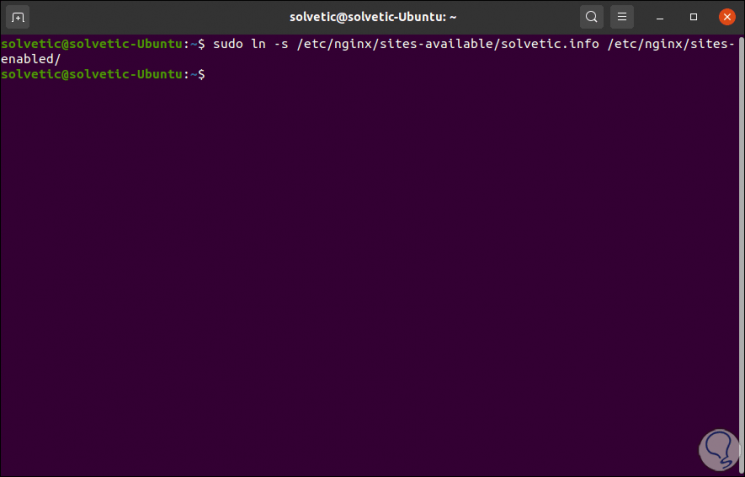
Now it is a matter of enabling the server block file by linking it to the site-enabled directory, this is that the Nginx will read at startup, we execute:
sudo ln -s /etc/nginx/sites-available/technowikis.info / etc / nginx / sites-enabled /
Step 8
We execute the following command to apply the changes:
sudo systemctl restart nginx
We check that the configuration is correct with the following order:
sudo nginx -t

Step 9
Once everything is correct, we access a browser and use the following syntax:
http: // domain-IP
As a result we will see the content that has been registered in the index.html file:

Key Directories for Nginx Management
There are some key directories for the management of Nginx, these are:
- /etc/nginx/nginx.conf - Refers to the main configuration file.
- / etc / nginx / sites-available: server blocks configuration is stored in this directory, Nginx will use server blocks only if they are linked to the enabled directory
- / etc / nginx / sites-enabled: Nginx server blocks per site are housed in this directory
- /var/log/nginx/access.log: all requests that are sent to the web server are registered there.
- /var/log/nginx/error.log - This is an error log file in which all Nginx errors are stored
We see how Nginx is one of the most functional solutions for everything related to web development.