The vulnerabilities to which data are exposed in Windows 10 every day grow more due to multiple factors, both internal and external, so Microsoft developers are always in search of the best security solutions and in this scenario we have an existing function from previous versions and it is BitLocker..
What is BitLocker
BitLocker is a drive encryption system which protects the information stored on the USB drive, this protection is integrated with the operating system and protects the data from different types of attacks to which it may be exposed.
As an extra point of security, BitLocker adds better protection if it is used in an integrated way with the Trusted Platform Module (TPM) version 1.2 or later, this is a small device on the motherboard of the computer that adds integral protection, but if the card does not have that chip, it will be possible to use BitLocker without problems.
BitLocker has different features and one of them is the possibility of blocking the normal startup of Windows 10 and only until the user enters the Pin or connects a removable device with the key will the process continue to load..
Bitlocker features
Some of its most outstanding features are:
- Supports SSO to protect BitLocker encryption keys from cold boot attacks (from PC startup)
- The space encryption implemented by BitLocker To Go gives us the opportunity to encrypt removable data drives in a short time
- BitLocker supports the decryption process of encrypted hard drives
- BitLocker supports hard drives that have been encrypted using built-in encryption hardware
- BitLocker prompts the user to enter a recovery key only when the disk is damaged or when the PIN or password has been lost
Set Bitlocker password Windows 10
When we are encrypting a USB drive with BitLocker we can assign a password or a smart card:
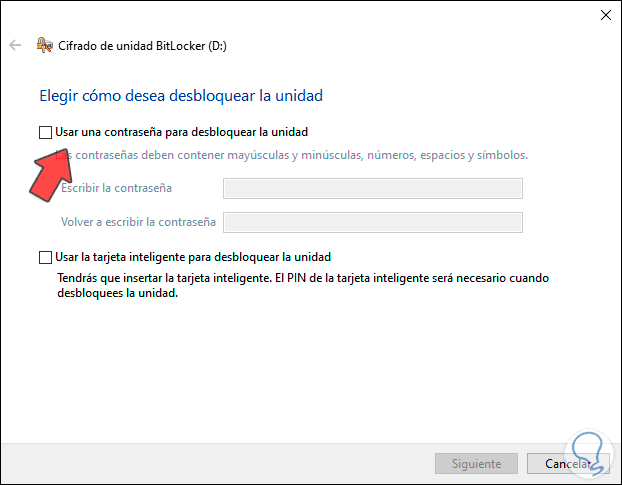
After this, different options will be available to host the backup copy of the recovery key, such as:
- Store it in the Microsoft account in the cloud
- Print the key and keep it in a safe place
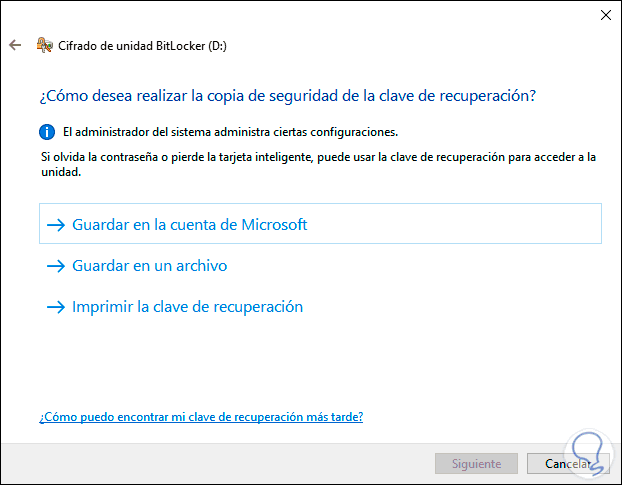
Now TechnoWikis will explain different ways to remove BitLocker password in Windows 10.
To stay up to date, remember to subscribe to our YouTube channel! SUBSCRIBE
1. Remove BitLocker USB password if we know the recovery key
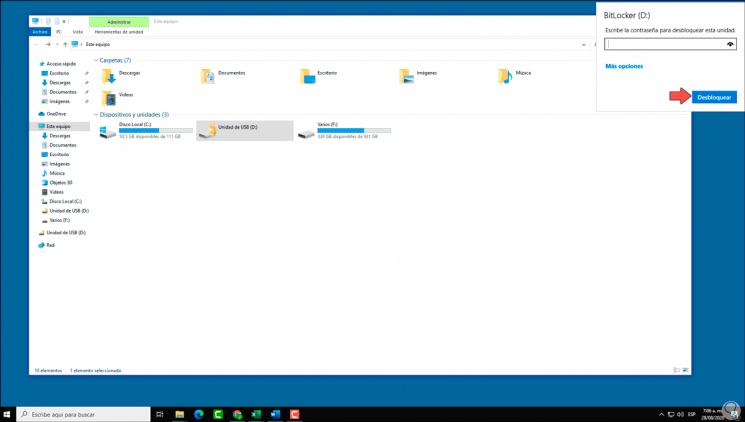
When we know the BitLocker password when connecting the USB to the computer and trying to access it, we will see a pop-up window where we must enter the password for it:
Step 1
There we enter the password and click on Unlock to start after this the process of removing the password.
Step 2
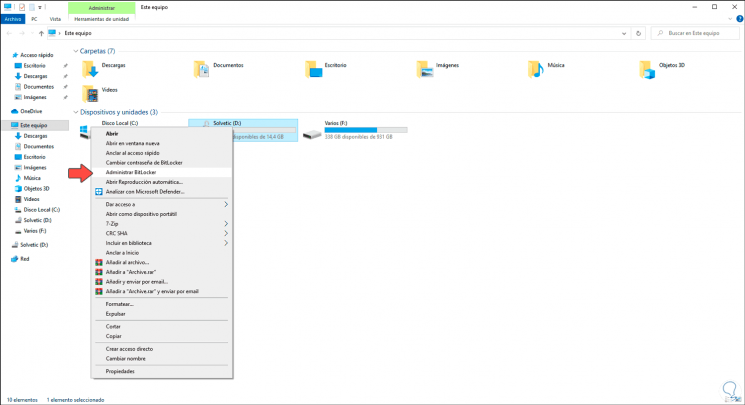
For this process we will go to the Windows 10 File Explorer, we right click on the protected USB drive and in the displayed list we select "Manage BitLocker":
Step 3
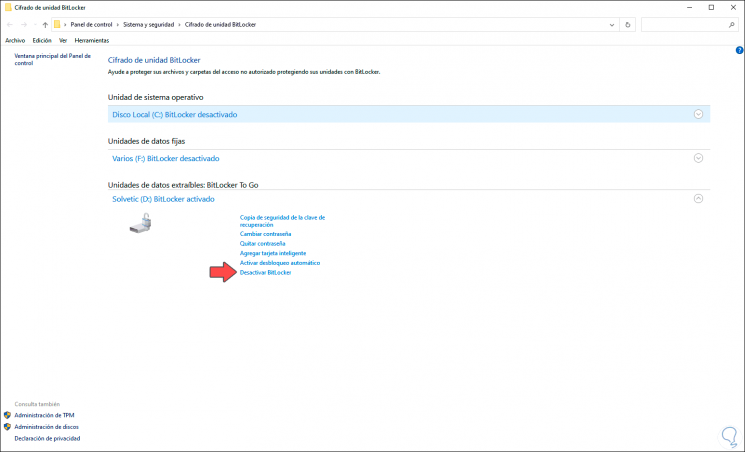
We will be redirected to the following Control Panel window where we will see our BitLocker-protected drive:
Step 4
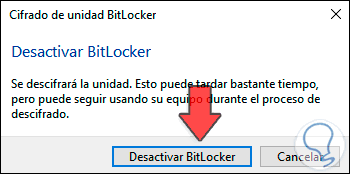
There we click on the line "Deactivate BitLocker", clicking there will display the following:
Step 5
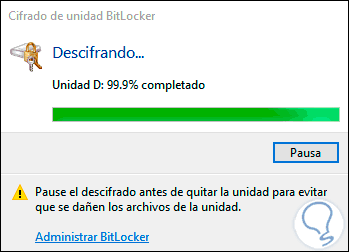
We click on "Disable BitLocker" and the process of disabling BitLocker security on the USB drive will take place:
Step 6
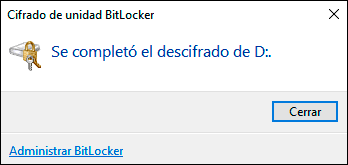
When it ends we will see the following message:
Step 7
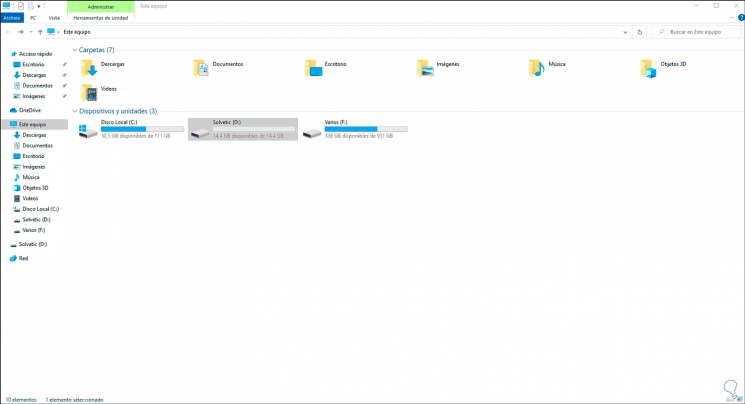
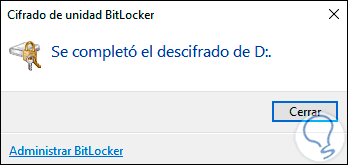
We click Close to exit the wizard and thus we have eliminated the BitLocker password on the USB in Windows 10:
2. Remove BitLocker USB password if we know the recovery key
Step 1
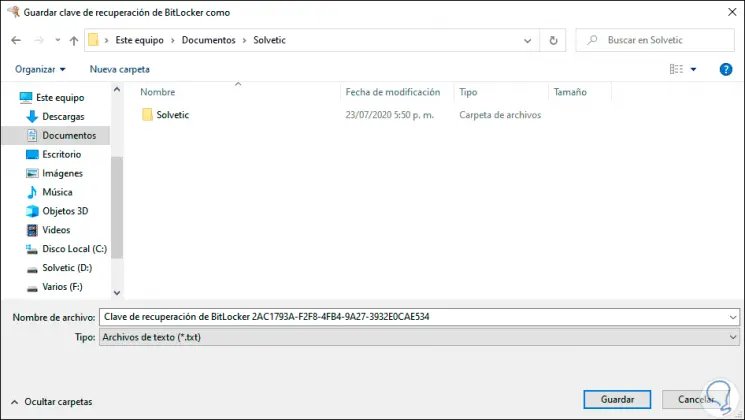
As we mentioned at the beginning, one of the options that BitLocker offers us to host the recovery key is by storing a file with it:
Step 2
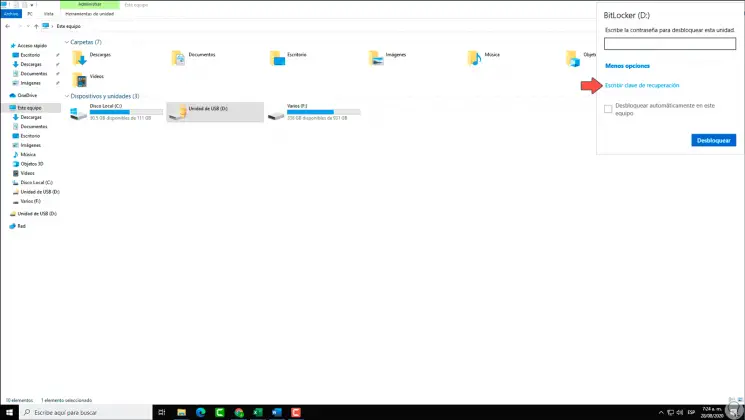
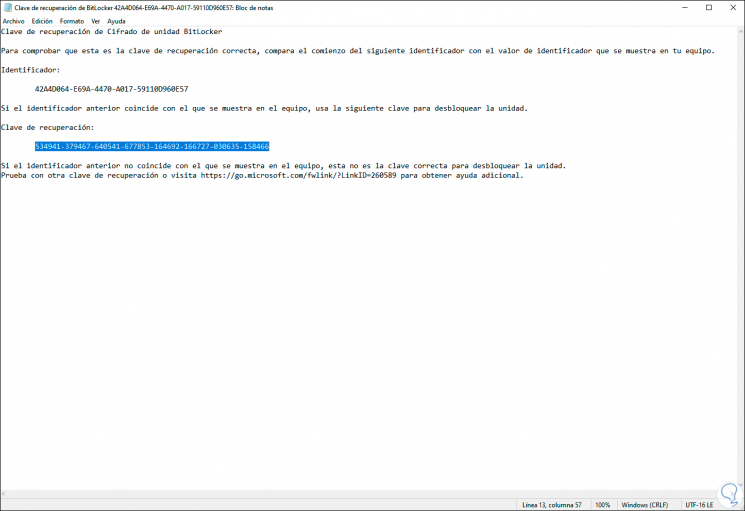
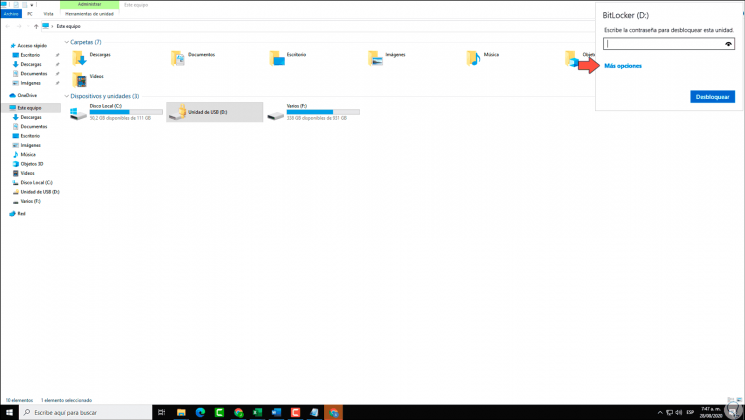
This file contains the recovery key, as well as the identifier of the USB on the computer, so that if we have forgotten the password we can resort to this file, for this when we connect the protected USB to the computer and double-click on it to access , we must click on "More options" in the pop-up window and then select the option "Write recovery key":
Step 3
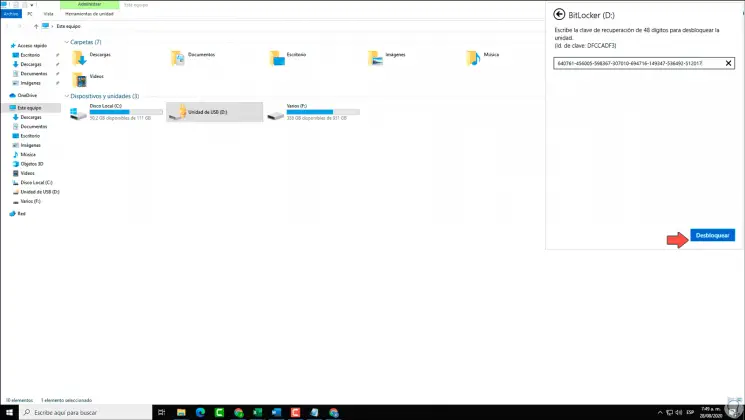
We open the file where the recovery key is and copy the 48 digits of it:
Step 4
Once we copy them, we proceed to paste them in the respective field:
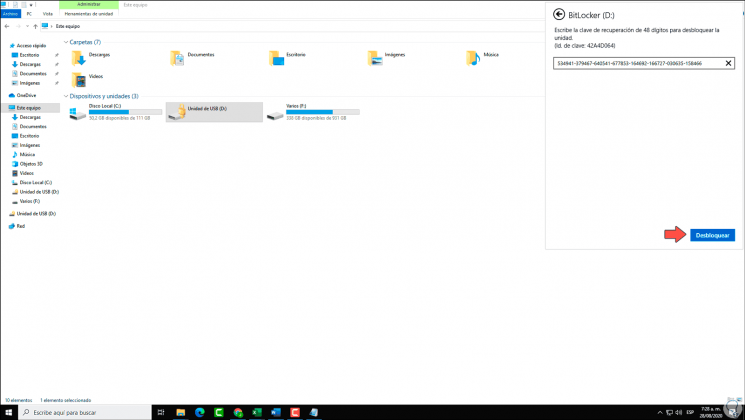
Step 5
We click on "Unlock", now we right click on the USB drive and select "Manage BitLocker":
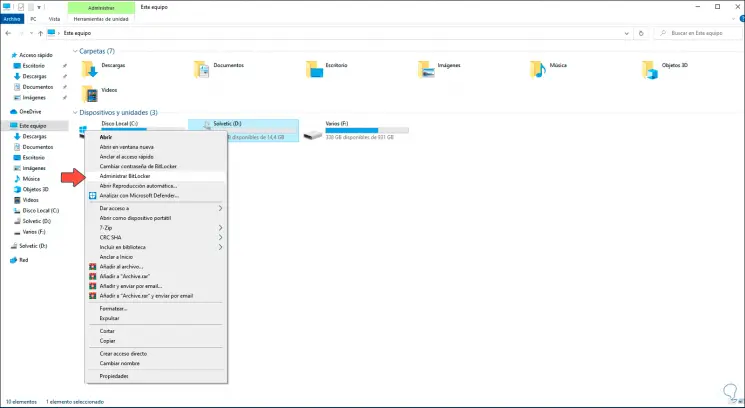
Step 6
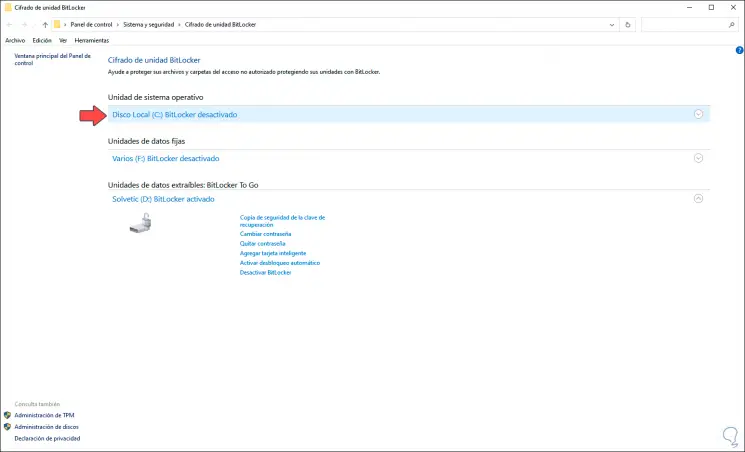
In the Control Panel we click on "Deactivate BitLocker" to complete the process:
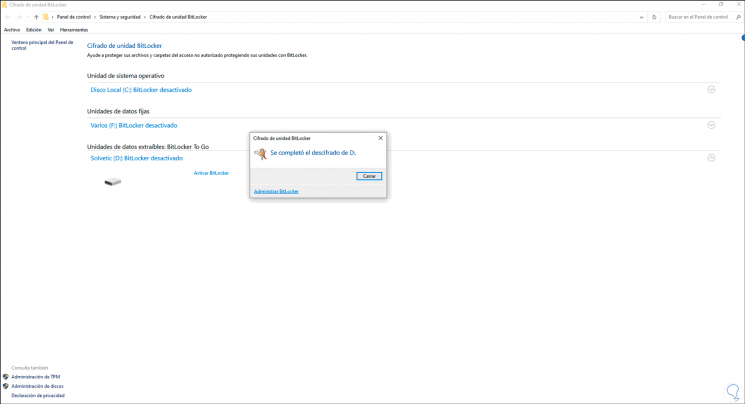
So we have removed the password using this recovery key method..
3. Remove BitLocker USB password if we don't know the key
It is normal that after a while of having the USB protected we do not even remember the password and we have deleted the file with the recovery key, in this case the process is much simpler than it seems.
Step 1
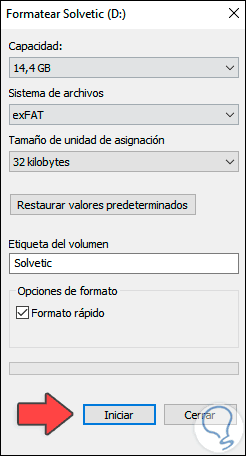
For this we access the Windows 10 File Explorer, right-click on the USB and select "Format":
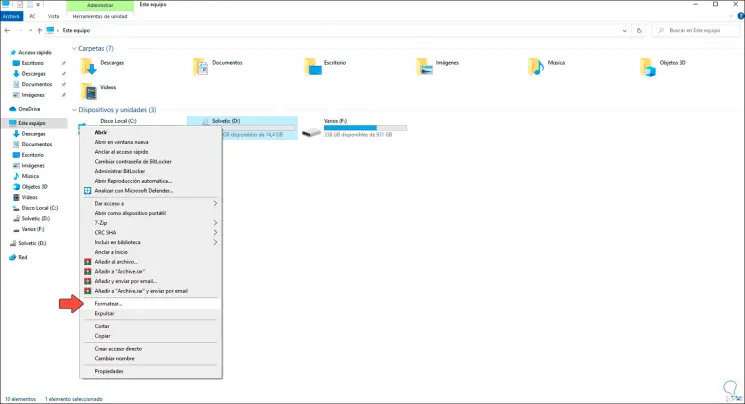
Step 2
In the pop-up window we define the file system and the name to assign:
Step 3
We click on "Start" to complete the unit format process, we will see the following message:

Step 4
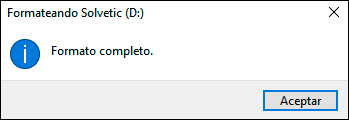
We confirm by clicking on "OK" and finally we will see that the format is completed:
Step 5
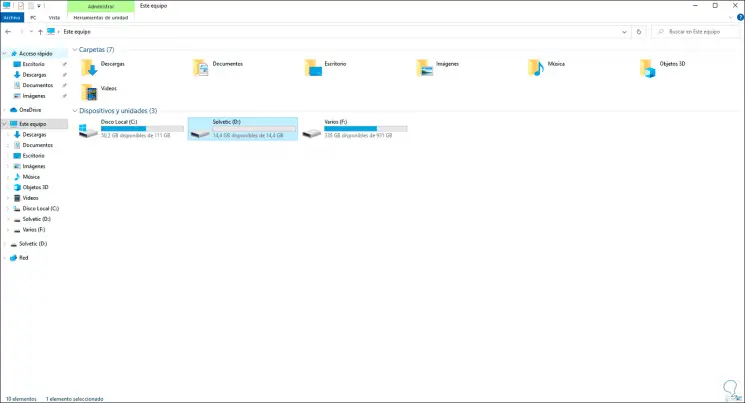
With this we will see that the BitLocker protection has been removed from the drive:
4. Remove BitLocker USB password from Microsoft account
Finally we have the option to use the Microsoft account for this purpose, when we have selected to save the password in the Microsoft account it will be hosted in the cloud.
Step 1
To use this method we will go to the following web address of our Outlook or Hotmail account:
Microsoft recovery key
Step 2
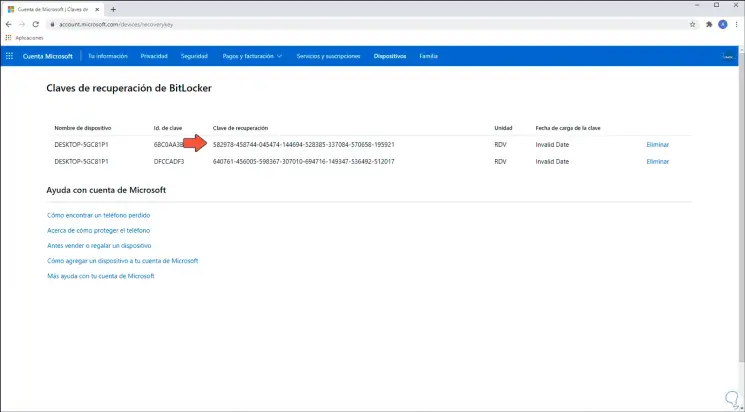
We will see the following:
Step 3
There we simply copy the recovery key, go to the File Explorer, double click on the unit and in the pop-up window we select "More options":
Step 4
We click on "Write recovery key" and after that we paste the key that we have copied previously:
Step 5
After this we click on "Unlock" and repeat the process of the initial steps, right click on the USB drive and select "Manage BitLocker", then click on "Disable BitLocker":
Step 6
We confirm the process for the password to be removed through BitLocker deactivation:
With some of the options that TechnoWikis has taught you, you will be able to remove the BitLocker password and thus be able to fully access the USB drive without restrictions of any kind.