Android is the most used mobile operating system in the world thanks to its constant updates and functionalities that make the user experience something new and practical. Thinking about the versatility of Android , Android OS (Android x86) has been developed, which is a perspective that seeks to correctly and fully migrate the open source of Android to the x86 platform, so the objective is to test Android on a PC avoiding the use of the mobile..
Teams
Android OS developers have tested on computers such as:
- Microtech e-tab Pro (2018)
- Lenovo ThinkPad x61 Tablet
Its free download is available at the following link:
Android OS
characteristics
The features offered by this version of Android OS are the following:
- Supports native netbook resolution
- Kernel 4.19, KMS enablement
- Compatible with mirror mode on external monitors
- Power Suspend / Resume (S3 Mode)
- Supports ext4, ntfs and fat32 file systems
- External storage auto mount bracket
- Debugging mode with busybox
Android 10 version with update to kernel 5.4 is currently under development.
TechnoWikis will explain how to install Android OS in VirtualBox since it is one of the best ways to know a system without affecting the real environment, VirtualBox is available to be downloaded at the following link:
VirtualBox
VirtualBox offers us multiple features to create and manage virtual environments..
1. How to create virtual machine for Android OS
Step 1
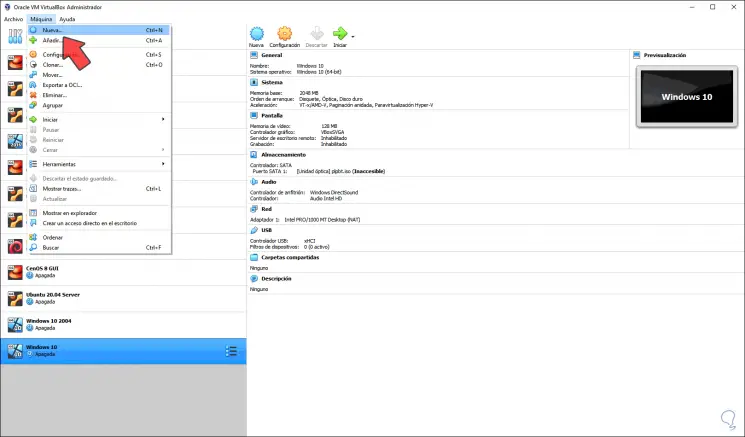
The first step will be to create the virtual machine in VirtualBox, for this we access VirtualBox and we can use any of the following options:
- Go to the menu Machine - New
- Click on the new machine icon
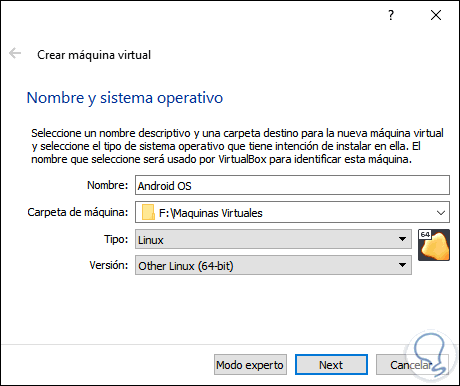
Step 2
In the displayed window we assign the following:
- Location where it will be saved
- System type (in this case Linux)
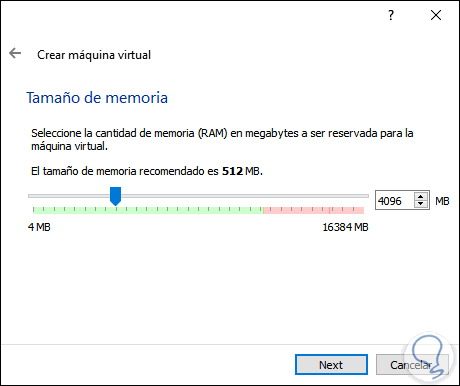
Step 3
In the next window we will assign the RAM memory to use for Android OS (minimum requires 512 MB):
Step 4
We click Next and in the next window we select the box "Create a virtual disk now":
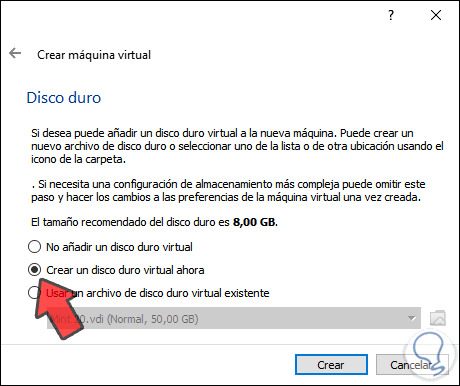
Step 5
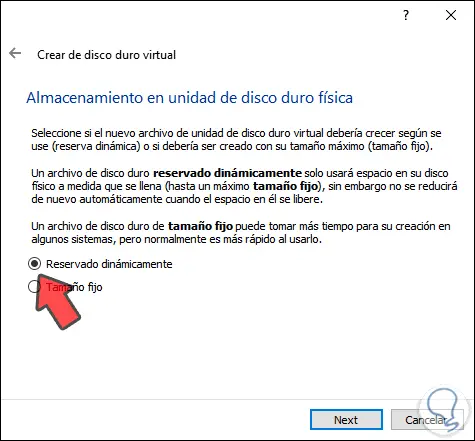
Click on Create and define the type of disk that will be created for Android OS:

Step 6
Next, we select the type of storage that will be configured in this virtual disk:
Step 7
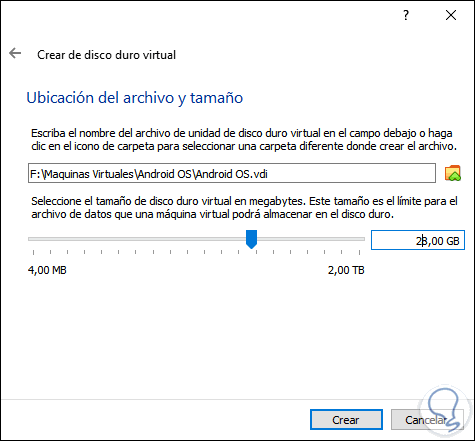
Then we define the following:
- Virtual hard drive location
Step 8
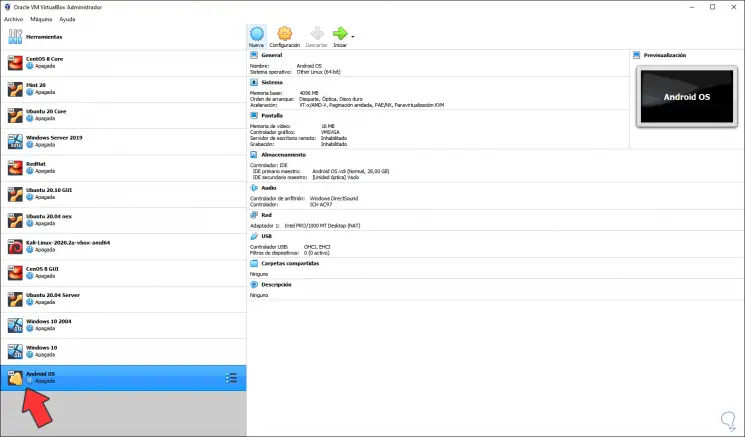
We click on Create and it will have been to create the virtual machine configuration:
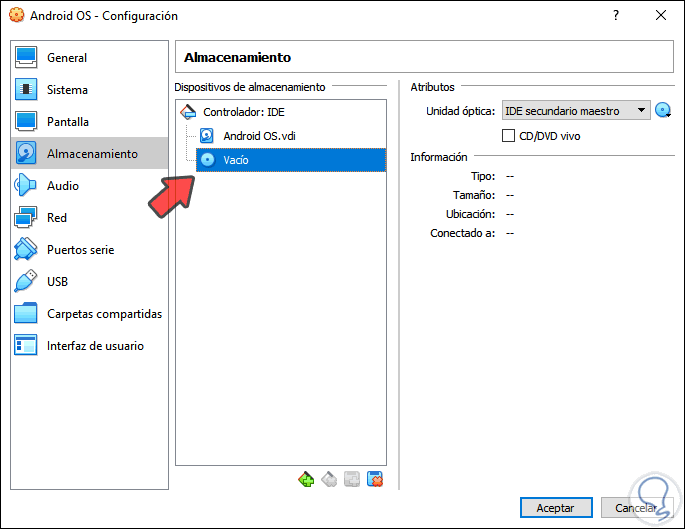
Step 9
We click on the "Configuration" button and we will go to the "Storage" section and there we select the CD / DVD drive which by default is empty:
Step 10
We click on the CD icon on the right side and click on "Select a disk file", we proceed to select the ISO image of Android OS that we have downloaded:
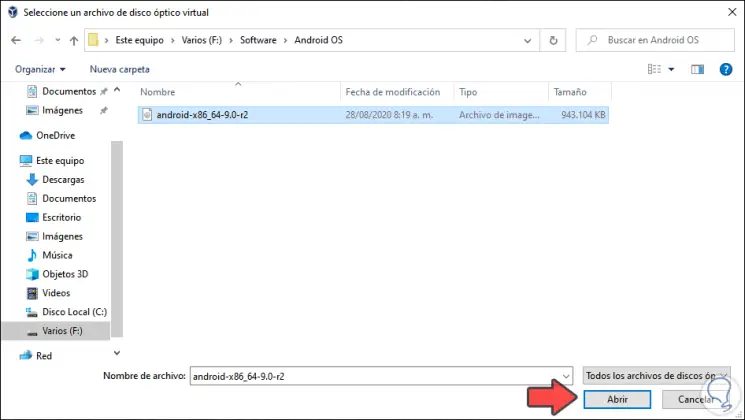
Step 11
We click on "Open" and we will see it integrated into the DVD drive:
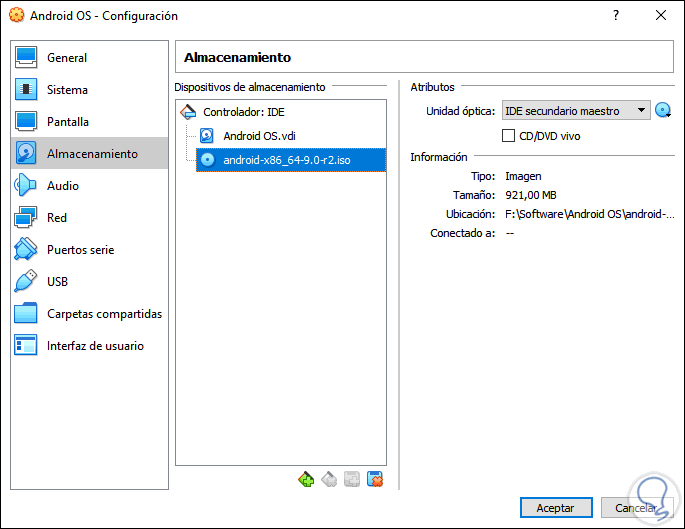
We click OK to complete the process.
Virtual machine management
Step 1
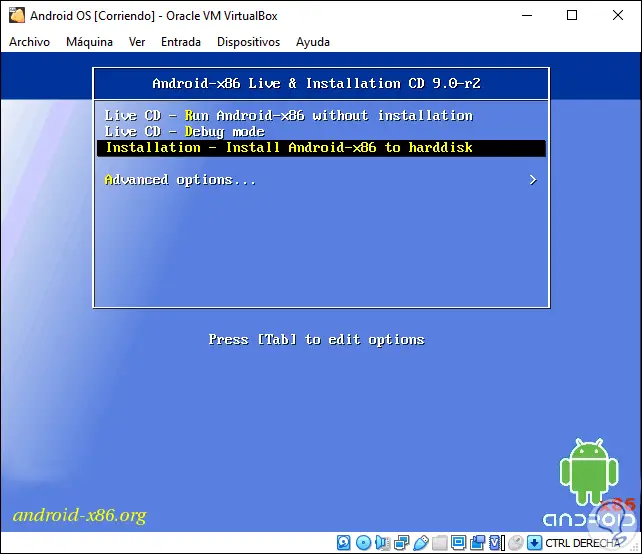
With this process completed, it will be possible to start the virtual machine configuration, for this we click on "Start" and we will see the following:
Step 2
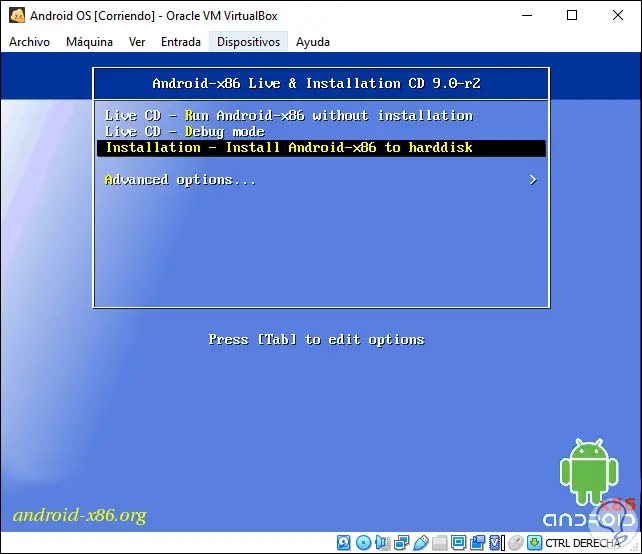
There we have the following options:
- Live CD without installation: this option allows you to know the operating system and its operation without installing it locally
- Live CD Debug mode: same as above only running error analysis
- Installation: allow to install Android OS locally on the virtual hard disk
- Advanced options - Access options to check hardware requirements or validate disk or memory status.
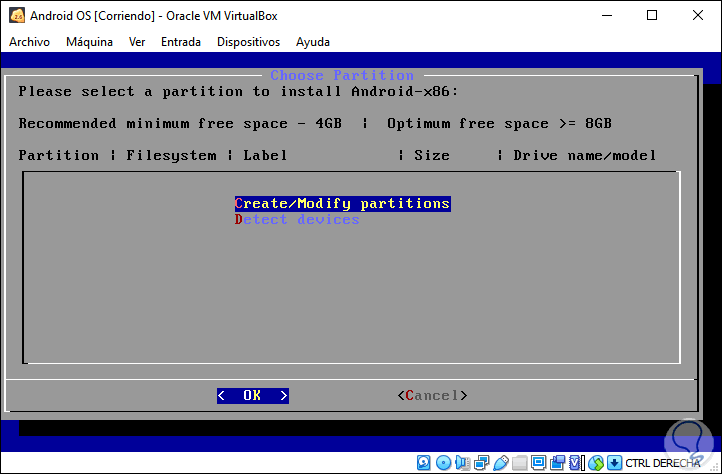
We select "Installation" and press Enter and the following will be displayed:
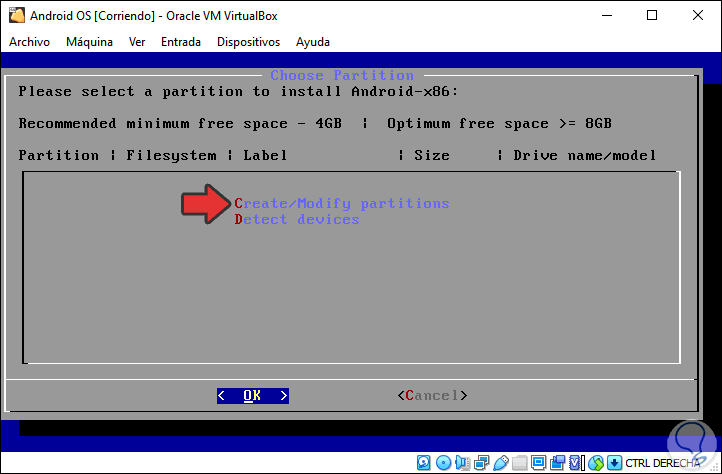
Step 3
Press the "C" key to select the option "Create / Modify partitions":
Step 4
We will see the following message:
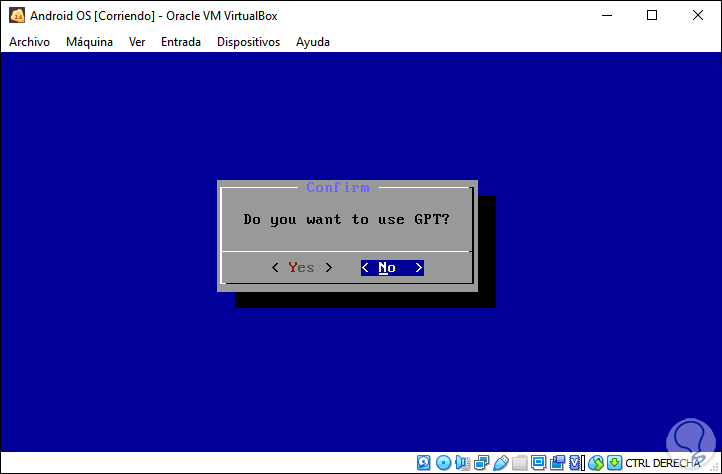
Step 5
We select "No" so that the scheme is bootable but not with the GPT system, we press Enter and we will see the following:
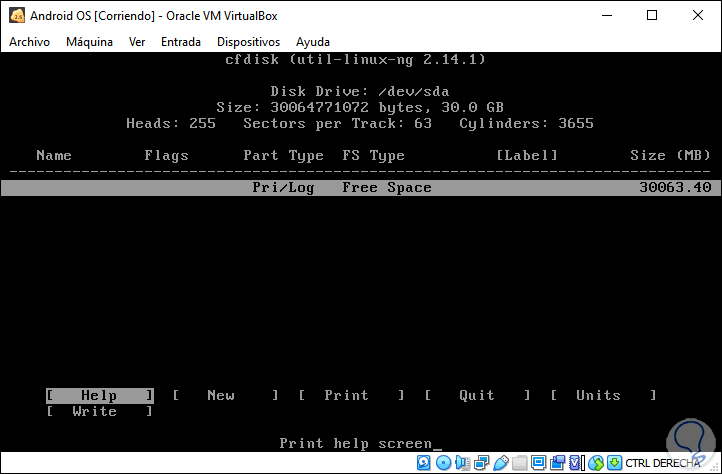
Step 6
There we find the hard disk that we have created, with the direction arrow we select "New":
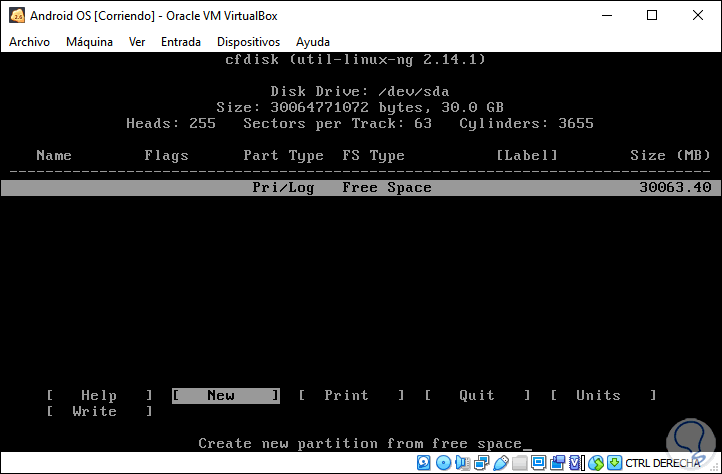
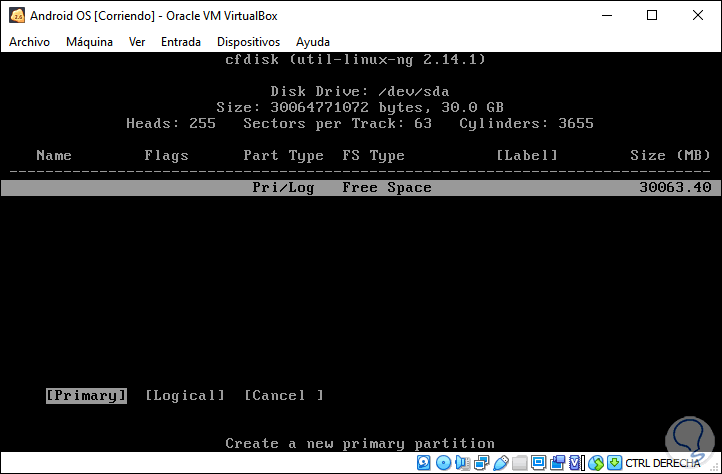
Step 7
Press Enter and then select "Primary":
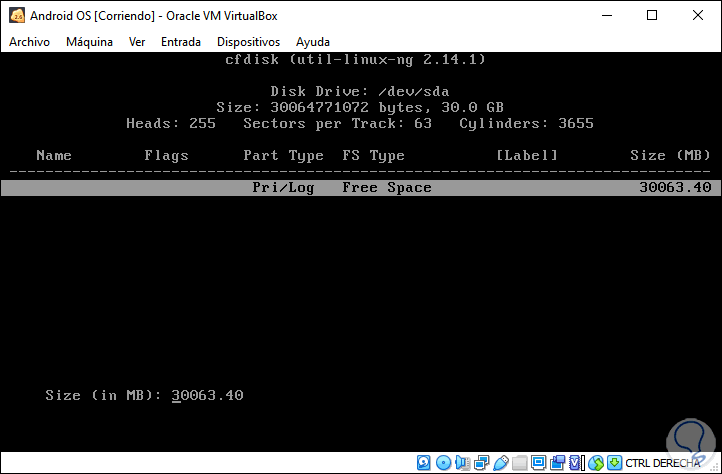
Step 8
Press Enter and assign the size of the partition, we will leave the default value:
Step 9
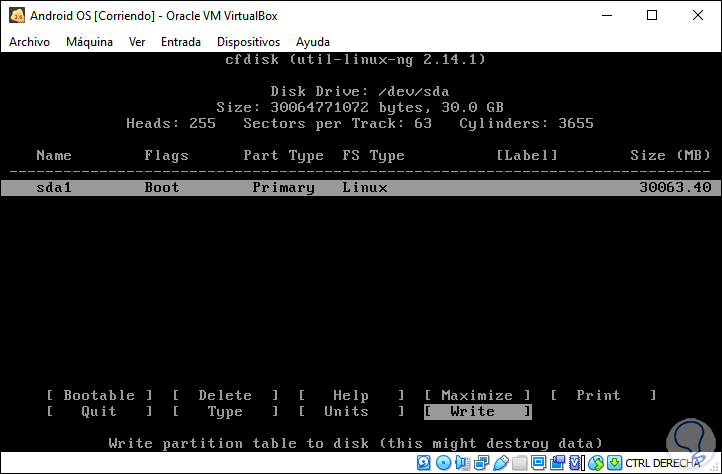
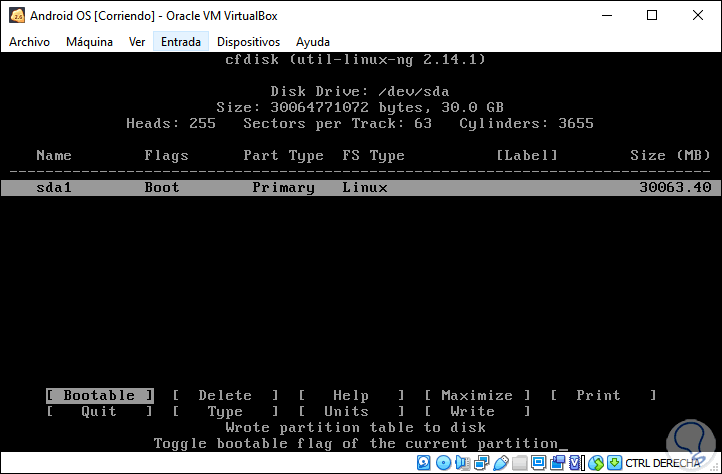
Next, we must allow the hard disk to be bootable in order to write changes to it, for this we select "Bootable":

Step 10
We press Enter and now we select "Write":
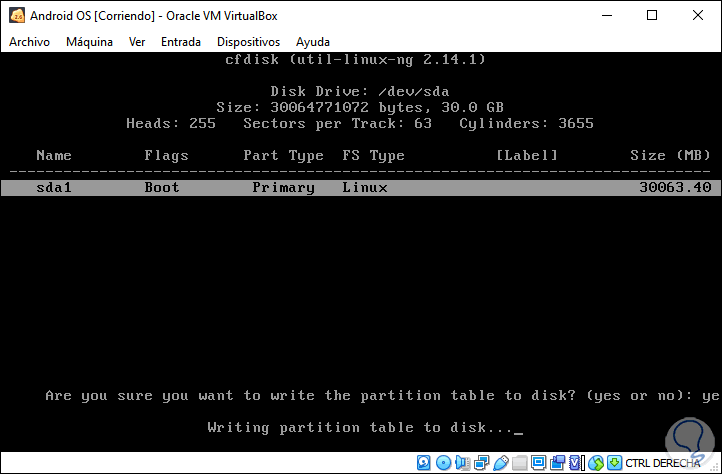
Step 11
This allows to apply the changes to the disk, we enter "yes" to validate it:

Step 12
We press Enter and the changes are applied:
Step 13
At the end we will see the following:
Step 14
We select "Quit" to exit the partition wizard and we will see the following:
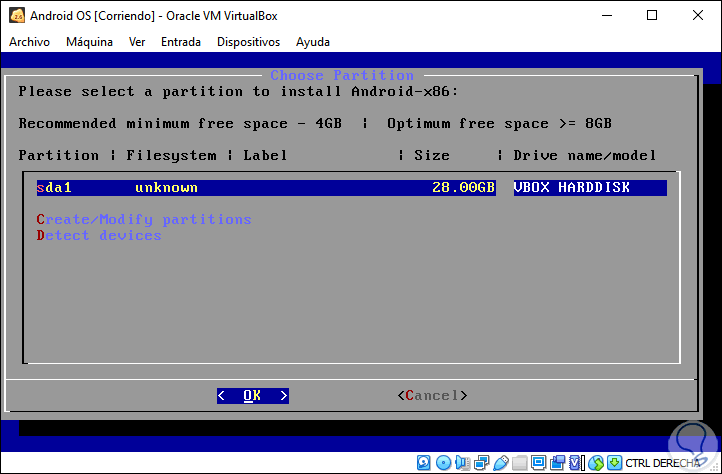
Step 15
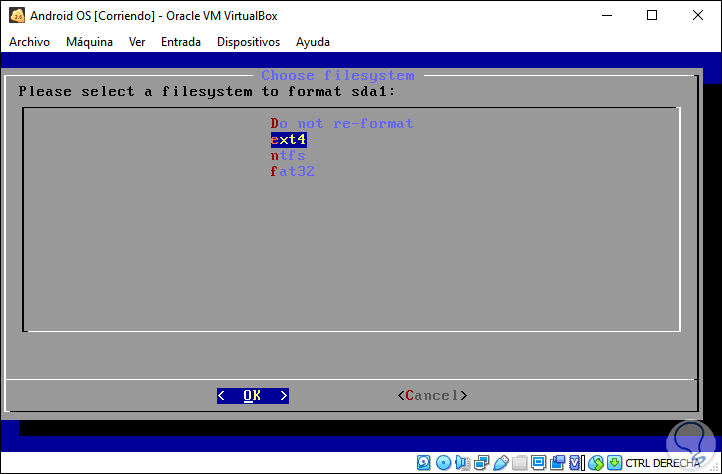
We select the partition since Android OS will be installed there and click Ok to continue the process, in the next window we select the ext4 file system as the default system:
Step 16
We click OK and we will see the following warning:
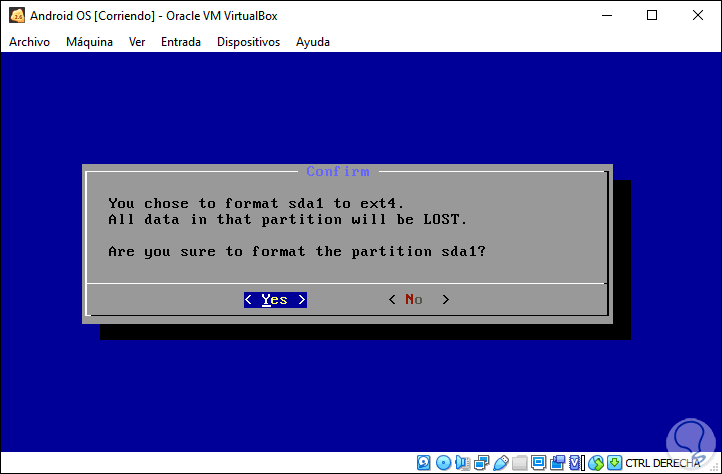
Step 17
We confirm the change by selecting “Yes” and pressing Enter, the partition process will start:
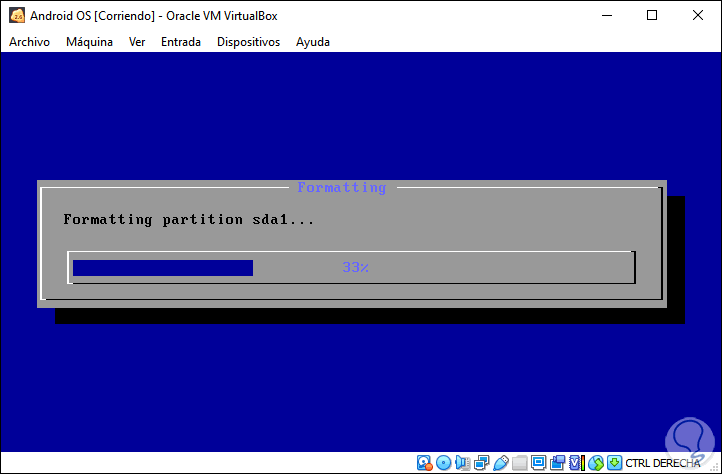
Step 18
It will ask if we want to install the GRUB boot loader:
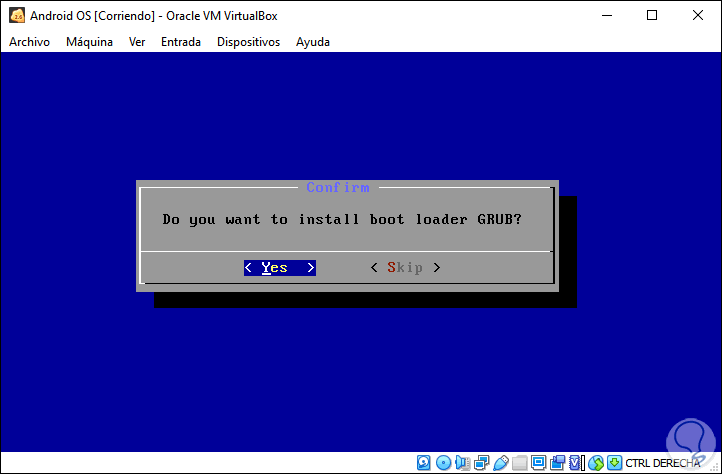
Step 19
We select Yes and press Enter, after this it will ask if the / system partition is allowed to write:
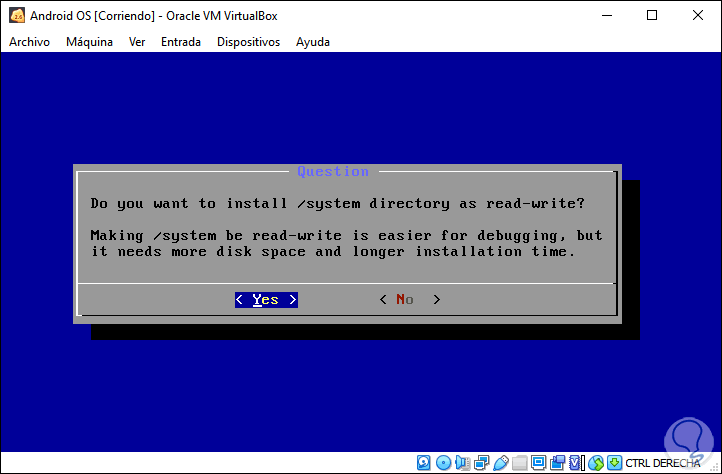
Step 20
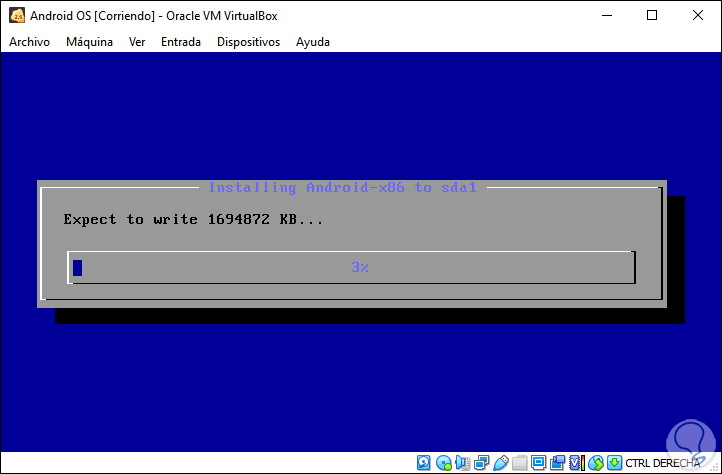
We select "Yes" and press Enter, the process of installing Android OS in VirtualBox will continue:
Step 21
When this ends we will see the following:
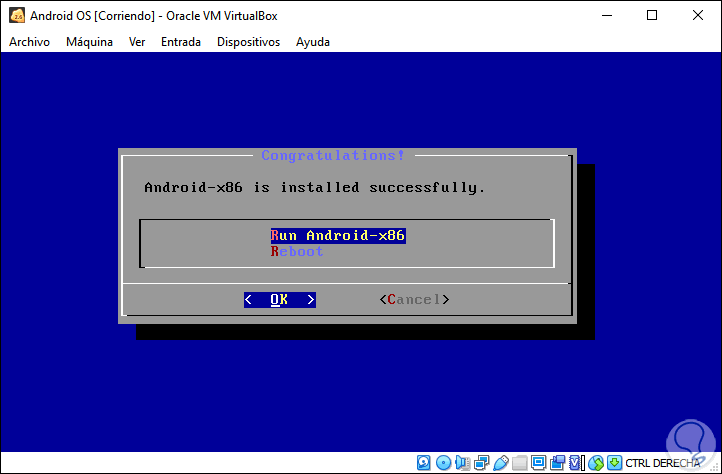
Step 22
There we can directly run Android or restart the system, select Reboot and press Enter.
When we restart we will see the Android OS installation manager again:
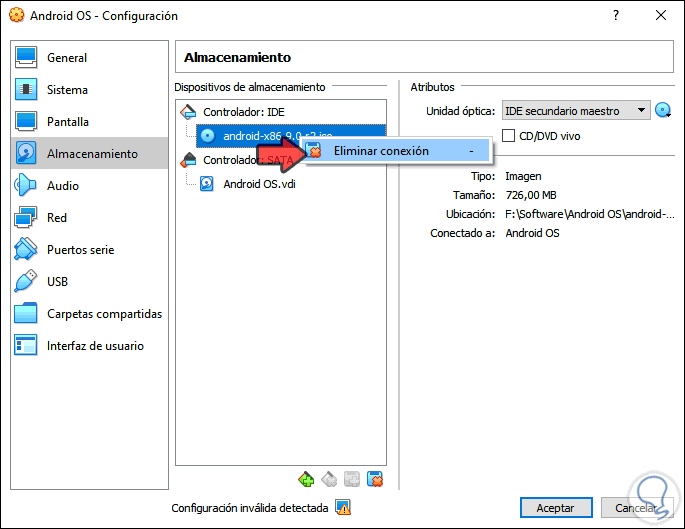
Step 23
To avoid this (it has already been installed locally ”, we must turn off the virtual machine, go to Configuration - storage and right-click on the DVD drive and there select“ Delete connection ”:
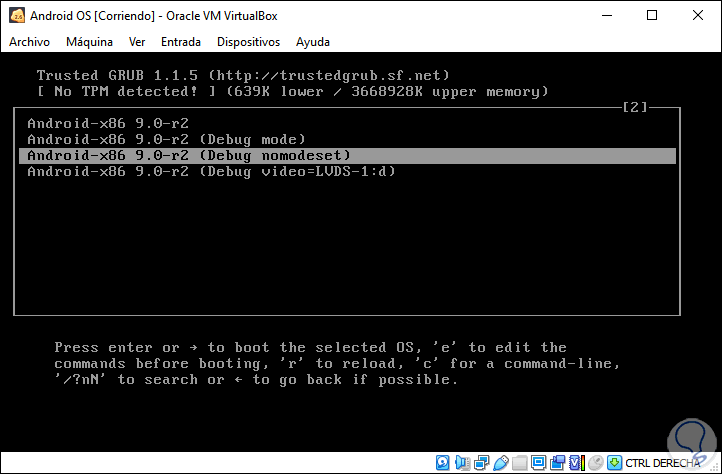
Step 24
We accept the changes and then we can select which version to start with:
Step 25
We press Enter on the selected option and a brief analysis will be made:
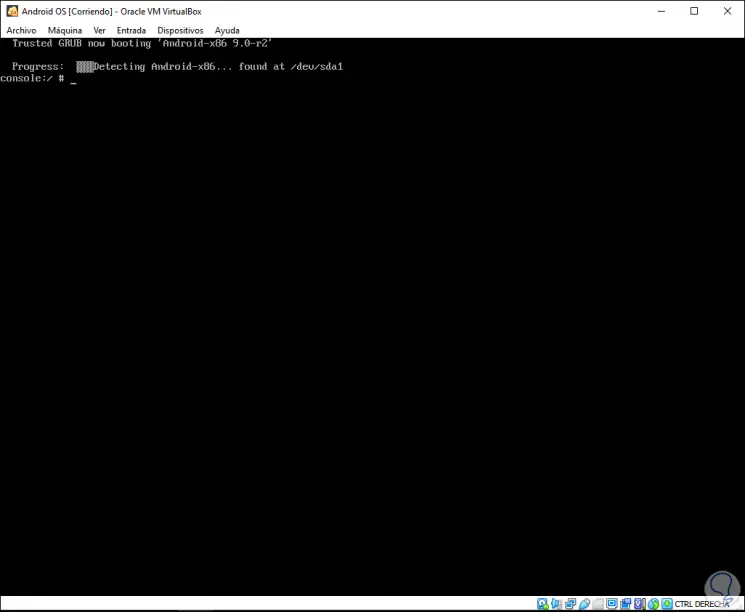
Step 26
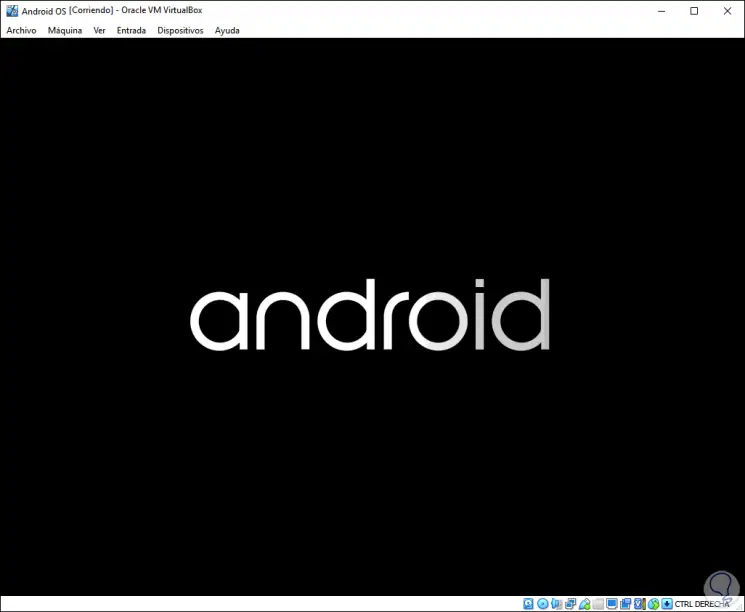
The Android system will load:
Step 27
Now we can define after this the language of use of Android:
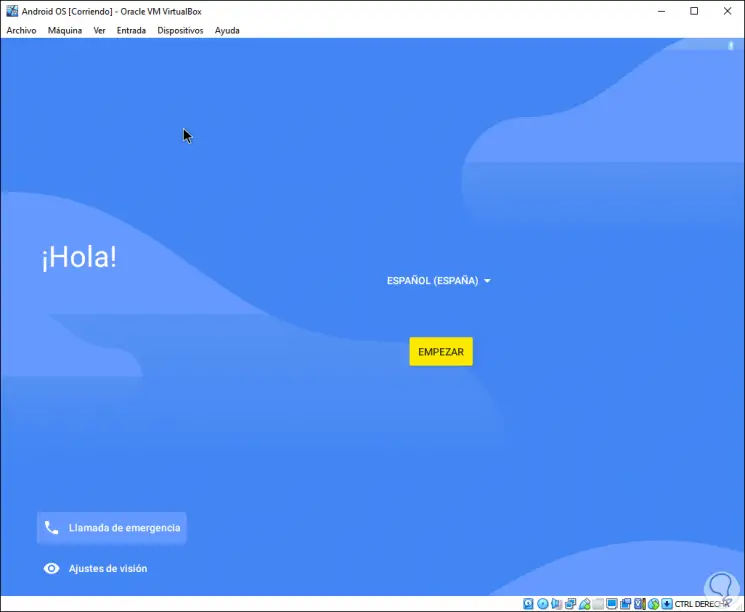
Step 28
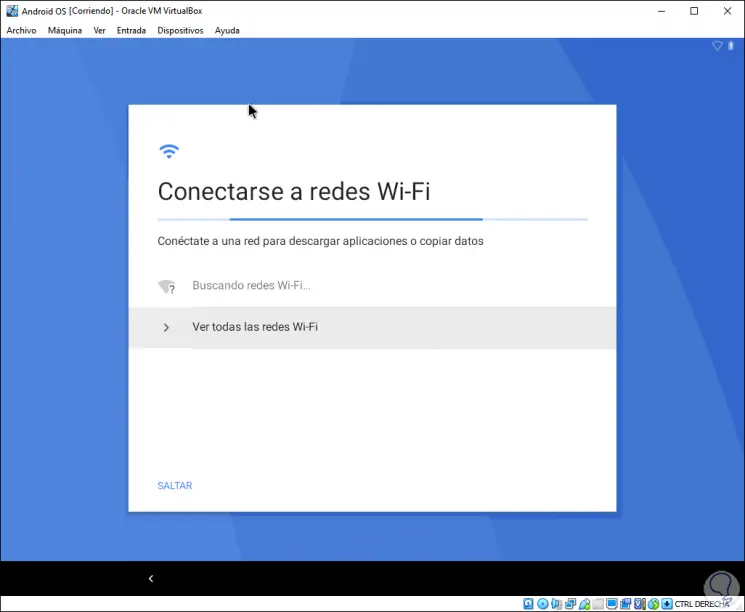
We click on Start and the system will first search for nearby networks automatically:
Step 29
After this we set the date and time:

Step 30
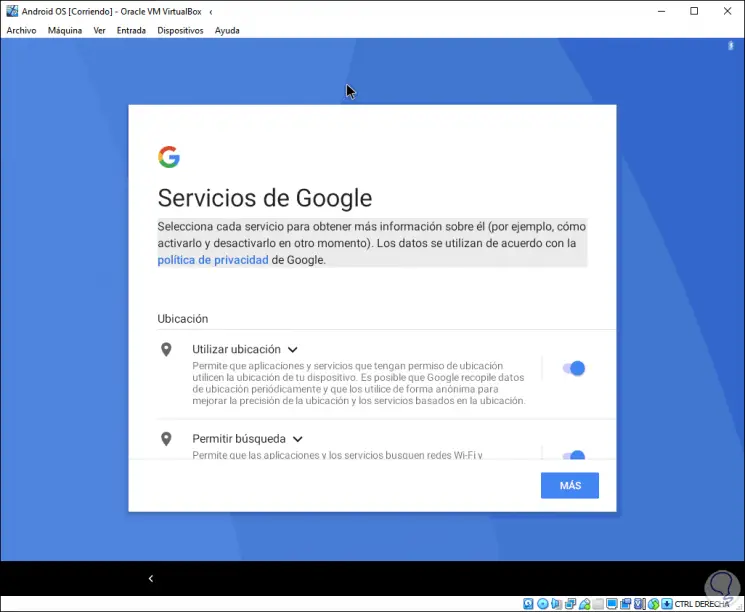
Now we will see the section of Google services:
Step 31
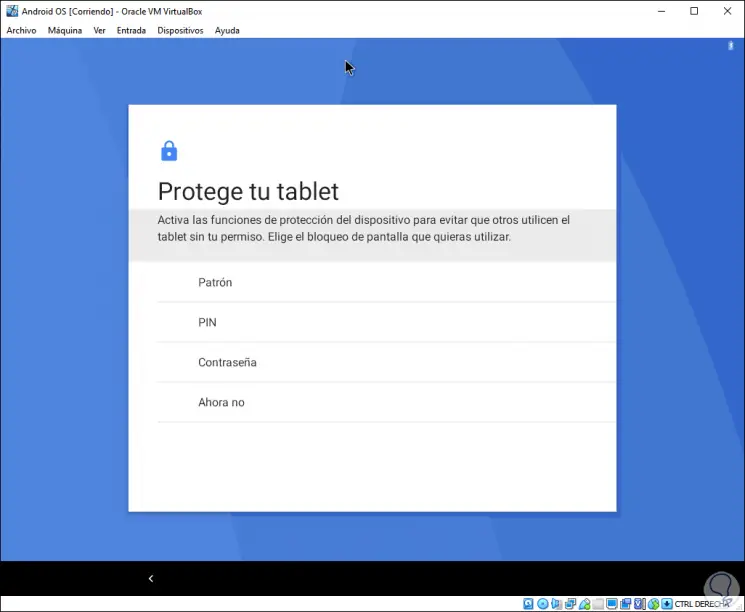
After this it is possible to assign the security method for the system:
Step 32
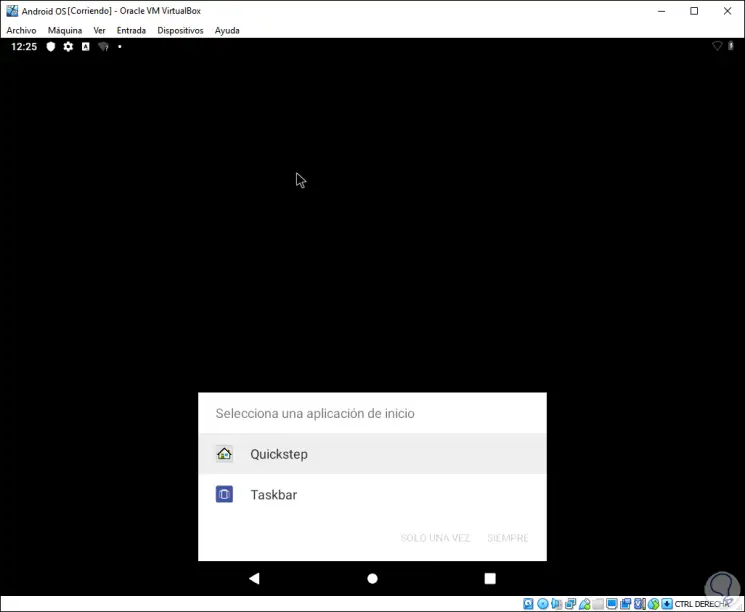
After this configuration we will see the following:
Step 33
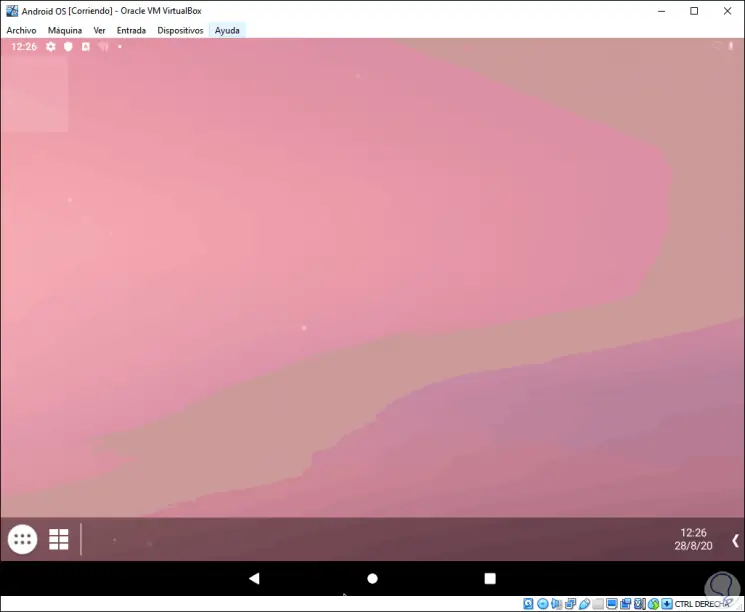
With this we will access the Android OS environment in VirtualBox:
Step 34
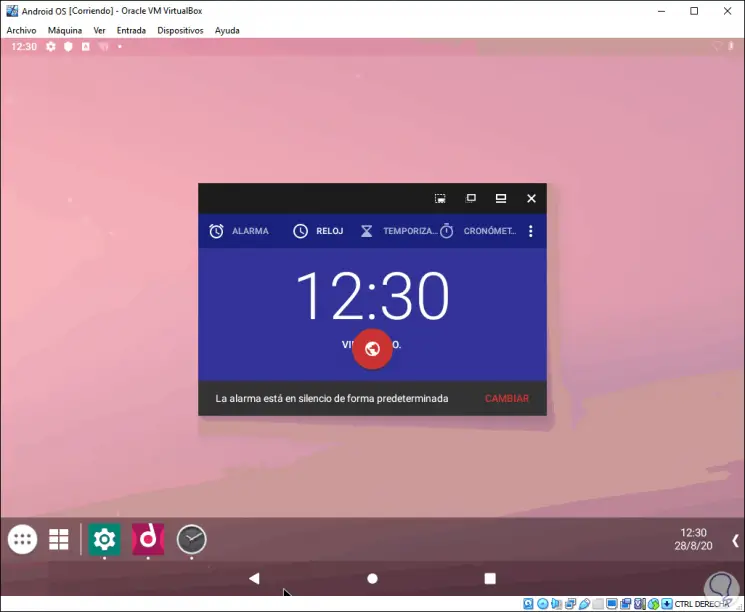
There it will be possible to access the different Android functions already known:
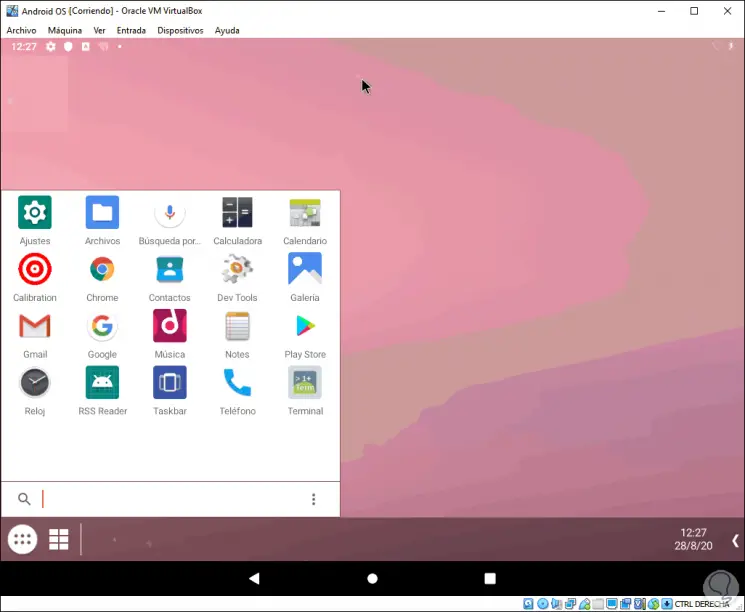
Step 35
So it will be possible to experience all the advantages of Android in Windows 10 thanks to VirtualBox and Android OS:
In this way you can use Android in Windows 10 in a simple way..