The current trend of operating systems, and all compatible applications, drives us to look for ways to work simultaneously with different systems that are not compatible with each other , that is, many tasks require the exclusive use of a file system. which we can not handle or do not have at the moment and there can be a question and is how to execute or perform actions of a special system in another?
For example, Android has become one of the fastest growing mobile operating systems for all its scalability and dynamism options, but you know that Android-only applications cannot be run on Windows or Linux natively but today this can come to an end since in TechnoWikis since today it will tell you about an operating system designed exclusively to run Android such as Phoenix OS..
What is Phoenix OS
Phoenix OS has been developed with the aim of having the option to run Windows applications, macOS or Linux applications of Android without losing their speed, performance and compatibility settings at any time.
Phoenix OS can be installed in 32 or 64 bit architectures and best of all, we have the following options for installation:
- Install it directly on the hard drive or any of its partitions.
- Install it on a USB medium to start it from there.
- Download the ISO image to mount it as an alternate operating system.
The best part of all this is that Phoenix OS will never affect the files on the hard disk or the USB media as it is installed and run independently.
Phoenix OS features
Phoenix OS includes improvements in Android that will make the user experience something much more dynamic, these improvements integrate the option to prevent applications from running in the background which can affect the performance of the equipment, improvements in response speed and possibility of receiving periodic updates.
Some of the most outstanding features of Phoenix OS are:
- Simple file manager with functions such as LAN access, global search, mouse tasks and some more.
- Start menu in full screen and not full screen.
- Intuitive keyboard with support for keyboard shortcuts such as Ctrl + V, Ctrl + A, Ctrl + C.
- Prevents the automatic start of integrated applications, has intelligent memory recovery, etc.
- It has free software tools for Word, Excel and PowerPoint.
- Support for multiple windows.
- Integrates a notification area similar to the Windows 10 and Remix operating system.
- It runs in its own browser (Stardust).
Hardware requirements for Phoenix OS
Although Phoenix OS is available for operating systems such as Windows, Linux and macOS, if we do not have the required hardware, we may not take full advantage of it, so the requirements to run Phoenix OS as expected are:
- Hard disk space of at least 2 GB.
- Intel or AMD processor from 2012 onwards.
- If we use the USB method have space of at least 8 GB free.
TechnoWikis will explain the various methods to install Phoenix OS and thus run Android applications as if you were on your mobile.
1. Download Phoenix OS in Windows 10
Step 1
Phoenix OS can be downloaded at the following link:
Phoenix OS
Step 2
There we will see the following:
Step 3
As you can see we have the following options:
- Download the installer using the executable.
- Download the ISO image and then install it on a new partition or use a platform such as VMware, VirtualBox or Hyper-V.
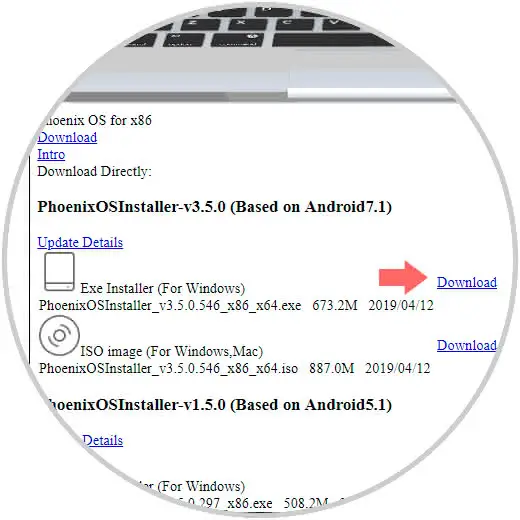
Step 4
First, we will see the method through the executable, click on it and we will be redirected to the following window:
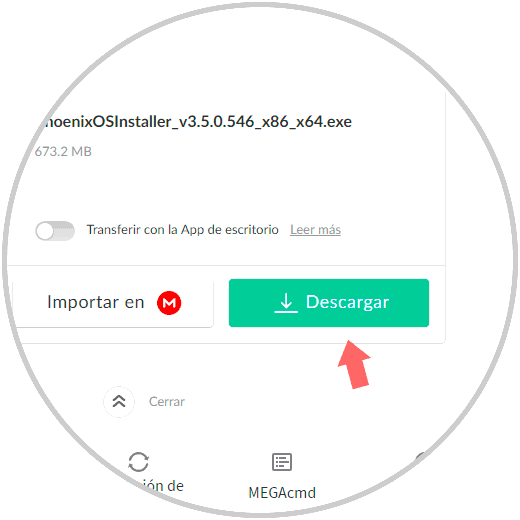
Step 5
There we click on the "Download" button to start the process:
2. Install Android with Phoenix OS using a USB media in Windows 10
Step 1
The first method to analyze will be using a USB device, for this we click on the downloaded executable and we will see the following window:
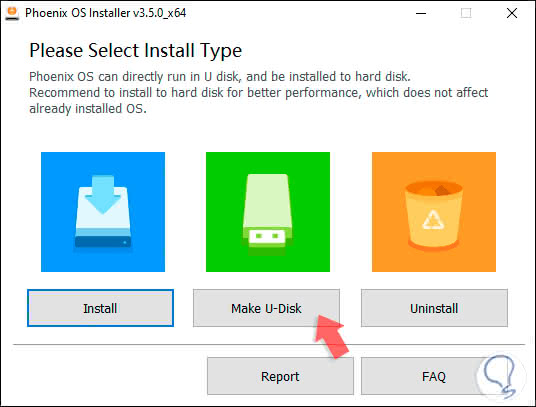
Step 2
For this purpose we click on the “Make U-Disk†button and the following window will be displayed where we will select the drive associated with the USB media:
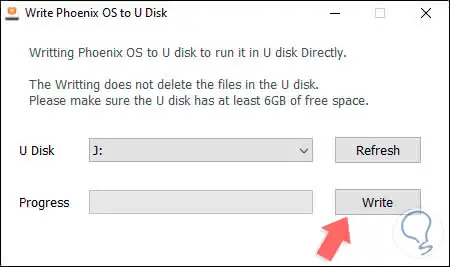
Step 3
We click on Write to start the process of creating the boot device for Phoenix OS:
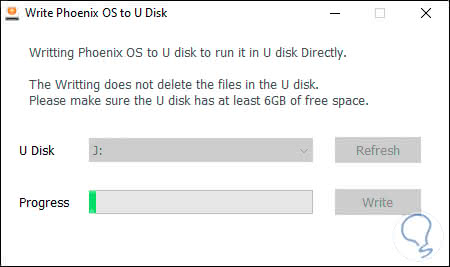
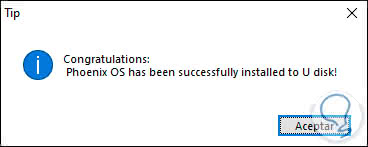
Step 4
When this process is finished we will see the following message. Click on the OK button to close the window and we are ready to run the boot and installation of Phoenix OS from there.
3 Install Android with Phoenix OS locally on Windows 10
Step 1
For this case we will use Windows 10 and if we want Phoenix OS to run locally as an alternate operating system, we click on the “Install†button and in the next window we define the partition on which Phoenix OS is to be installed:
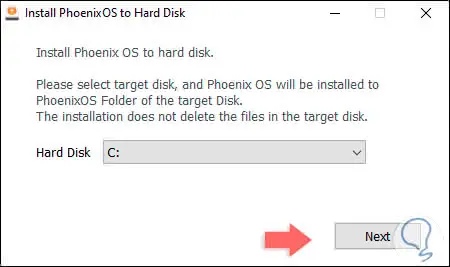
Step 2
Click on Next and now we will select the size of the data to use for the system
:
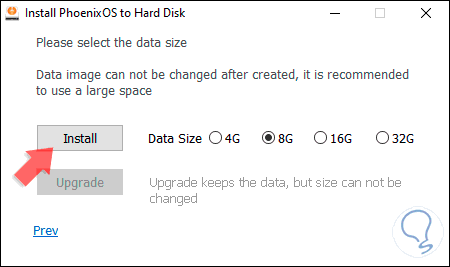
Step 3
Once the size is selected, the installation process will automatically begin:

Step 4
When this is completed, the following message will be displayed:
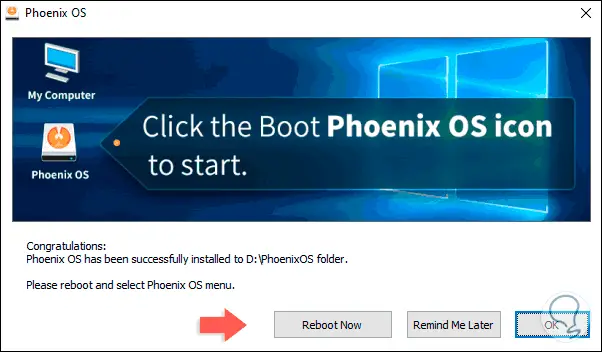
Step 5
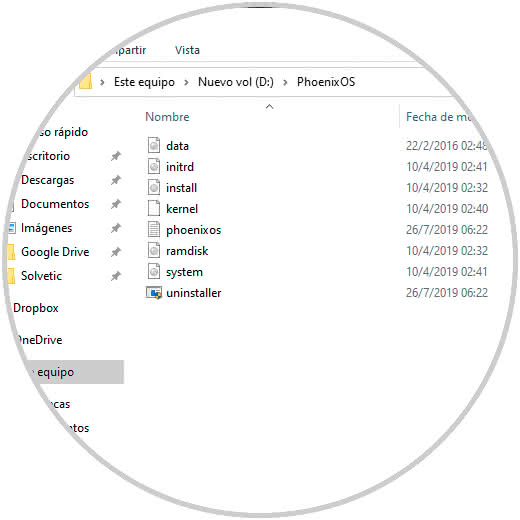
In this case we have selected drive D and it will be necessary to restart the operating system to complete the installation process of Phoenix OS. If we access this directory we will see the system components:
4. Install Android with Phoenix OS using the ISO image in Windows 10
Step 1
As we mentioned, there is the option to download the Phoenix OS ISO image and mount it on a virtual platform for your knowledge, if we use this method, this will be the first window we will see:
Step 2
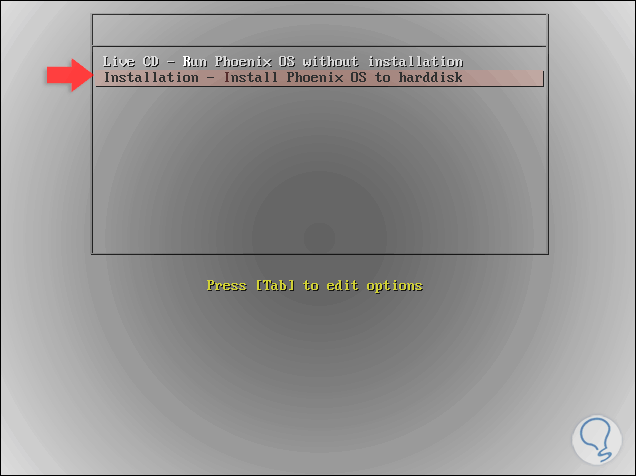
There we can try Phoenix OS live (no installation required) or install it on the hard drive, select the “Installation†line and then we will see the following:
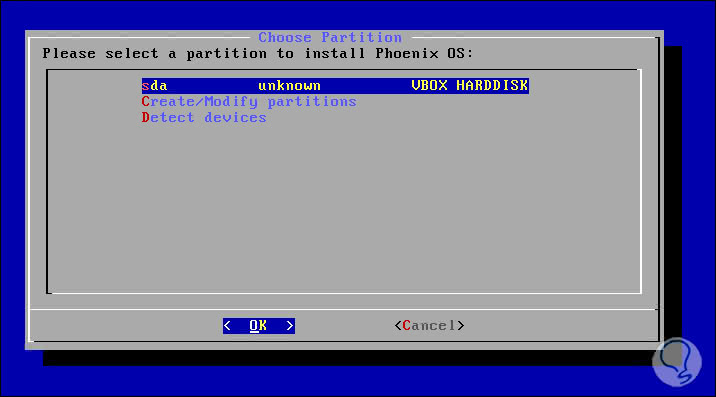
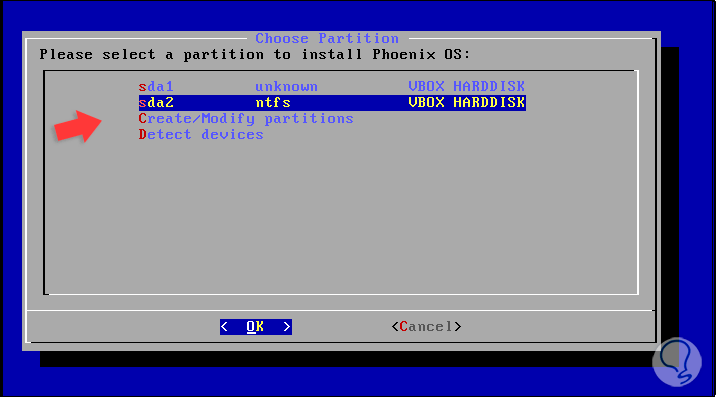
Step 3
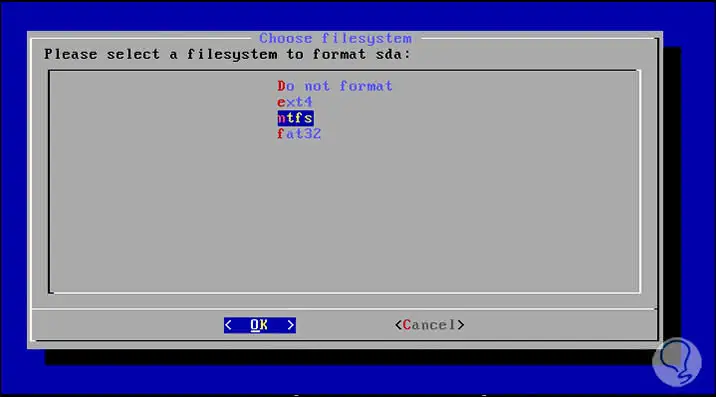
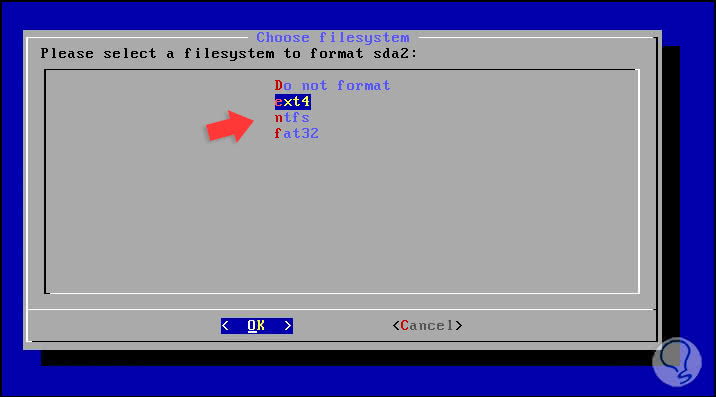
Here it is possible to select the partition on which Phoenix OS will be installed, we can select the default partition or create new partitions, defined this is time to select the type of file system to use:
Step 4
We confirm the operation:
Step 5
Now, we can create a new partition by selecting the “Create / Modify partitions†line to see the following:
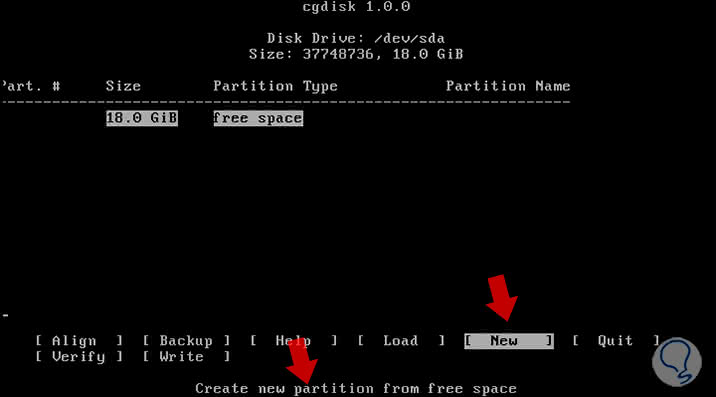
Step 6
There, with the Tab key, select New at the bottom and assign the name sda1 and define the size of the sector:
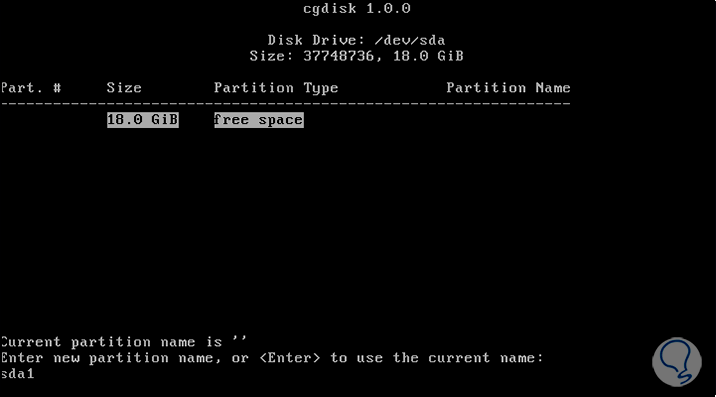
Step 7
Press Enter and we will see that this partition has been created:
Note
We can create the desired partitions according to the available space.
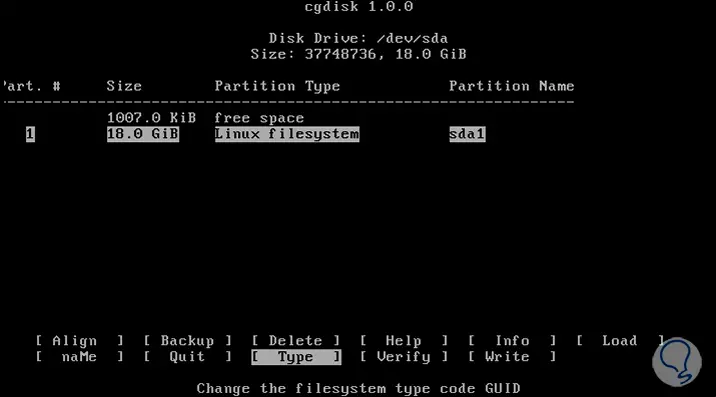
Step 8
After this we select Load and in the next window we select the unit where Phoenix OS is to be installed:
Step 9
Press Enter and now select the type of file system to set:
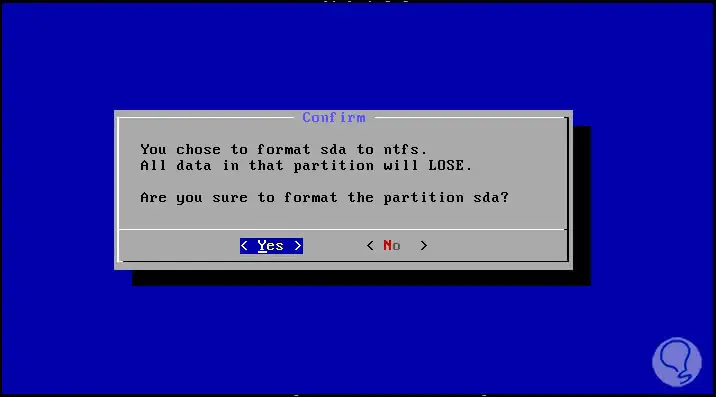
Step 10
Press Enter again and now confirm the partition format:
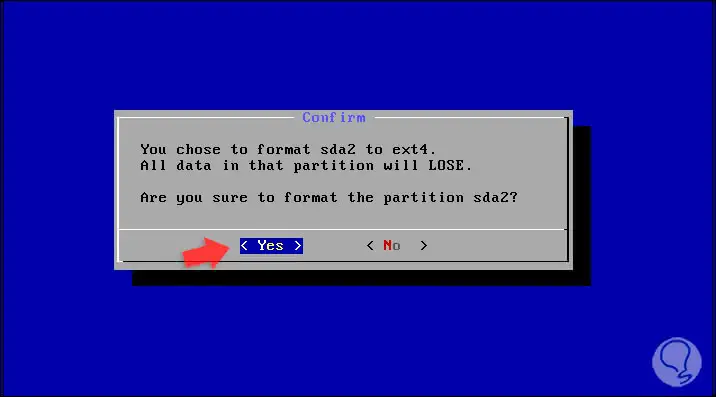
Step 11
By clicking we will see that the format starts:
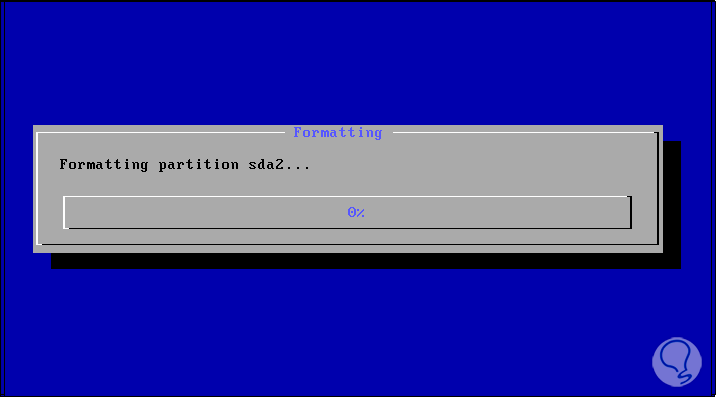
Step 12
Then we will see the following message:
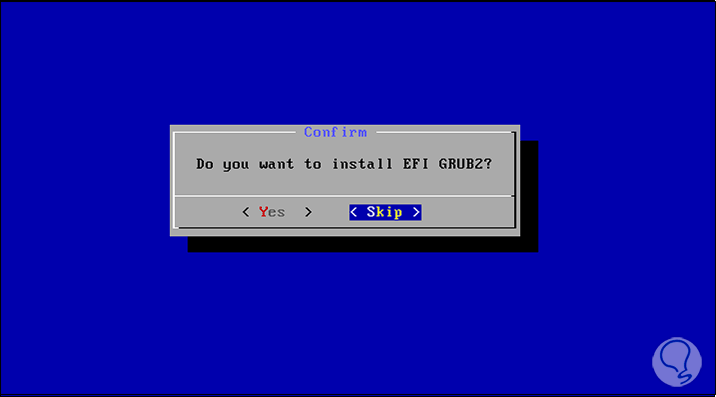
Step 13
There we select Skip and then we will see the new message:
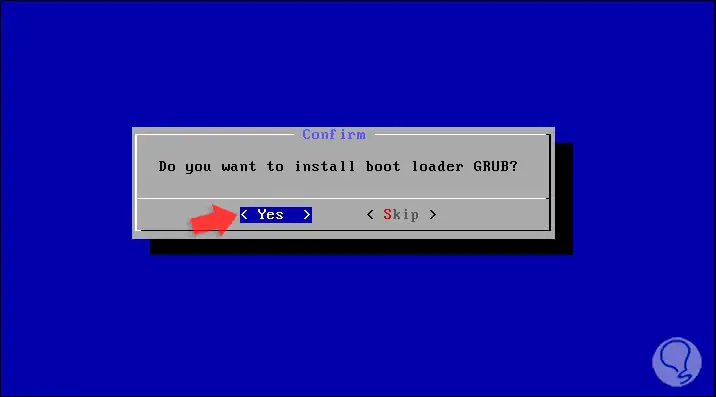
Step 14
There we select Yes and press Enter and the Phoenix OS installation process will begin:
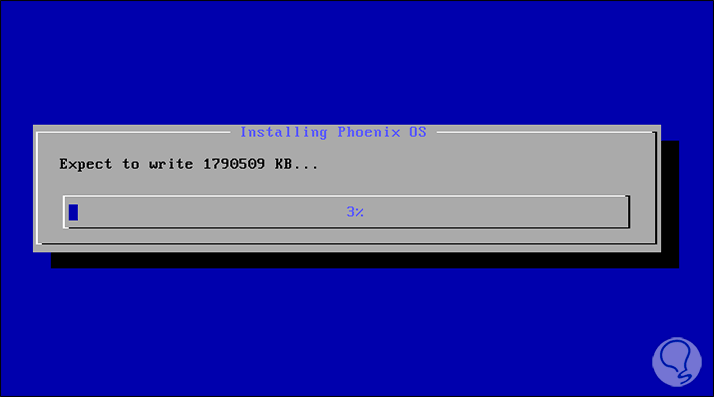
Step 15
When it finishes we will observe the following:
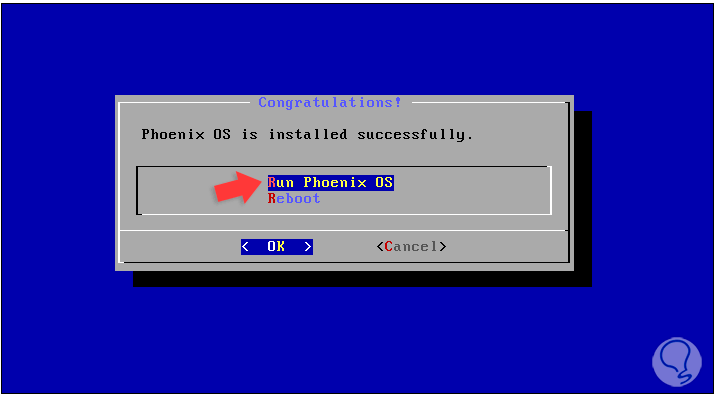
Step 16
There we select “Run Phoenix OS†to access the final environment of the operating system but before some parameters are met (same steps for the USB method, local disk):
Note
If when you restart or run “Run Phoenix OS†you are redirected to the terminal, simply start start to access the environment.
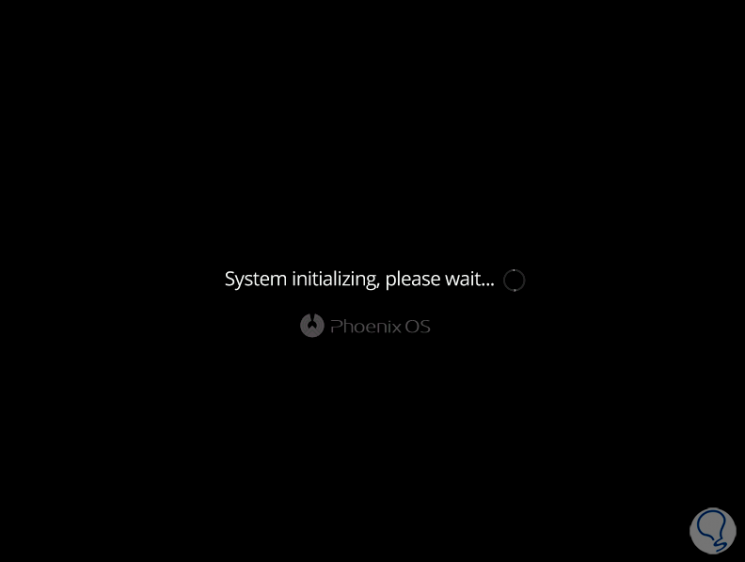
Step 17
Once this process is finished, it lasts a bit since all the parameters of Phoenix OS are configured, we will see this:
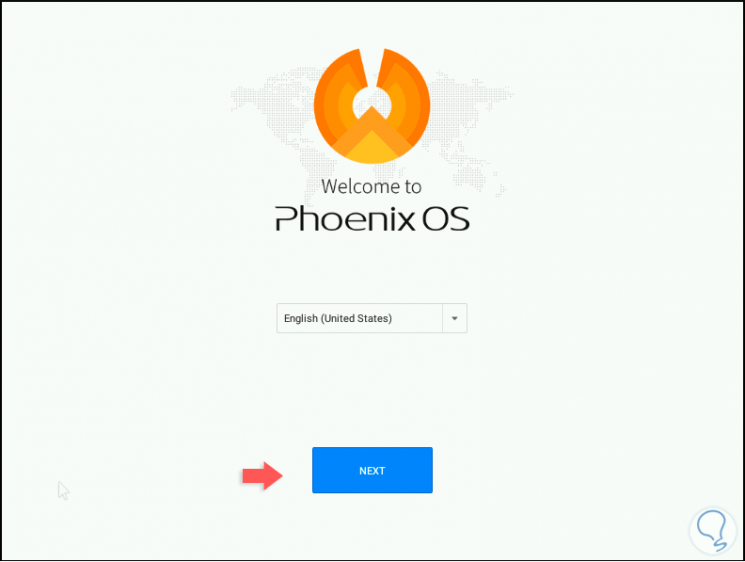
Step 18
There we define the language (we only have Chinese and English), click Next to accept the license terms:
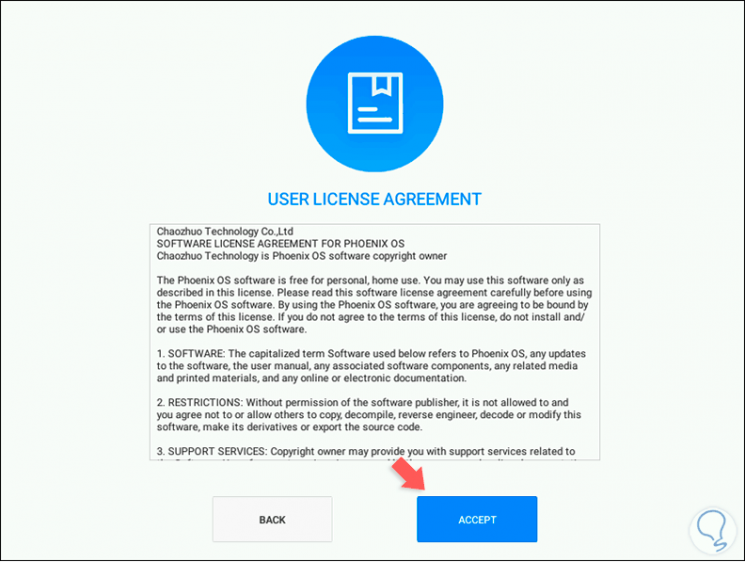
Step 19
We click on Accept and then we will see the type of connectivity available:
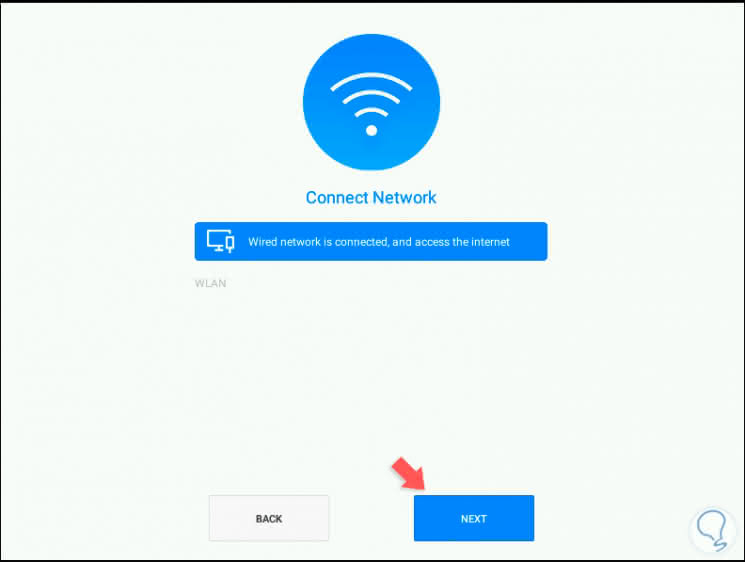
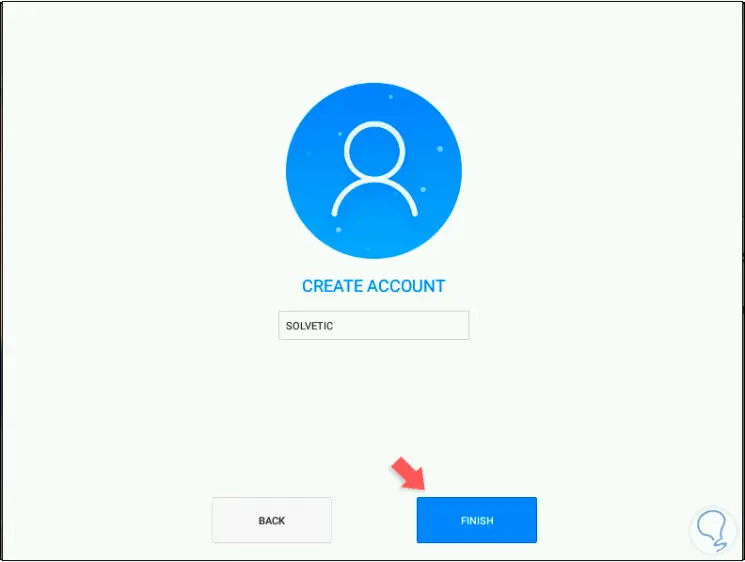
Step 20
We create the user account. Click on the Finish button to complete the Phoenix OS configuration process.
Step 21
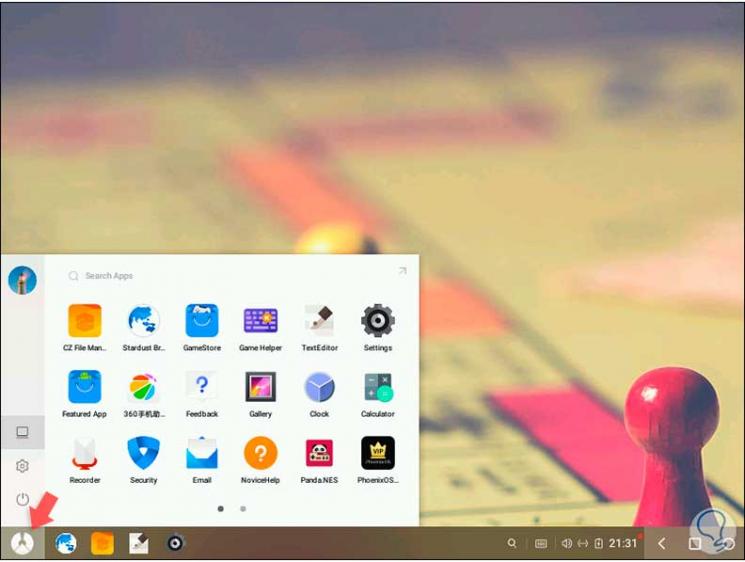
There we are ready to use Phoenix OS and get the most out of every Android application we want to use, as we see its environment is friendly, simple and completely modern:

Step 22
We can use the Windows key (in Windows 10) to access the menu and choose the appropriate option to use.
With this we can access the library and use or download Android applications and run them without problems.
5. Troubleshoot when installing Android with Phoenix OS on Windows 10
In case you use Phoenix OS directly on the hard drive of your computer, an error may be displayed at the time of its execution since Windows 10 installs the system by default in order to prevent malicious software from being loaded with the start of the system, this is thanks to the safe mode of the system.
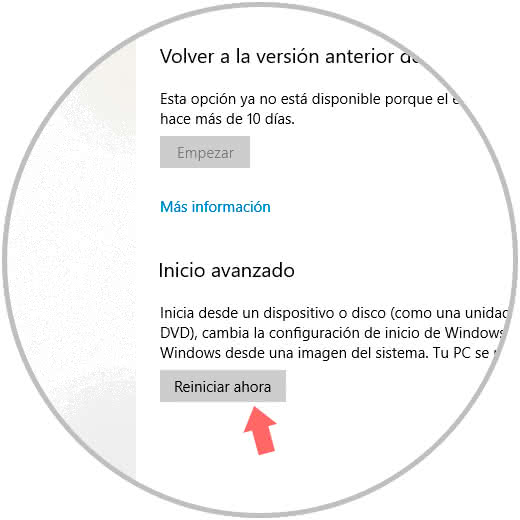
Step 1
To correct this, we must access the UEFI or BIOS and edit a parameter, to achieve this we go to the Start menu / Settings / Update and security / Recovery and click on the "Restart now" button located in the "Advanced startup" section:
Step 2
The system will restart and we will see the following:

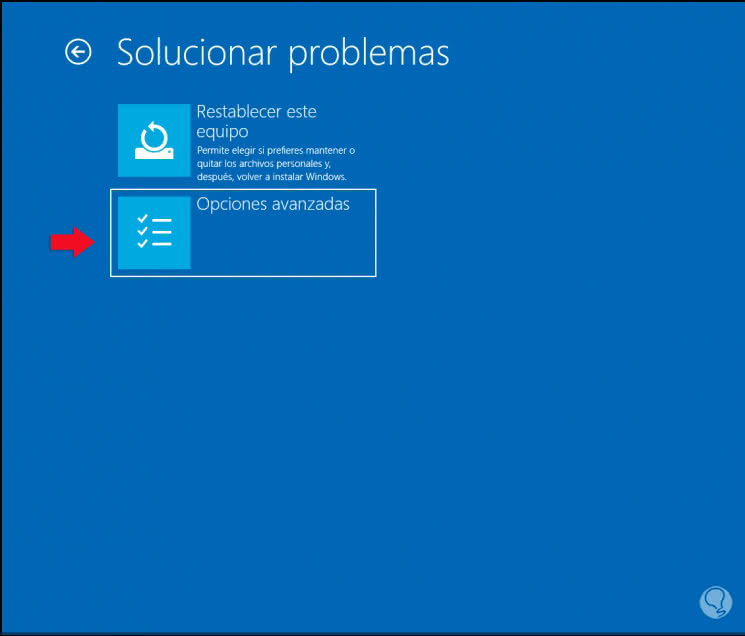
Step 3
Select "Troubleshoot" and in the next window choose "Advanced options":
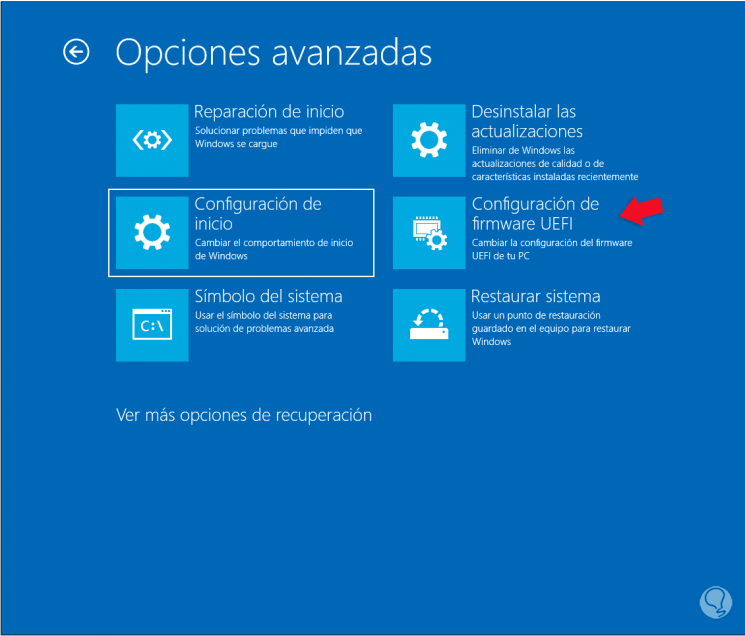
Step 4
We will be directed to the following options. There we click on “UEFI Firmware Configuration†and then the system will take us to the BIOS of the computer where we must change the UEFI line from boot to Legacy and restart the system.
Thanks to Phoenix OS we will be in full capacity to run any Android application on Windows, Linux or macOS systems with all its known functionalities..