Without a doubt, PowerPoint is one of the most comprehensive solutions developed by Microsoft since thanks to its different characteristics and functions we can create slides in a professional, dynamic and complete way. By playing with the opacity of images in PowerPoint, we can create presentations with images that are joined or overlapped and thus create different visual effects..
The images in PowerPoint are an essential part of each slide since they visually represent the theme that we want to show the user. For this reason there are multiple functions associated with these, one of them is the ability to adjust the transparency of the image , this basically allows the image to be a little more transparent and display other additional content in the background.
TechnoWikis will explain how to adjust the transparency or opacity of an image in PowerPoint 2016 or 2019..
To stay up to date, remember to subscribe to our YouTube channel! SUBSCRIBE
1. Change transparency of an image in PowerPoint 2016, 2019
Step 1
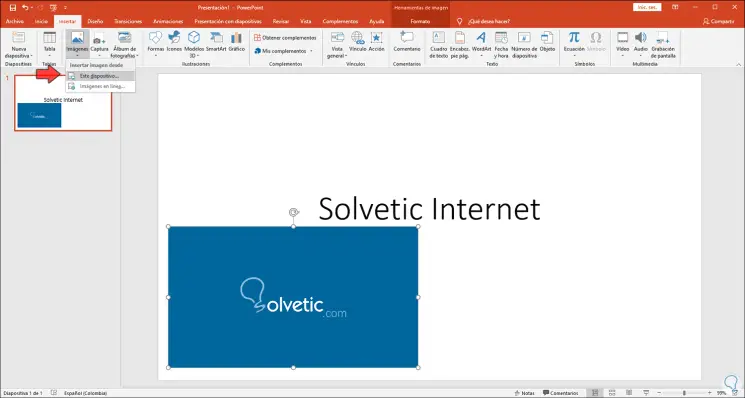
The first thing we must do is go to the Insert menu and in the Images section we select the desired image for the slide:
Step 2
Once the image is integrated into PowerPoint, we select it, right click on it and in the displayed list we select "Image format":

Step 3
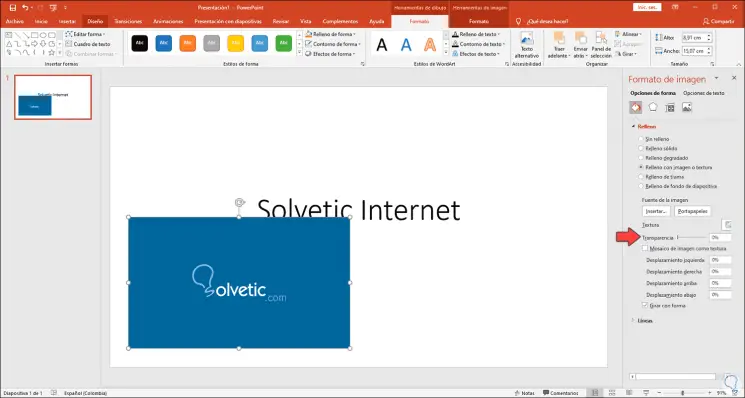
On the right side of PowerPoint we will see the editing options, there we must go to the section "Fill and line" (first icon from left to right), we will see the following:
Step 4
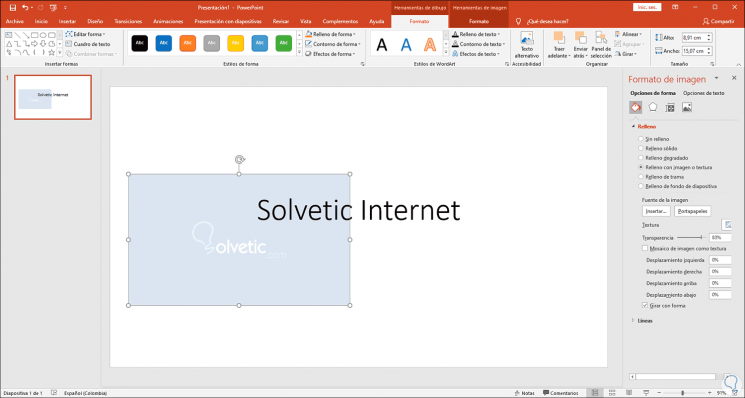
As we can see, in the “Texture” section we find the “Transparency” sliding bar, there we can move it or enter a value between 0 and 100 in the respective field, remember that 0 is without transparency and as the value increases s Look at the transparency of the image, for example, we have set a value of 83% and we will see the following:
2. Change transparency of an image part in PowerPoint 2016, 2019
This is an option in PowerPoint with which it is possible to adjust the transparency or opacity only in part of the image (or in all), for this the object or image must be added from the Insert - Image menu.
Step 1
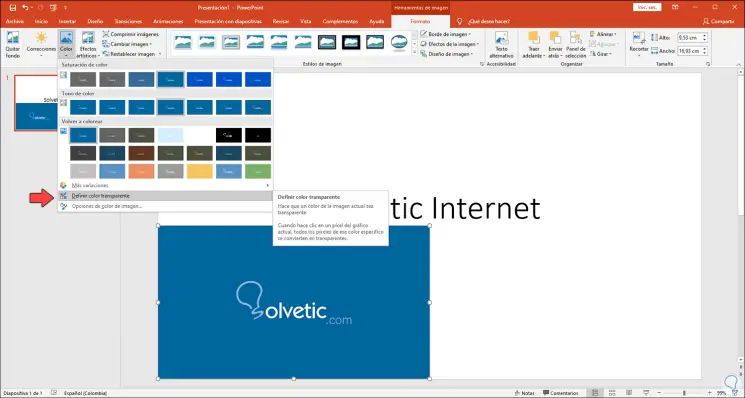
Once the image is added we select it and go to the Format menu (from the Image Tools pop-up menu) and go to the Color section and there we find the option “Define transparent color”:
Step 2
This will turn the cursor into a pencil, there we simply have to select a color, this will make each instance of the selected color in the image transparent:

This is how simple we can manage the transparency of images in PowerPoint 2016/2019..
3. Fix no transparency appears in PowerPoint 2016, 2019
Step 1
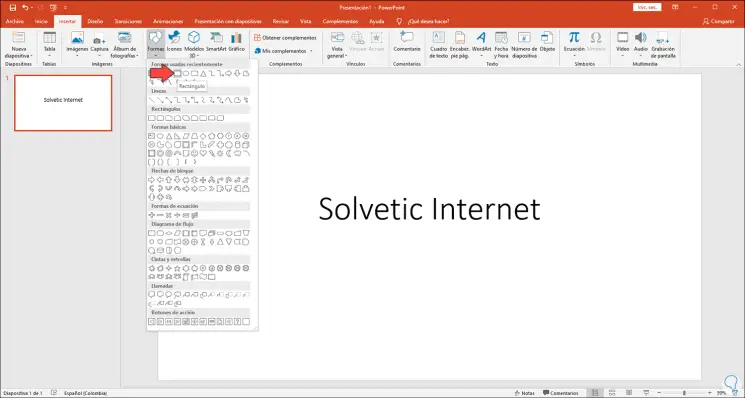
In the event that in the initial process we do not see the transparency option, we must add the image as a Shape, for this we go to the Insert - Shapes menu and select "Rectangle":
Step 2
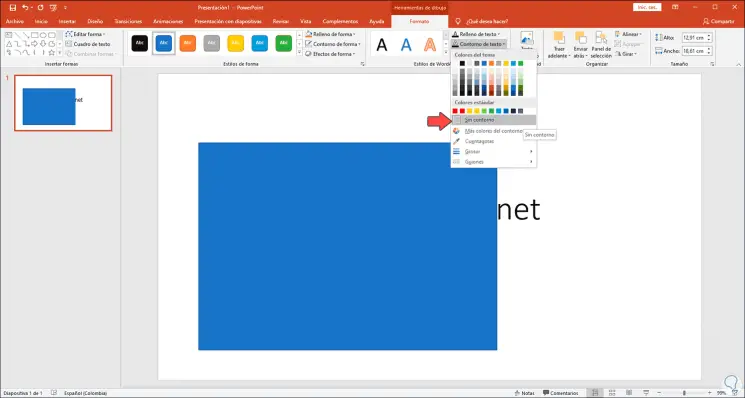
After this we define the dimensions of the rectangle, the Drawing Tools menu will be activated and there we will go to the "Shape outline" section and in the displayed list we select "No outline":
Step 3
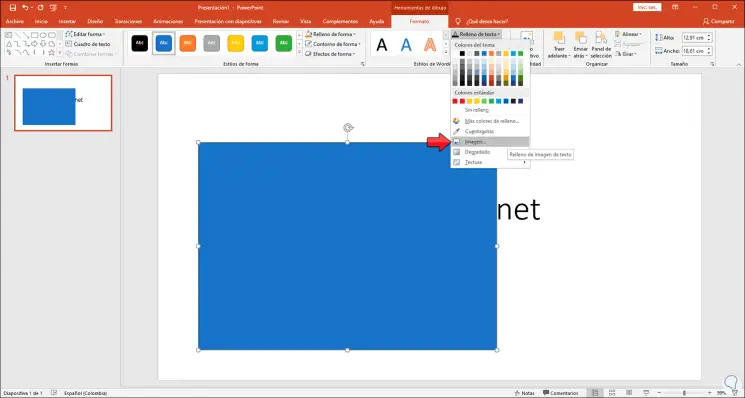
Now we go to the "Text Fill" section and there we select "Image":
Step 4
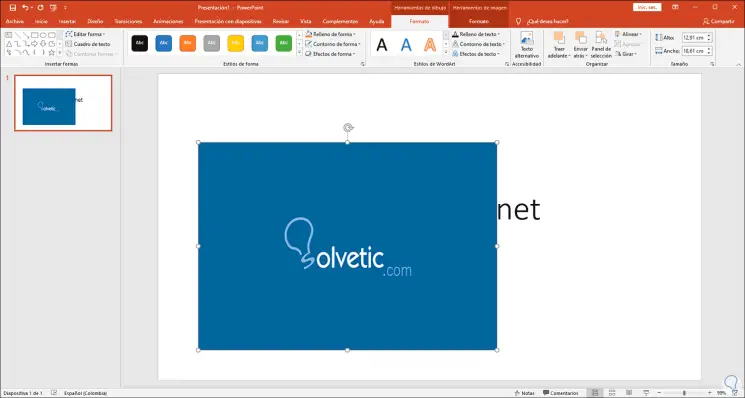
We select the desired image to add in this way. We click on "Insert" and in this way the image will be integrated into the PowerPoint slide with a shape style:

Step 5
After this, we can select the image and from Fill and line see the transparency option available to be applied to the desired image.
TechnoWikis has explained to you in a simple way how to apply a transparency in a PowerPoint 2016 or 2019 image.