Virtualization is the technology that has taken a very important boom today since it allows us to know and test operating systems and applications without having to mount them in a productive environment where errors can be present causing massive failures or errors in the execution of services and processes. That is why virtualization with Hyper-V Windows Server 2019 is key to knowing the real behavior of a system..
Hyper-V role
If you are a Windows Server 2019 user, you should not look for third-party applications since we can enable the Hyper-V role on the server, with this it will be possible:
- Run multiple machines on a single computer without incurring additional expenses.
- Prevent administrative expenses when implementing new resources.
- Evaluate operating systems and applications.
- Centrally manage hardware resources.
Hyper-V Features
Some of the features of Hyper-V are:
- It allows us to move virtual machines between different nodes.
- Allows you to add or remove hot storage with this system, it is not necessary to turn off the server.
- Improve business continuity by having different alternatives.
- You can create a backup and access disaster data recovery.
- Offers remote connectivity.
Hyper-V was developed as a virtualization technology which is based on hypervisor, therefore it makes use of the Windows hypervisor which in turn requires a physical processor whose functions allow the use of Windows Server virtualization since the hypervisor is the one in charge of managing the actions between the hardware and the virtual machines created.
'Hyper-V elements'
Hyper-V in Windows Server is made up of the following elements:
- Hyper-V module for Windows PowerShell
- Virtual Machine Connection (VMConnect)
- Windows PowerShell Direct
TechnoWikis will explain different ways to install Hyper-V on Windows Server 2019..
To stay up to date, remember to subscribe to our YouTube channel! SUBSCRIBE
1. Install Hyper-V Windows Server 2019 from Server Manager
Step 1
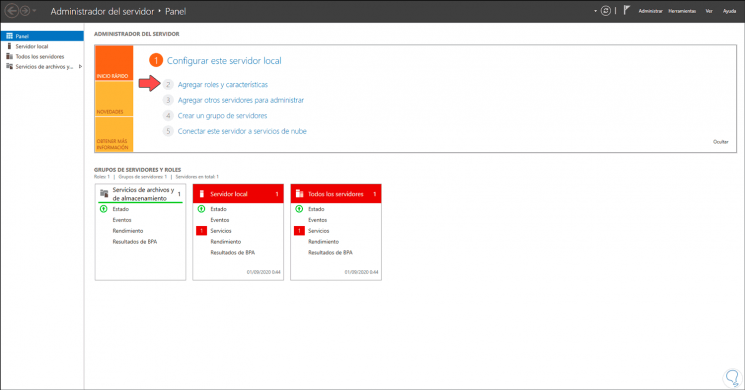
This is the guided and graphical way to carry out the process, for this we access the Server Administrator and click on "Add roles and characteristics":
Step 2
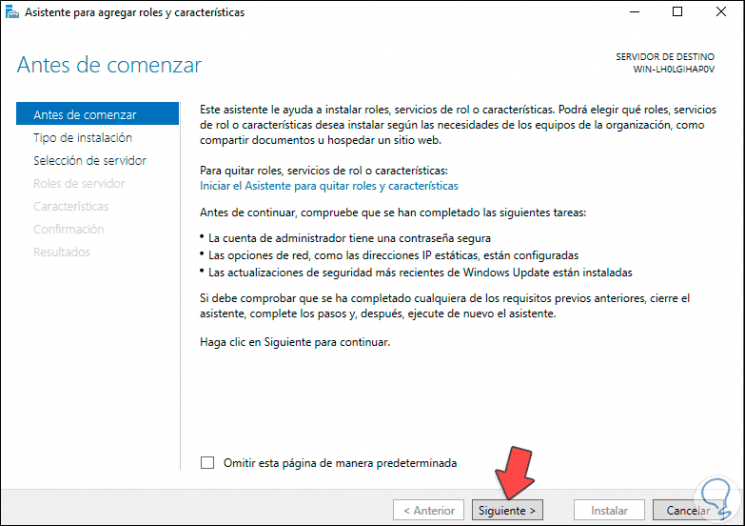
The following wizard will be displayed:
Step 3
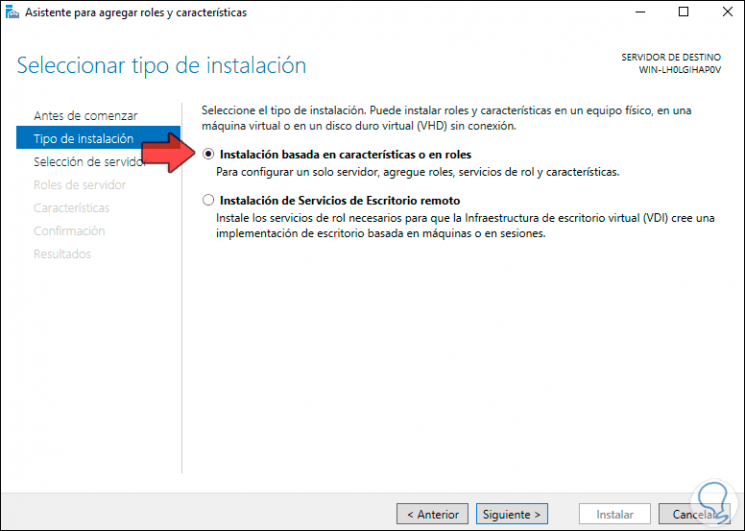
We click on Next and now we activate the box "Installation based on characteristics or roles":
Step 4
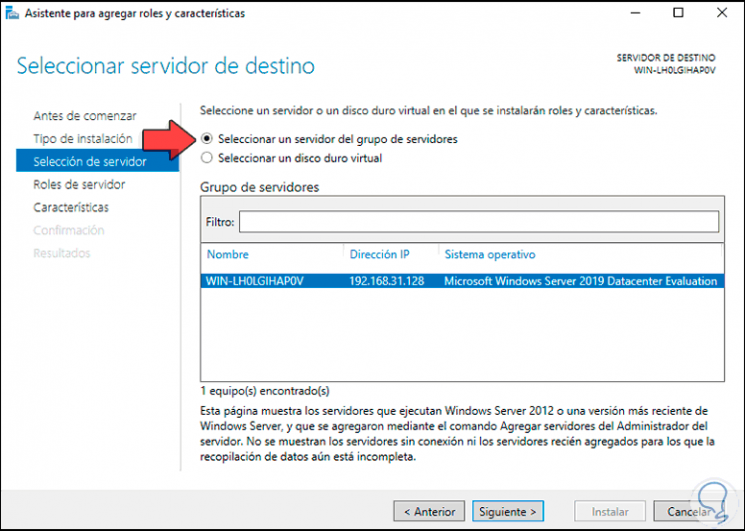
We click Next and now we select the server where the role will be installed:
Step 5
Now, in the next window we locate "Hyper-V":
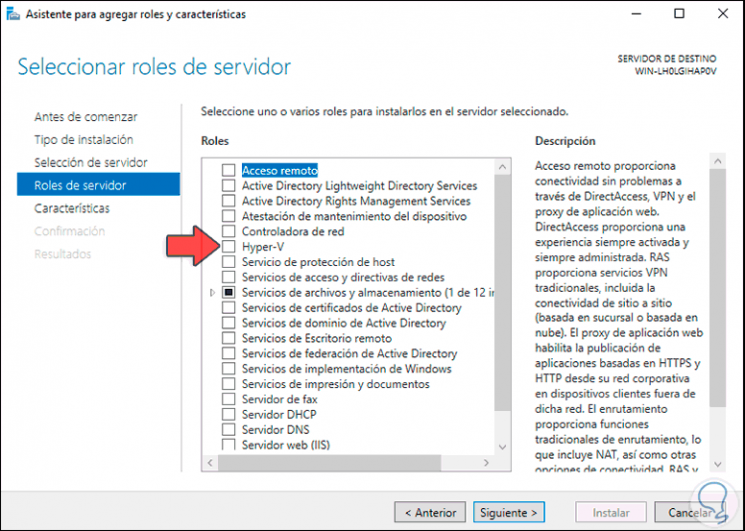
Step 6
By clicking on it to activate it, the following pop-up window will be displayed:
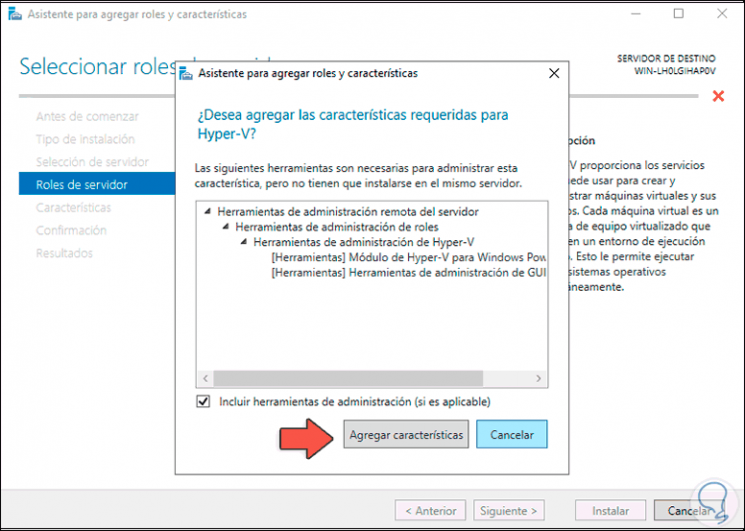
Step 7
We click on "Add features" and we will see that the "Hyper-V" box has been activated:
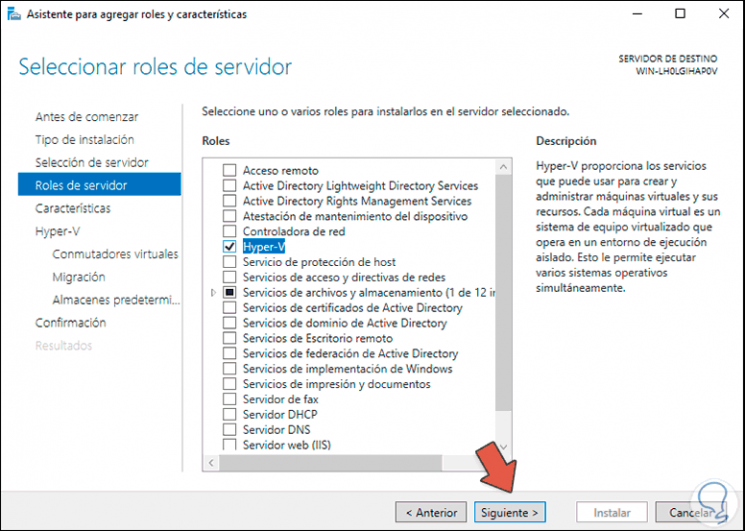
Step 8
In the next window we do not modify anything and then we access the Hyper-V assistant:
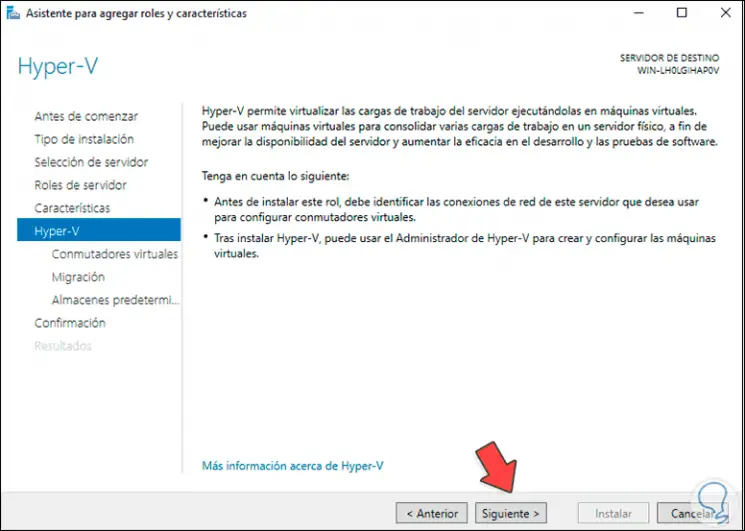
Step 9
We click Next and here it will be possible to select the physical network adapter which will act as a virtual switch to allow the virtual machine to connect to the Internet:
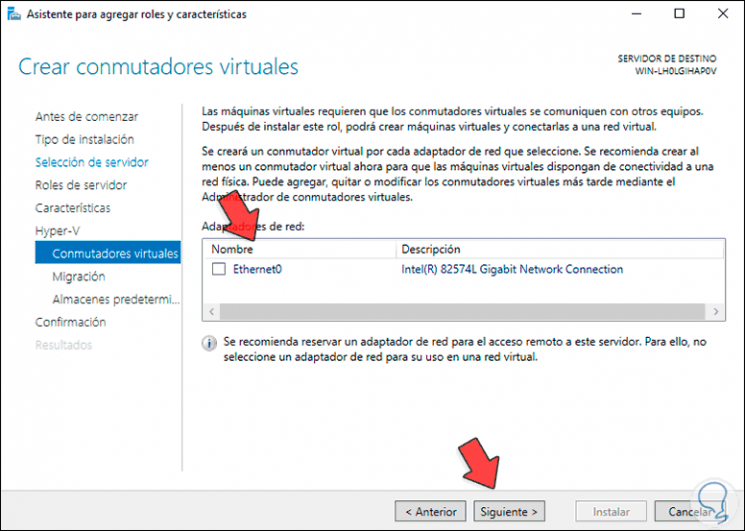
Step 10
We click Next and it will be possible to allow Hyper-V in Windows Server 2019 to support live migrations of virtual machines, that is, without having to turn off the server:
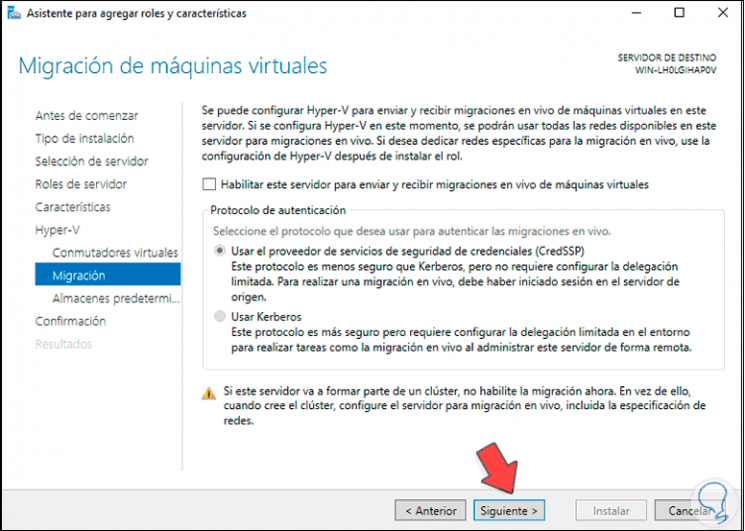
Step 11
This is an option that we can enable or not, in the next window we find the Hyper-V default routes:
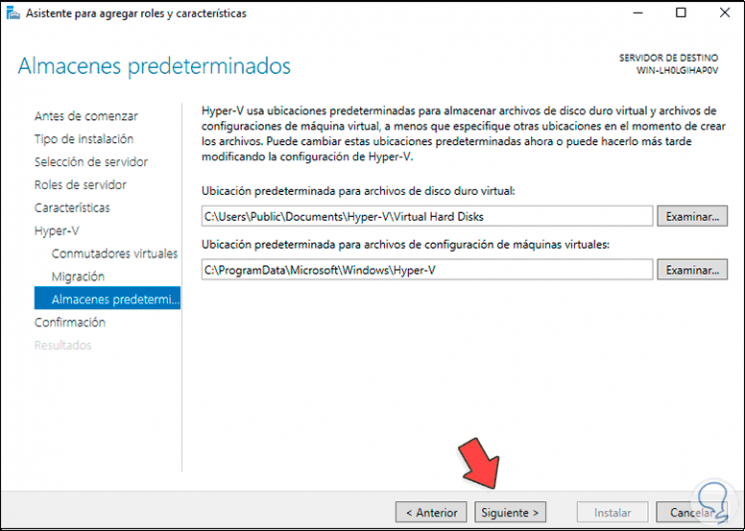
Step 12
In the next window we will find a summary of the role that we are going to install:
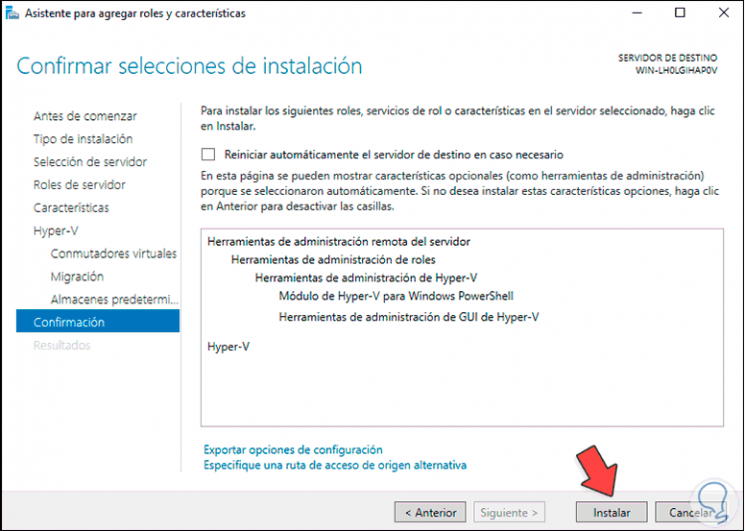
Step 13
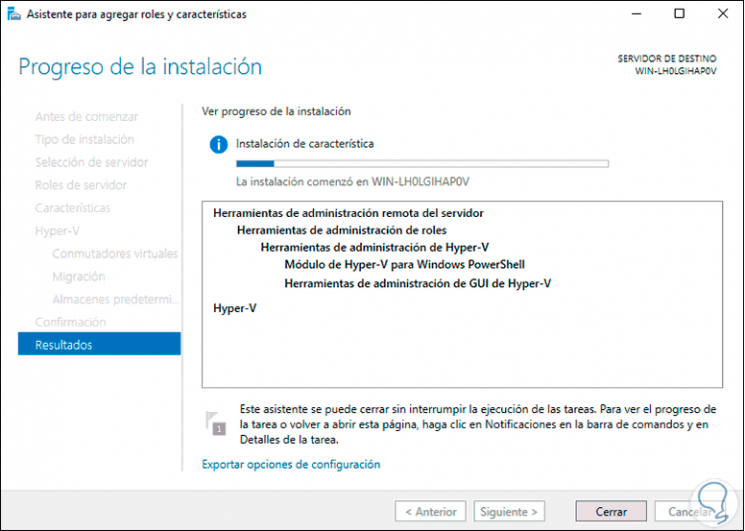
To start the Hyper-V installation process in Windows Server 2019, click on "Install":
Step 14
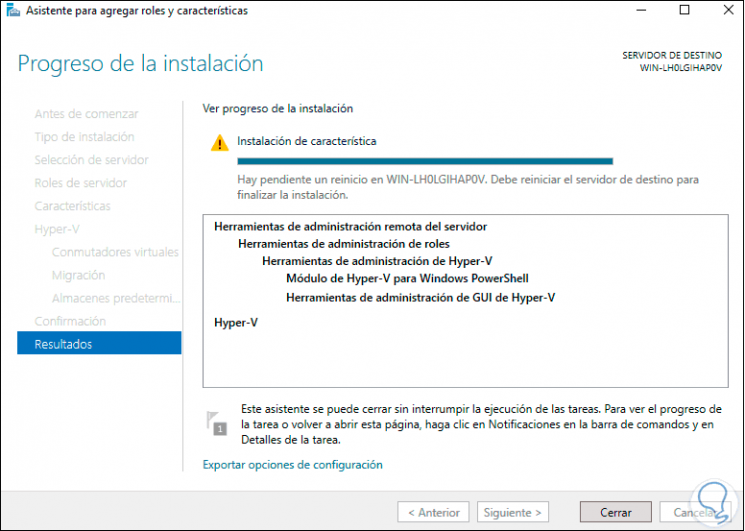
At the end of this process we will see the following:
Step 15
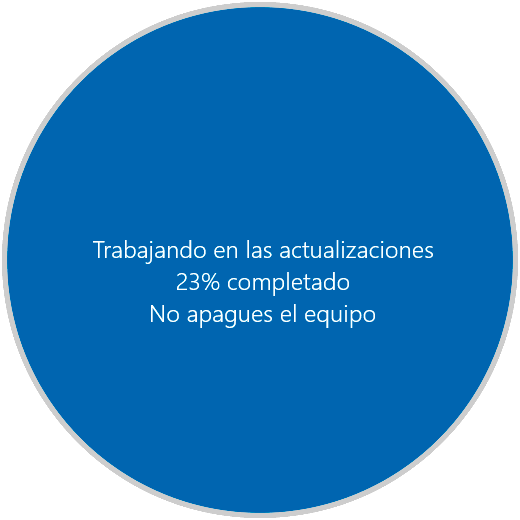
As we can see, a restart is required to successfully complete the installation, we restart Windows Server 2019 to see that the changes are applied:
Step 16
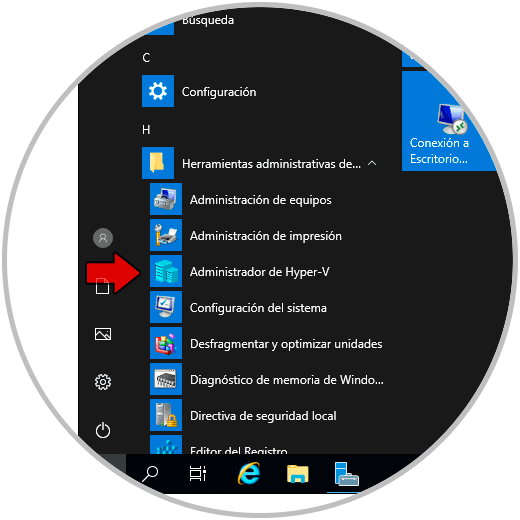
After this we log in and find the Hyper-V Manager from the Start menu:
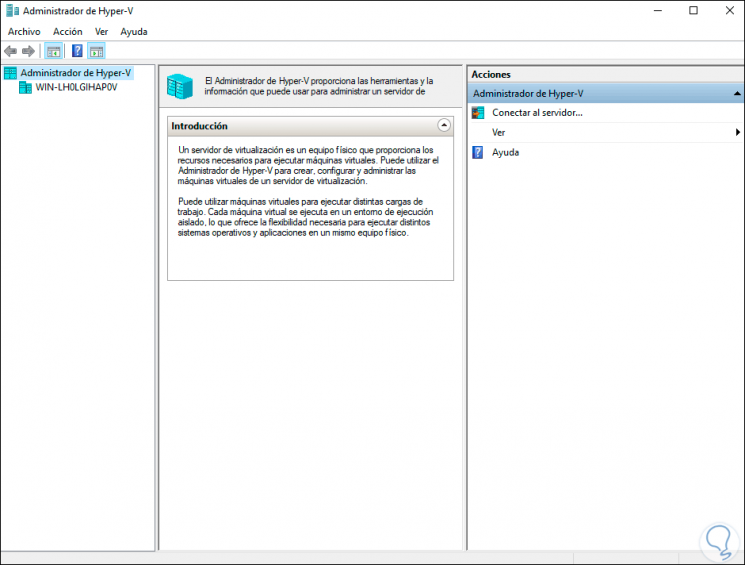
Step 17
We access it and this will be your console:
2. Install Hyper-V Windows Server 2019 from PowerShell
The PowerShell console is another functional alternative for installing Hyper-V on the server.
Step 1
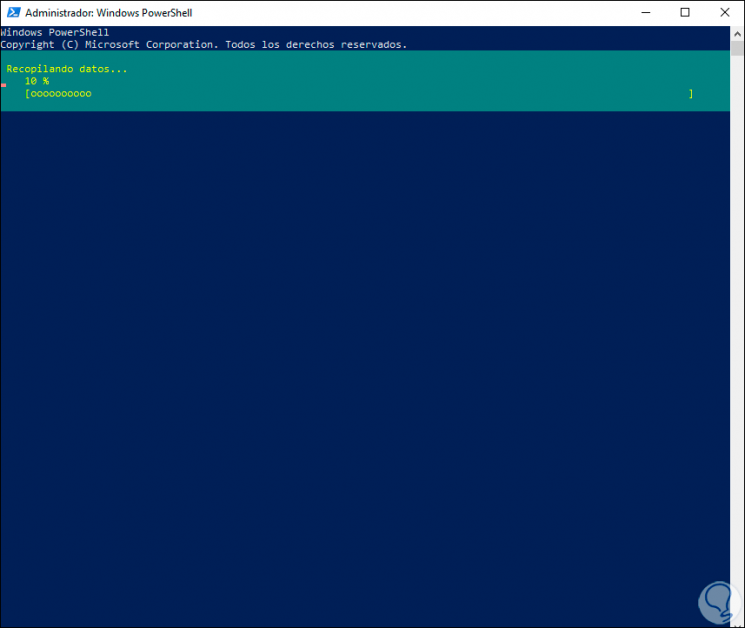
For this we access as administrators and in the console we execute the following:
Install-WindowsFeature -Name Hyper-V -IncludeManagementTools
Step 2
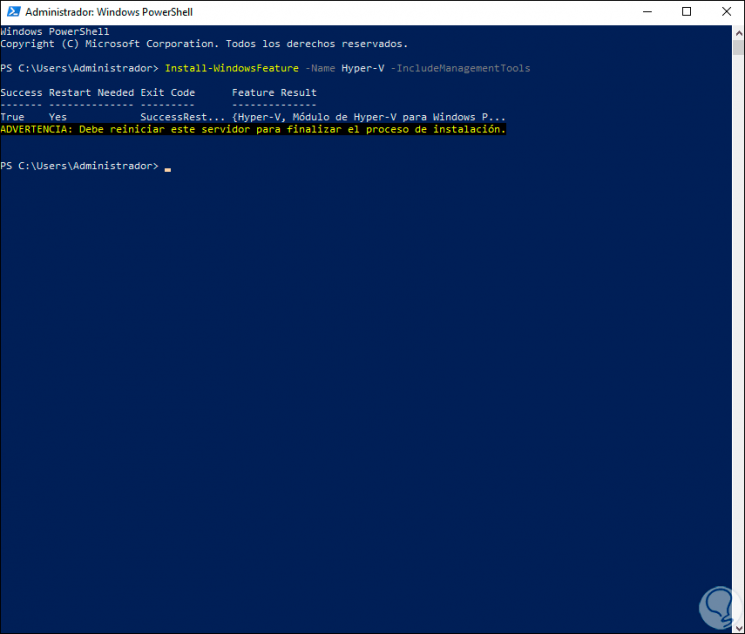
Once the process is finished we will see the following:
Step 3
There we must restart the computer to complete the process as we have seen.
Note
To restart the computer automatically we will execute the following:
Install-WindowsFeature -Name Hyper-V -IncludeManagementTools -Restart
Step 4
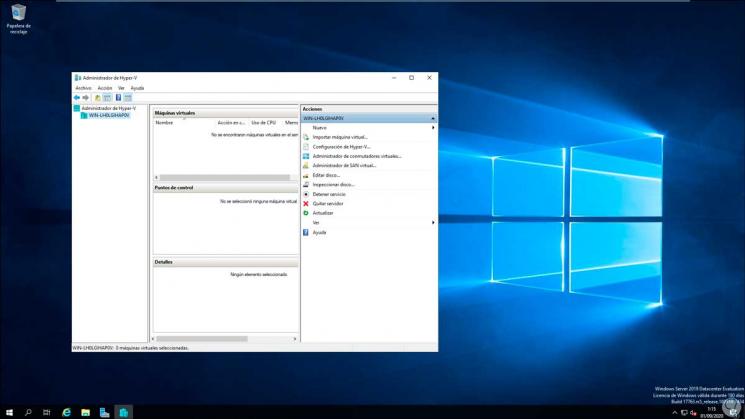
After logging in we will access the Hyper-V console:
3. Install Hyper-V Windows Server 2019 using DISM
DISM (Deployment Image Servicing and Management.) Is a tool integrated in the server with which we manage the system images and it allows us to install Hyper-V.
Step 1
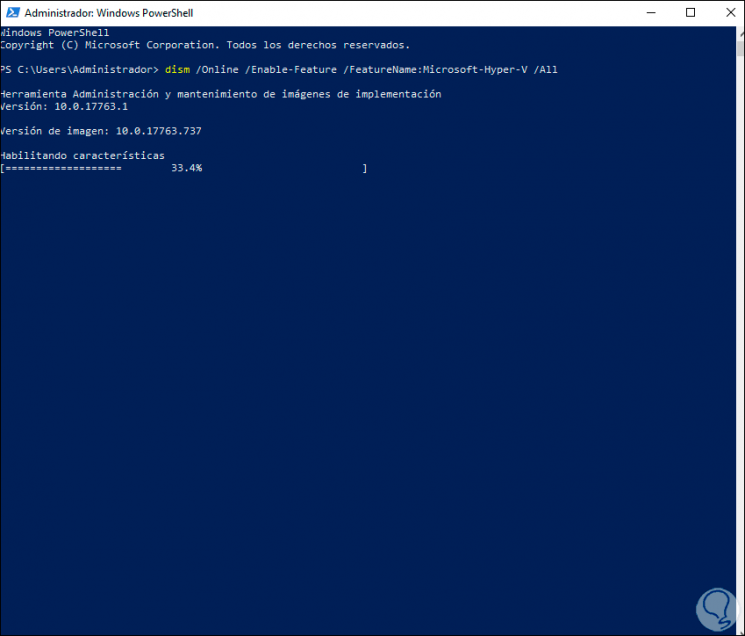
For this method we access PowerShell as administrators and there we execute:
dism / Online / Enable-Feature / FeatureName: Microsoft-Hyper-V / All
Step 2
At the end of the process it will ask if we want to restart, we enter the letter Y to complete the process and be able to access Hyper-V:

Some of the methods that TechnoWikis has explained to you are functional to install Hyper-V in Windows Server 2019 and thus have this utility to mount virtual machines and work with them as necessary.