Virtualization technology has become one of the best support and management tools not only for IT administrators , but for all users who are interested in trying new operating systems, new applications, etc. All this without investing in expensive hardware or without jeopardizing both the infrastructure and the operation of a real environment. Thanks to virtualization we can have several systems, even incompatible with each other, in a single physical device using all virtual machines the same disk resources, memory and CPU of the physical equipment, so that this translates into a centralized and complete administration ..
Hyper-V features
One of the best platforms for virtualization is Hyper-V, which is developed by Microsoft, and through which we have several features such as:
- Creation of virtual machine control points using VSS
- Armored virtual machines and much more.
Now, as a rule, when we create a virtual machine, there is no compatibility to create another virtual machine within it for testing purposes, which can affect certain tasks. One of the most practical and useful virtual machines that we can create are the production machines with Windows Server 2016 operating systems, or the newest 2019 , and we may want to create within it a client machine to validate server roles, configuration of Policies and more.
TechnoWikis will explain how to create and configure a virtual machine within an existing virtual machine in Hyper-V with Windows Server 2016 or 2019 , for this study we will try to install a virtual machine with Fedora 29 in Windows Server 2019 from Hyper-V..
Initial requirements
The initial requirements we must have are:
- The Hyper-V host and guest must have the Windows 10 / Windows Server2016 Anniversary Update or later.
- Virtual machine configuration version 8.0 or higher.
- An Intel processor with VT-x and EPT technology: nesting is currently only for Intel CPUs.
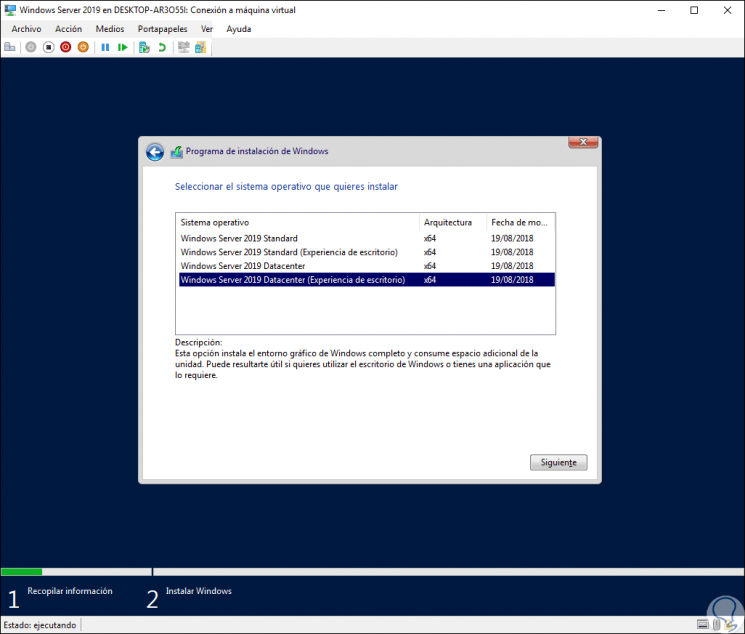
- As a basic requirement we must create our Windows Server 2019 virtual machine in Hyper-V.
Note
The whole process is identical for Windows Server 2016.
1. Configure the Hyper-V role in the Windows Server 2019 Hyper-V virtual machine
Step 1
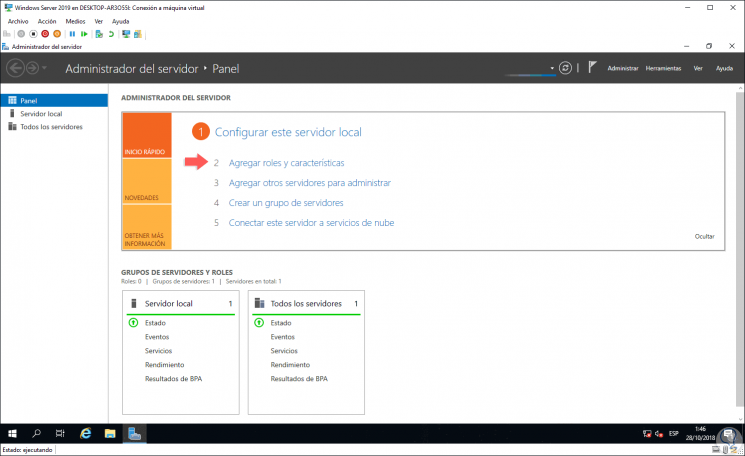
Once the Windows Server 2019 virtual machine is created, the next step is to enable the Hyper-V role which by default is disabled, for this we will go to the Server Administrator where we will see the following:
Step 2
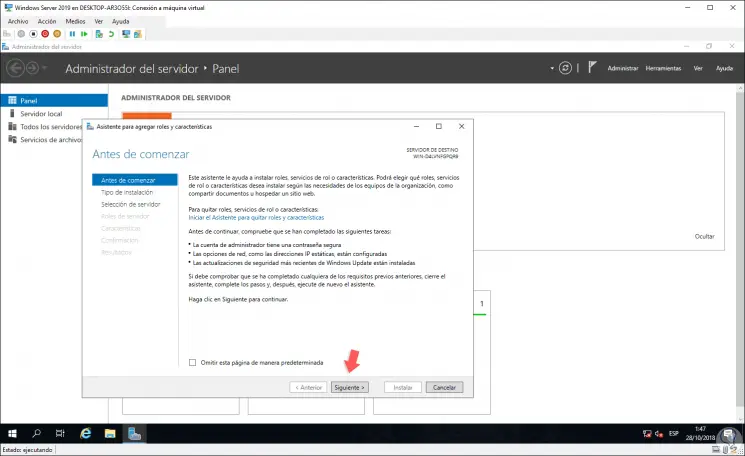
There we click on the “Add roles and features†line and the following wizard will be displayed:
Step 3
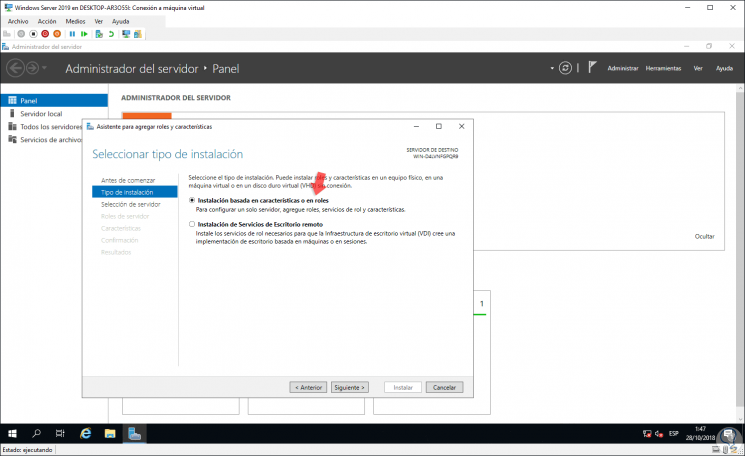
There we click on Next and now we define the type of installation, in this case we select the option “based on features or rolesâ€:
Step 4
In the following window we select the server where the Hyper-V role is to be enabled:

Step 5
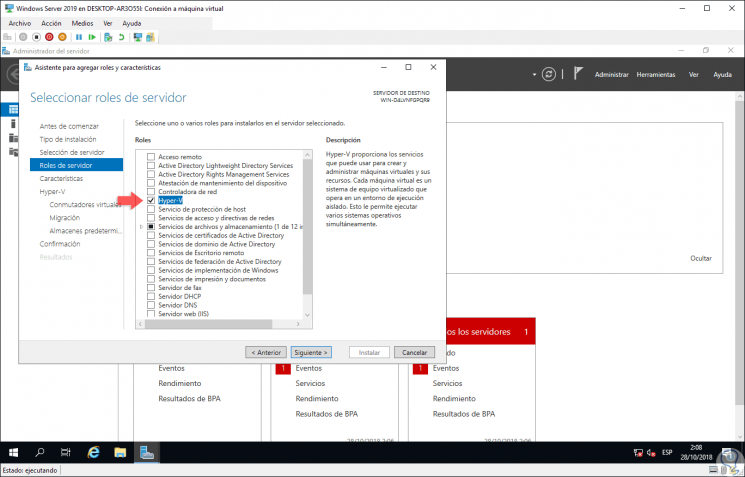
In the following window, Server Roles, we locate the “Hyper-V†role:
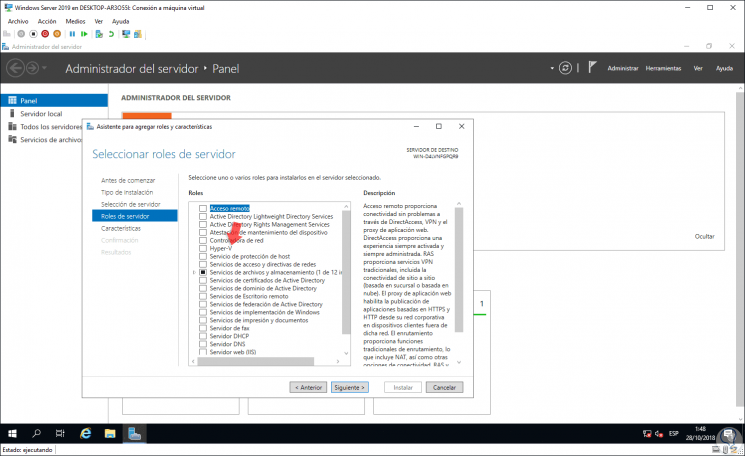
Step 6
When you activate your box, the following pop-up window will appear:
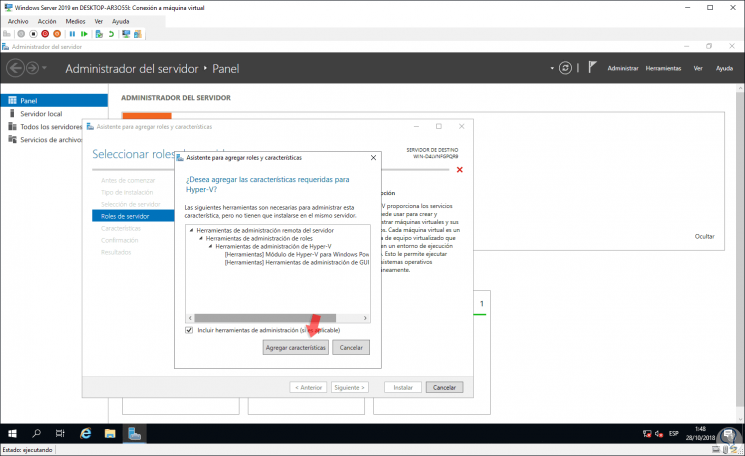
Step 7
There we click on the “Add features†button and we will see that, as we have indicated, there is a compatibility failure as it is a virtual machine, we will see the following:
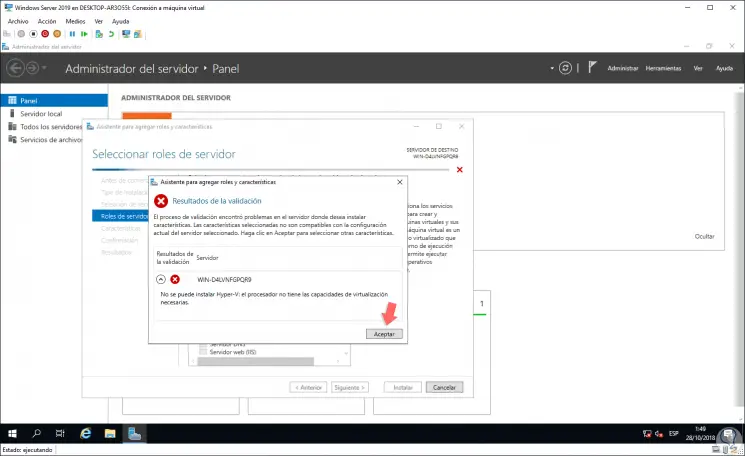
Step 8
To correct this error, we must access Windows PowerShell as administrators and there execute the following syntax:
Set-VMProcessor -VMName <VM Name> -ExposeVirtualizationExtensions $ true
Step 9
Before executing this, the machine must be deactivated:
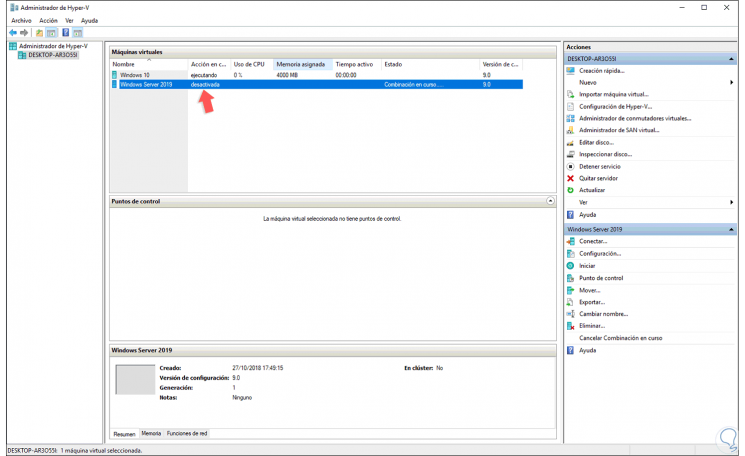
Step 10
Now we can execute the command in PowerShell in order to enable nested virtualization which allows you to run Hyper-V inside a Hyper-V virtual machine (VM). When executing this cmdlet we will see the following:

Note
If at any time we wish to disable nested virtualization, we will execute the following:
Set-VMProcessor -VMName <VM Name> -ExposeVirtualizationExtensions $ false
Step 11
Now, we start the virtual machine again and now we can see that the Hyper-V role can be activated normally:
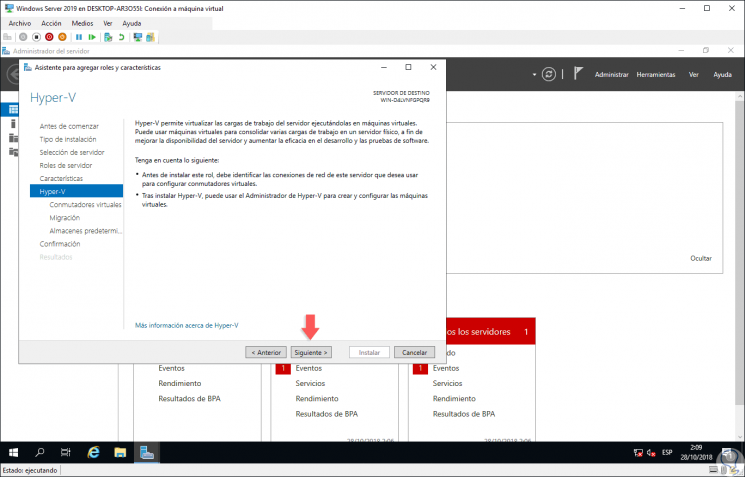
Step 12
With the active role, click on Next and you can skip the Features section to go to the “Hyper-V†window where we will see a brief summary of the role:
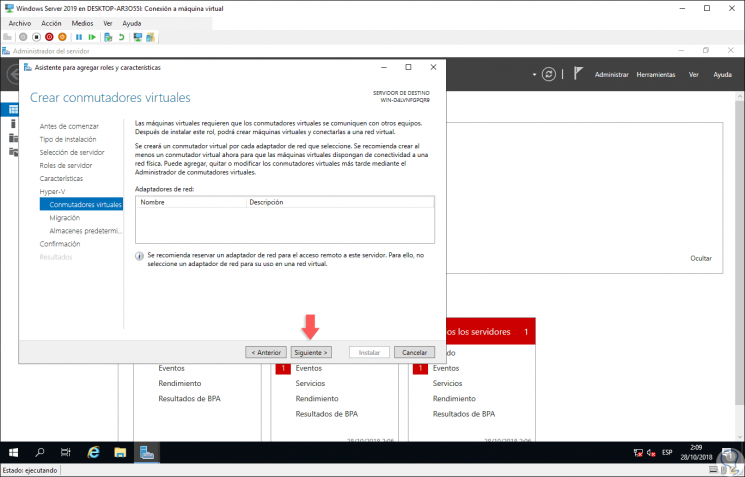
Step 13
There we click on Next and then we can configure or not the virtual switches which allow communication with both the host computer and the external network:
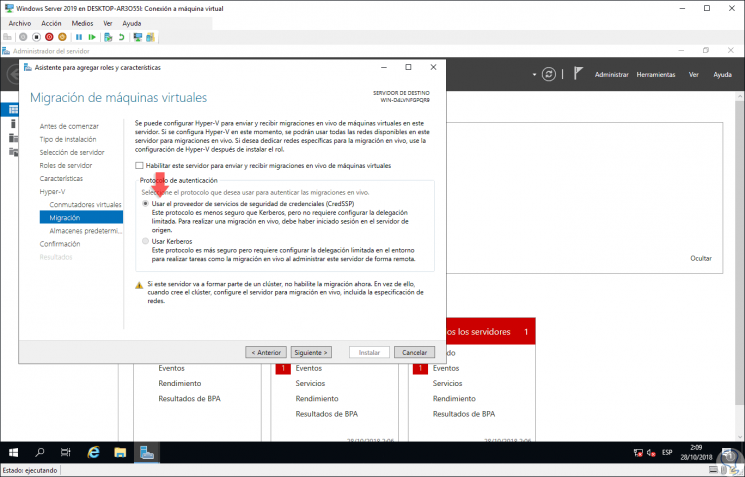
Step 14
In the next window we will have the option to enable the Windows Server 20109 virtual server so that you can send and receive virtual machine migrations live:
Step 15
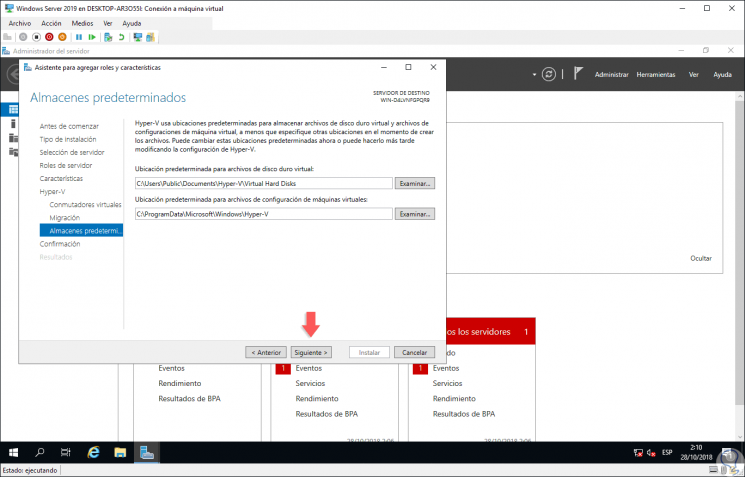
This is optional, now, in the following window we will see the routes where the values ​​of the virtual machines created are hosted:
Step 16
Click on Next and we will see a summary of the role of Hyper-V:
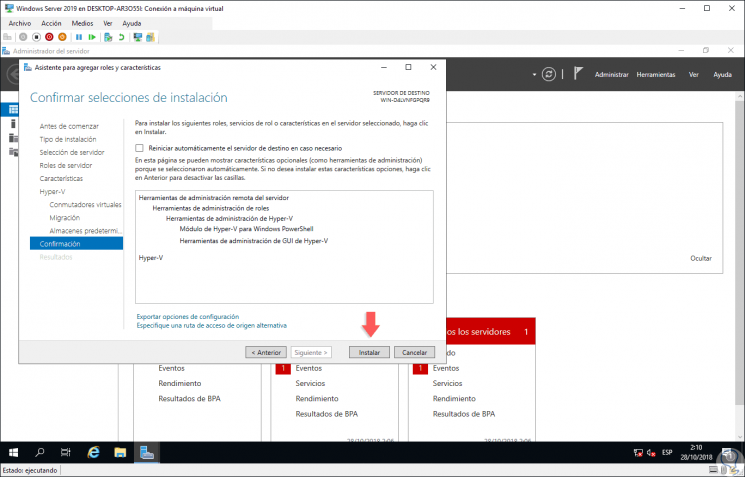
Step 17
Click on the "Install" button to start the process of installing this role in the Windows Server 2019 virtual machine:
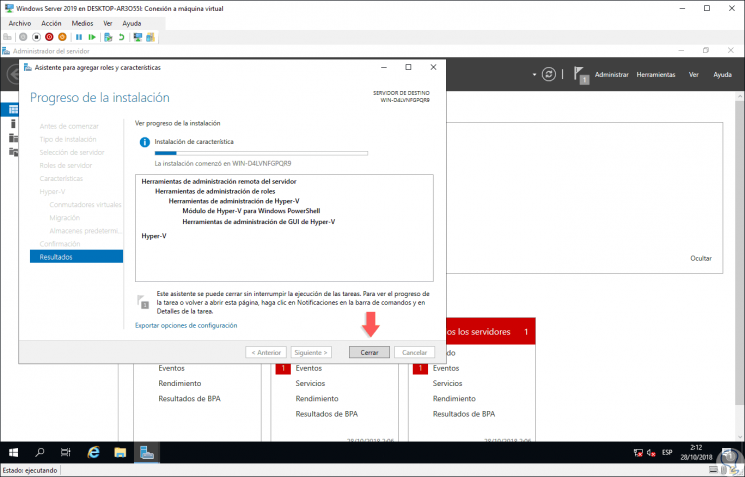
Step 18
Once this process is finished we will see the following message:
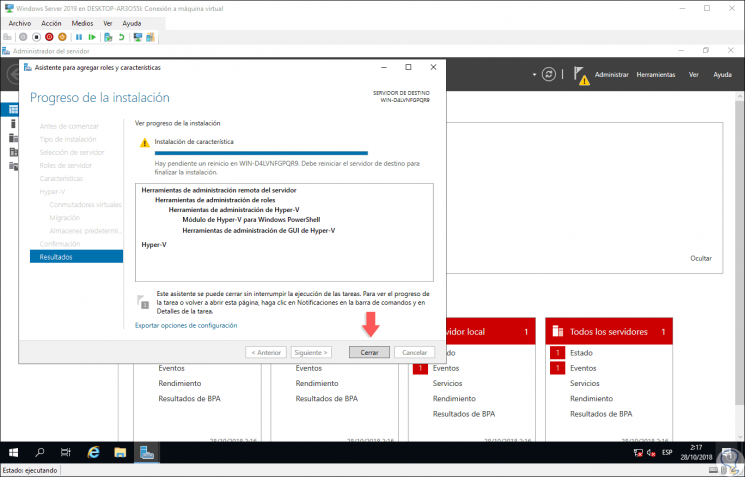
Step 19
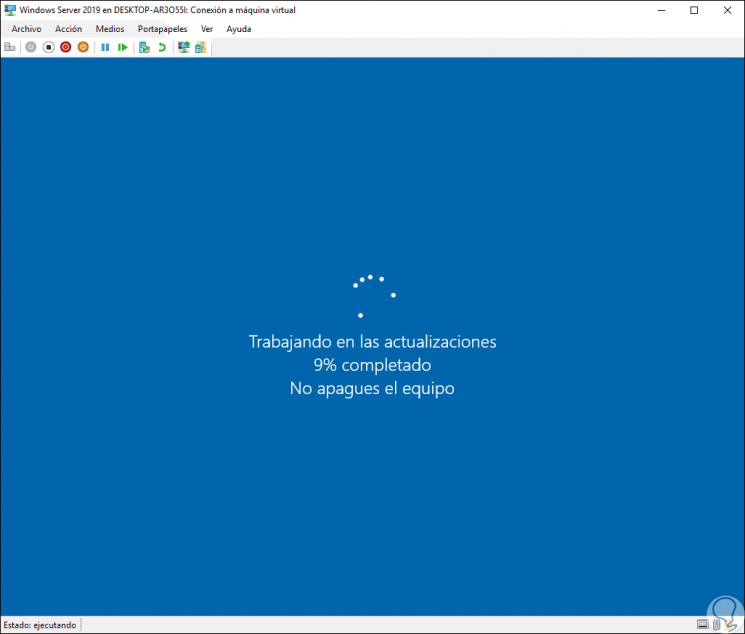
As we see, you need to restart the operating system for the changes to be applied:
Step 20
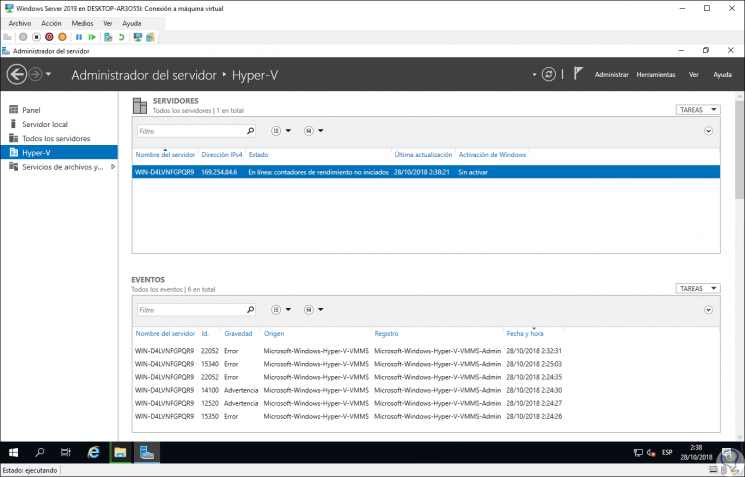
After this, we will be able to log in and we will see that the Hyper-V role has been enabled in the Server Manager:

Login Join up!