Virtualization has been developed as a mechanism to avoid causing damage in physical environments where information is key, as well as processes, this is because if an operating system is installed on a real computer in beta phase or applications that we do not know its behavior against the environment, we can cause a series of errors that in the worst case will have a direct impact on the system, affecting the entire operation. There, virtualization is declared as the integral solution since with it it is possible to use new systems or applications using computer resources, based on the available hardware resources, but at no time is the real system affected, which is why Hyper -V in Microsoft..
Hyper-V offers the Windows 11 user a hardware virtualization environment giving us the option to create virtual hard drives, virtual switches, as well as different virtual devices for general control of the machines created.
Hyper-V can be used on 64-bit versions of Windows 11 Pro, Enterprise, and Education..
Hyper-V Advantages
Some of the advantages of using Hyper-V are:
- It has a virtual fiber channel
- Live migration of virtual machines from one host to another without losing functionality
Hyper-V supported systems
Some of the operating systems that we can install in a virtual environment are:
- Windows Server 2012, 2019 and 2022
- SUSE Linux Enterprise Server 11 to 15
- Ubuntu 18, 19, 20, 21, 22
Hyper-V minimum requirements
The minimum requirements to install Hyper-V on Windows 11 are:
- Windows 11 Enterprise, Pro, or Education
- CPU support for VM Monitor Mode Extension (VT-c on Intel CPUs)
- 64-bit processor with second level address translation (SLAT)
TechnoWikis will explain how to create a virtual machine in Hyper-V in Windows 11.
To stay up to date, remember to subscribe to our YouTube channel!
SUBSCRIBE ON YOUTUBE
How to create Hyper-V Windows 11 virtual machine
Step 1
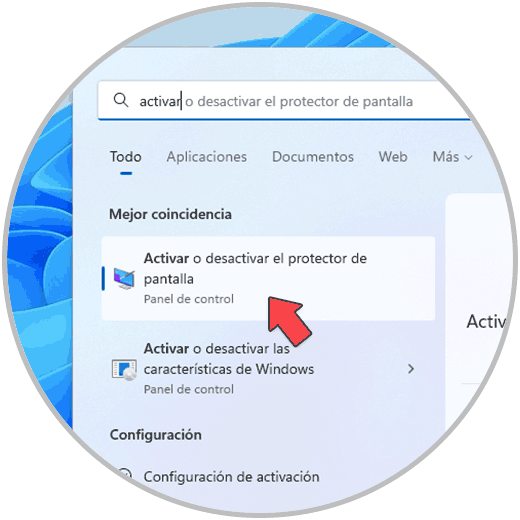
The first thing we must do is activate the feature, for this in the Start search engine we enter "activate" and there we select "Activate or deactivate Windows features":
Step 2
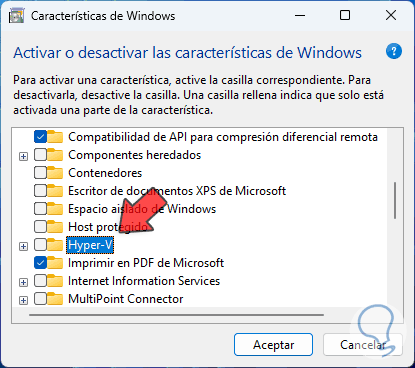
In the pop-up window we locate “Hyper-V”:
Step 3
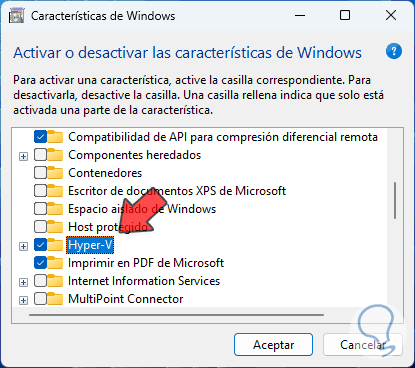
We activate the "Hyper-V" box:
Step 4
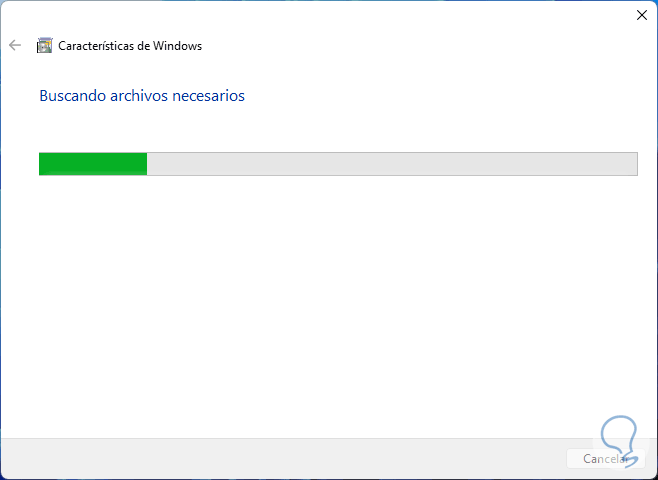
We click "OK" to start the installation of this feature:
step 5
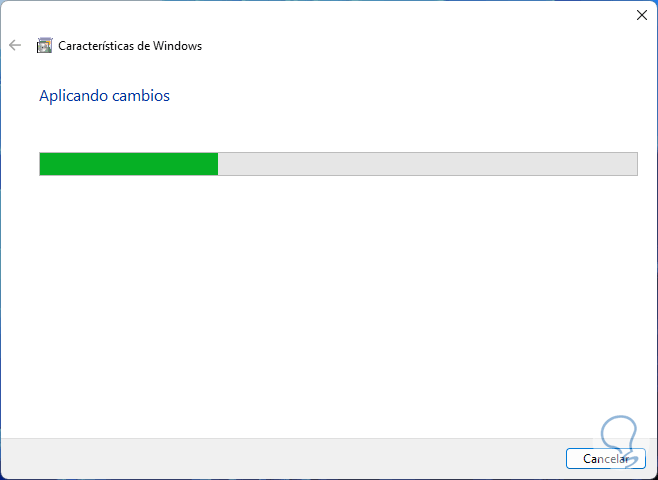
Now the changes are applied:
Step 6
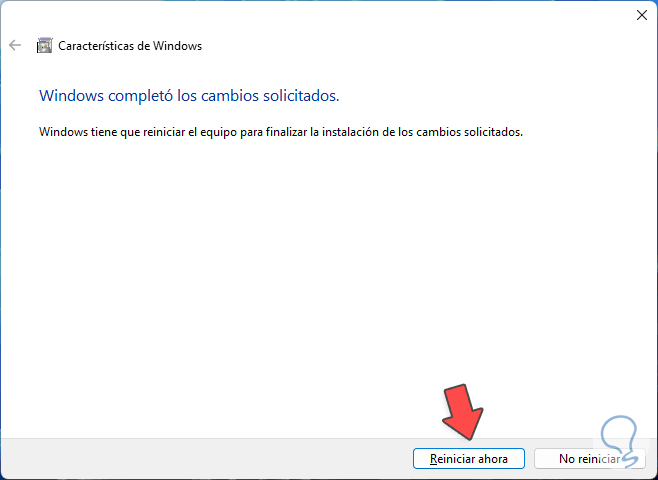
We wait for the process to finish:
Step 7
We restart Windows 11 to add the Hyper-V feature:

Note
It is possible to use PowerShell for this process, in that case open PowerShell as administrator and run:
Enable-WindowsOptionalFeature -Online -FeatureName Microsoft-Hyper-V -All
Or we can use DISM with the following command:
DISM /Online /Enable-Feature /All /FeatureName:Microsoft-Hyper-V
step 8
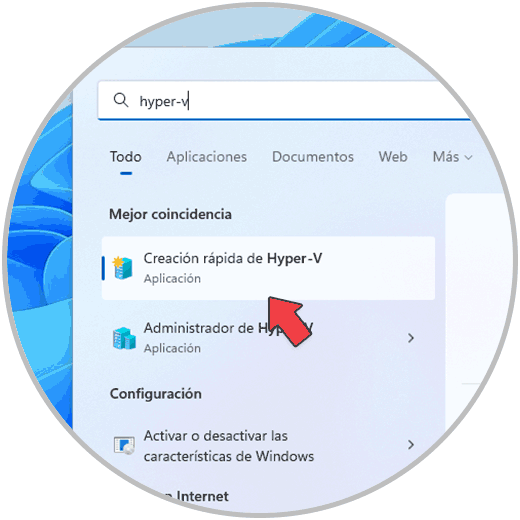
Once we log in, we open the Hyper-V Manager from Start:
step 9
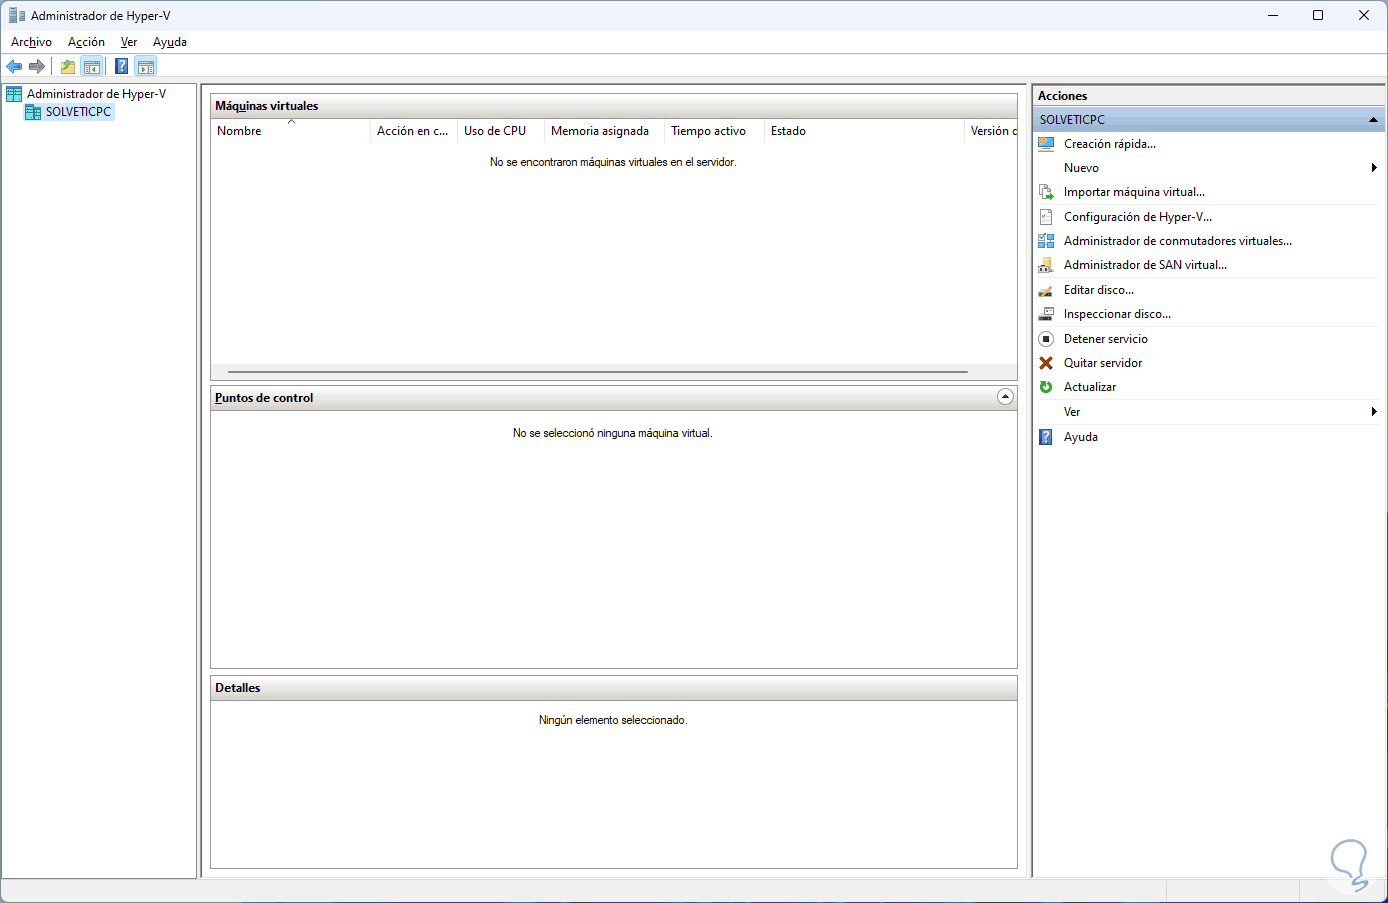
We will see the following:
step 10
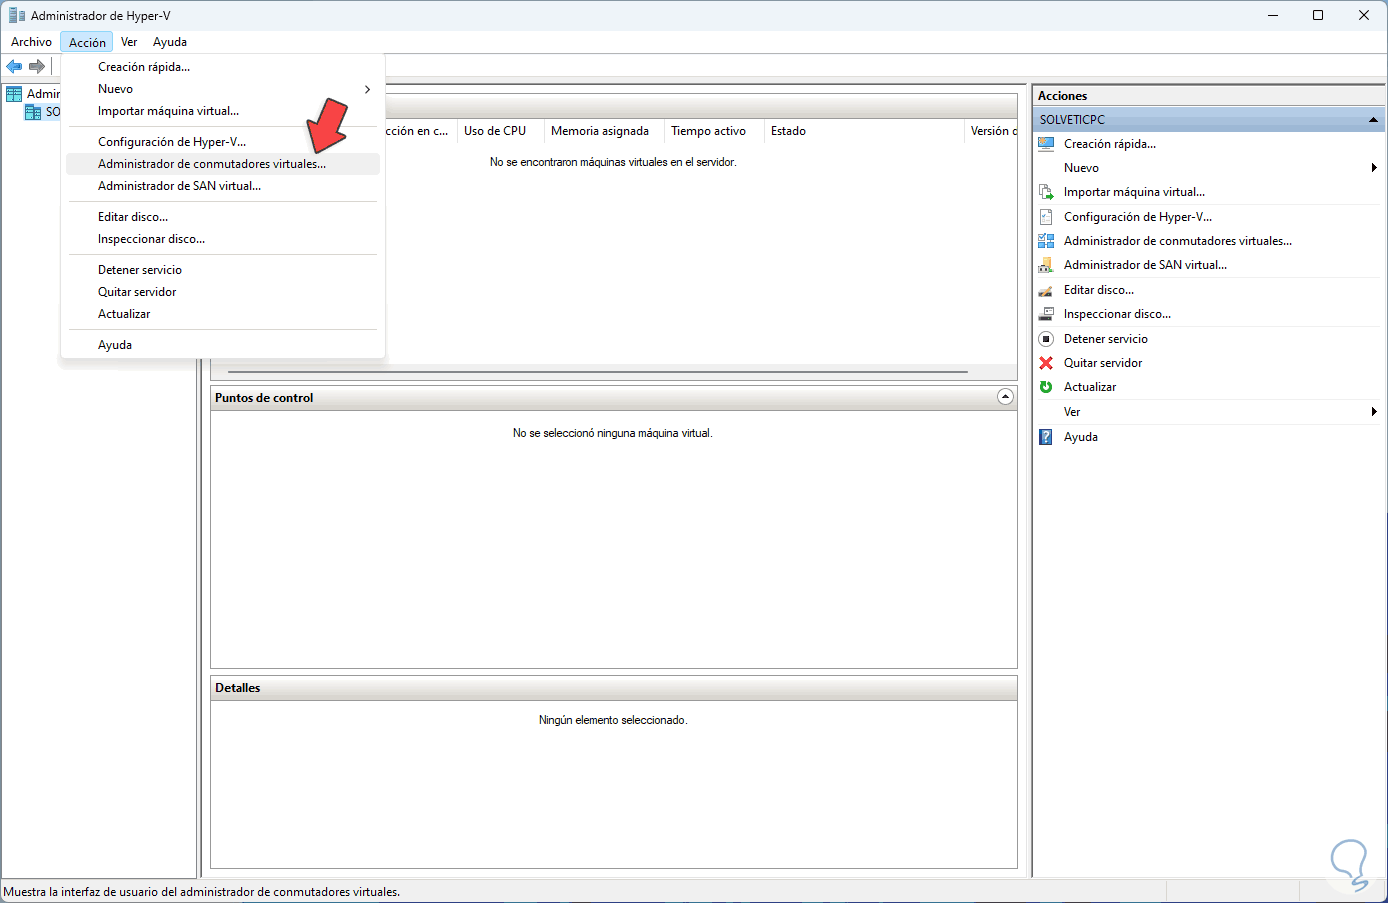
First of all, we are going to create the virtual switch so that the virtual machine can have access to the network through the physical equipment, for this we go to "Action - Virtual Switch Manager":
step 11
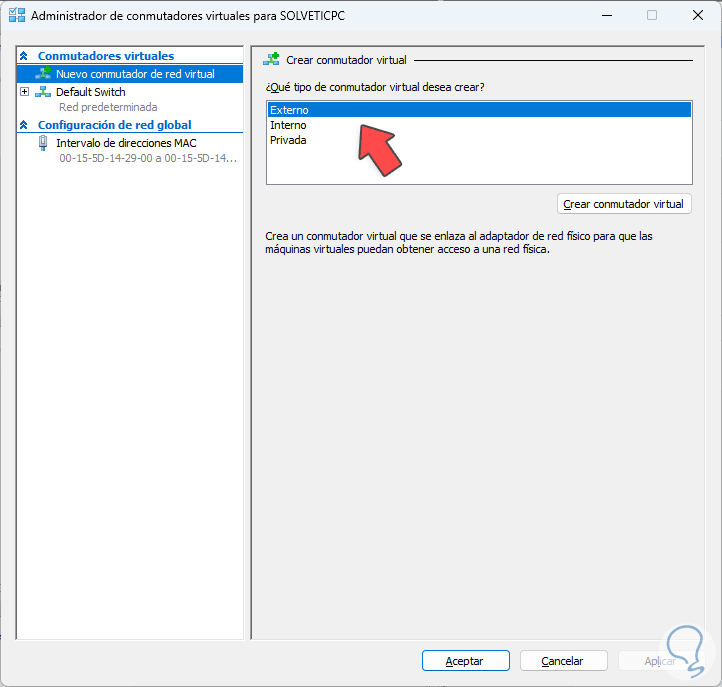
The following will open:
step 12
There it is possible to edit the default switch or create a new one, in this case in the section "What type of virtual switch do you want to create?" select "External" and then click on "Create virtual switch", the following will open:
step 13
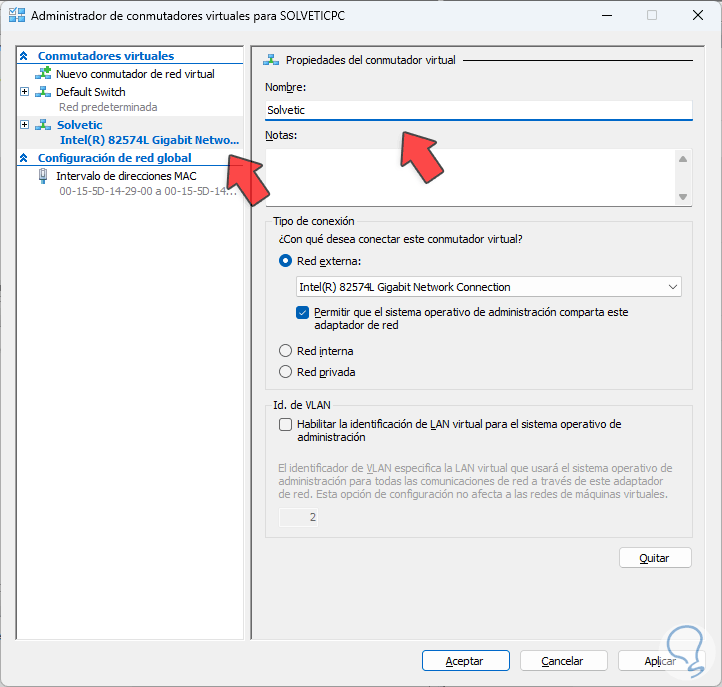
We assign a name to the switch, select the physical network adapter and apply the changes, the following will open:
step 14
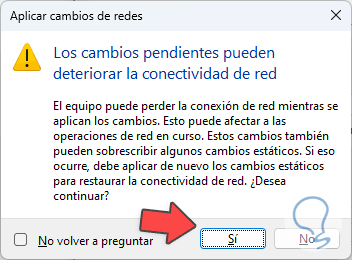
We click on "Yes" and wait for the process to be carried out:

step 15
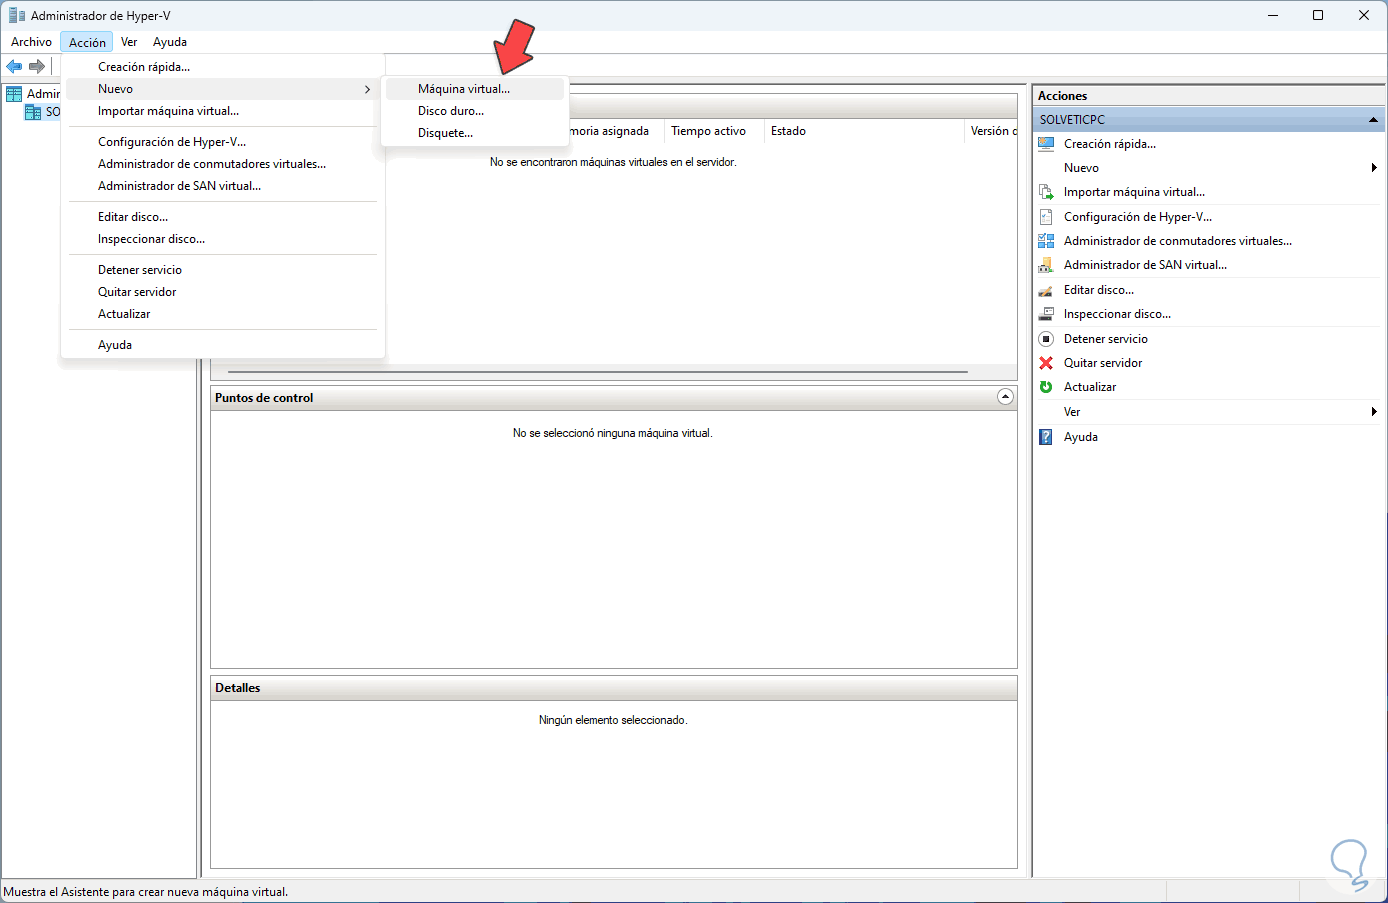
It is time to create our virtual machine, for this we go to "Action - New - Virtual machine":
step 16
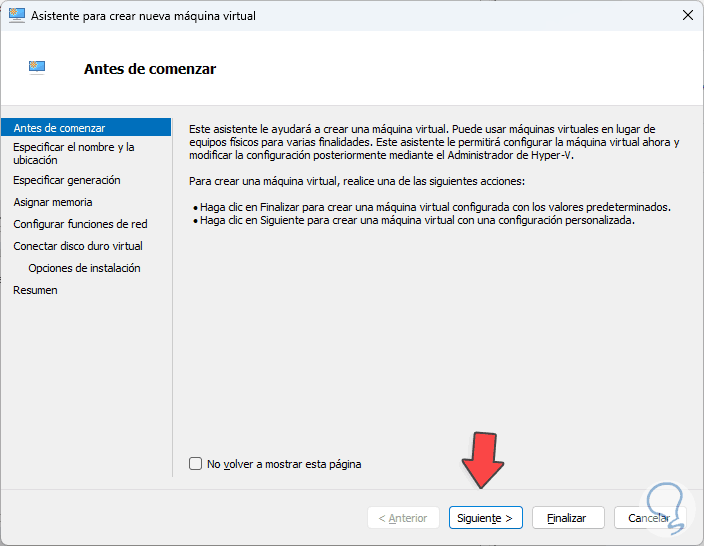
The following wizard will open:
step 17
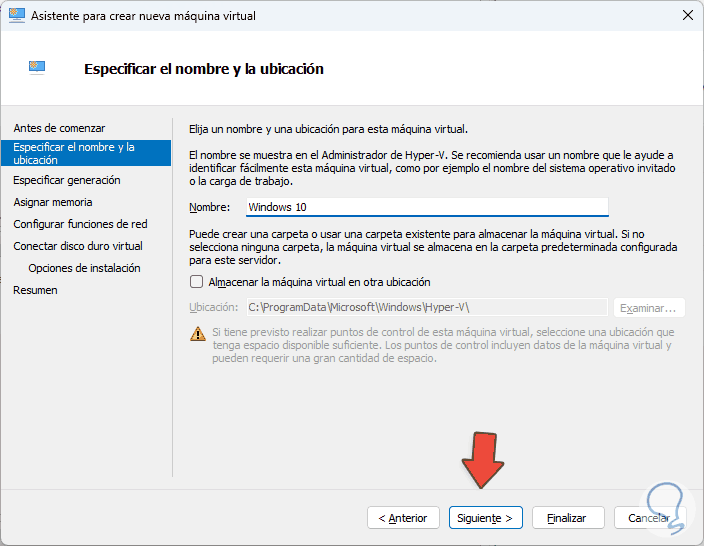
We click Next to enter the name and location of the virtual machine:
step 118
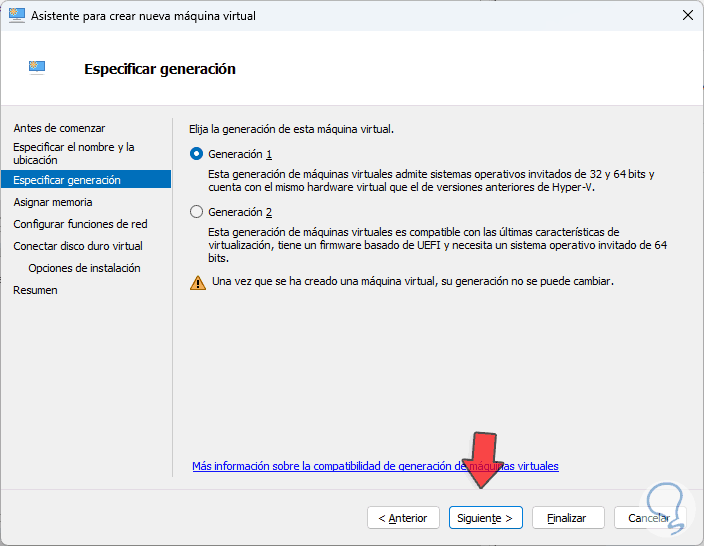
In the next window we select the generation to use, the options to use are:
- Generation 1: This allows the use of 32 and 64 bit machines compatible with virtual hardware of
- earlier versions of Hyper-V
- Generation 2: only supports 64-bit machines with UEFI
step 19
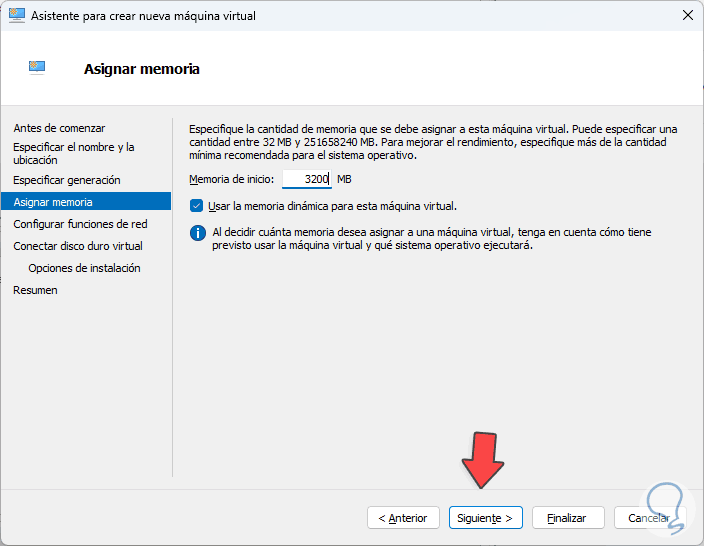
Once the generation is selected, we click Next to assign the RAM memory:
step 20
We activate the box "Use dynamic memory for this virtual machine" which takes RAM resources when the processes are slow.
step 21
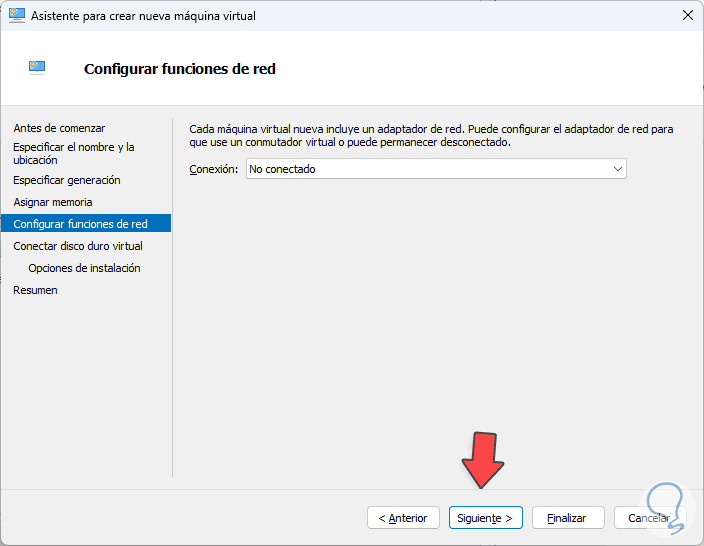
In the next window we select the network adapter:
step 22
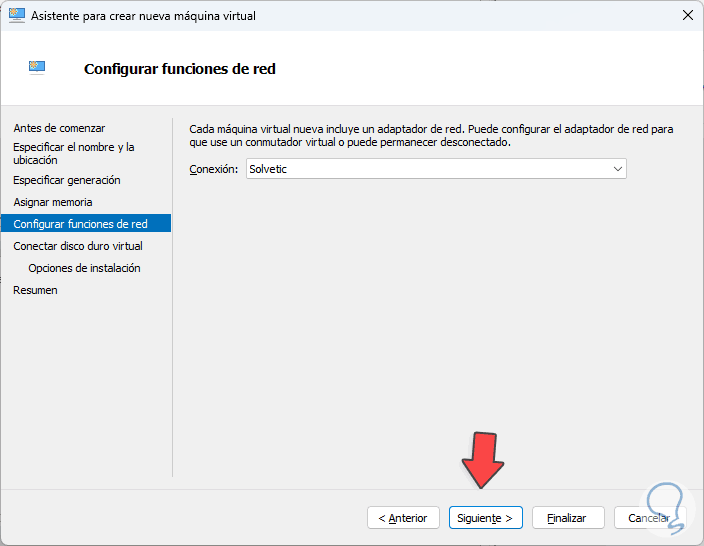
There we will use the switch created earlier:
step 23
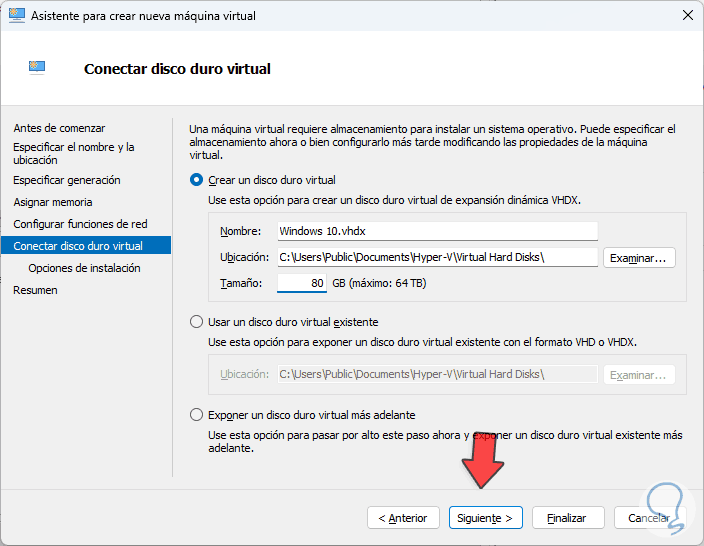
In the next window we assign the size of the virtual hard disk:
step 24
In the next window we will see the following:
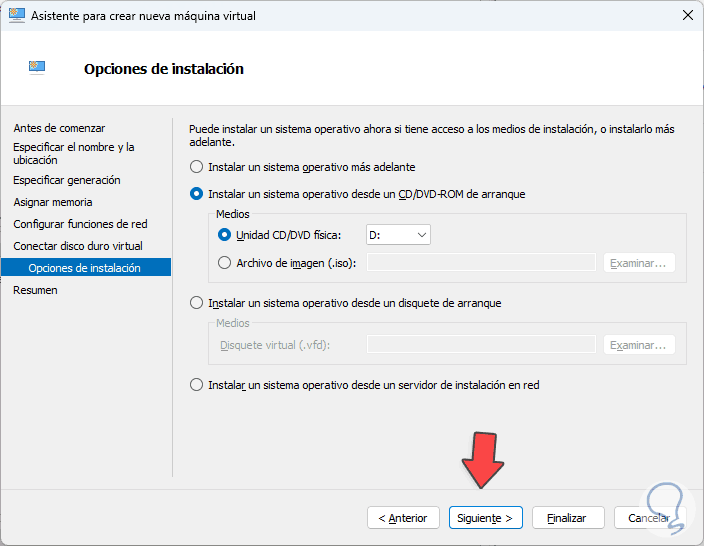
step 25
Check the box "Install an operating system from a bootable CD/DVD-ROM" and then check the box "Image file (.iso)", select the ISO for the machine:
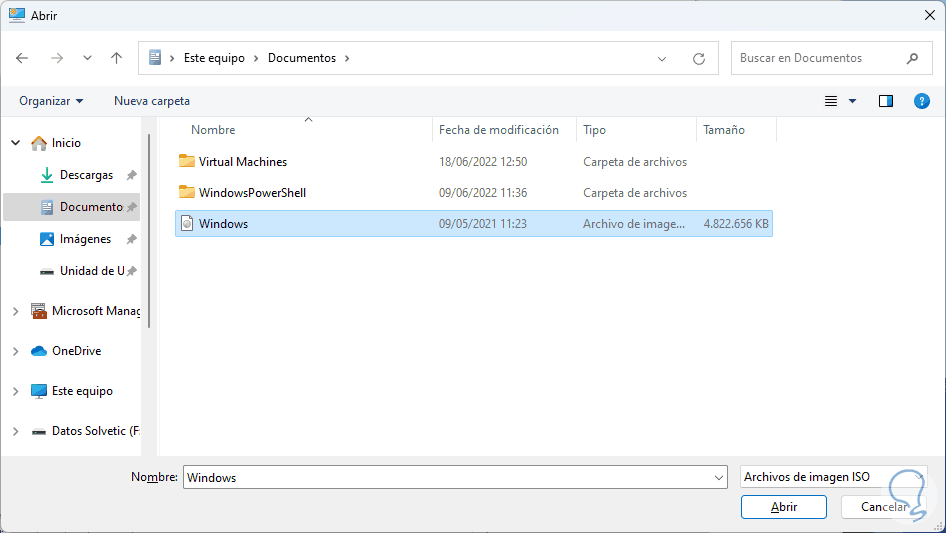
step 26
This will be added:
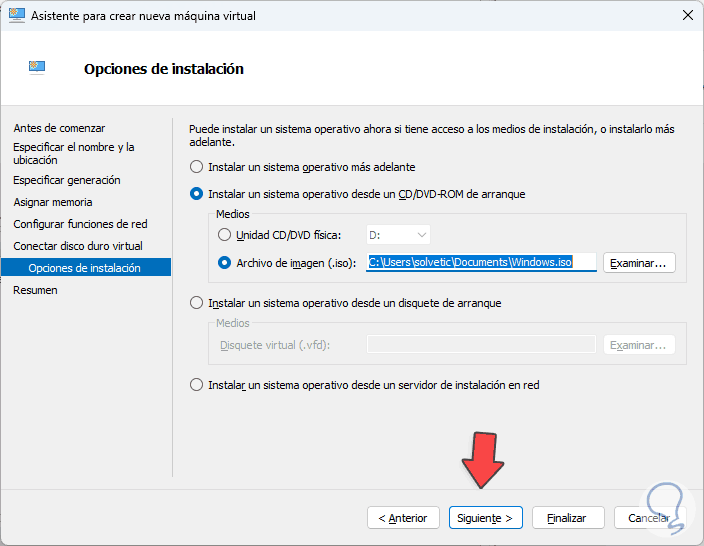
step 27
We click Next to see a summary of the virtual machine to create:
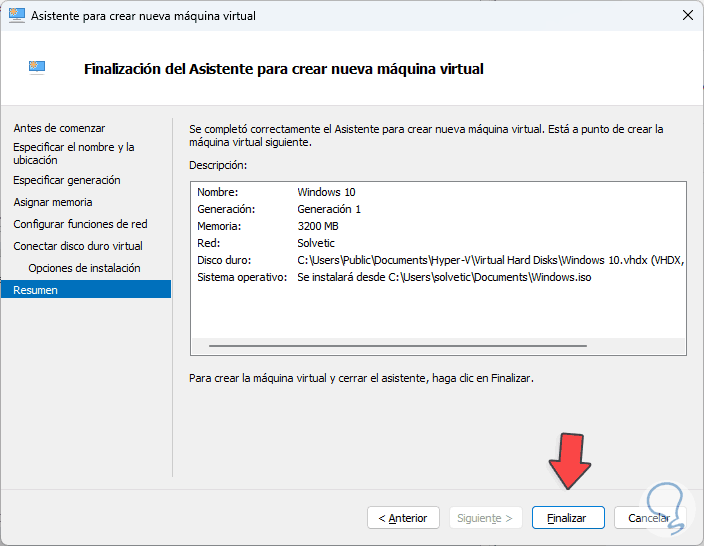
step 28
We click "Finish" to create the virtual machine:

step 29
We can see our virtual machine created in Hyper-V:
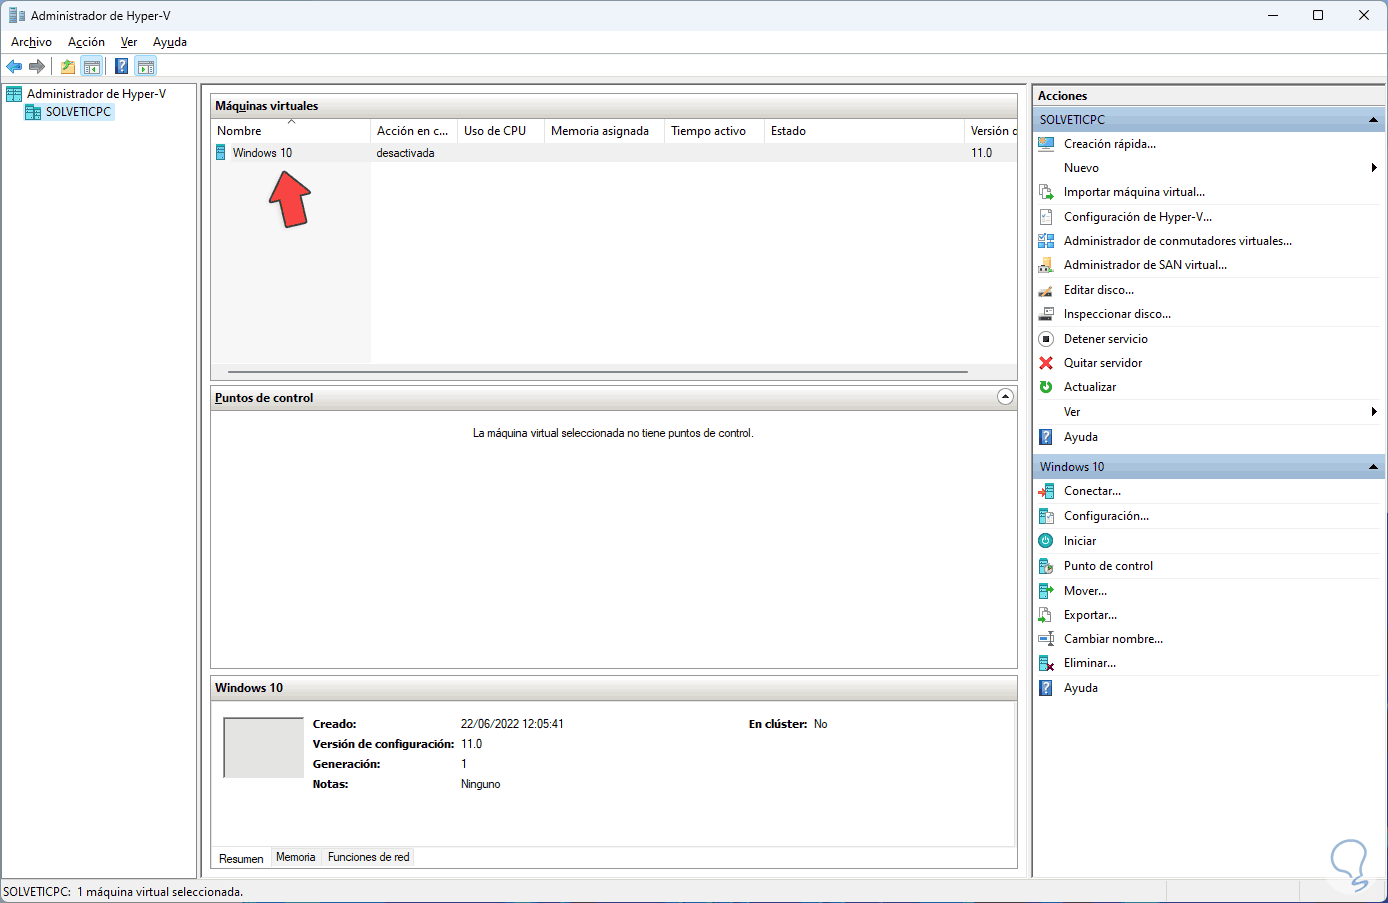
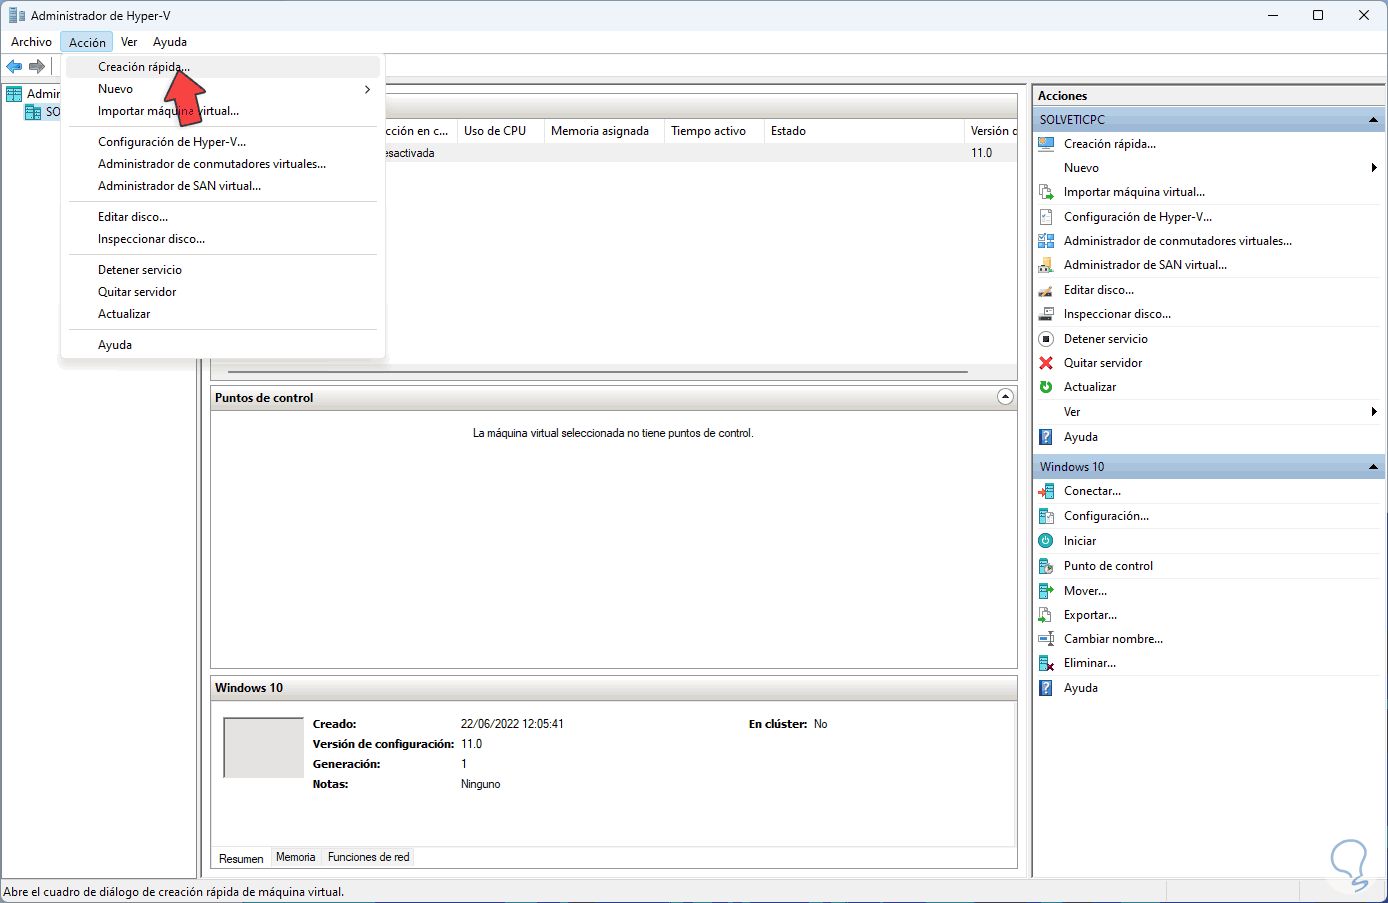
step 30
It is possible to go to "Action - Quick Create":
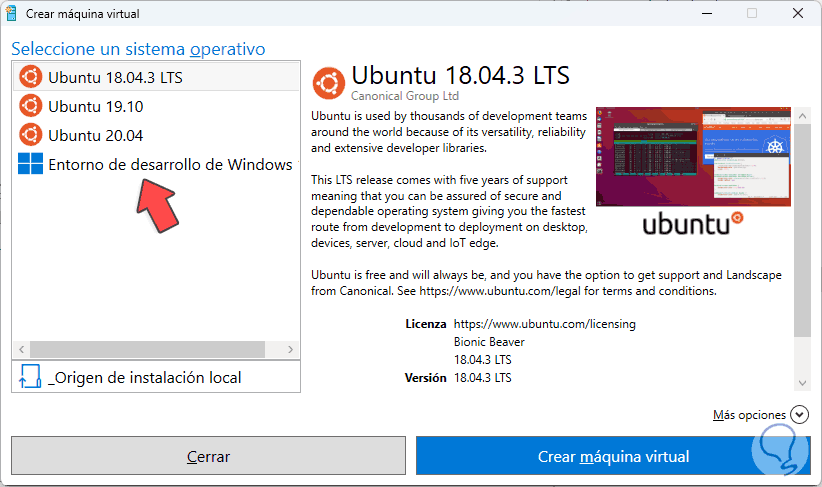
step 31
In the displayed window it is possible to select one of the established systems without the initial configuration seen previously:
step 32
We double click on the virtual machine created to see the following:
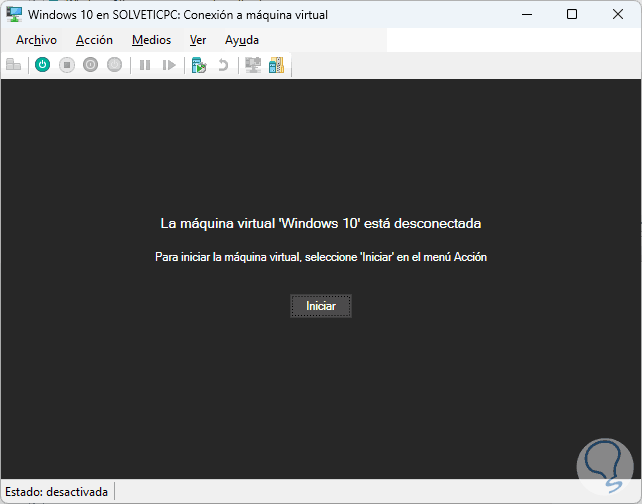
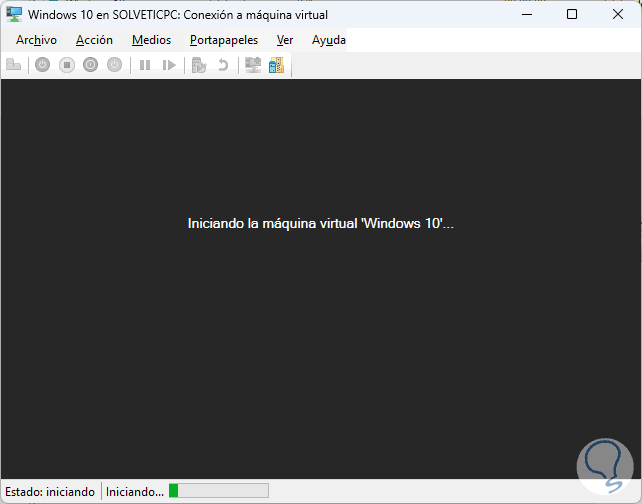
step 33
We click on "Start" to start the process:
step 34
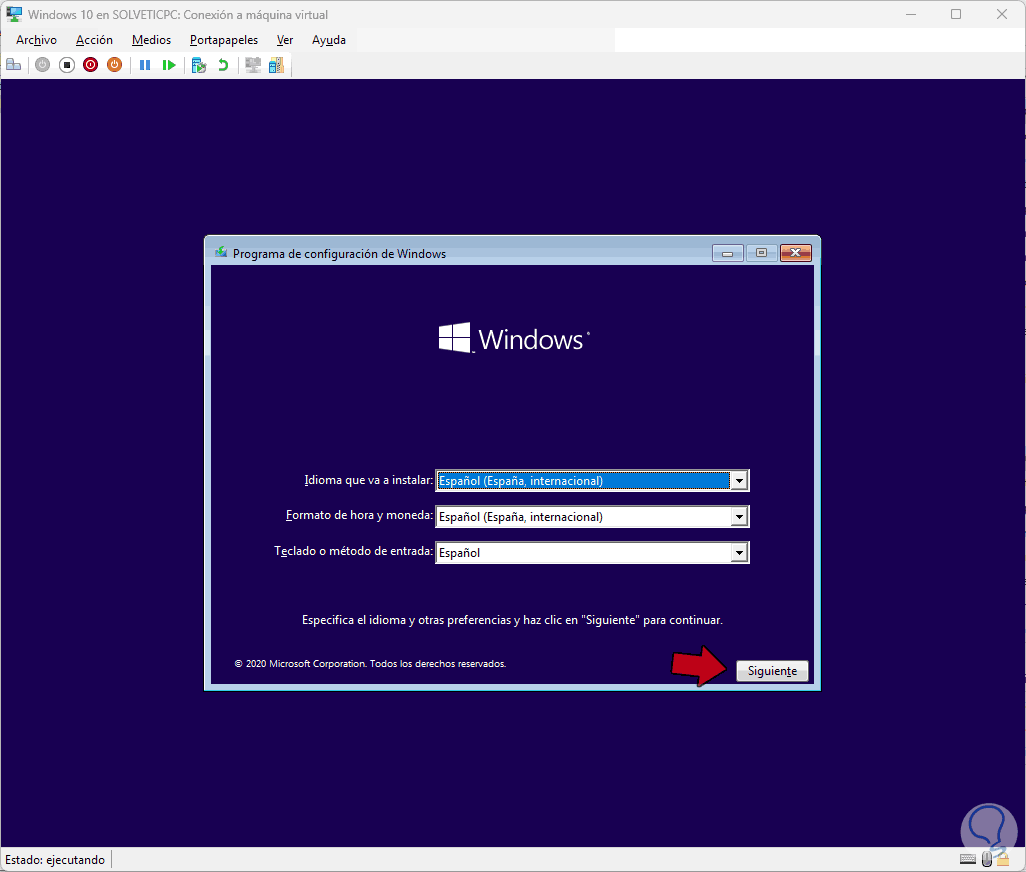
From here you can follow the installation steps:
step 35
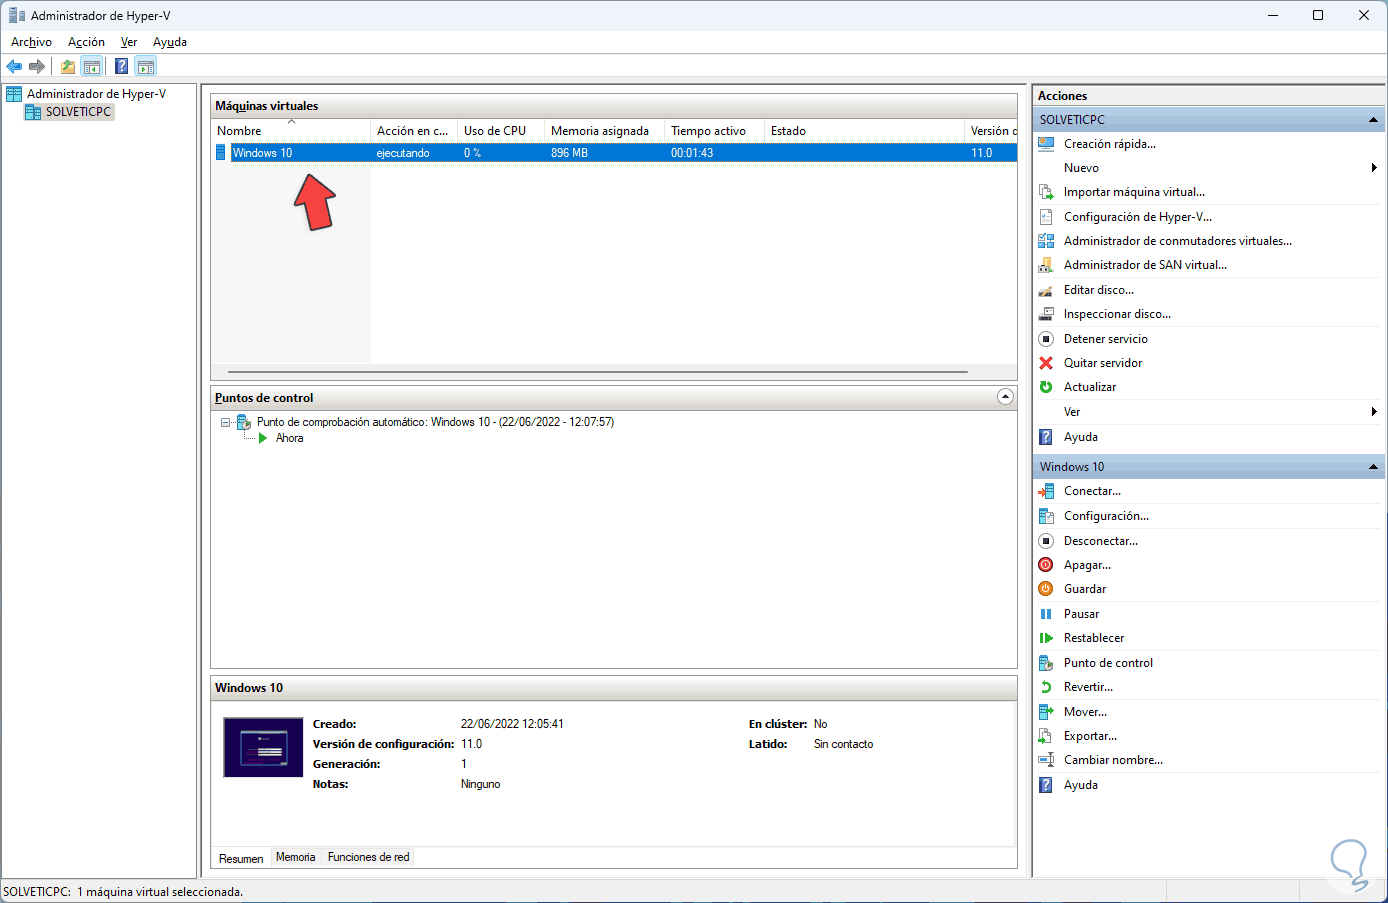
Hyper-V offers us some configuration options to manage virtual machines in the best possible way:
With Hyper-V it is possible to create various virtual machines and thus be able to discover new functions and processes without affecting a productive environment..