Windows 10 is constantly looking for new system updates whether cumulative, security or new editions that are available. For this, Windows 10 is responsible for downloading the necessary files for this task locally and then proceeds with the update, when it is a new edition of Windows 10, these files are the ones that allow us to return to a previous version if it is the case..
But one of the most common problems with this process is the size that they occupy in the system. These files can occupy different gigs of space on the disk, which many times turns out to be a space that can be used for other activities of the hard disk. It is for this reason that TechnoWikis will explain to you how to eliminate the system update history and thereby free up disk space and optimize Windows 10 actions.
We also leave you the video tutorial to delete the update history in Windows 10..
To stay up to date, remember to subscribe to our YouTube channel! SUBSCRIBE
1. How to delete update history in Windows 10
First, we must configure some aspects of the explorer to see the system files.
Step 1
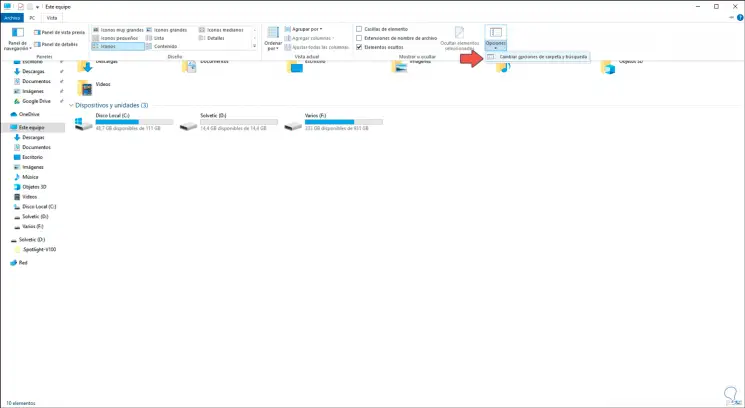
We access the Explorer and in the View menu we click on "Options - Change folder and search options":
Step 2
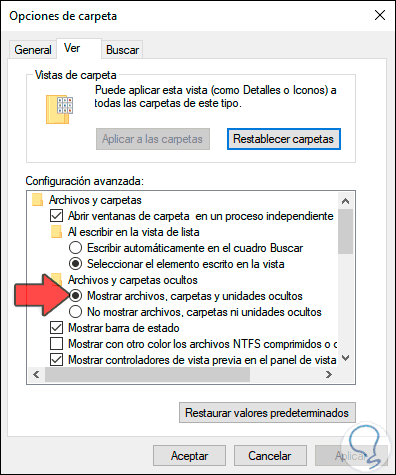
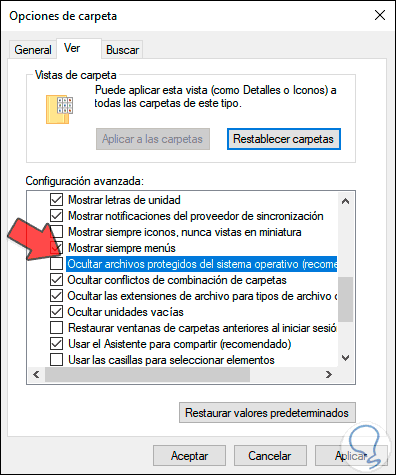
In the displayed pop-up window we define two parameters in the View tab, which are:
- Check the box "Show hidden files, folders and drives"
- Uncheck the box "Hide protected operating system files"
Step 3
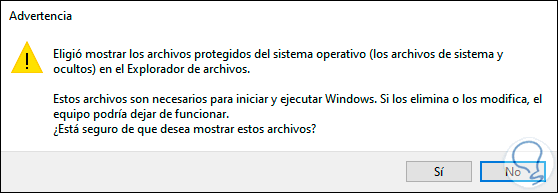
By clicking there we will see the following message:
Step 4
We click Yes to confirm. We click on Apply and OK to confirm the changes.
Step 5
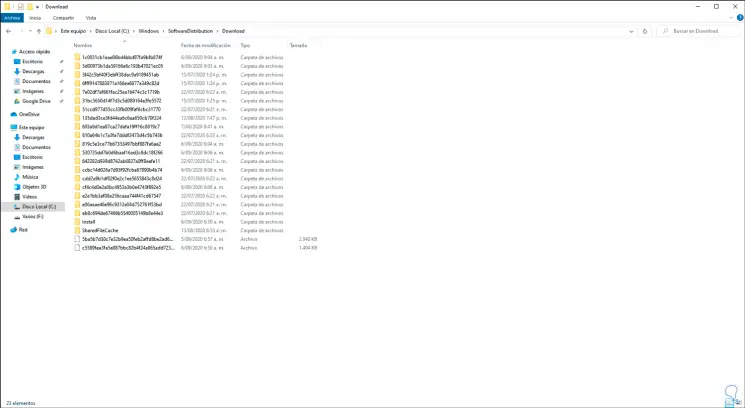
After this we will go to the following path in the explorer:
C: \ Windows \ SoftwareDistribution \ Download
Step 6
In this folder we find all the files associated with the operating system update downloads:
Step 7
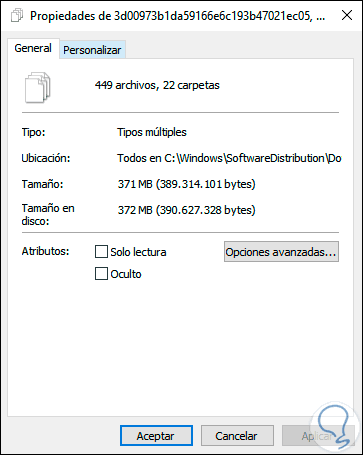
We can select all these files, right click - Properties to see their current weight on the disk:
Step 8
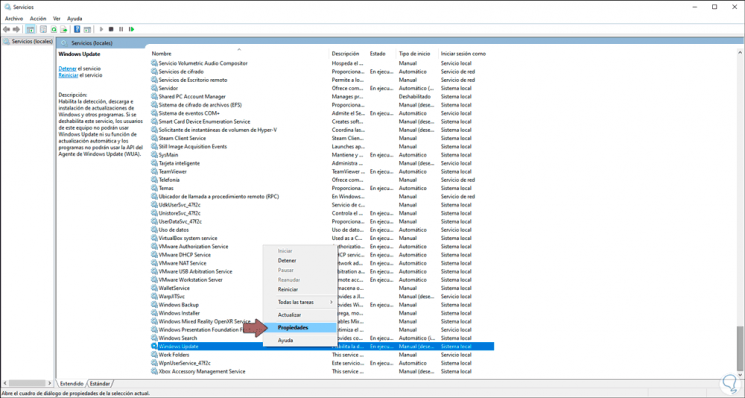
After this we must deactivate the Windows Update service since these files are still linked to this service in order to search, download and apply updates, we enter "services" in the search box of the Start menu and select the local services platform Windows 10. There we locate the service called "Windows Update", we right click on it and in the displayed list we select "Properties":
Step 9
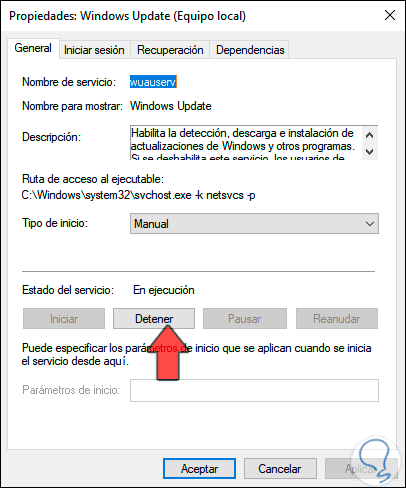
We will see the following window. We click on "Stop" so that the service is stopped and we can work on the files of the system update downloads.
Step 10
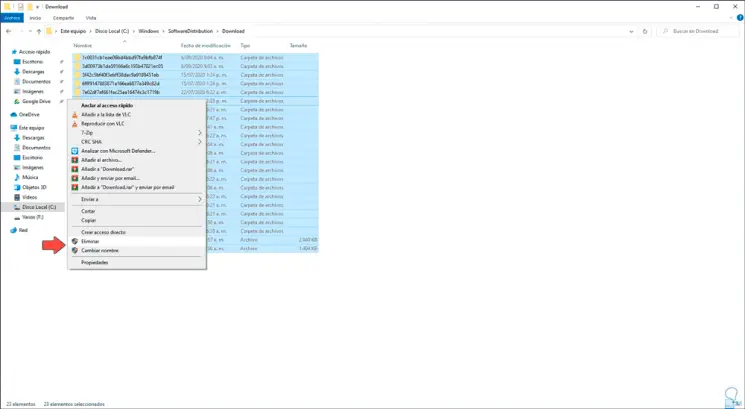
We go back to the Download folder, select all the files and choose "Delete":
Step 11
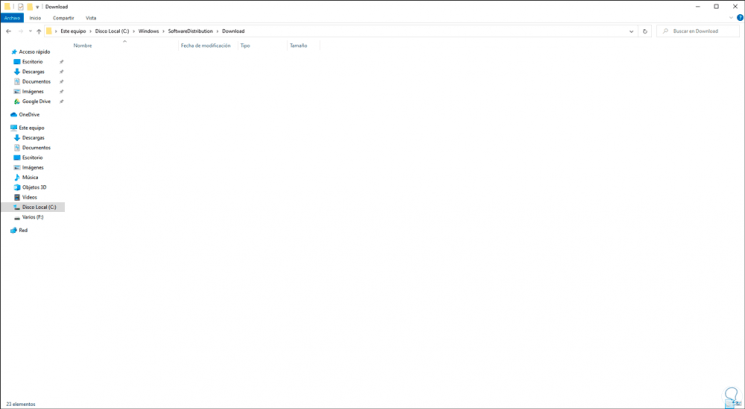
We can see that all the files will be removed correctly:
2. How to delete update history with Windows 10 Explorer
Step 1
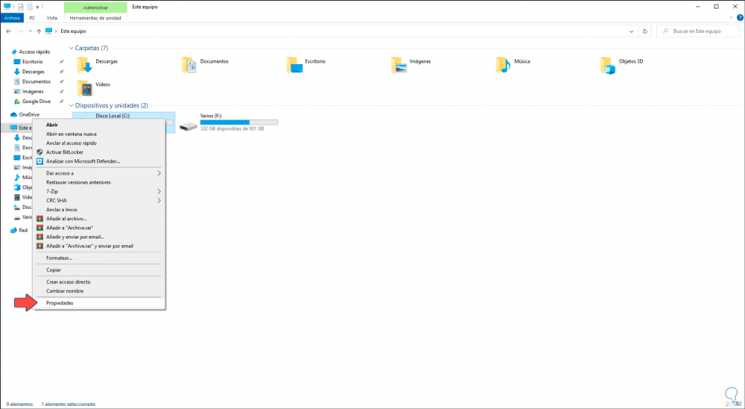
In addition to this, there is another method to delete system updates, for this we go to File Explorer and there we right-click on drive C and select "Properties":
Step 2
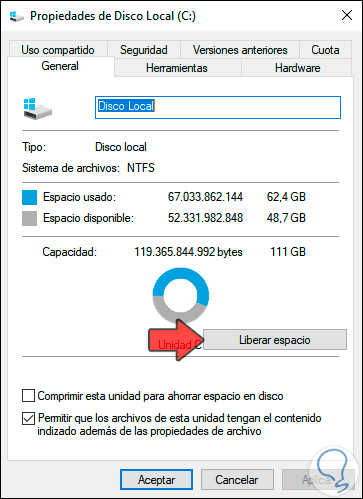
The following window will be displayed:
Step 3
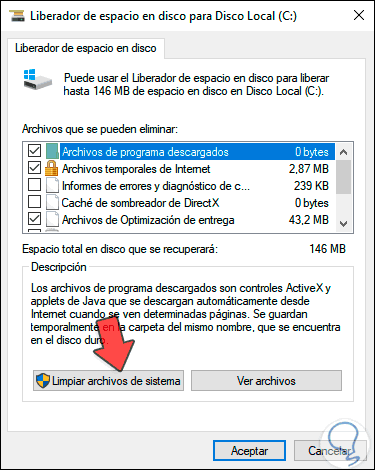
There we click on the "Free up space" button so that we have access to a series of options that take up space on the disk with their respective size:
Step 4
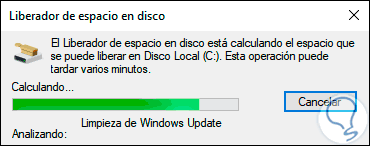
In this first analysis we did not find the update files, so we click on "Clean system files" and we can see that a more detailed analysis is carried out:
Step 5
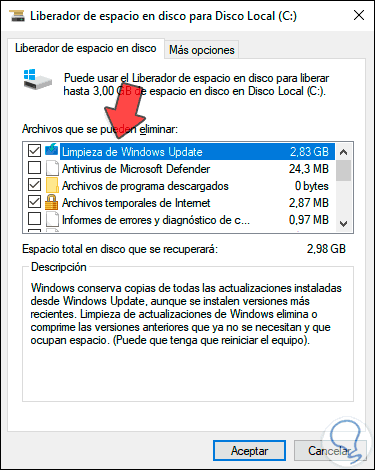
This gives us a more global look at Windows 10 updates in the line "Clean Windows Update":
Step 6
We can see that in this case there are 2.83 GB of disk space, we can select the desired boxes and confirm by clicking OK, we will see the following. We click on "Delete files" to proceed with the elimination of these files. After this it is advisable to reboot the system to complete the process.
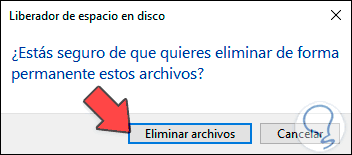
This is how you have learned how to delete the update history in Windows 10 and recover space on your hard drive.