The computer is one of our favorite devices when it comes to doing different tasks since thanks to it we have the possibility of managing a number of documents and information in a simple way. There is no doubt that by itself it is a very valid device, but the truth is that the internet connection makes the functions multiply practically to infinity..
Our Chromebook equipment is designed to be worked online through Google (Gmail) accounts, therefore, when using this mechanism, access to the Wi-Fi network is required for the account to be registered and all data to be synchronized between yes. But at times we may want to disable the Wi-Fi network to perform certain support, analysis or maintenance tasks.
The process to disable connectivity to the Wi-Fi network is really simple and TechnoWikis will explain it to you in detail..
To stay up to date, remember to subscribe to our YouTube channel! SUBSCRIBE
How to turn Wi-Fi on or off on Chromebook
Step 1
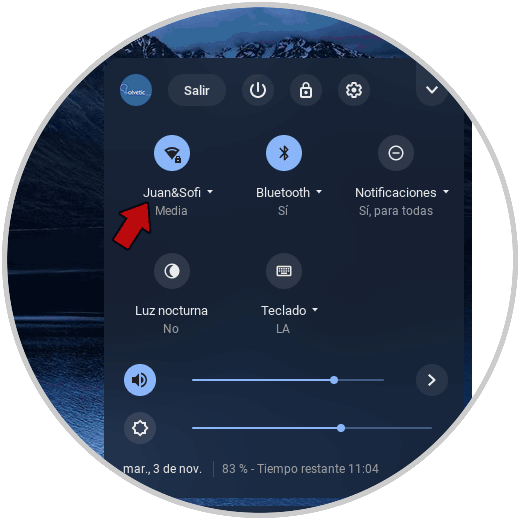
To start we click on "Start" in the Chromebook task bar, there we can see the active network and to which it is connected:

Step 2
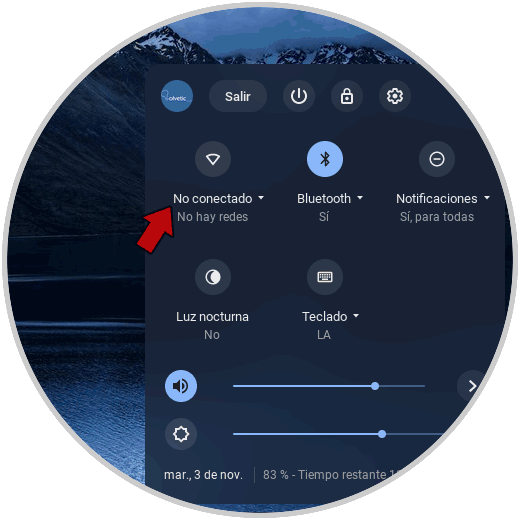
To deactivate it, we simply click on the Wi-Fi icon and its status will change to "Not connected":

Step 3
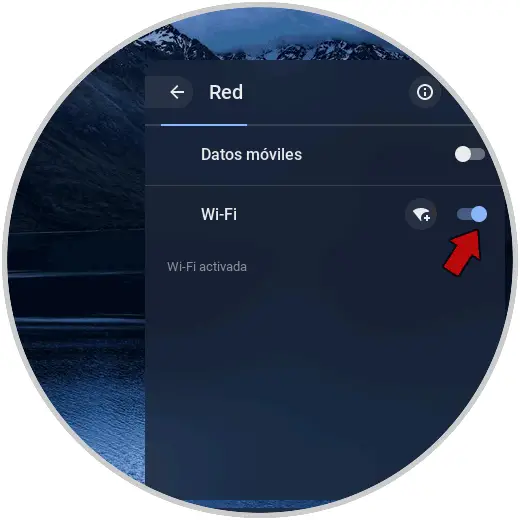
To activate it again, just click on this icon and two sections will be activated:
- Mobile data: allows us to connect through options such as mobile or others
- Wi-Fi: this option is ideal for stable work

Step 4
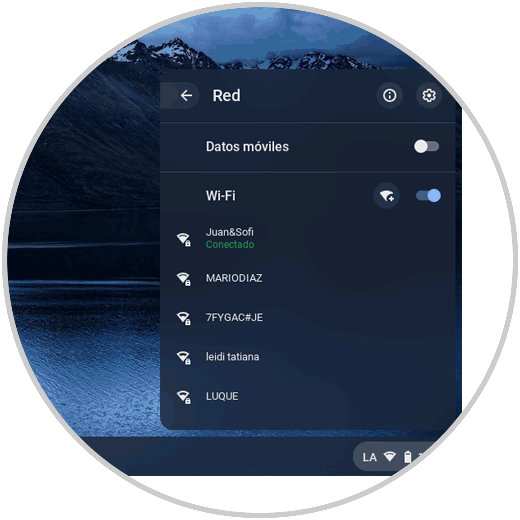
There the process of searching for nearby Wi-Fi networks in the area will start:

You will be able to connect to the detected WiFi networks as you see in the image. If you have already connected to one, and it is in range, by default it will connect to the network that you have as predefined and from this moment it is possible to access the network and all the services that involve the use of the Internet.
It's that simple to perform the process of enabling or disabling WiFi on Chromebook..