Internet connectivity will always be something vital and fundamental in every operating system because thanks to the network we can access our personal information, work platforms, entertainment and much more, hence we hear that today's world is an online world..
For optimal connectivity, network adapters are the part that plays a unique role since they are the providers of the connection between our equipment and the network, internal or external . We must always validate that these are active, but in some specific cases we can proceed with the disabling of these either by some administrative task, support, guarantee or more.
Through this tutorial, TechnoWikis will explain some practical ways we have to enable or disable our network adapter in Windows 10 and thus always have excellent connectivity or execute administrative tasks when necessary..
1. Disable the network adapter using the Windows 10 Control Panel
The classic Windows Control Panel is a central point for carrying out different administrative and support tasks in Windows 10.
Step 1
To disable our network adapter from there, we will go to the following route:
Step 2
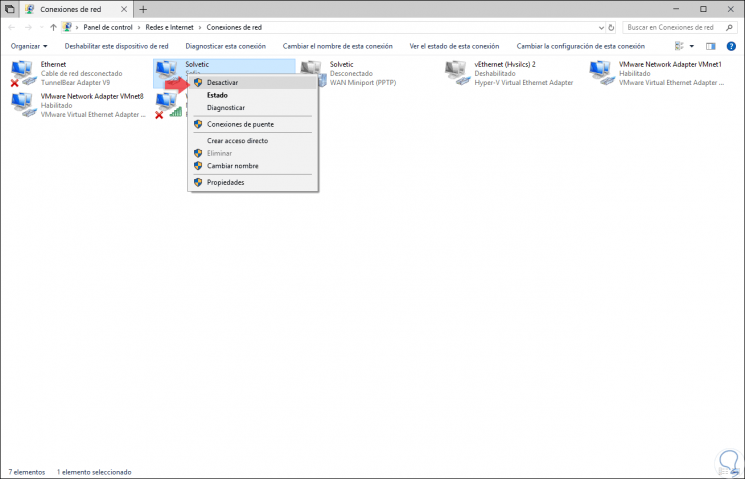
There we will right click on our active network adapter and select the option “Disableâ€:
Step 3
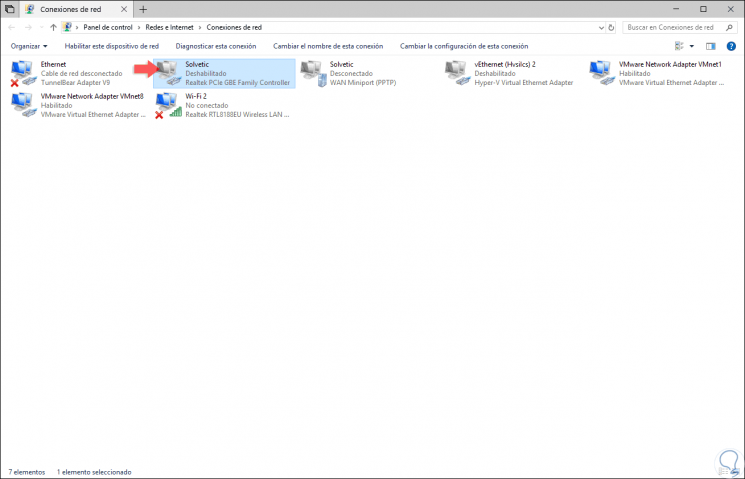
Once we click there we will see that the state of the adapter will be “Disabledâ€:
Step 4
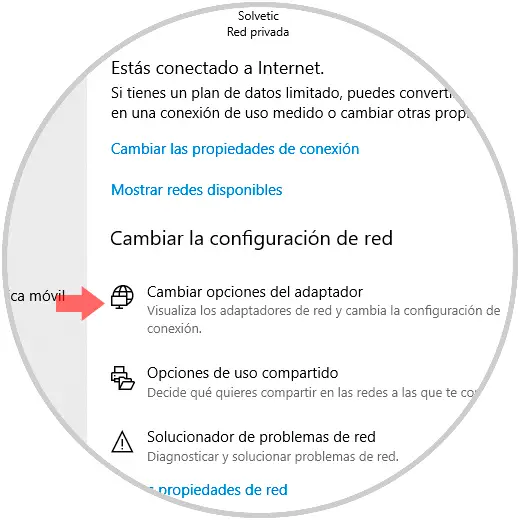
Another way to access this route is from the menu is the following route. There we select the option “Change adapter optionsâ€.
2. Enable the network adapter using the Windows 10 Control Panel
Step 1
To carry out this process we go back to the next route.
Step 2
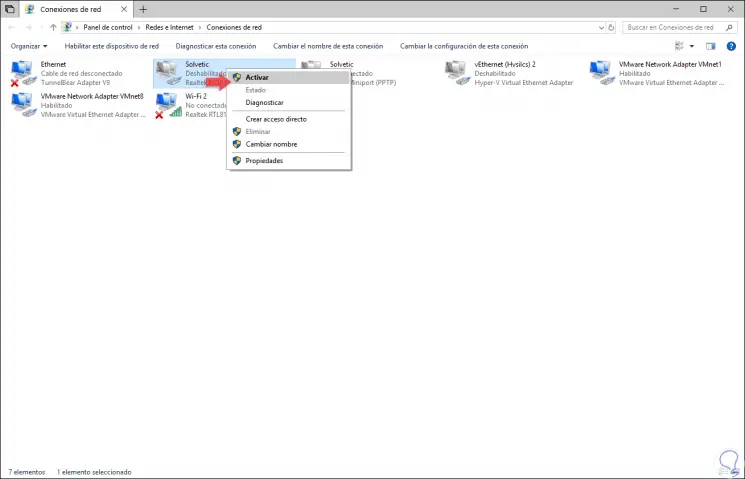
Ali we must right click on the adapter that is deactivated and select the option “Activateâ€. This way we can disable and enable the network adapter in Windows 10 using the control panel.
2. Disable the network adapter using Windows 10 Device Manager
The Windows 10 device manager is another central point for the management of all hardware items on the computer.
Step 1
To access the Device Manager we have the following options:
To keep up, remember to subscribe to our YouTube channel! SUBSCRIBE
Step 2
In the deployed administrator we go to the "Network adapters" section and there we will right click on the adapter to disable and select the "Disable device" option:
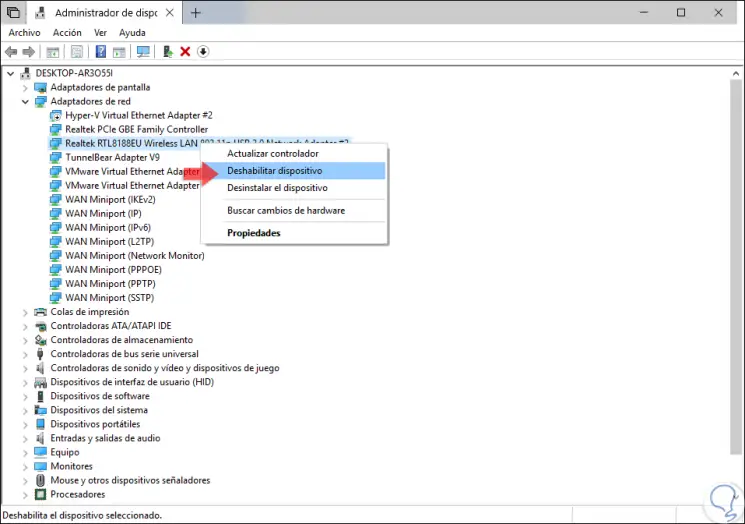
Step 3
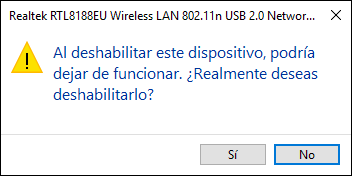
Clicking there will display the following message. Click on the Yes button to confirm the disabling of said device.
4. Enable the network adapter using Windows 10 Device Manager
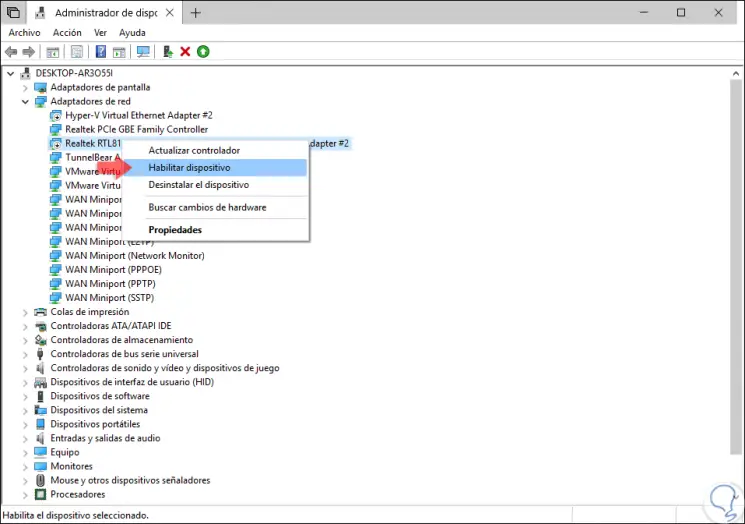
Now, to enable the adapter using this option, just right click on this device and select the option “Enable deviceâ€. This will automatically be enabled again.
5. Disable the network adapter using the Windows 10 Command Prompt
The CMD console is an ideal option to execute hundreds of tasks in command mode with precision and security.
Through the command prompt we can also enable or not enable the network adapter thanks to the "netsh" command.
Step 1
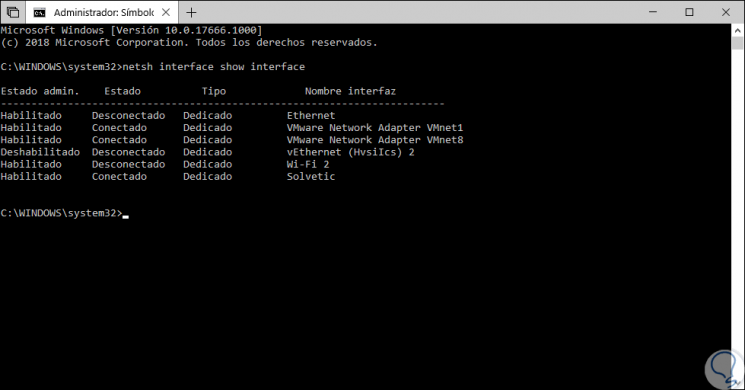
To execute these tasks we must access the command prompt as administrators by right clicking and selecting the option "Run as administrator". For this, we access the console and there we proceed to execute the following command:
netsh interface show interface
Step 2
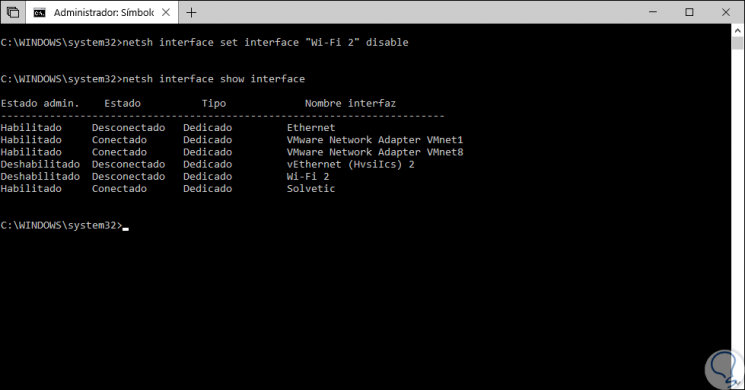
There we have the status and name of all current network interfaces. To proceed with the disabling of the adapter we will execute the following syntax:
netsh interface set interface "interface name" disable
Step 3
Later we can verify that the correct interface has been disabled using
netsh interface show interface
6. Enable the network adapter using the Windows 10 Command Prompt
Step 1
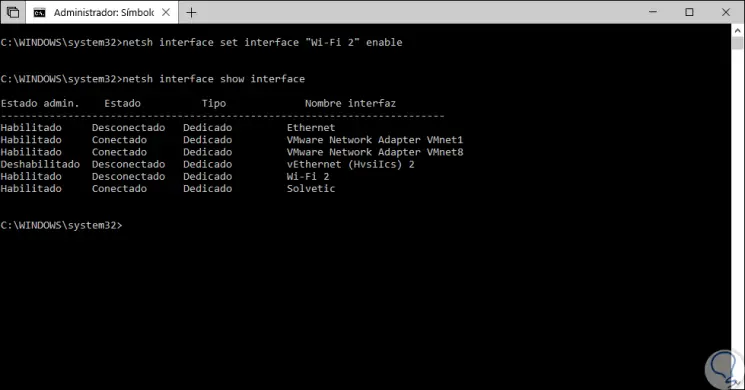
The process to enable it is simple, we access the command prompt again and once we have the interface name in mind we will execute the following syntax:
netsh interface set interface "interface name" enable
Step 2
We can verify that the correct interface has been disabled using:
netsh interface show interface:
7. Disable the network adapter using Windows PowerShell Windows 10
Windows PowerShell is the default management console in Windows 10 which, thanks to its cmdlets, allows us to fully manage the system and its components.
Step 1
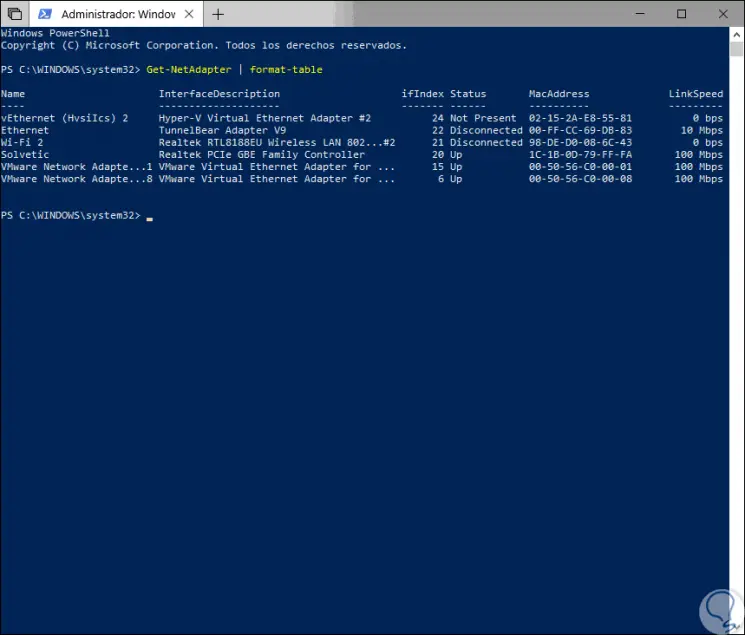
To do this, we access Windows PowerShell as administrators and execute the following:
Get-NetAdapter | format-table
Step 2
The result will be the name of the network adapters available on the computer:
Step 3
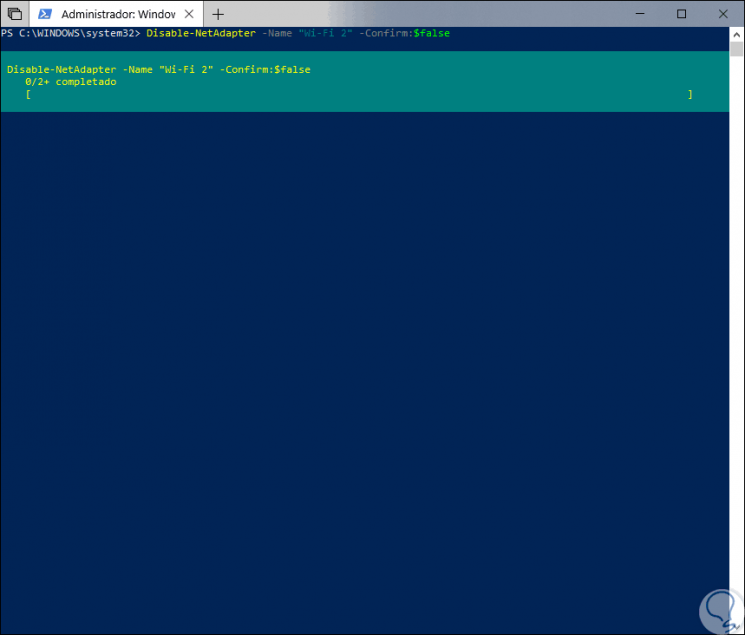
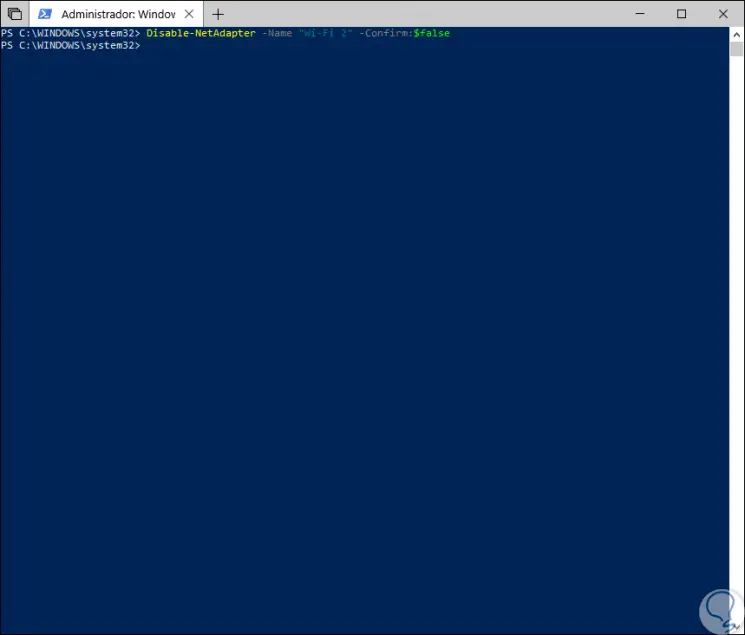
Now we are going to use the following syntax to disable the network adapter:
Disable-NetAdapter -Name "Adapter name" -Confirm: $ false
Step 4
The final result will be as follows:
8. Enable the network adapter using Windows PowerShell Windows 10
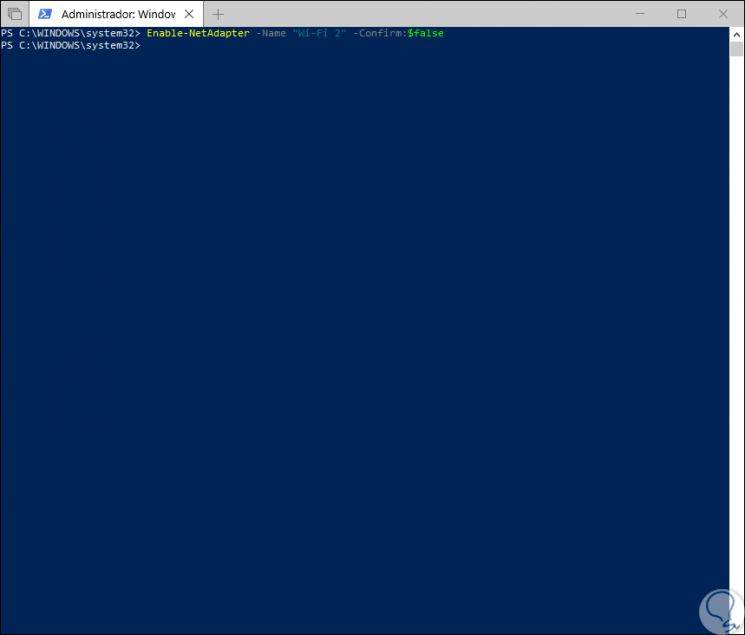
Now, to enable the network adapter we can use the “Get-NetAdapter | format-table â€to verify which one is disabled and then execute the following:
Enable-NetAdapter -Name "Adapter name" -Confirm: $ false
With any of the methods described we will have the possibility of administering in a simple way the network adapters in Windows 10.