It is no secret to anyone that one of the most vital elements in any operating system, type of user and equipment used is the network, since without it it will be impossible to access the Internet and enjoy its large amount of available information .
Currently wireless networks, or Wi-Fi , are taking an impressive boom due to the massive manufacture of mobile devices but a network that will always continue to exist is Ethernet, the famous wired network that we use in our homes or offices, and we say it will continue existing for simple reasons, some are:
- They are more secure and stable than the wireless network
- They allow to connect large networks
- They are ideal for connecting critical servers or equipment
- Its management is simpler.
We have a lot to say about Ethernet networks and their evolution, but today TechnoWikis will focus on an essential issue which, when it happens, puts the entire IT department to work for its immediate solution and is to correct Ethernet connection errors, and it doesn't matter if we are users of home or an organization, those tips are for everyone and will be essential when solving any network problem ..
Basic verification
Before going into details or calling technical support we will verify the following:
- Check that the network cable is correctly connected to both the modem and the network card
- Verify that the modem is on
- See if the UTPO network cable is not broken at some point or that the RJ-45 connectors do not present any fault that prevents their normal connection.
- We can turn off or disconnect the modem for a period of 30 seconds and then connect it again so that all its services charge again.
This is essential before going into detail with the other options.
1. Generate a WLAN report in Windows 10, 8, 7
The next alternative, if we use a Wi-Fi network next to the Ethernet, is to generate a wireless network report, with this report it will be possible to diagnose the problem or give guidelines on the causes of this.
Step 1
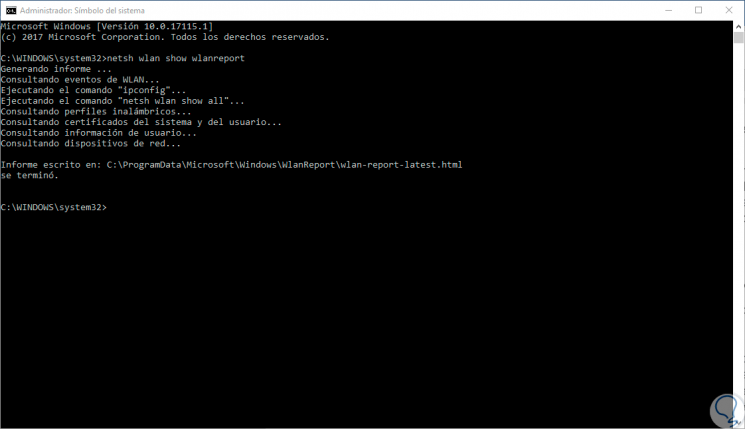
To do this, we will access the command prompt as administrators and there we execute the following:
netsh wlan show wlanreport
Step 2
Then, we can go to the path indicated there and open the HTML file for its respective analysis:
2. Check the ISP service in Windows 10, 8, 7
The ISP (Internet Service Provider) is the company in charge of providing us with the Internet service and the root of the problem may be there.
Step 1
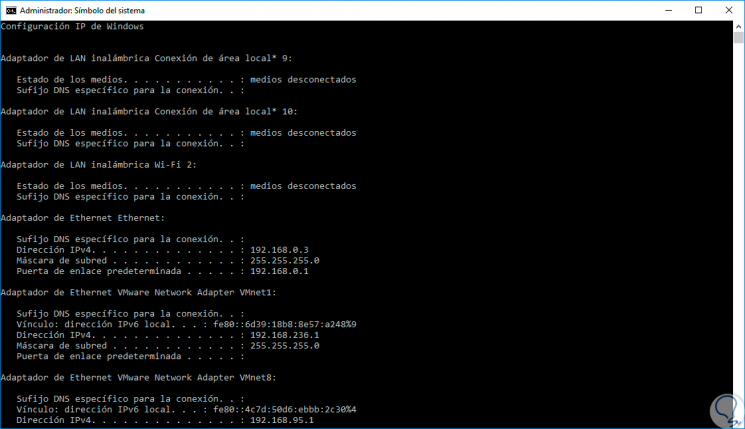
To verify this, first of all, we must execute the “ipconfig†command in the terminal and look at the address of the “Default gateway†line:
Step 2
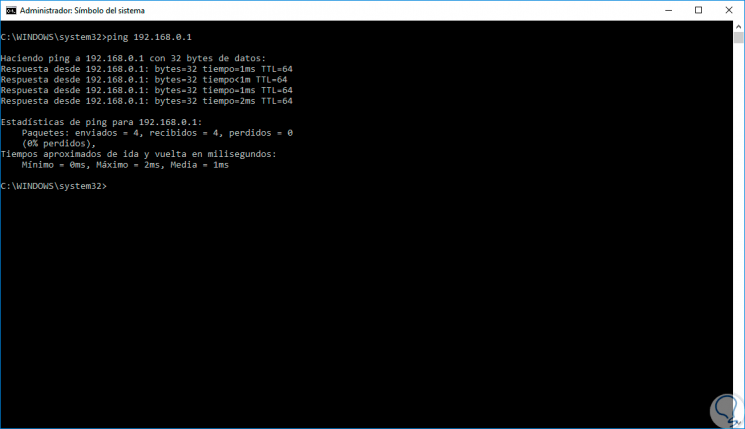
In this case it is 192.168.0.1, then, we will ping this address to check the status of ISP. If we get a response from the ping command everything is normal, if not, we can contact the ISP to correct the problem.
ping 192.168.0.1
3. Check the network drivers in Windows 10, 8, 7
Step 1
For this, we must access the Device Manager using one of the following options:
Device administrator
Step 2
In the window that appears, we will go to the “Network adapters†section and right click on our network adapter and select “Propertiesâ€:
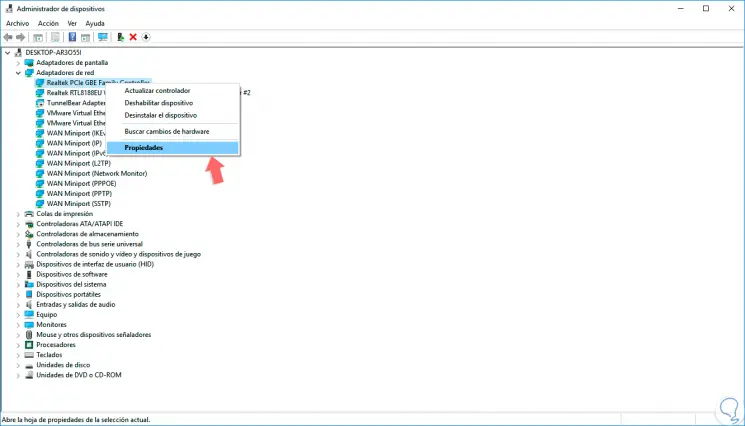
Step 3
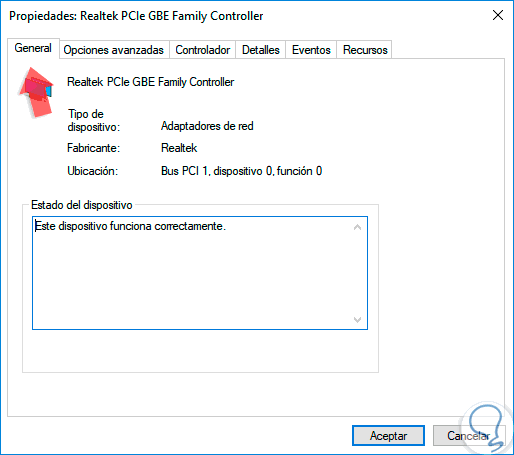
In the window displayed, in the "General" tab we can see the current state of the controller:
Step 4
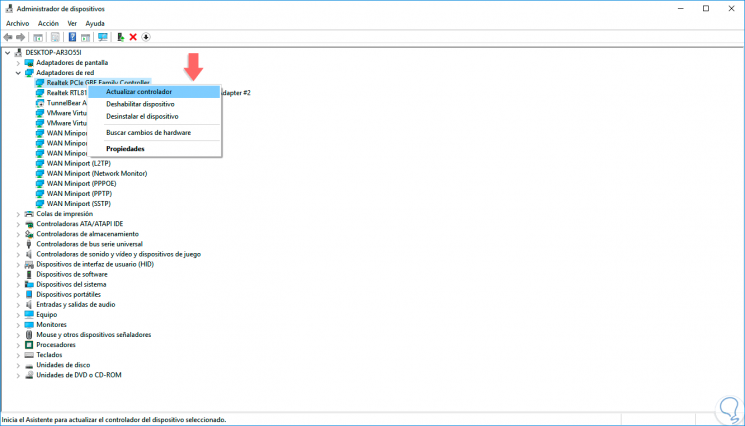
In case it is failing we can reinstall or update the driver again and for this we will right click on it and select the following:
Update Driver
It allows us to update the driver locally or automatically.
Uninstall the device
Remove the system driver and on the next reboot automatically Windows will load the correct version of it.
4. Verify the details of the network connection in Windows 10, 8, 7
Step 1
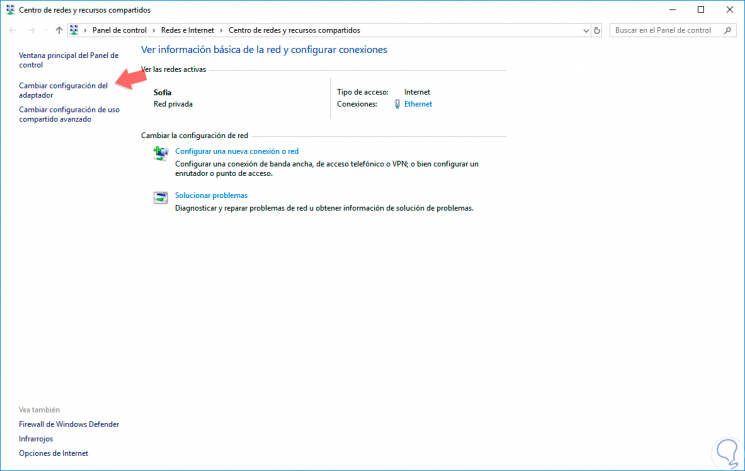
The next point is to verify the status of the Ethernet connection in Windows, for this, we will go to the following route:
- Center network and sharing
Step 2
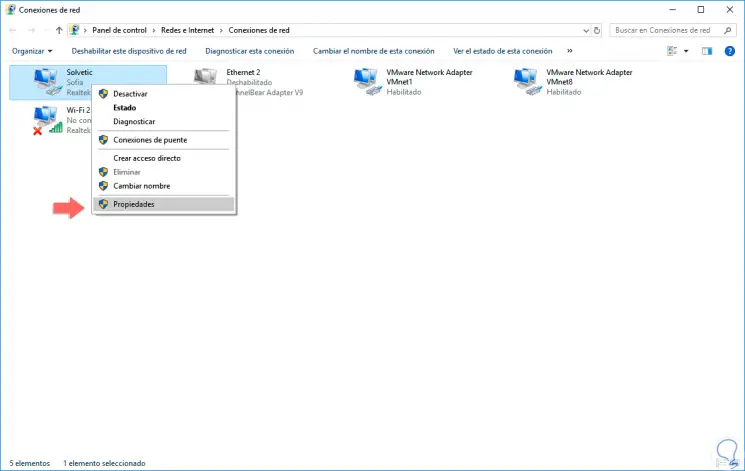
There we click on the "Change adapter settings" option on the left side and then right click on our network adapter and select the "Properties" option:
Step 3
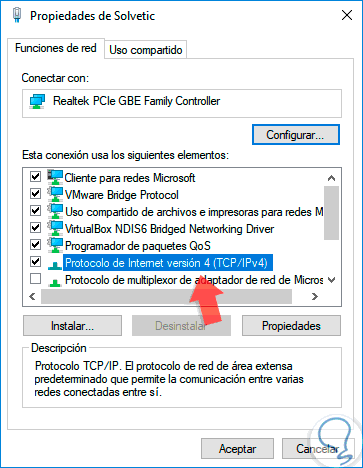
In the displayed window we will go to the "Internet Protocol version 4" line and click on the "Properties" button:
Step 4
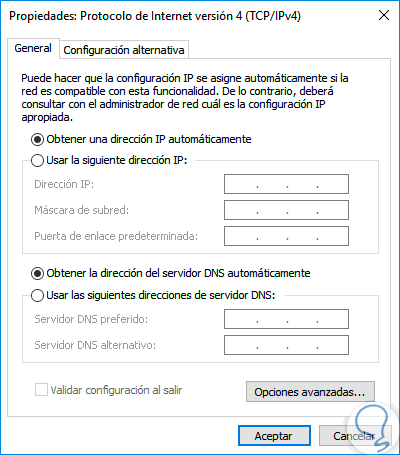
As a general rule, when we use an ISP, the IP address must be obtained automatically.
In some specific cases, especially in DNS failures, we can manually enter the IP address in the respective fields.
5. Use the troubleshooter in Windows 10, 8, 7
Windows 10 includes a utility called "Troubleshoot" which is responsible for automatically analyzing the problems of a defined parameter and give its solution or provide alternatives for correction..
- To access this functionality, we will go to the following route:
Step 2
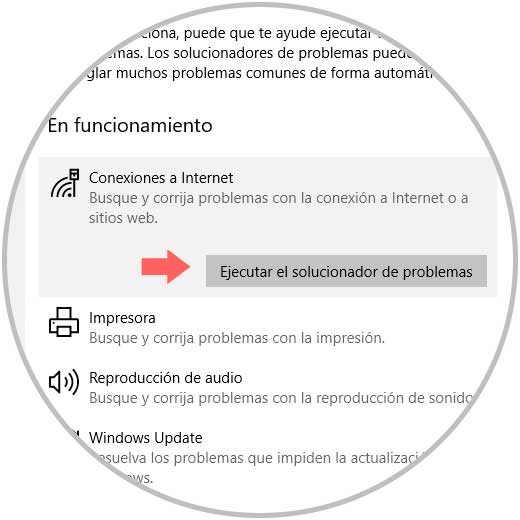
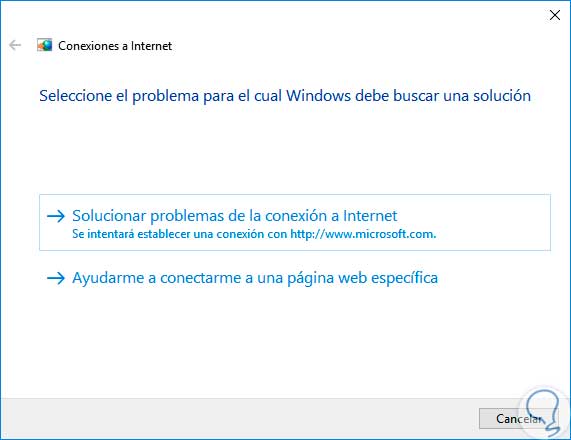
There, we click on “Internet Connections†and we will automatically see the “Run the troubleshooter†button:
Step 3
There the process of analysis of part of the tool will begin. Once finished we will have a complete result on the state of the network and its solutions.
6. Scan malware or virus in Windows 10, 8, 7
In certain cases, the problem of Internet connection is due to the presence of some kind of threat such as virus or malware in the system which directly affects the exit of the packets to the Internet network.
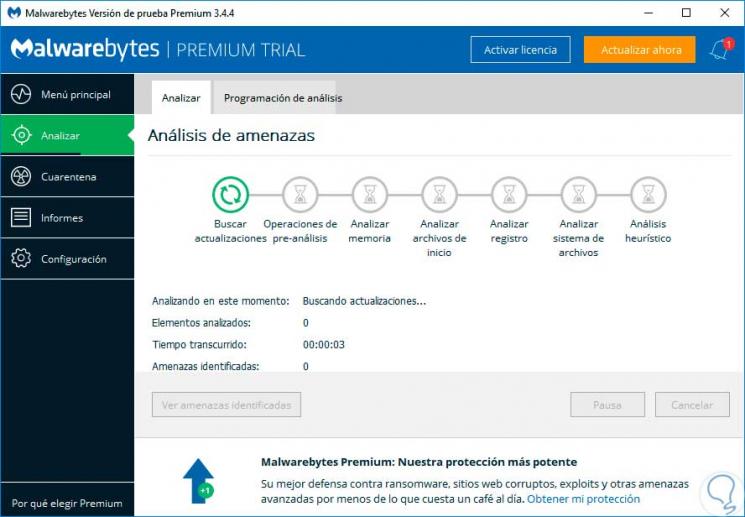
To analyze this, we can use our antivirus software or use free applications such as Malwarebytes and run a full scan of the computer to detect any anomaly and proceed with its correction:
7. Use a previous driver in Windows 10, 8, 7
Another cause of errors in Ethernet is associated with the controller and specifically when an update is made of it, for some reason, when a developer releases a new version of its product, the driver update is included, but this may create an inconsistency with the system thus generating the connection error.
Step 1
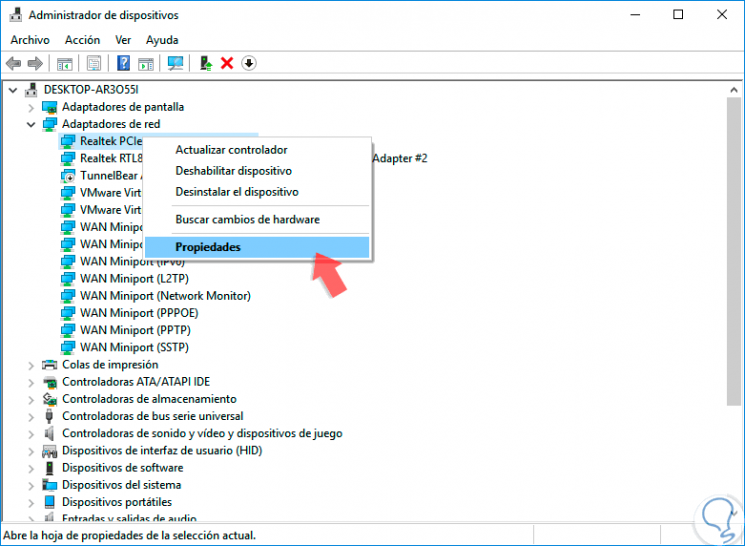
To solve this, we must return to an earlier version of the driver and for this, we will go back to the device manager and right click on the network adapter and select “Propertiesâ€:
Step 2
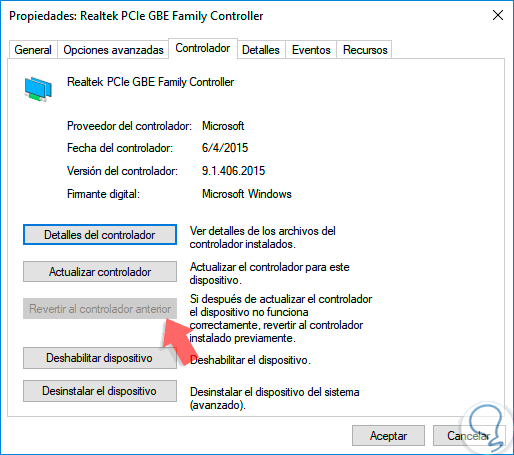
In the new window we will go to the “Controller†tab and there, click on “Revert to the previous controller†if it is active. Click on OK to save the changes.
8. Reset the Ethernet network in Windows 10, 8, 7
Step 1
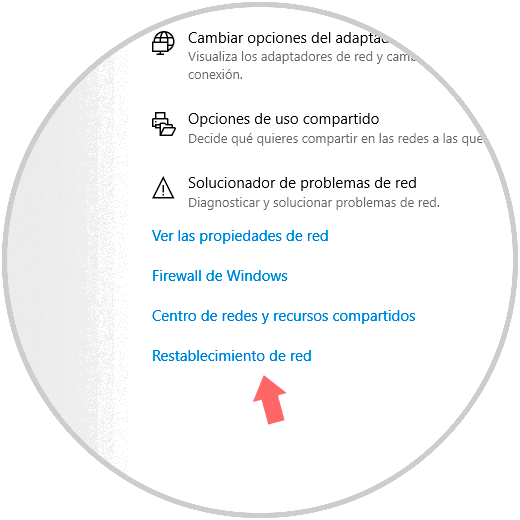
The next solution, in case none of the above does not help us solve this problem, is to restore the local network to its factory settings, for this we go to the "Start / Settings / Network and Internet" menu and there we go to the "Status" section:
Step 2
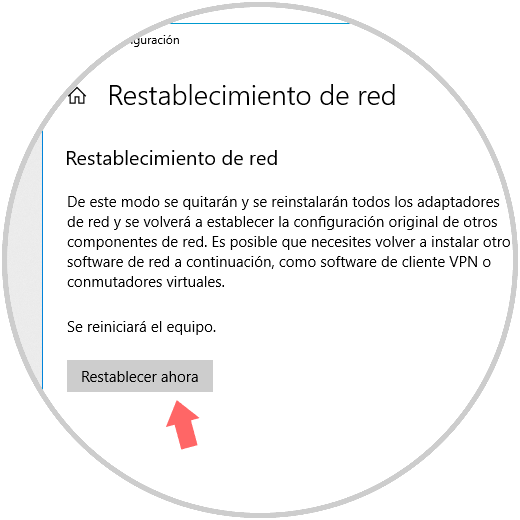
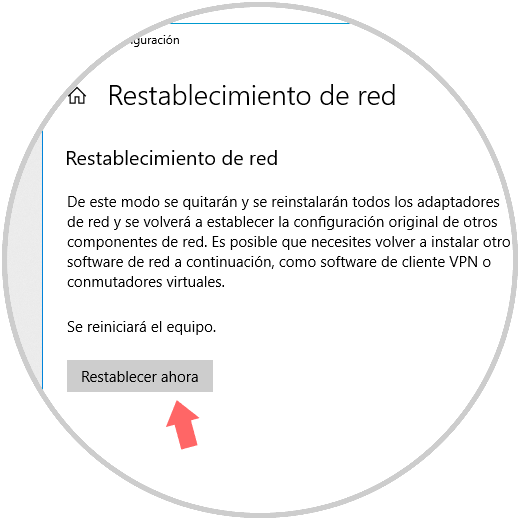
At the bottom we click on the “Network reset†button and the following will be displayed. To complete the process click on the "Reset now" button.
9. Modify network settings in Windows 10, 8, 7
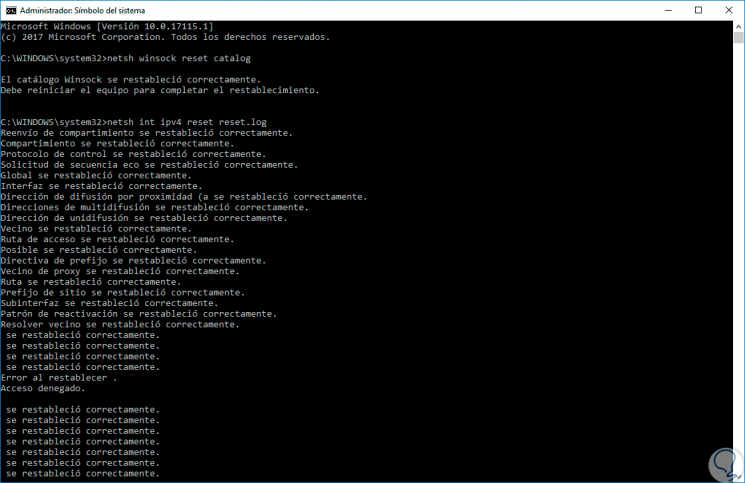
Another alternative to use is to modify the default parameters of the Ethernet and thus check the connection, for this, we go to the command prompt as administrators and execute the following commands:
netsh winsock reset catalog (Reset the network catalog) netsh int ipv4 reset reset.log (Reset the IPv4 network catalog) ipconfig / renew (Renew the IP address)
10. Temporarily disable Firewall in Windows 10, 8, 7
The function of the Firewall is to analyze in detail the incoming and outgoing network packets seeking to optimize the security of the system, but in some cases its rules may prevent Ethernet access.
Step 1
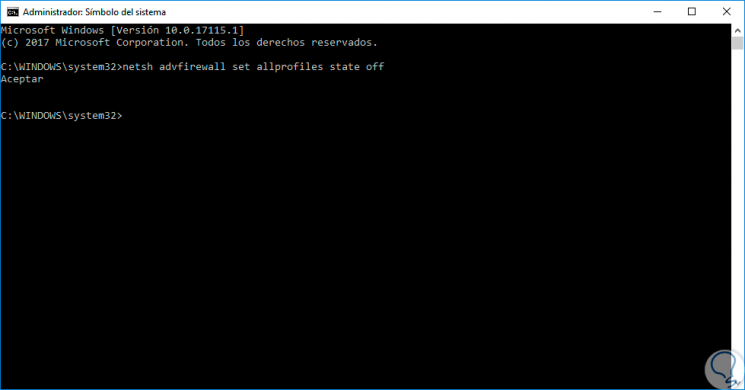
We can temporarily disable the Windows Firewall and thus validate network connectivity, for this we access the command prompt as administrators and execute the following:
netsh advfirewall set allprofiles state off
Step 2
We proceed to validate the web connection and if this is correct it indicates that the Firewall generates some inconsistency and it will be necessary to perform management work on it. If this is not the case, we can activate the Firewall again by running:
netsh advfirewall set allprofiles state on
We have seen practical solutions to correct all the problems associated with Ethernet and thus be able to navigate in a secure and integrated way that is the objective of our connections.