We currently have two types of connection for our computer equipment and each of them has its advantages and disadvantages. The first type of connection is Ethernet , or wired, which is widely used in home and office environments and its main limitation is its range, but it is a stable, secure network that offers great speeds based on the new Technologies implemented
The second is the Wi-Fi network which is practical because it is portable and does not require cables for its use, but this type of network has security problems since going through waves is susceptible to attacks and another major disadvantages of this network is the transmission capacity since many elements, such as walls, ports, electrical waves, affect the stability of the signal..
Regardless of the one we use, these connections are useful because they allow us to access the Internet and browse the hundreds of pages that we can visit frequently and in many cases we can have both connections at the same time in our equipment and see that the Wi-Fi network presents Some kind of anomaly, so in TechnoWikis we will analyze the various options to correct these failures in the Wi-Fi network and thus enjoy your connection to the fullest.
1. How to verify router to fix WiFi connection
Option 1
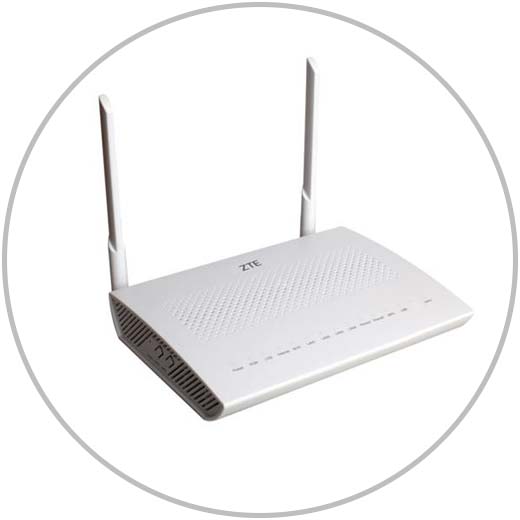
The first step we will take will be to directly validate the router or modem from where the signal originates and this we can carry out are simple steps such as the following.
Check router
- Connect other devices, such as Smartphones, Smart TVs, etc., to the Wi-Fi network and if there is a connection it will be necessary to check the equipment
- Check the elements that can affect the signal as we have indicated before, doors, walls, floors, etc.
If none of these steps gives us a viable solution, we can resort to the following steps:
- Turn off the modem, leave it for about 15 seconds and then proceed to turn it on, this will make the modem internally cool and charge the service normally.
- If this step does not work, we can reset the modem to factory settings so that everything returns to its original operation, for this we have the following option that consists of pressing the Reset button located on the back of the device for three seconds. modem:
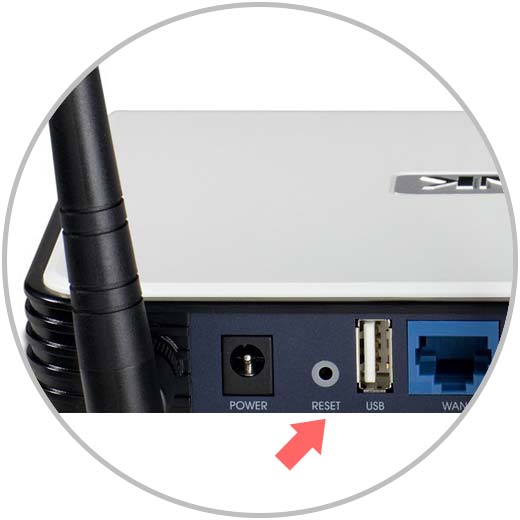
We can do this with a pin and after this process all values ​​will be restored in the modem..
Option 2
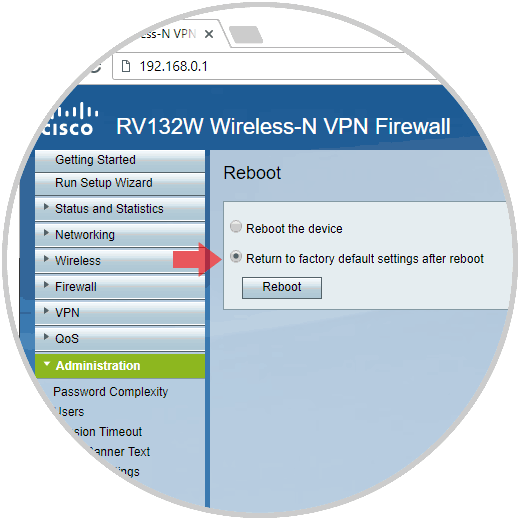
Another of the options we have to restore the optimal modem operation is to restore the factory settings of this mode, for this we must access the modem using the IP address of the gateway which we obtain by executing any of the following commands:
Once we obtain the IP address of the gateway, which is usually 192.168.0.1, we will enter the credentials and in the modem management we must locate the option to reset the modem to its factory values:
If these steps do not solve the correct functioning of the Wi-Fi network, it will be necessary to call the provider to send a technician or replace the device.
2. How to use the troubleshooter in Windows to fix WiFi connection
Windows 10 includes a problem solver which has been developed to analyze the problems associated with the selected component, detect anomalies and provide possible solutions to it.
Step 1
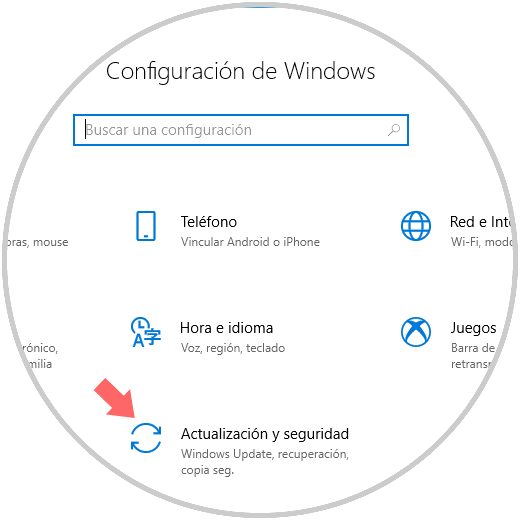
To access it, we go to the Start / Settings menu and see the following:
Step 2
There we will click on the option Update and security and in the new window we will go to the section Troubleshooting:
Step 3
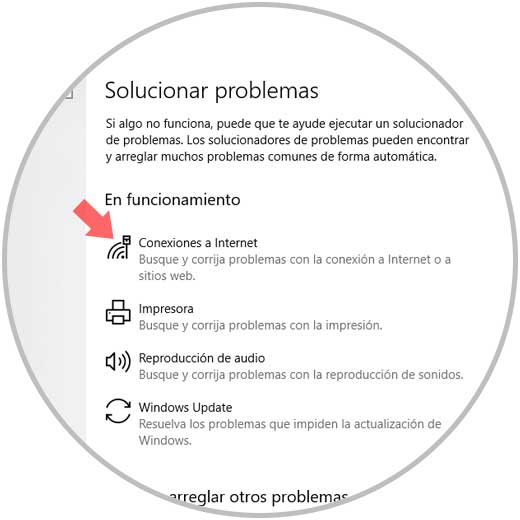
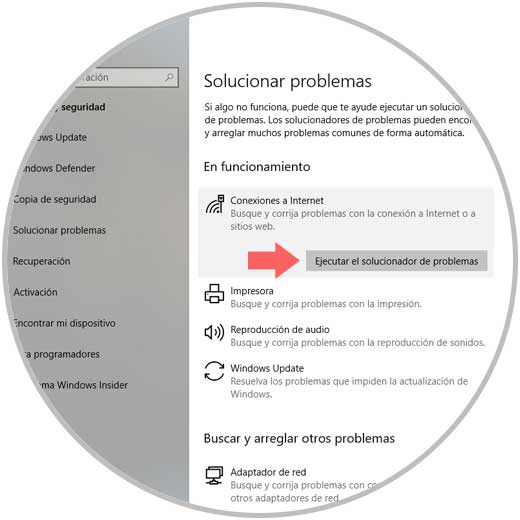
There we click on the Internet Connections option and the button Execute the troubleshooter will be automatically displayed:
Step 4
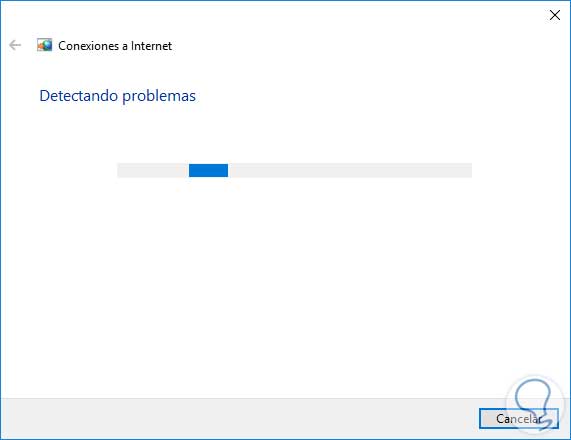
Pressing there will start detecting problems:
Step 5
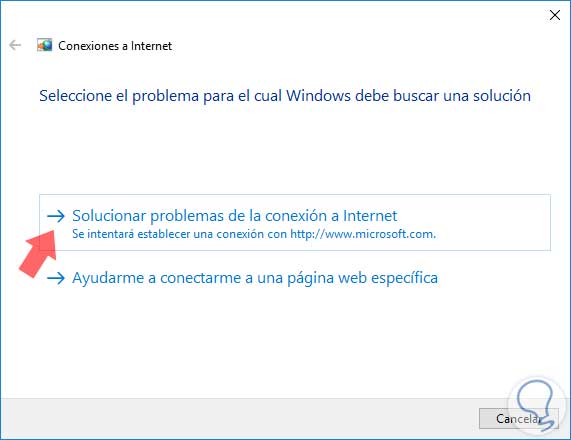
Once finished, we will see some options on what problem we may have with the network:
Step 6
Once we define the possible problem, the tool will analyze the causes and give us a solution for that problem.
Another option that we can review with the troubleshooter is the Incoming Connections line:
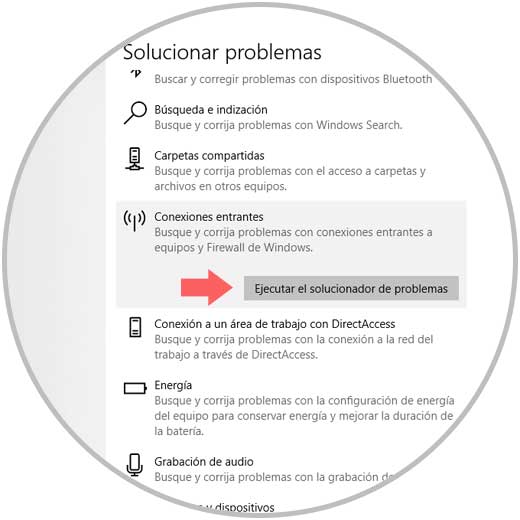
This allows you to rule out any error at the firewall or connection level that directly affects the Wi-Fi network..
3. How to clean the DNS to fix WiFi connection
Another of the options available is to clear the DNS cache of the network, remember that the DNS (Domain Name System) is one of the fundamental network elements for the optimal connection since it serves as an intermediary between the computer and the network translating IP addresses into domain names and vice versa.
The problem is that many times this DNS cache is stored, affecting the optimal network connectivity. To perform this DNS cache cleaning process we must access the command prompt as administrators by right clicking on it and selecting the option Run as administrator:
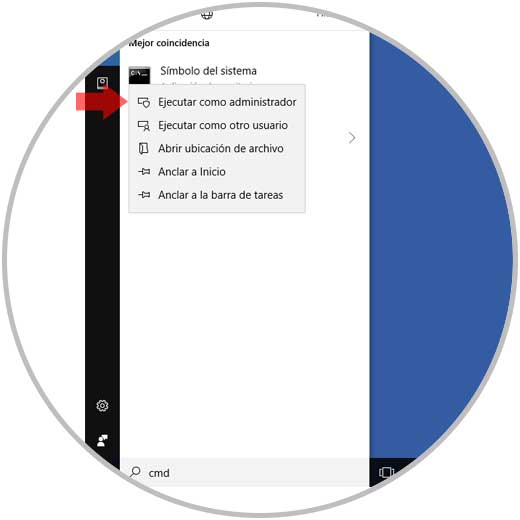
Once we access the console, we will first execute the following commands:
ipconfig / relay (Free current IP address) ipconfig / renew (Renew IP address)
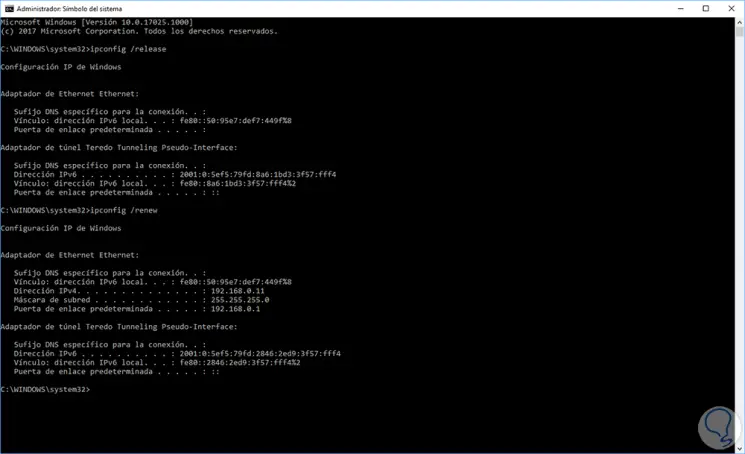
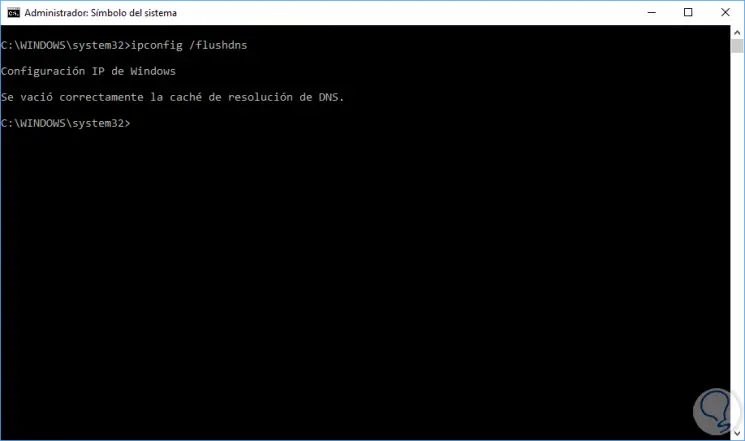
After this we will execute the following:
ipconfig / flushdns (Free DNS cache)
4. How to reset Winsock and IP parameters to fix WiFi connection
Winsock is the fundamental component for system-based communication between our computer and the Internet, and since it is an integrated Windows application, it cannot be reinstalled, it will only be possible to restore it.
To perform this process, we go back to the command prompt as administrators and execute the following commands:
netsh winsock reset catalog (Reset the Winsock catalog) netsh int ipv4 reset reset.log (Reset IPv4 settings) netsh int ipv6 reset reset.log (Reset IPv6 settings)
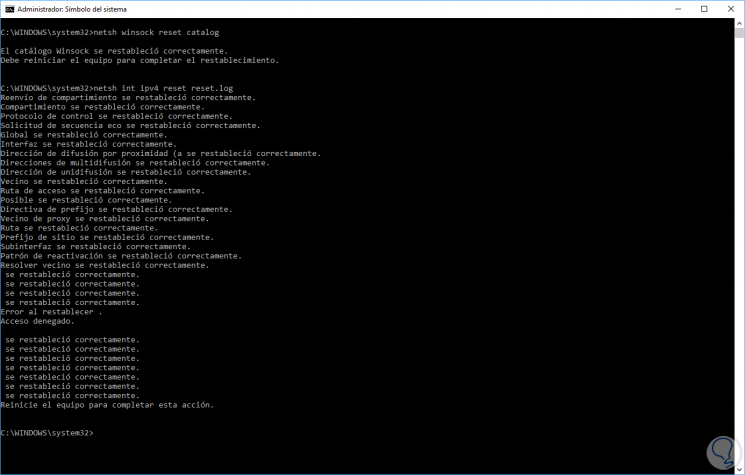
After this, it will be necessary to restart the operating system to apply the changes.
5. How to modify the frequency of the band to fix WiFi connection
When using a Wi-Fi network we have the option of using bands between 2.4 GHz and 5 GHz, which optimizes the speed and coverage options, the 2.4 GHz band being slower than the 5 GHz band because most of devices are connected to it.
Step 1
We can change this option by performing the following process, we will go to the following route:
- Control Panel \ Networks and Internet
- Center network and sharing
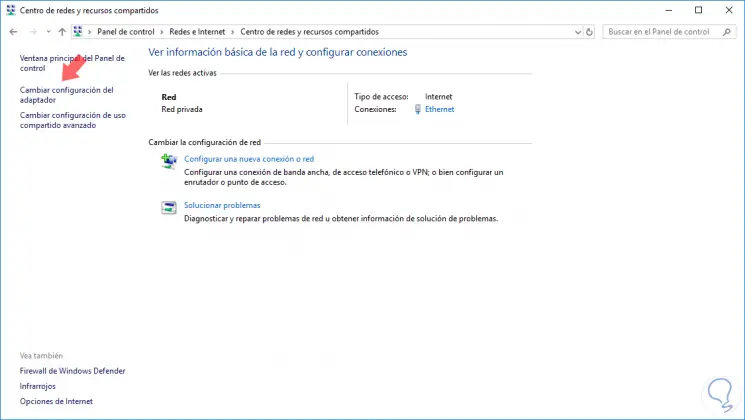
Step 2
There we select the Change adapter configuration option located on the left side side and we will see the following window where we will right click on the Wi-Fi network adapter and select the Properties option:
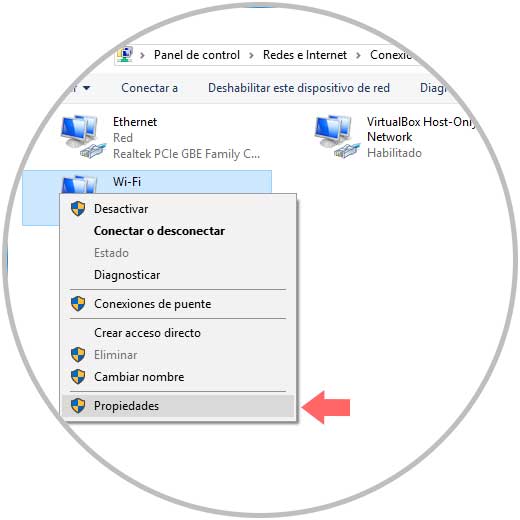
We will see the following window:
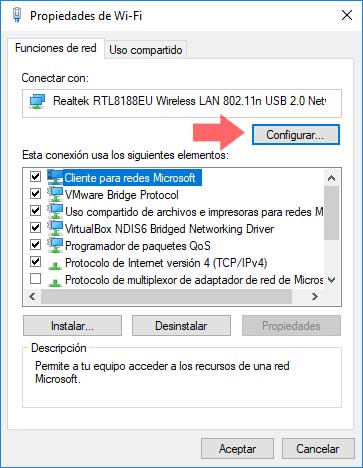
Step 3
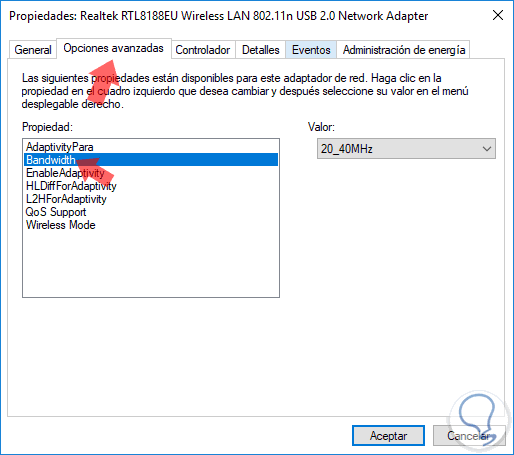
Click on the Configure button located at the top and in the new window displayed go to the Advanced tab and in the Bandwith line we will select the most appropriate option:
Additional option
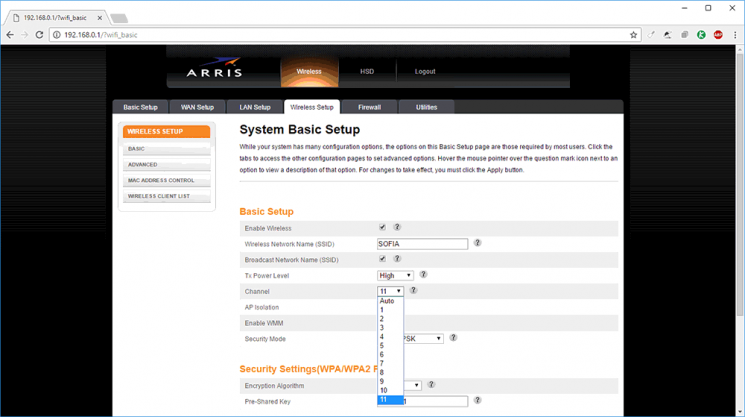
Another additional option is to change the channel directly in the modem, for this we access again using the IP address of the gateway and in the Wi-Fi network configuration we locate the Channel line and simply display the available options and select the suitable:
6. How to reinstall drivers to fix WiFi connection
The controllers have been developed to allow a device to work in the best way and be compatible with the system and its parameters, but in certain occasions this controller may present certain flaws.
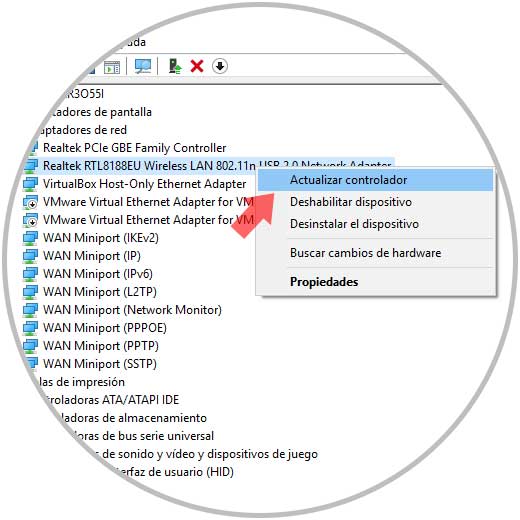
To reinstall this driver from the Wi-Fi network, we can go to the device manager by right clicking on the Start menu and selecting the respective option, then, in the pop-up window, we display the Network Adapters options and we will right click on the adapter Wi-Fi network and select the option Update driver:
In case this option does not solve the problem, we will right click on the Wi-Fi network adapter again and select the Properties option and go to the Details tab where we must select the Hardware ID field in the Property section and we will see the next:
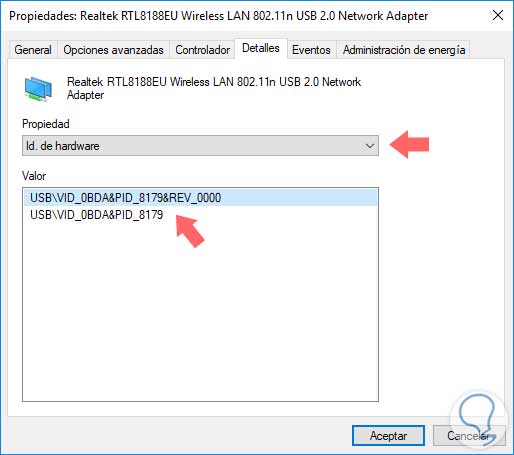
There we will copy the line that identifies the Wi-Fi network and we can paste it in any browser and there locate the manufacturer of said hardware to download the latest version of the controller.
We can see that we have several options to solve Wi-Fi connectivity and thus have an additional alternative to connect regardless of the type of device used and independent of the operating system used.