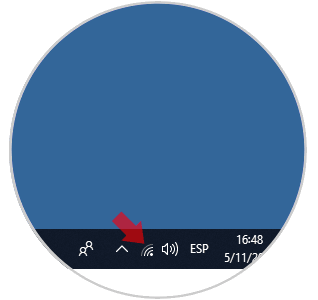
Windows 10 has been developed so that it automatically identifies the type of network to which it is connected and based on this network it displays the corresponding icon, in this way, when we connect to a wireless or Wi-Fi network we will see the following icon in the taskbar:
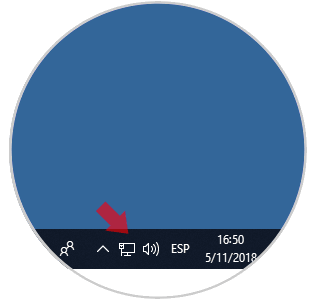
If we are connected to an Ethernet network we will see the following icon:
But in some situations when we are connected to a Wi-Fi network, Windows 10 continues to display the Ethernet icon in the taskbar, which can become an error factor for certain activities:
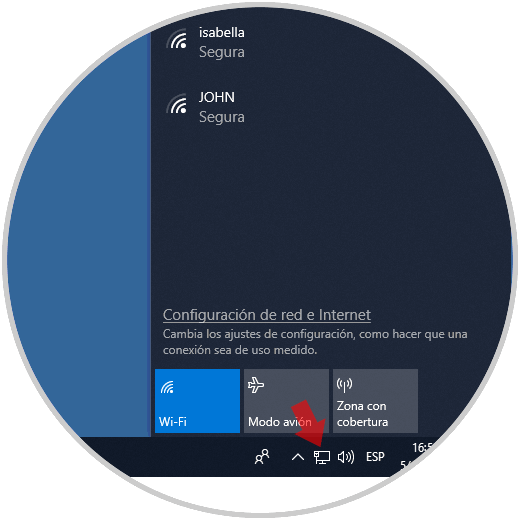
Through this tutorial TechnoWikis will explain how to see the respective icon in the Windows 10 taskbar. Keep in mind that if you have WiFi and Ethernet cable connected at the same time, it will have Ethernet preference over WiFi so you should disconnect cable if You want to exit by WiFi signal..
1. How to reset Windows 10 Explorer
For this we must access the Task Manager using one of the following options:
- By right clicking on the taskbar and selecting the Task Manager option
- By right clicking on the Start menu, or using the Windows + X keys, and in the list select Task Manager
- Use the Ctrl + Alt + Delete keys and there select Task Manager
Remember that the Windows 10 browser is different from the file browser because this browser manages parameters such as the Start menu, desktop and more.
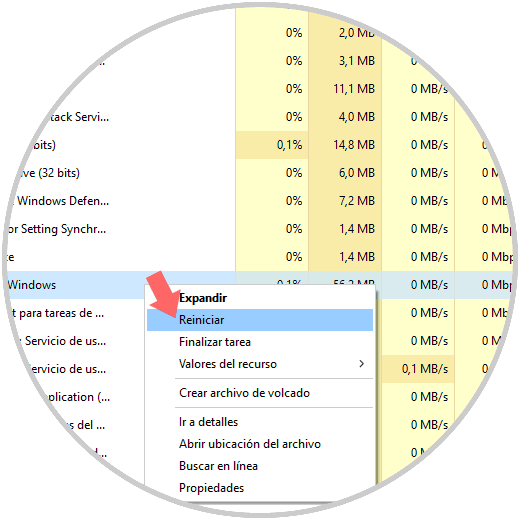
In the Task Manager deployed we will go to the Processes tab and there we must locate the process called Windows Explorer and for its restart we have two options:
- Right click on it and select the Restart option
- Select the process and click on the Reset button located at the bottom
This will cause the browser to be restarted and recover the normal icon..
2. How to enable and disable Wi-Fi network
Step 1
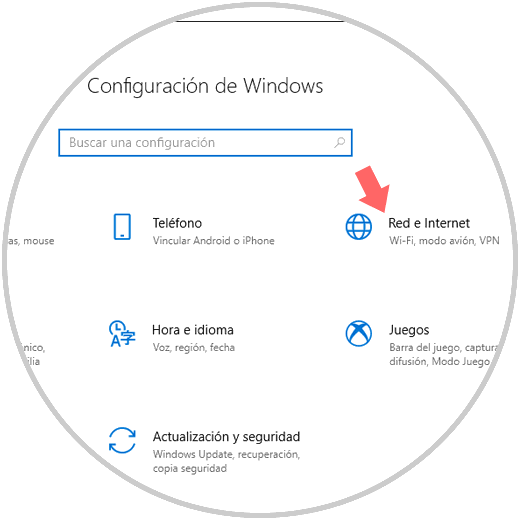
This option allows you to refresh the Wi-Fi network service and for this we will go to the Start menu and there we select the Configuration utility where we will see the following:
Step 2
There we must go to the Network and Internet category and then go to the Wi-Fi section where we will see the following:
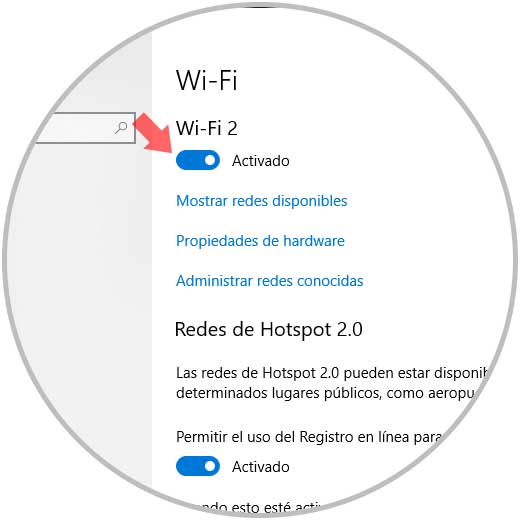
There we must press on the Wi-Fi switch to deactivate it and press it again for activation.
3. How to remove and add the Wi-Fi icon Windows 10
Step 1
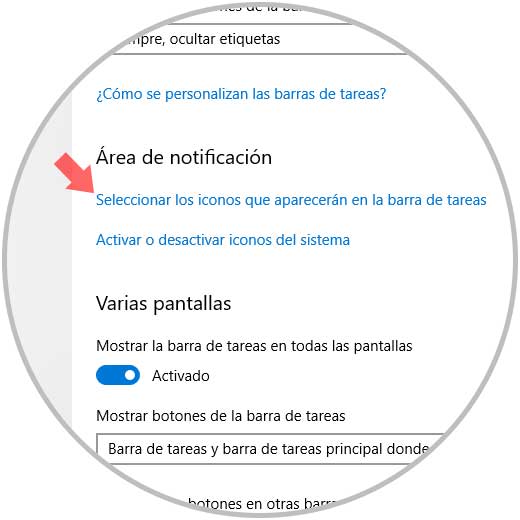
This option allows us to add the icon manually and for this we will go to the route Configuration / Personalization / Taskbar where we will see the following:
Step 2
There we will go to the Notification Area section and we must click on the line Select the icons that will appear in the taskbar and we will see the following:
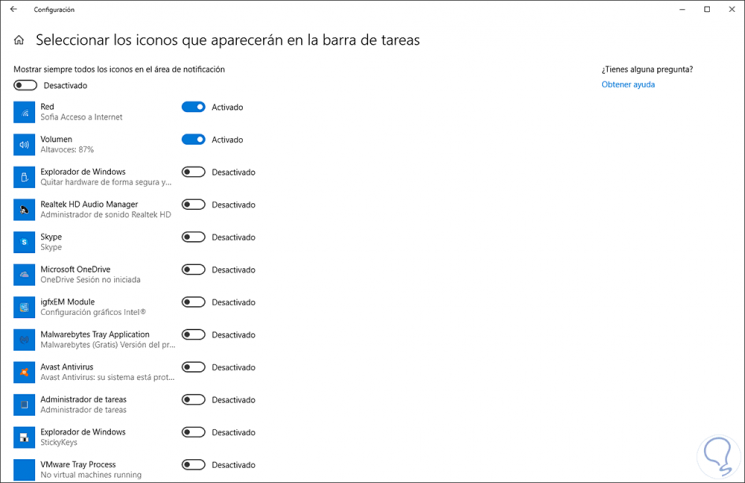
It will be necessary to deactivate the Network icon in order to remove the Wi-Fi / Ethernet icon from the taskbar, after this it can be activated again to add the icon to the taskbar..
4. How to update Windows 10 drivers
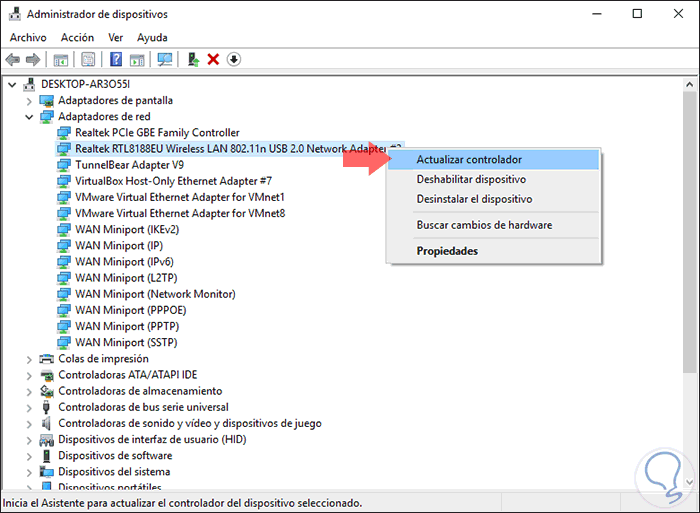
In some cases this may be the source that prevents the Wi-Fi network icon from being displayed correctly, for this we can update the Wi-Fi network controller by accessing the Device Manager using the Windows + R key combination and running the command "devmgmt.msc" and pressing "Enter."
In the displayed window, we will go to the "Network Adapters" section and there we will right click on the Wi-Fi network controller and select the Update driver option:
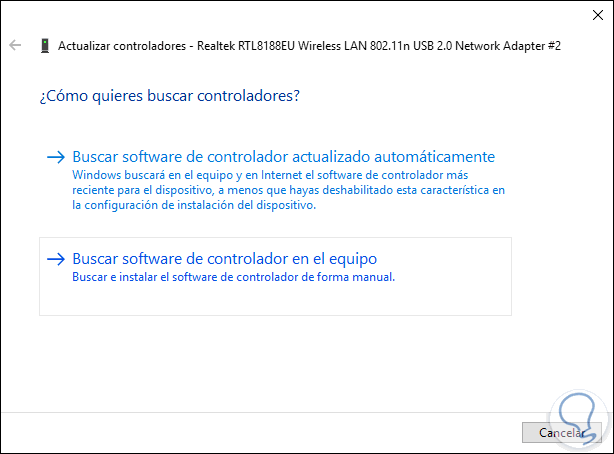
We will have two options to update our network driver:
- Manually and for this, the last update must have been downloaded first from the developer's website
- Automatically through Windows Update
5. Restart the Windows 10 computer
In the event that any of the solutions provided does not help correct the error of displaying the correct icon, we can restart the equipment so that all processes and services, including the network, are renewed and the correct icon is displayed .
To keep up, remember to subscribe to our YouTube channel! SUBSCRIBE
With any of these methods it will be possible to access the latest version of the Wi-Fi driver for Windows 10. Thus, we have options to see the correct icon based on the network used.