The use of Wi-Fi networks is one of the most active resources of today due to the wide boom of mobile devices. It is very likely that most of us have a portable or mobile device, which by default connects to the wireless network to complement its "portable" name..
When we turn on our computers, they usually automatically search for the known Wi-Fi network (that is, saved in the system preferences), in order to establish connectivity much faster. In case of not finding an available network we can look for it in the Wi-Fi network icon (already known by all) in the taskbar but wait, surprise! The icon is not there, why? Well, the causes can range from misconfiguration to errors in Windows 10 services, but there's no need to despair as TechnoWikis comes to help you. That's why we'll learn how to display the Wi-Fi network icon in the Windows 10 taskbar.
To stay up to date, remember to subscribe to our YouTube channel! SUBSCRIBE
1. Put the Wi-Fi icon in the taskbar using Settings in Windows 10
Step 1
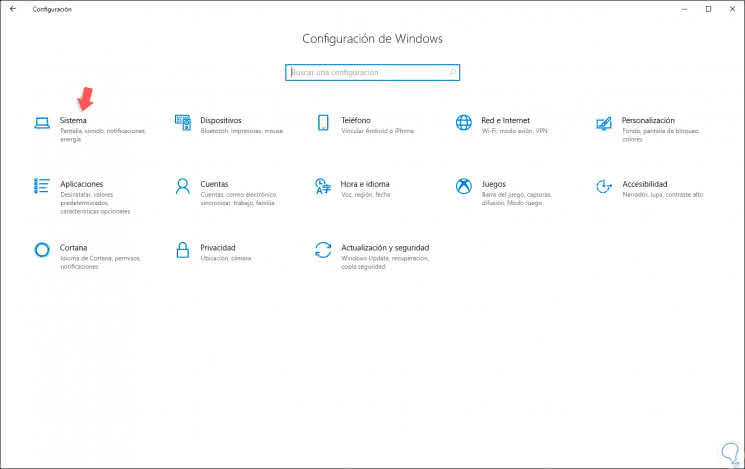
Through the utility "Configuration" we find many options to manage and manage the system parameters including the network (LAN and Wi-FI), to use this method we go to the Start menu and there we select the utility "Configuration" which will display the next:
Step 2
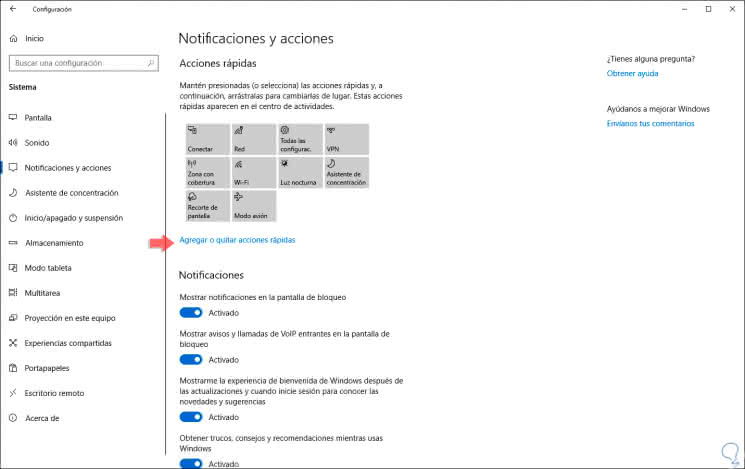
There we will go to the "System" category and in the next window we will go to the "Notifications and actions" division:
Step 3
There we will click on the line "Add or remove quick actions" and we must validate that the switch of the Wi-Fi option is active. If this is not the case, we must press it to activate it.

2. Put the Wi-Fi icon in the taskbar using Group Policy in Windows 10
This option is only available for Windows 10 Enterprise and Pro editions, for this we must access local policies and make some strange or complex changes..
Step 1
To use this method we will combine the following keys and execute the following order:
+ R
gpedit.msc

Step 2
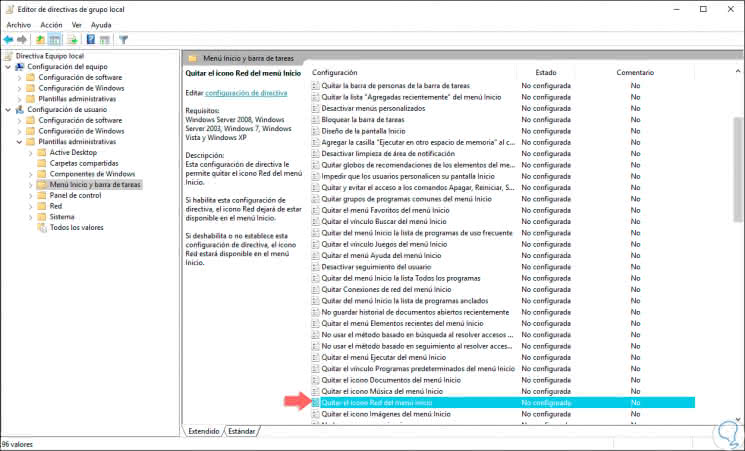
Press OK or Enter and in the window that will be displayed, we go to the following route:
- Administrative Templates.
Step 3
In the central panel we will locate the policy called "Remove the Network icon from the Start menu":
Step 4
We double-click on it and in the expanded window we can activate any of the following boxes. Click on the Apply button and Accept to save the changes. After this we rebooted the system to see the changes applied in the taskbar.

3. Put the Wi-Fi icon in the task bar by restarting the Explorer service in Windows 10
Windows 10 integrates a service called explorer.exe, which is referred to by Windows Explorer, it is responsible for managing aspects such as the desktop, the taskbar and more, we should not confuse it with the file explorer, by restarting this service as much as possible. probable (it's what we want), the icon of the Wi-Fi network will be visible in the taskbar.
Step 1
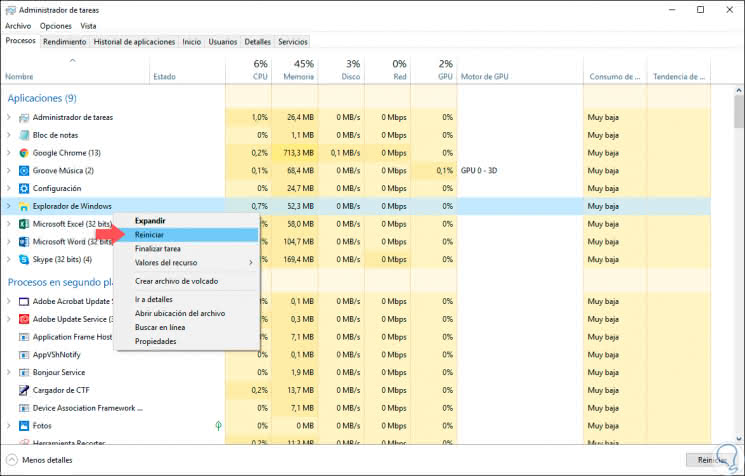
To achieve this we must access the "Task Manager" using any of the following methods:
Step 2
Once we access the task manager, we go to the Processes tab and there we will locate the process called "Windows Explorer", we right click on it and we have two options that are:
- Finish it and activate it again
Step 3
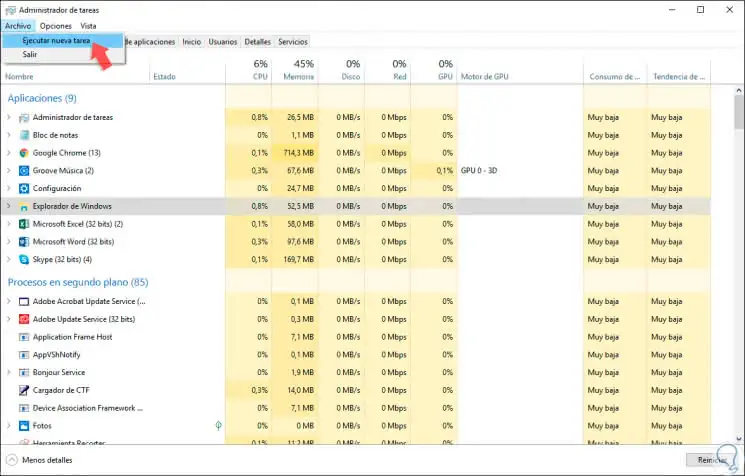
In case we use the "End task" option, we must go to the File menu and there select the option "Execute new task":
Step 4
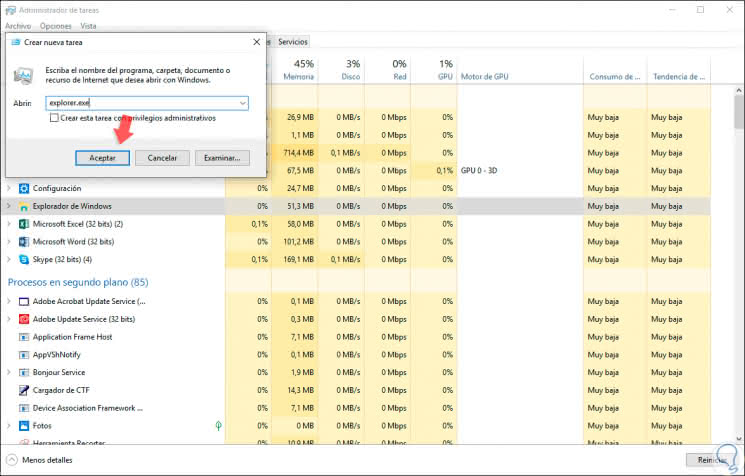
In the pop-up window we execute the command "explorer.exe". Click on OK and restart the Windows 10 explorer process.
4. Put the Wi-Fi icon in the taskbar updating network drivers in Windows 10
Although it may not seem feasible, sometimes it happens, network controllers may be outdated, which has a direct impact on the behavior of the network both at the level of connections and the visualization of their icons.
Step 1
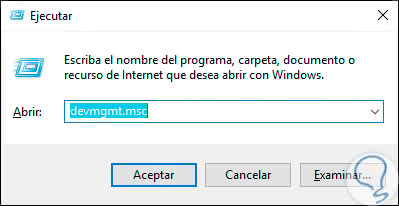
To update them, we must access the Device Manager using the following keys and executing the command devmgmt.msc:
+ R
devmgmt.msc
Step 2
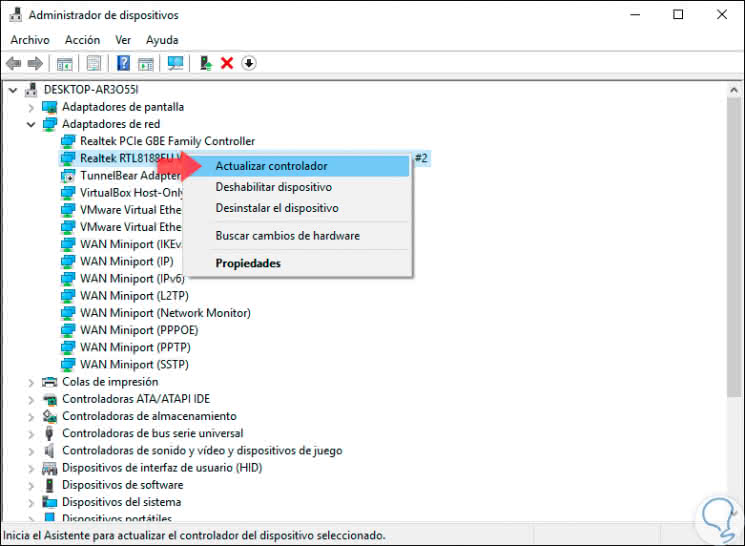
In the window that will be displayed, go to the section "Network adapters" and there we right click on the current adapter and select the option "Update driver":
Step 3
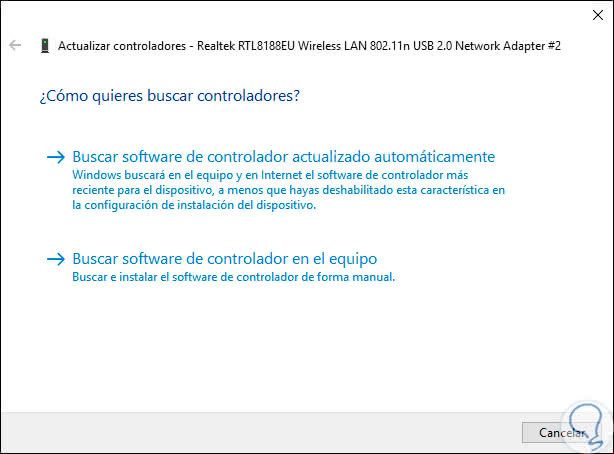
We have two options for updating the wireless network controller:
- Automatically through the Windows Update servers.
- Manually downloading the driver from the manufacturer's website.
Step 4
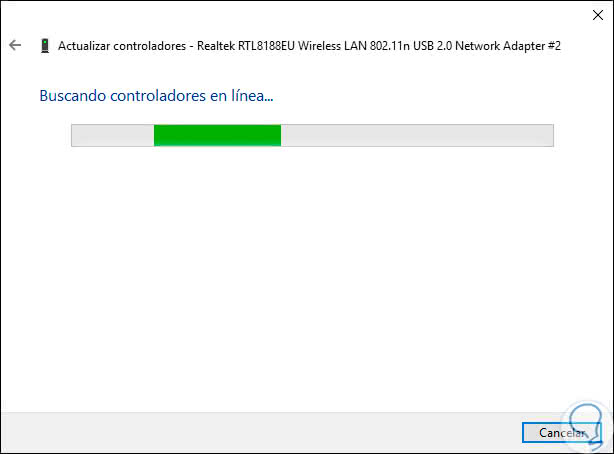
In this case we will use the option automatically and Windows 10 will start updating this:
Step 5
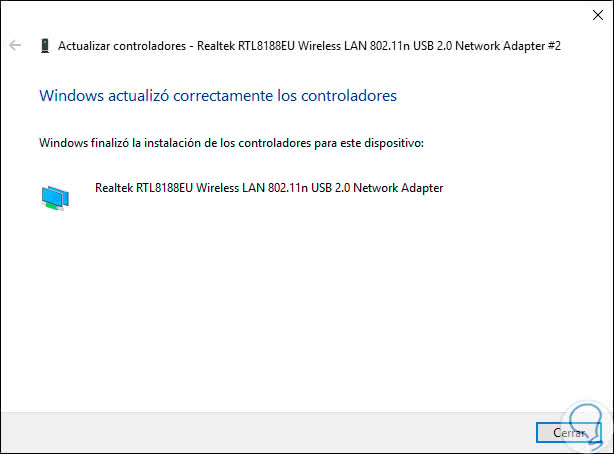
The result may be that we do not have the latest update or that Windows 10 downloads and installs the most up-to-date driver for the Wi-Fi network card:
As a result of using any of the methods explained by TechnoWikis it will be possible to visualize the Wi-Fi network icon in the task bar in order to access the network and its configurations:
