As operating systems, such as Windows, launch new editions, we can see how adjustments are made that redesign the options to which we are accustomed over the years, a specific case is the Configuration menu which seeks to centralize everything that we previously performed through the Control Panel and although there is still the traditional control panel we can see how little by little everything migrates to Configuration..
One of the aspects that have been most adjusted in Windows 10 is the access to the network configuration which is essential for multiple control and support tasks and within these tasks we have to disable the network adapter which leads to carried out exclusively for some administration task such as changing drivers , virus analysis, etc.
Through this tutorial we will know some options as we can disable this network adapter in Windows 10 in a much more practical way since we remember that when we right click on the network icon and select the option “Open network and Internet settings â€We will see the following:
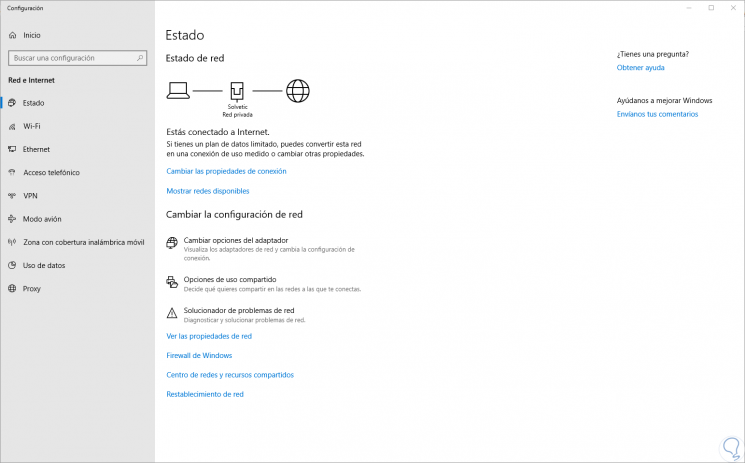
From there we can carry out multiple tasks, but it can be a bit more complex for some users.
To keep up, remember to subscribe to our YouTube channel! SUBSCRIBE
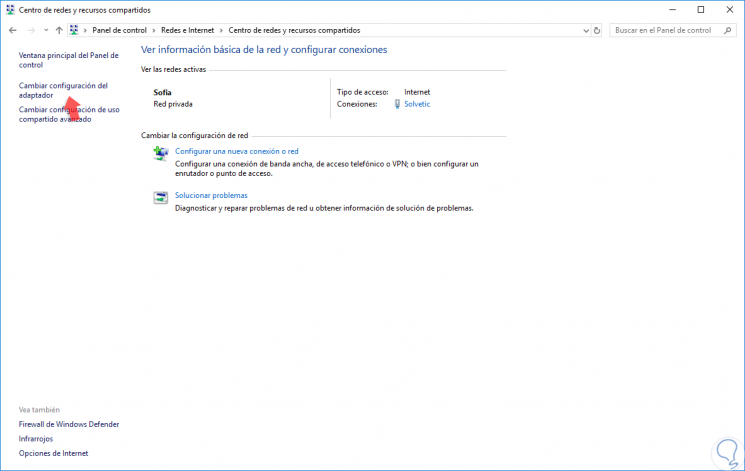
1. Disable the network adapter from the Control Panel in Windows 10
Step 1
To make use of this method we will go to the following route:
- Center network and sharing
Step 2
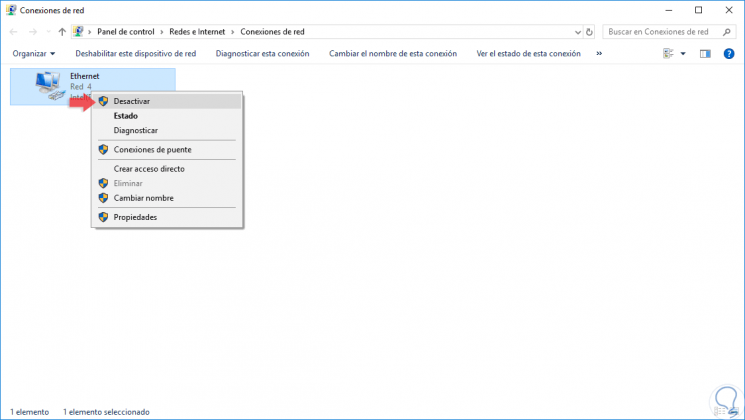
There we click on the “Change adapter settings†line and in the new window displayed we will right click on the adapter to disable and select the “Disable†option:
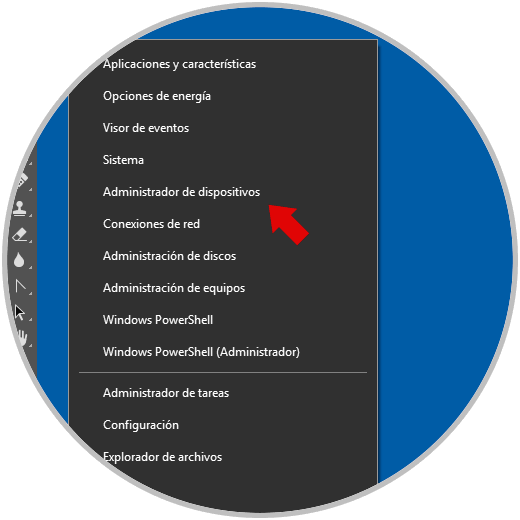
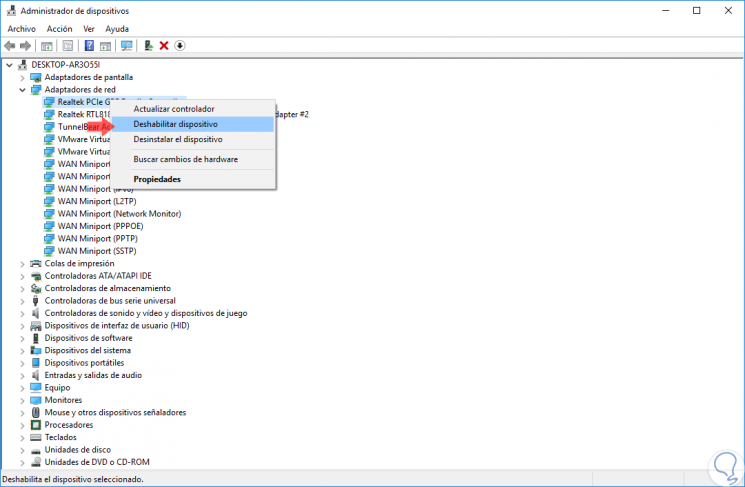
2. Disable the network adapter from Device Manager in Windows 10
Another of the practical options that Windows 10 offers us to disable the network adapter is using Device Manager.
Step 1
We can access the Device Manager using one of the following methods:
To keep up, remember to subscribe to our YouTube channel! SUBSCRIBE
Step 2
Once we access the administrator, we go to the “Network adapters†section and we will right click on the adapter to disable and select the option “Disable deviceâ€:
3. Disable the network adapter using the Netsh command in Windows 10
Netsh is a Windows console utility which gives us the possibility of carrying out various tasks focused on aspects of the network. Some of the tasks that we can execute with netsh are:
- Validate the compatible WiFi speed of the wireless adapter in Windows 10.
- Create backup and restore profiles of wireless networks in Windows 10.
- Filter wireless networks in Windows 10 in order to create and manage blacklist or whitelist.
- Configure and manage the Windows 10 ad hoc wireless access point
Step 1
To use this option, we will access the command prompt as administrators and execute the following line to verify active connections:
netsh interface show interface

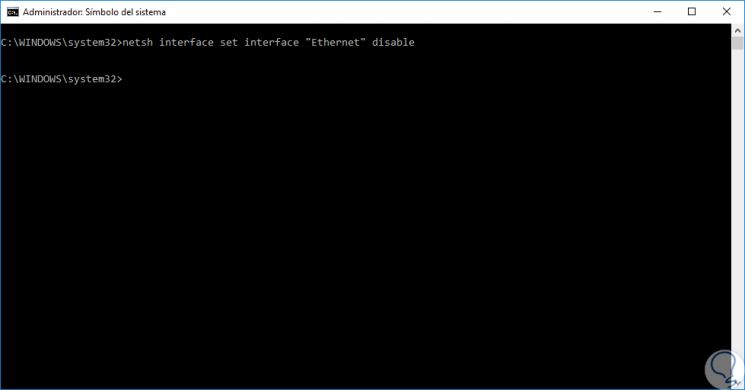
Step 2
In the "Interface name" field we must keep in mind the name of the adapter to be disabled, to proceed with its disablement we will execute the following line:
netsh interface set interface "Ethernet" disable
Note
We must replace Ethernet with the name of the interface as appropriate.
Step 3
To re-enable the interface we will execute the following:
netsh interface set interface "Ethernet" enable
4. Disable the network adapter using Windows PowerShell in Windows 10
PowerShell is Microsoft's commitment to the entire console issue because thanks to its cmdlets we will have the facility to execute hundreds of administrative and support tasks in Windows 10.
Step 1
To carry out this process in PowerShell we will access as administrators and execute the following line:
Get-NetAdapter | format-list
Step 2
This will display the adapters available on the computer.

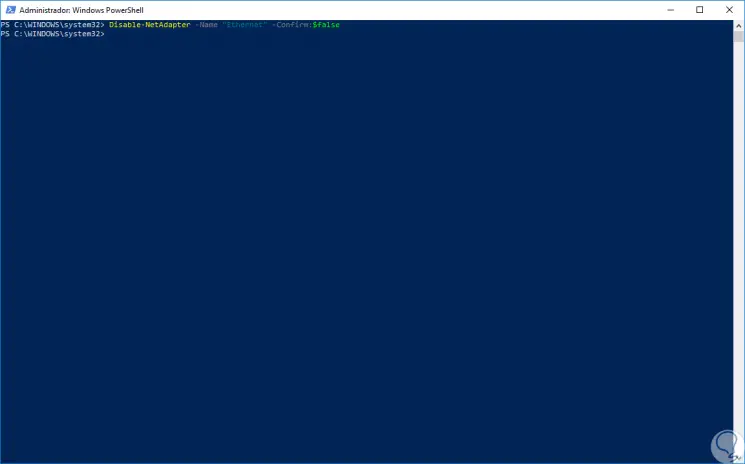
Step 3
To carry out the process of disabling the adapter we will execute the following:
Disable-NetAdapter -Name "Adapter name" -Confirm: $ false
Step 4
To activate the adapter again we will execute the following:
Enable-NetAdapter -Name "Adapter name" -Confirm: $ false
With any of these simple steps it will be possible to disable the network adapter in Windows 10 and carry out the necessary tasks.