Internet connection has become an almost essential thing for most of us today since thanks to this type of connection we will be able to do many things such as searching the web, accessing our social networks , managing our email , download applications and programs, share documents etc. That is why a good connection is very important so that the speed is correct and we can perform these actions efficiently..
At the network level , adapters play a vital role for communication between our equipment and the Internet network, since it serves as a bridge for this communication to be effective. It is important that its configuration is correct, so that it works properly. However, it is possible that on some occasion you need to remove some of our adapters for some reason or because the connection is failing and you want to configure this again.
That is why below we are going to show you how you can remove the network adapter in Windows 10 in several different ways, and how you can re-enable it again..
1. How to know if the option to remove Windows 10 network adapter is enabled
Step 1
For example, when we create a connection by VPN or using virtual machines, we can see that the network adapters for such devices are created in Windows 10:
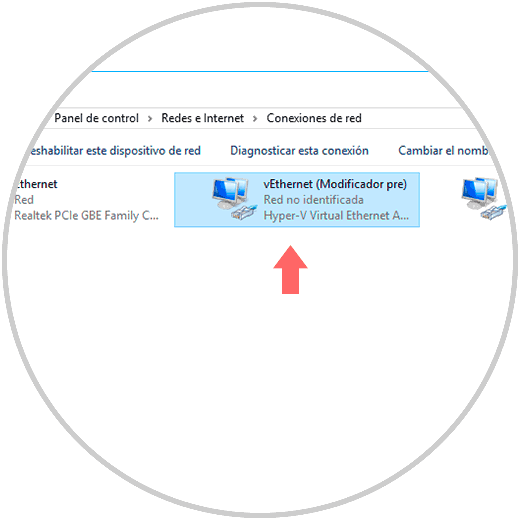
Each of these devices allows virtual machines or VPN services to have access to the network.
Step 2
When we no longer use these services, the most ideal is to eliminate these adapters from the system so that they do not affect the communication of the physical adapter of Windows 10, and the logical method, which in theory should be practical, is to go to the following route:
Step 3
There, we should right-click on the adapter and select the "Delete" option, but it is not enabled to perform this action:
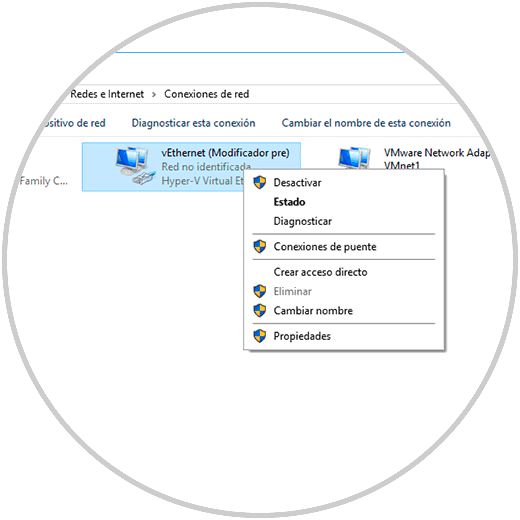
TechnoWikis today will give some advice on how we can eliminate this type of adapters entirely in Windows 10..
2. Delete the network adapter using Windows 10 Device Manager
Step 1
To access the device manager we have the following options:
Device manager
Step 2
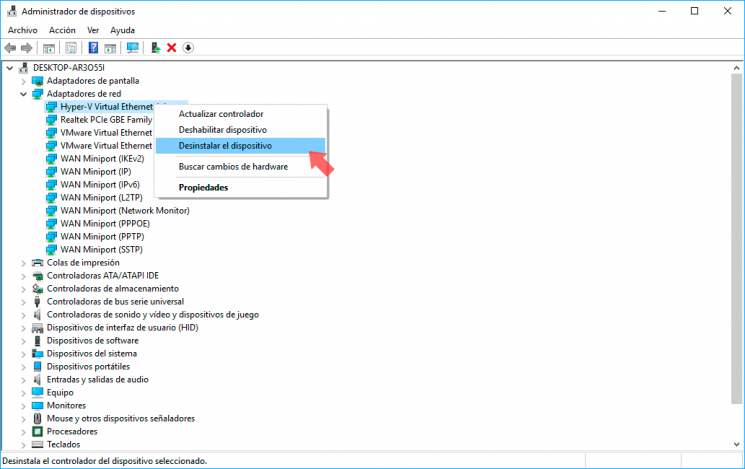
In the displayed window, we will go to the line "Network adapters", we will display its options and we will right click on the adapter to be removed and select the option "Uninstall device":
Step 3
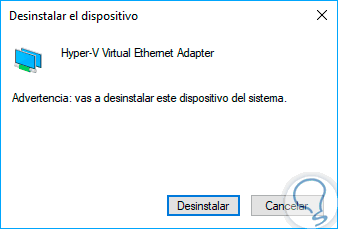
The following message will be displayed. There we click on the "Uninstall" button to confirm the action.
Step 4
This action will remove the adapter from both Device Manager and the list of network adapters in Control Panel.
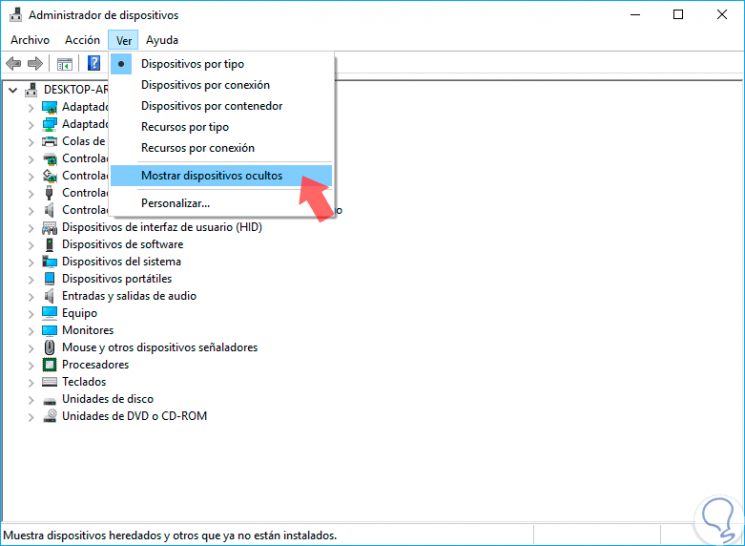
Note
In case of not seeing the network adapter, we can go to the menu View / Show hidden devices.
3. Delete the network adapter by deleting your Windows 10 network profile
The next option available is to remove the network profile from that adapter and thus remove it from the system.
Step 1
To do this, we must access the command prompt console as administrators and in the open window execute the following line:
netsh lan show profiles (For wired networks) netsh wlan show profiles (For wireless networks)

Step 2
There we can see the list of all active network adapters in the operating system.
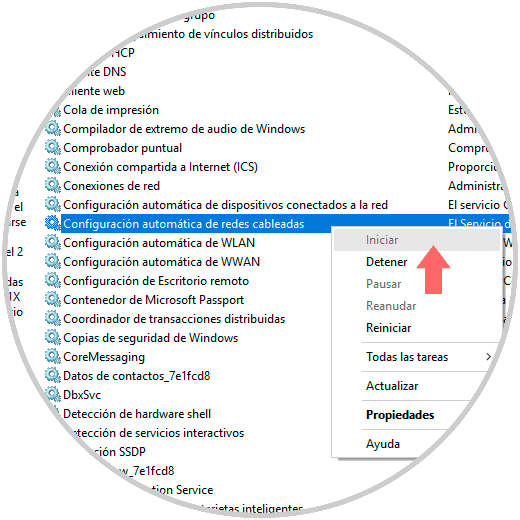
In some cases we can see an error indicating that the automatic configuration service for wired networks is not running, for its solution, we must use the following key combination and execute the services.msc command.
+ R
services.msc
Step 3
In the displayed window we will locate this service, we will right click on it and select the "Start" option.
Step 4
Finally, to eliminate the desired adapter interface, we will execute the following syntax:
netsh lan delete profile interface = "Interface"
4. Delete the network adapter using Windows 10 Registry Editor
The registry editor in Windows 10 allows us to carry out a series of practical actions for the management and control of the entire system.
We must be careful and very responsible in the way we manage the records since a bad configuration can affect the entire system in general.
Step 1
To access the registry editor we will use the following key combination and we must execute the command "regedit" and press Enter or OK.
+ R
regedit
Step 2
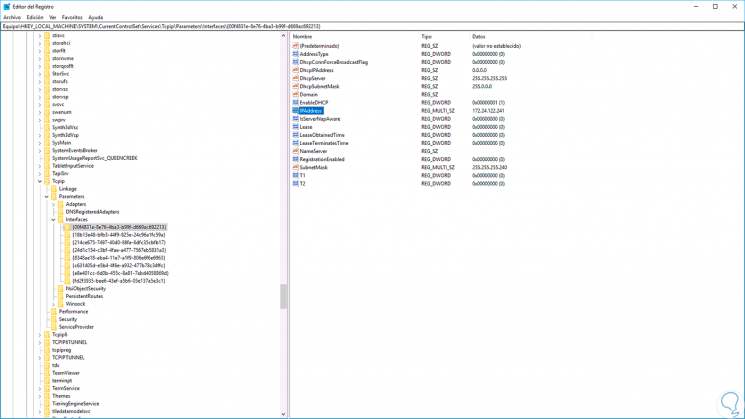
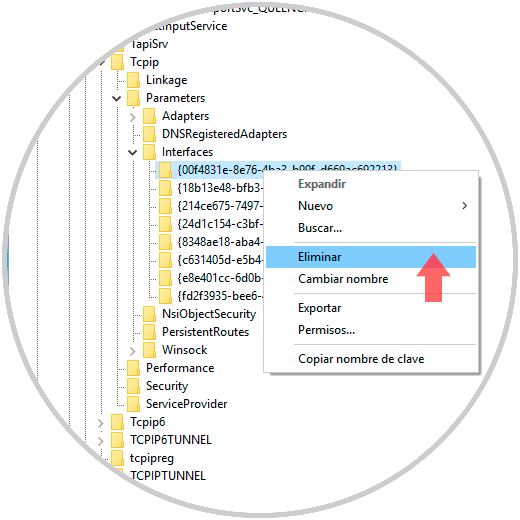
In the displayed window we will go to the following route:
HKEY_LOCAL_MACHINE \ SYSTEM \ CurrentControlSet \ Services \ Tcpip \ Parameters \ Interfaces
Step 3
We will see several elements numbered with a long series of random numbers. If you click on each one, you will see the IP address that is assigned to that network adapter:
Step 4
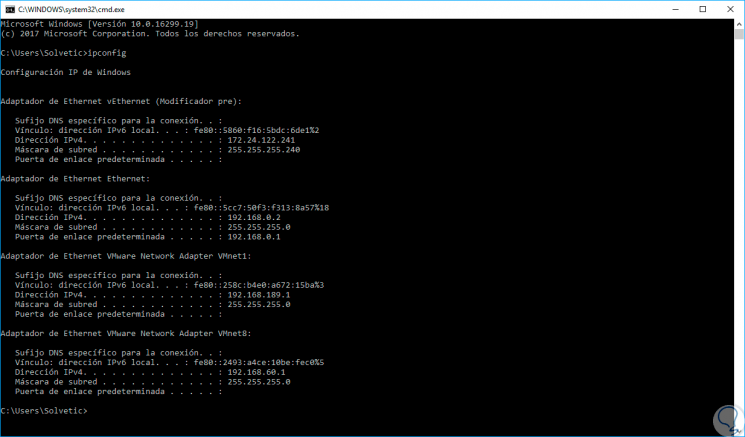
To confirm which is the IP address of the adapter to be removed, we can go to the command prompt and run the command "ipconfig" and we will see the IP address of each of the network adapters:
Step 5
Once the IP address is defined, we will right-click on the key of that adapter and select the "Delete" option:
5. Delete the network adapter using the Windows 10 Configuration utility
The Configuration utility was introduced in Windows 10 and offers us a series of practical options for managing many aspects of the operating system.
Step 1
To access this utility we go to the Start menu and there we select the "Configuration" option and we will see the following:
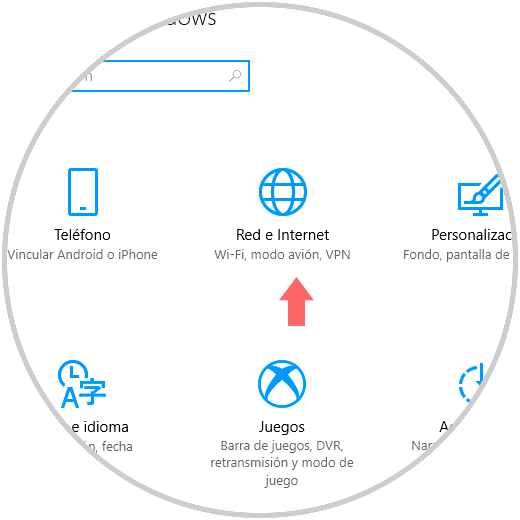
Step 2
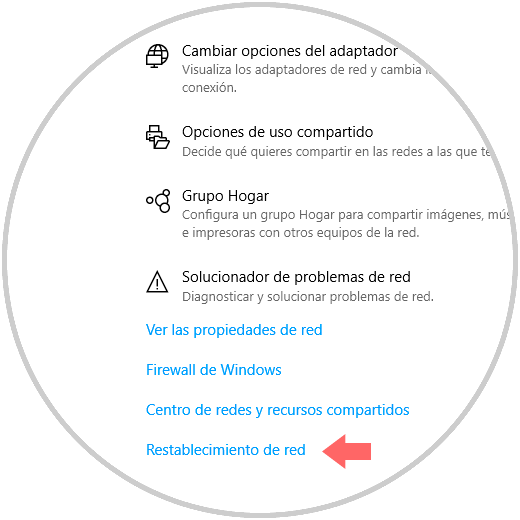
There we click on the option "Network and Internet" and go to the "State" section where we will see the following.
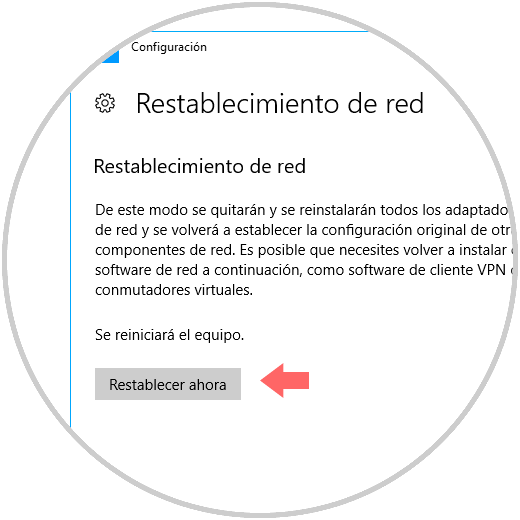
There we select the line "Network reset" located at the bottom and the following window will be displayed.
Step 3
There we click on the button "Reset now" to make the change.
In this way we have various alternatives to remove a network adapter in Windows 10.
6. Enable or disable WiFi or LAN network connection adapter Windows 10
You may not want to remove the network adapter, but simply disable it in Windows 10 for a while, and then re-enable it. This way you don't have to remove it permanently and have to reinstall it again. This process is easier than the previous ones and that is why if you prefer to perform this action, then you will see a tutorial that explains in detail how to enable and disable the network adapter in Windows 10.
This can be done in several ways, so go in and select the one that best suits your needs and tastes:
- Enable or disable adapter network connection from control panel.
- Enable or disable adapter network connection from Device Manager.
- Enable or disable adapter network connection from Command Prompt.
- Enable or disable adapter network connection from PowerShell.
This way you will be able to select if you want to remove the network adapters in Windows 10 or simply want to disable this option for a while.