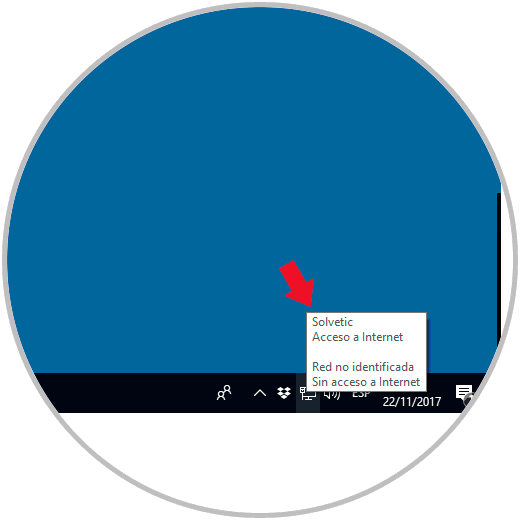
When we perform a clean installation of Windows 10, by default the Windows operating system registers the network information as a new network profile and assigns it a standard name such as "Network Connection", "Network Connection 2" etc..
Now, when we access the operating system, this will be the name that will be displayed when clicking on the network icon located in the taskbar or when accessing the Network and Sharing Center in the Control Panel:
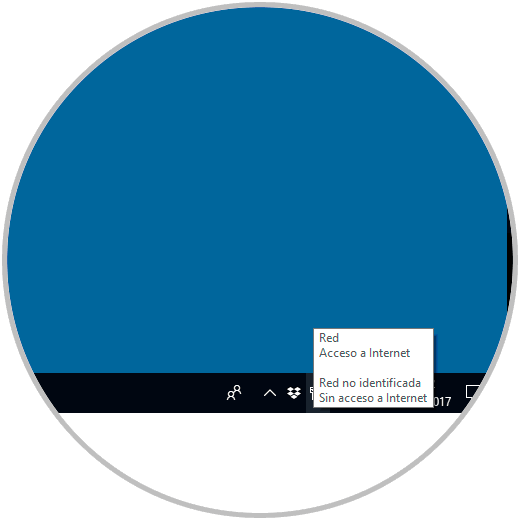
Although the default name is not something that significantly influences the system, it can be quite confusing if we have multiple network profiles . The good news is that you can customize the name of the network profile and today TechnoWikis will teach you some methods for it.
To stay up to date, remember to subscribe to our YouTube channel! SUBSCRIBE
1. Modify network profile using local Policies in Windows 10
The most practical way to change the network profile name in Windows 10 is to modify the settings of the Local Security Policy.
The local security policy is part of the Group Policy Editor, however, unlike the Group Policy Editor, where we can configure the settings for all computers and users in the domain, the Local Security Policy is used to configure and modify the settings of the particular local machine..
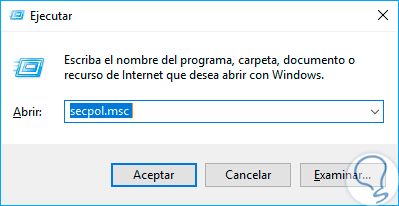
Step 1
To access it, we will use the following key combination and there we will execute the command "secpol.msc" and press the Enter or OK button.
+ R
Step 2
We will access the following window:
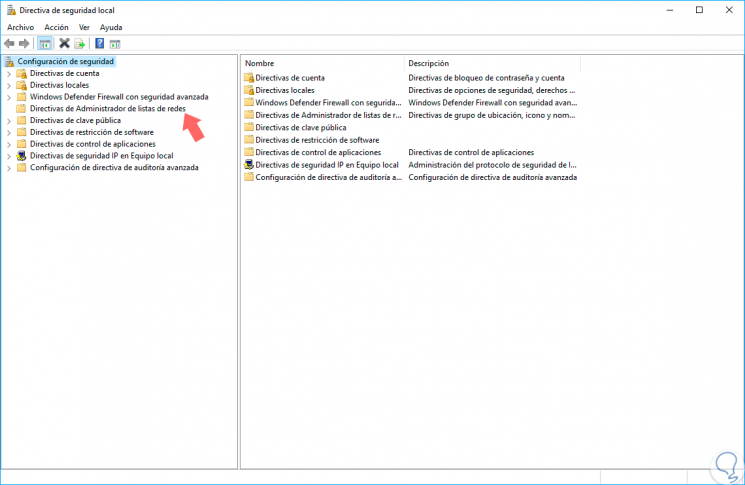
Step 3
There we click on the option "Network List Manager Policies" and in the options displayed on the right side we choose our local network:

Step 4
We will access its properties using one of the following options:
- Right-clicking and selecting the "Properties" option.
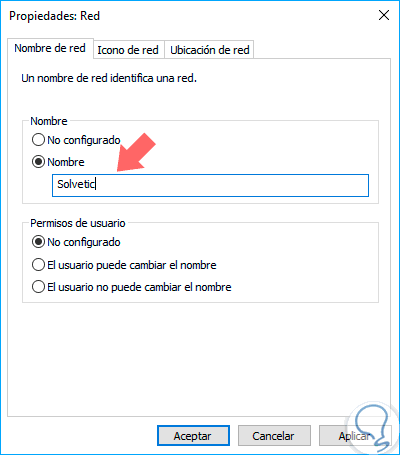
Step 5
In the displayed window we activate the “Name” box located in the Name section and in the available field we will enter the desired name for the network:
Step 6
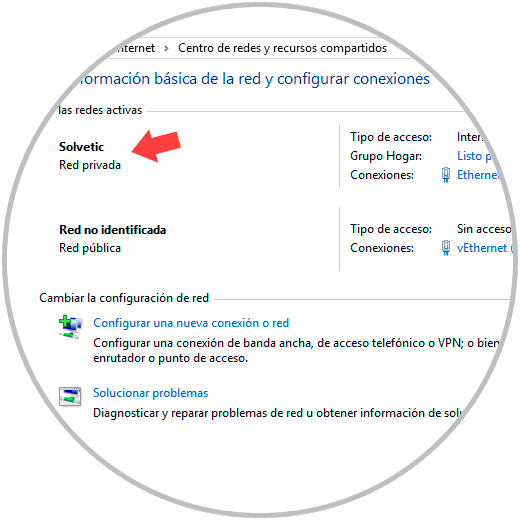
Click on "Apply" and then "OK" to save the changes. We can see the new name of the network by clicking on the network icon in the Windows 10 task bar:
Step 7
If we access the network and shared resources center we will see the new name in the same way:
2. Modify network profile using Registry Editor in Windows 10
Being a subgroup of the Group Policy Editor, we will not have access to the Local Security Policy if we are using the Windows Home version, the security policies are only available for Windows 10 Pro or Enterprise.
In case of using Windows 10 Home we can use the Registry Editor to change the name of the network profile, this method applies in all editions of Windows.
Step 1
To access the Registry Editor, we will use the following key combination, and there we will execute the
regedit command and press Enter or OK.
+ R
regedit
Step 2
In the displayed window we will go to the following route:
HKEY_LOCAL_MACHINE \ SOFTWARE \ Microsoft \ Windows NT \ CurrentVersion \ NetworkList \ Profiles
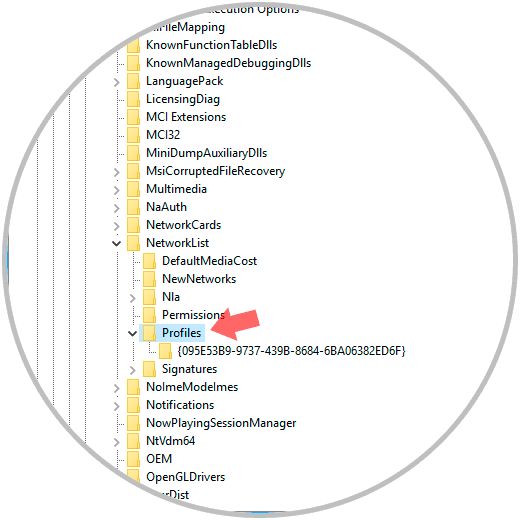
Step 3
Below the Profiles key we will see one or more subkeys with alphanumeric names. Windows 10 sets a new key for each network profile on the system.
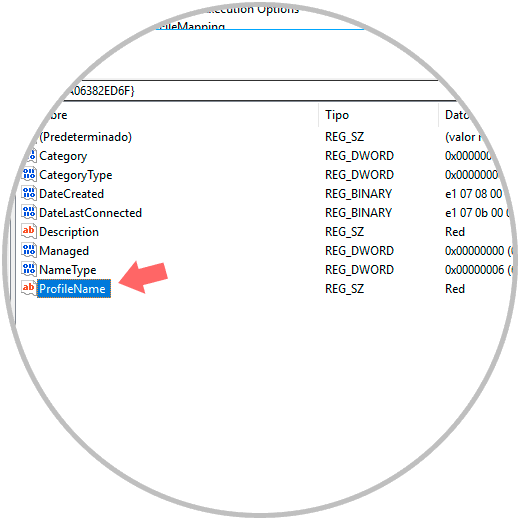
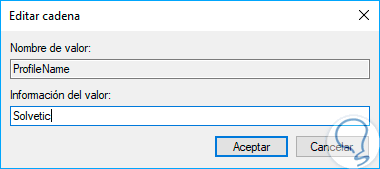
In this case we only have a network profile and therefore we only have a corresponding password. If we have multiple keys below the Profiles key, we should review and search for the key related to the target network profile. It is possible to identify the specific key by selecting the value "ProfileName" in the right panel:
Step 4
There we can see that it has the default name assigned by the system. We will double click on this value and in the field "Value information" we will enter the desired name. Click on OK to save the changes. We proceed to restart the system and the changes will be made.
With these simple methods we can assign a new profile name to our network in Windows 10.