Today's technology offers us hundreds of options for a comprehensive, safe and above all dynamic work and it is not for less since many of us like to handle different applications, programs and files when we access our PC. But at the same time we like to keep the work order and therefore Windows 10 gives us the opportunity to manage in a much more orderly and centralized way each open element thanks to the virtual desktops..
Basically the function of a virtual desktop is something typical of Linux distributions but it has already been integrated into Windows 10 and with the use of virtual desktops we are able to create various “virtual desktops†on our computer. This does not imply having more user accounts created and active . Seen from this point of view, in the main desktop you can have the office applications open, in the virtual desktop 1 you can open audio or video programs , in the virtual desktop two you will have open design programs and so consecutively in each desk it will be possible to open different programs without the one interfering with the other.
An ideal point, to bring a more adequate order, is to be able to assign a name to each of the virtual desktops which allows us to know with certainty what elements are on each desk. But this was not possible until Microsoft has decided to integrate from Windows 10 build 18963 the option so that each of its users can rename virtual desktops and thus handle a much clearer order in them..
Note
Version 18963 of Windows 10 is only available at the moment for Insider users and if you wish you can register for free at the following link:
Windows Insider
1. How to know the version of Windows on the PC
Step 1
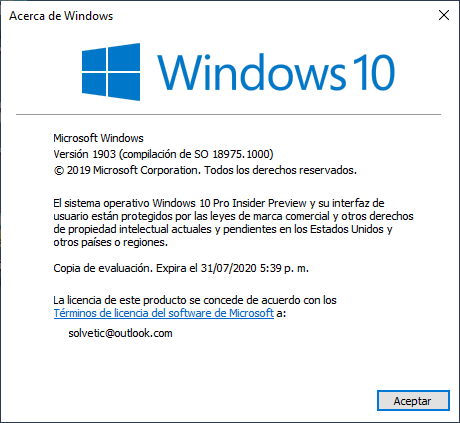
To know which version of Windows 10 you use, you must press the Windows + R keys and execute the “winver†command:
+ R

Step 2
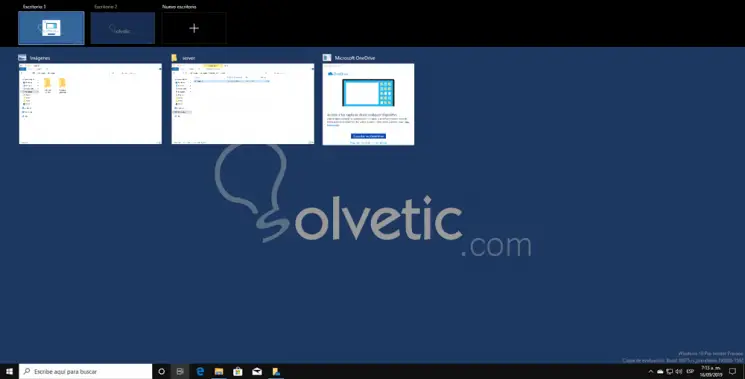
Now you can see that when you click on the "Task View" icon on the taskbar, each desktop is assigned as "Desktop 1", "Desktop 2" etc:

2. How to rename a virtual desktop in Windows 10
Step 1
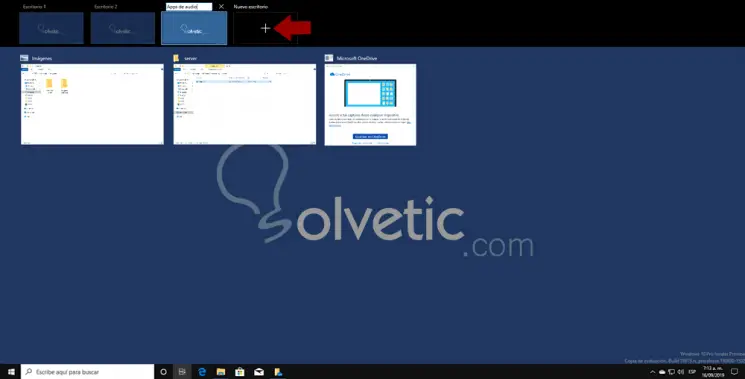
The process is quite simple. To do this, we click on the “Task view†icon and then simply click on the name of the desktop, for example, click on “Virtual Desktop 3†and the editable box where we will enter the desired name will automatically be activated:

Step 2
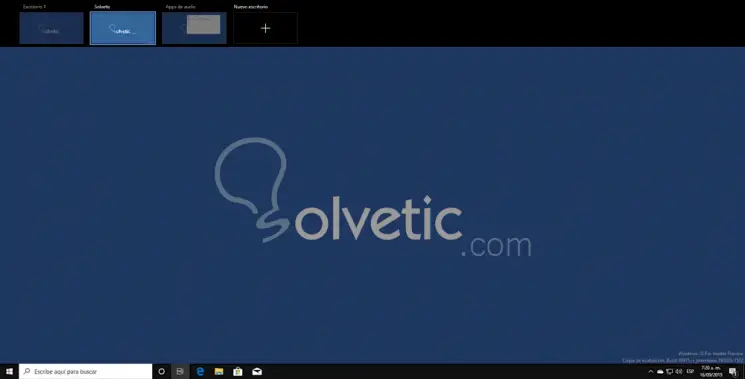
So we must do with each of the desks and then access them much easier:

You can see how with this new edition of Windows 10 you can rename virtual desktops as you deem necessary and thus take much more direct control over them.