In Windows 10 we have the possibility of integrating communication with other devices on the network using network units which we can configure with the appropriate permissions and make it easier for other users to access it and transfer or take objects from it. The network units allow us to have a space on the hard disk that we designate as available in access for other users. In this way we will be allowing the information to be shared thus simplifying the management and exchange of data..
Like many of the actions that we perform in Windows 10 , the time may come when it is not necessary to use said network unit more so that for security and control it is best to remove it from the system and today we will see the different ways to do it.
We also propose the video tutorial with the necessary steps to disconnect a network drive in Windows 10..
To keep up, remember to subscribe to our YouTube channel! SUBSCRIBE
1. How to disconnect network drives in Windows 10 using File Explorer
File Explorer is the central point from which we access the network drives and their content.
Step 1
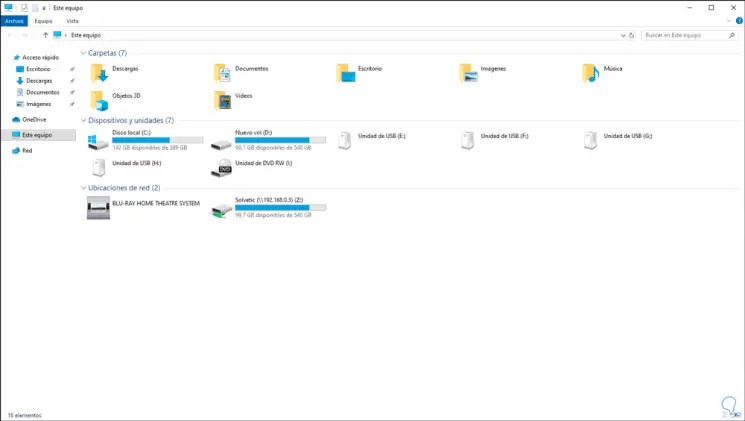
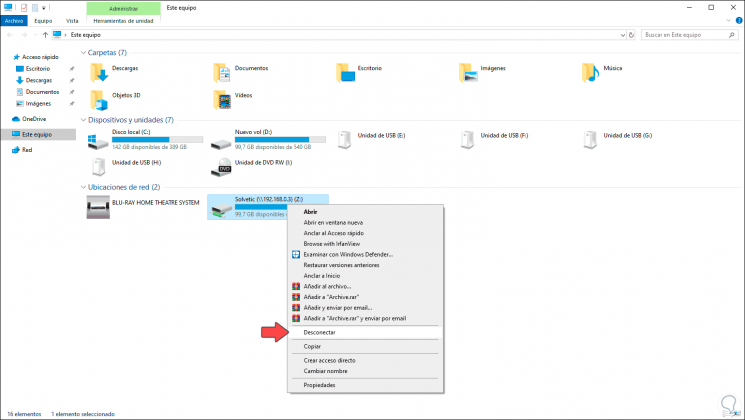
To disconnect it using this method we will access the Explorer, go to the “Network locations†section, right click on the network unit and select “Disconnect†option:
Step 2
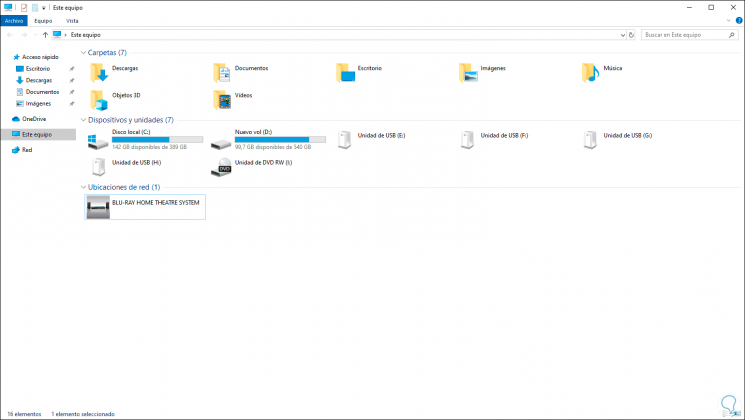
Pressing there the network unit will be disconnected:
2. How to disconnect network drives in Windows 10 using the Command Prompt
Step 1
Windows 10 integrates the command prompt console thanks to which it will be possible to create and disconnect the network drives in the system, for this we must detect the letter that has been assigned to the network drive in File Explorer and then use The following syntax:
net use “letterâ€: / delete
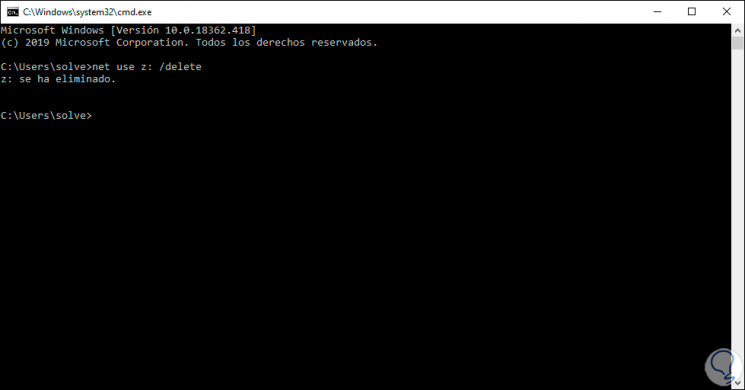
This will automatically disconnect the Windows 10 network drive.
3. Disconnecting network drives in Windows 10 using the System Log
Before performing any task on this editor it is advisable to create a restore point or a backup of the data
Step 1
After that we will combine the following keys and execute the “regedit†command
+ R
regedit
Step 2
In the displayed window we will go to the following route:
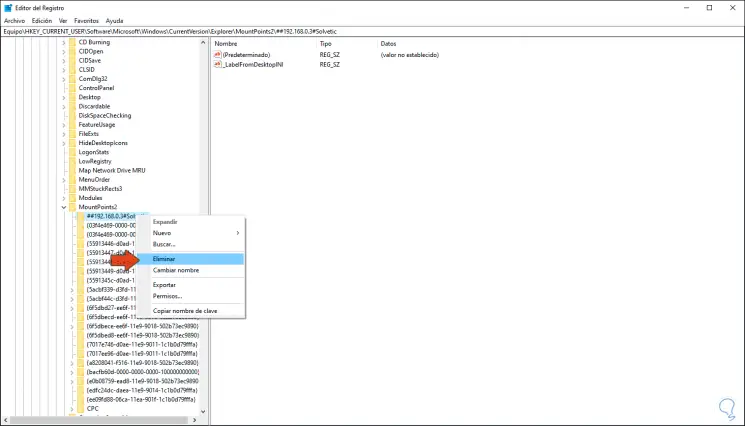
HKEY_CURRENT_USER \ Software \ Microsoft \ Windows \ CurrentVersion \ Explorer \ MountPoints2
Step 3
There we display the options of that key and find the route of the network drive, we must right click on it and select the option "Delete":
Step 4
The following message will be displayed that we must accept to continue with the process:

Step 5
Now we will go to the following route:
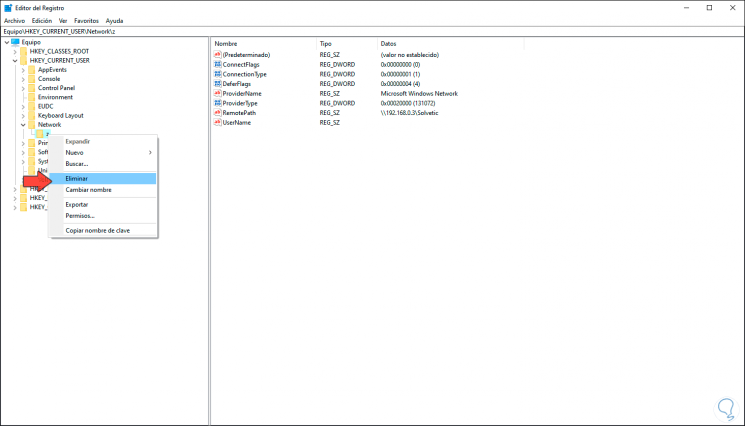
HKEY_CURRENT_USER \ Network
Step 6
There we find the letter that the system has assigned to the network unit, we must right click on it and select the option “Deleteâ€. Again we accept the confirmation to remove this key from the Windows 10 registry.
With any of the options mentioned above it will be possible to safely disconnect the network units that have been linked to Windows 10 remembering the functionality of these and that if we disconnect them it is for a clearly security and privacy issue of the end user, so check in your browser if you have network drives that you don't use to disconnect them..