One of the tasks that we can frequently carry out in our daily tasks is to share files with other users and for this you need to have safe , comprehensive and fully functional tools . There are protocols that allow us to carry out this task in a much simpler way and a specific case is the SMB protocol..
The SMB (Server Message Block) protocol is a protocol for sharing network files, and in Windows environments it is known as the Microsoft SMB protocol. The set of message packets that define a particular version of the SMB protocol is called a dialect. The Common Internet File System (CIFS) protocol is a direct dialect of SMB, so both SMB and CIFS are available on VMS, several versions of Unix and other current operating systems.
SMB options
Although the main objective of SMB is to share files, we have additional options such as:
- Dialectal negotiation between teams
- Determination of other Microsoft SMB protocol servers in the network or network scanning
- File, directory and shared access authentication
- File and directory change notification
- Extended handling of file attributes
There are three (3) main versions of the SMB protocol, and even today many devices run the original version, called SMB version 1 (v1), which is old and insecure, and Windows 10 no longer installs it by default and even less in its new edition April 2018, one of the main causes to put aside SMB you see its vulnerability to malware attacks..
If we are using Windows and we try to establish an SMB connection, we can receive one of the following messages:
- Unable to connect to file share because it is not secure
- The specified network name is no longer available
- Unspecified error 0x80004005
One of the advantages is that, if we still have network devices that can no longer be accessed by disabling SMB v1, it will still be possible to enable it temporarily to access the resource.
1. How to temporarily enable the SMB v1 protocol in Windows 10
Step 1
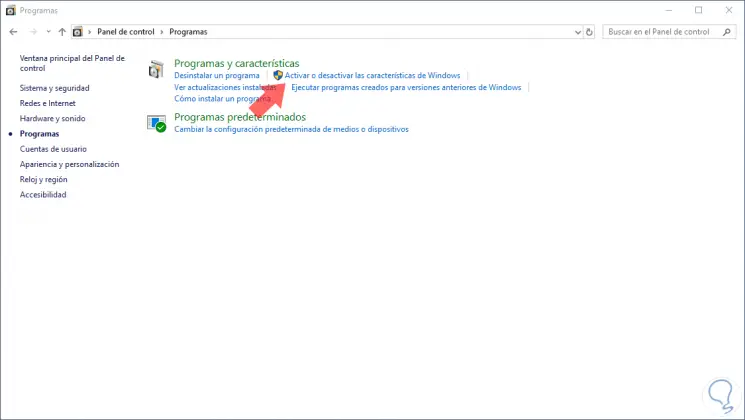
To achieve this, we will go to the following route:
Control Panel \ Programs
Step 2
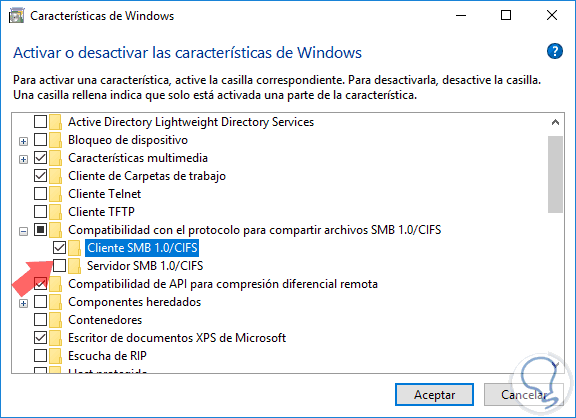
There we click on the Activate or deactivate the Windows features line and in the window we will find the section Compatibility with the SMB 1.0 / CFS file sharing protocol and in the displayed options we activate the SMB 1.0 / CFS Client box:
Step 3
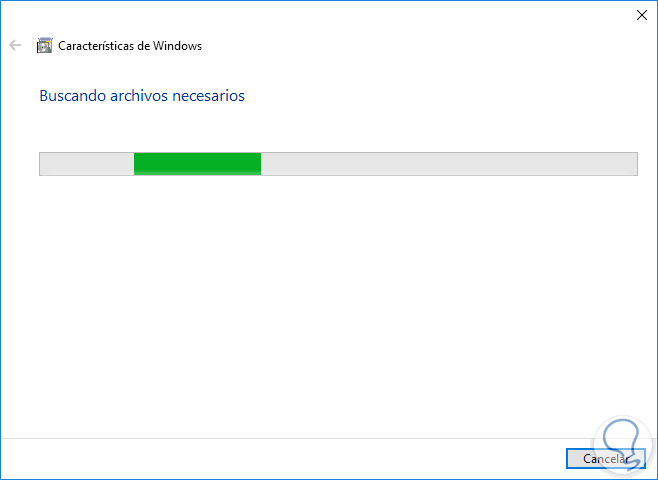
Click on Accept and the SMB adjustment process will begin:
Step 4
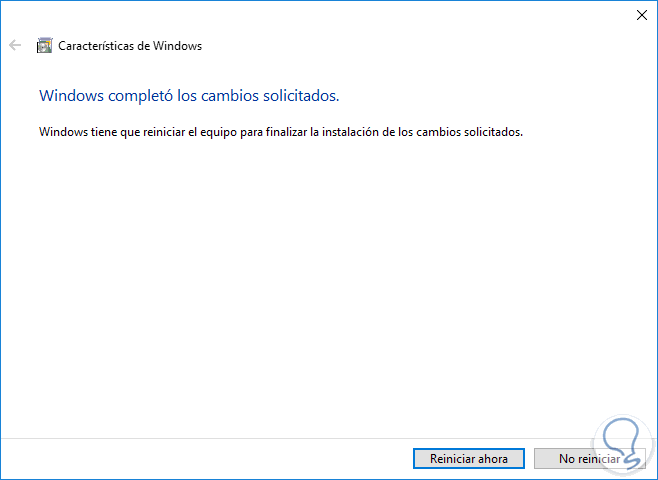
Once finished we will see the following:
Step 5
Click on the Restart now button and we will see that Windows 10 starts the configuration process. After the restart, it will be possible to see and connect again to the network devices that execute the previous protocol in the local network.
Once the changes have been made, we can deactivate SMB v1, in the route described above and deactivating the SMB 1.0 / CFS Client box.
2. How to check if the SMBv2 protocol is enabled in Windows 10
Step 1
By default the SMB v2 protocol must be enabled in Windows 10 and its security features are much better, as it offers features such as:
- Transparent failover where the client reconnects without interruption to the cluster nodes during maintenance or failover
- Scale horizontally with simultaneous access to shared data on all nodes of the file cluster
- Multichannel as it allows to add more network bandwidth and error tolerance in case there are several routes available between the client and the server
- Direct SMB which has RDMA network support for better performance without abusing network resources
- Encryption improvements to add more security to the data to transfer
- Directory granting which improves response times for branch applications through caching
- Performance optimizations at the reading and writing level
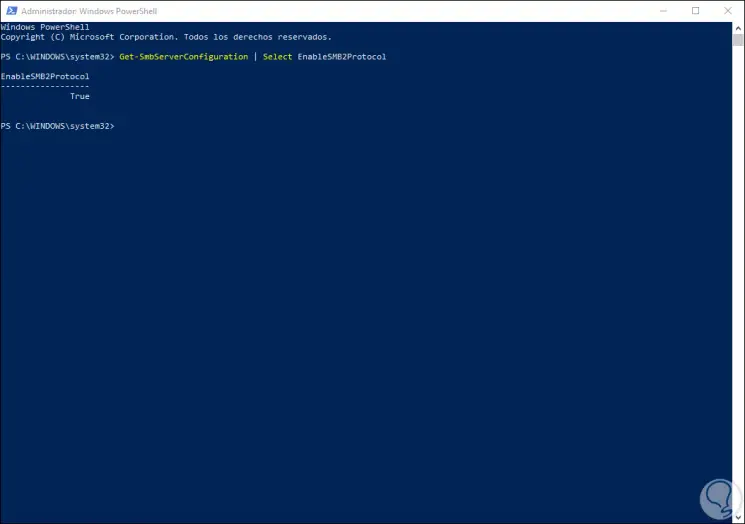
- To verify this protocol in Windows 10, we will access Windows PowerShell as administrators and there we execute the following line:
Get-SmbServerConfiguration | Select EnableSMB2Protocol
Step 2
If the result, as in this case, is True means that SMB v2 is active, in case the result is False, we must execute the following:
Set-SmbServerConfiguration –EnableSMB2Protocol $ true
If for some reason, not recommended, we must disable SMB v2, we can execute the following:
Set-SmbServerConfiguration –EnableSMB2Protocol $ false
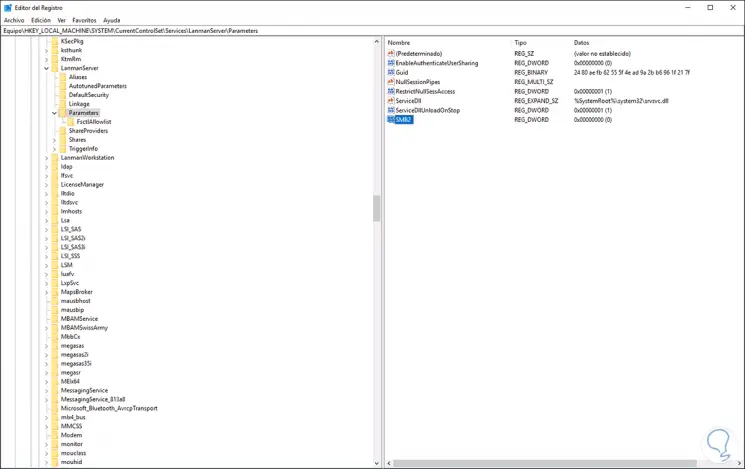
Alternatively, we can enable or not SMB v2 from the Windows 10 registry editor, for this, we will use the Windows + R key combination and execute the regedit command, then we will go to the following route:
+ R
HKEY_LOCAL_MACHINE \ SYSTEM \ CurrentControlSet \ Services \ LanmanServer \ Parameters
Step 3
There we will double-click on the SMB2 record and in the Value data field, we set one of the following options. Click on OK to apply the changes.
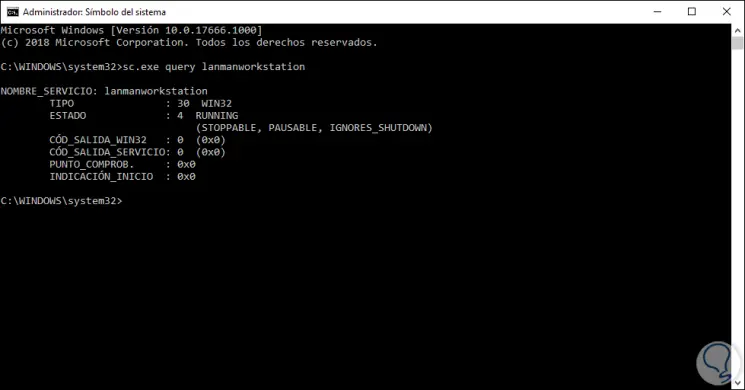
To disable or enable it from the command prompt, we must access as administrators and first detect the current status of SMB using the following line:
sc.exe query lanmanworkstation
Step 4
To disable SMB v2 we execute the following:
sc.exe config lanmanworkstation depend = bowser / mrxsmb10 / nsi sc.exe config mrxsmb20 start = disabled
To enable it, we execute:
sc.exe config lanmanworkstation depend = bowser / mrxsmb10 / mrxsmb20 / nsi sc.exe config mrxsmb20 start = auto
Thus, we have seen how to temporarily enable SMB v1 to access network files, but considering the risks of this.
To keep up, remember to subscribe to our YouTube channel! SUBSCRIBE