One of the essential and most delicate components of a Windows 10 operating system is its network , since thanks to this we will access the internet and we will be able to carry out practically 100% of the activities that we carry out daily.
This aspect of the network in Windows 10 is essential since behind this value there are a number of security policies that will allow the computer, and with it our data, to be more secure or more vulnerable..
There are basically 3 types of networks in Windows 10 which are Public, Private and Domain. Depending on the type of network selected, the System Firewall will change its policies and rules by establishing packet transit restrictions and thus optimize the overall security of the system, being the most restrictive configuration for public networks and the least restrictive for domain networks. By default, any new connection in Windows 10 is established in a public network.
Networks in Windows 10 have features such as:
Public network
As we have said, this is the default value for any new network when it is first connected. A public network is open to all users and there are no protection rules between the local computer and any other computer, hence the Windows Firewall rules associated with the public profile are the most restrictive, these rules prevent them from working following applications and services such as PlayTo, file sharing, network detection and automatic configuration of printers, televisions and other network devices.
Private network
This network can be used for home or small office networks, or it can be implemented if users and devices on the network are known and trusted. This configuration allows the equipment to connect to a group in the home, if that function is still available, and devices on the network, such as printers.
Domain network
As the name implies, this type of network is when it is detected that the local computer is a member of an Active Directory domain, and this computer can authenticate to a domain controller in one of its network connections.
TechnoWikis will explain how we can change the current network type in Windows 10 through the Windows PowerShell console..
1. How to identify current Windows PowerShell networks
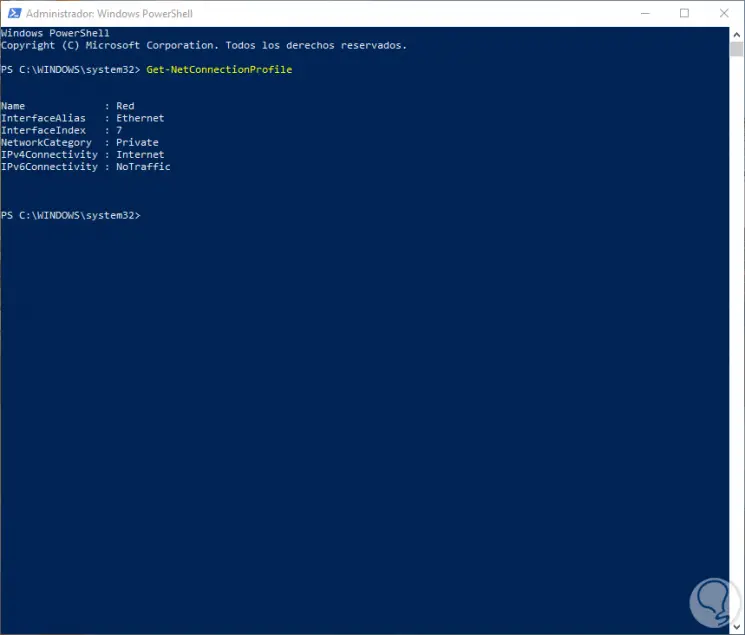
To perform this verification, we access Windows PowerShell as administrators and run the following cmdlet:
Get-NetConnectionProfile
The result will be as follows:

There we find specific details such as:
- Network interface aliases
- Type of network currently used
- IPv4 or IPv6 connectivity
There we must keep in mind the value of the InterfaceIndex line which, in this case, is 7.
2. How to change the type of network in Windows 10
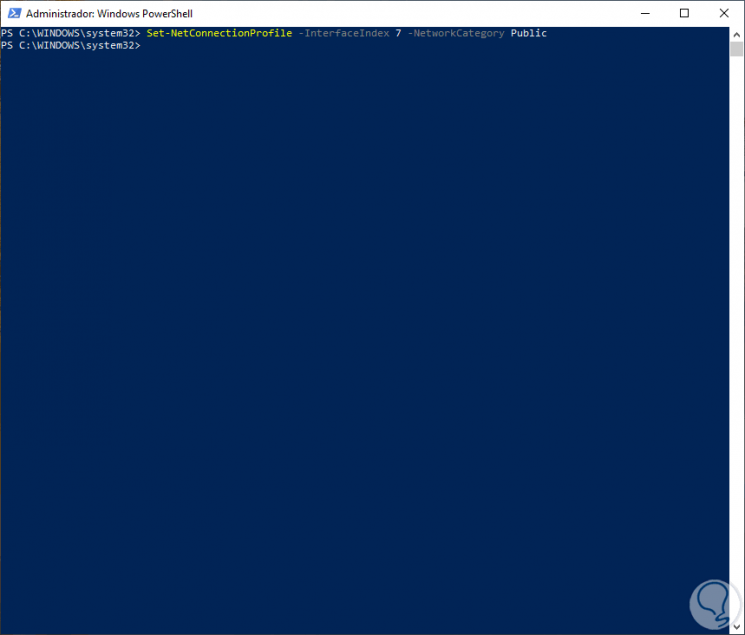
Identified that, we will execute the following line to change the type of network, in this case to Publica:
Set-NetConnectionProfile -InterfaceIndex 7 -NetworkCategory Public

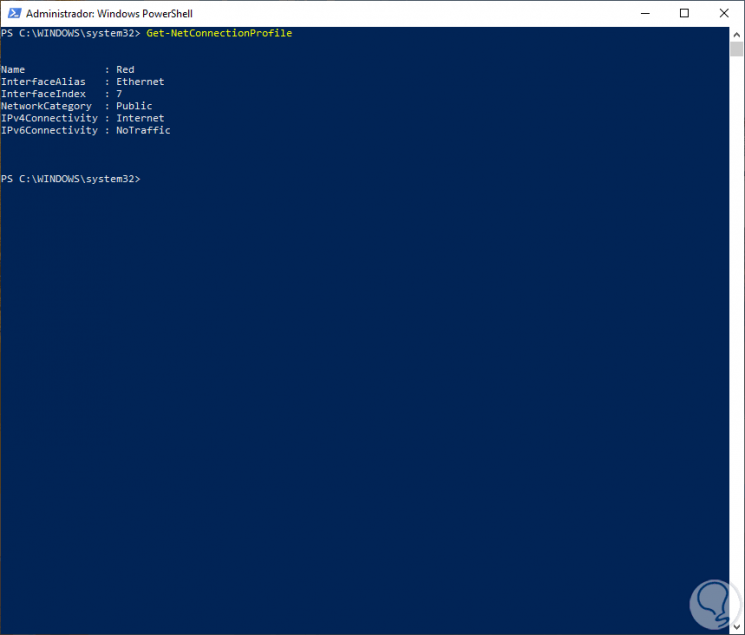
Now again we can run Get-NetConnectionProfile to verify that the new type of network is Public:

The options we can use to change the type of network in Windows 10 through PowerShell with:
As we can see, each type of network has its own configurations and it is up to us to select the best option to use considering the security of the information in the system..