Windows 10 is a dynamic operating system, with various features and focused on fully fulfilling the expectations of each of its millions of users and within these versatility options we find the Quick Access thanks to which we will have a much more direct access to system libraries like:
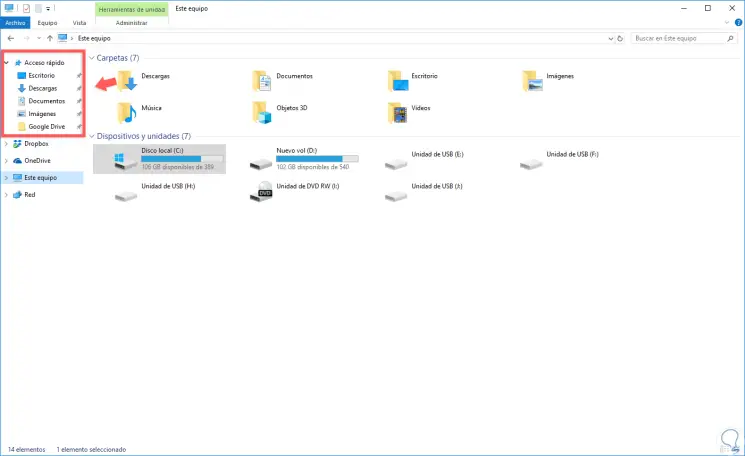
By default, Quick Access in Windows 10 is enabled by default in the file browser and is located on the left side of the file . From the Quick Access we have the opportunity to access not only certain libraries but to access documents in a much more direct way since it will be possible to access the latest files that have been created or edited from the browser..
Through this tutorial we will see how to use this Quick Access in Windows 10.
To keep up, remember to subscribe to our YouTube channel! SUBSCRIBE
1. Change Basic Explorer Settings in Windows 10
Step 1
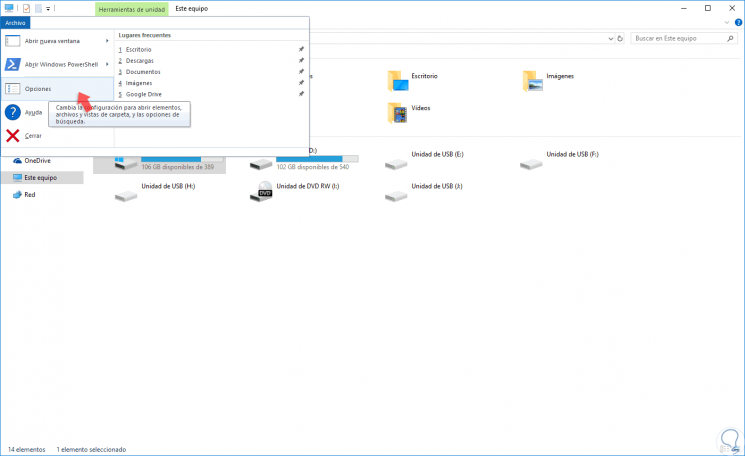
We can perform a series of basic configurations when managing Windows 10 Quick Access and for this we will access this using one of the following options in the Windows 10 File Explorer:
- Click on the "File" menu and select "Options".
- Click on the "View" menu and then click on "Options".
Step 2
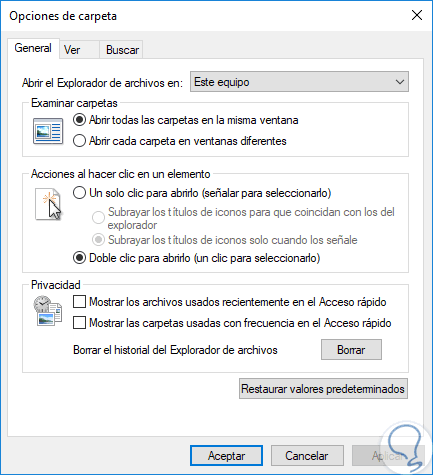
In the window we will have the following alternatives. There we will activate the necessary boxes and click on the “Apply†button and then on “OK†to apply the changes. Now we will see some tasks that we can perform in the Windows 10 Quick Access.
- Open the Windows 10 file explorer directly in the Quick Access.
- Deploy recently used files and folders.
2. Pin a new folder to Quick Access in Windows 10
Step 1
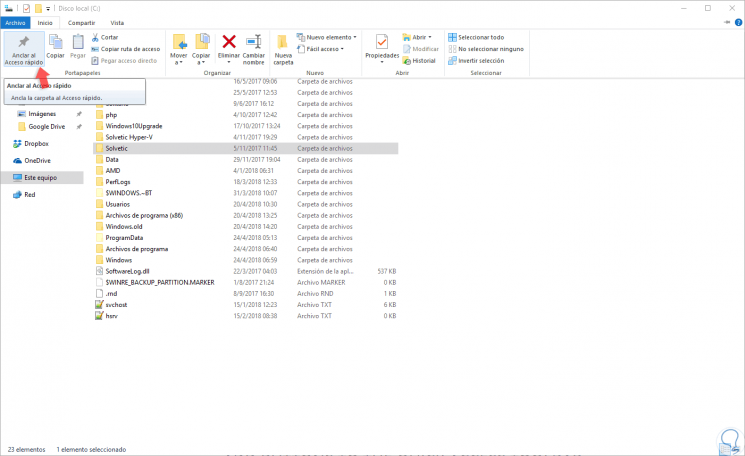
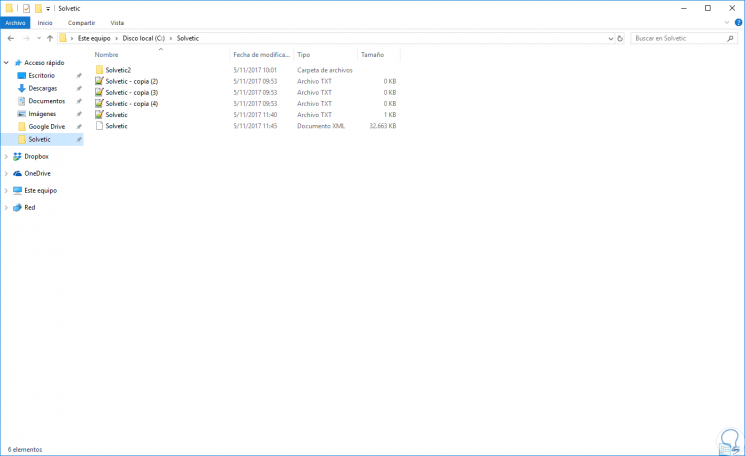
It is a very simple process when adding more folders to the Windows 10 Quick Access, for this we go to the folder that we wish to anchor, select it and in the “Start†menu we click on the “Anchor to Quick Access†option:
Step 2
In this way we can access all the contents of this folder from the Quick Access:
3. Unpin a folder from the quick access in Windows 10
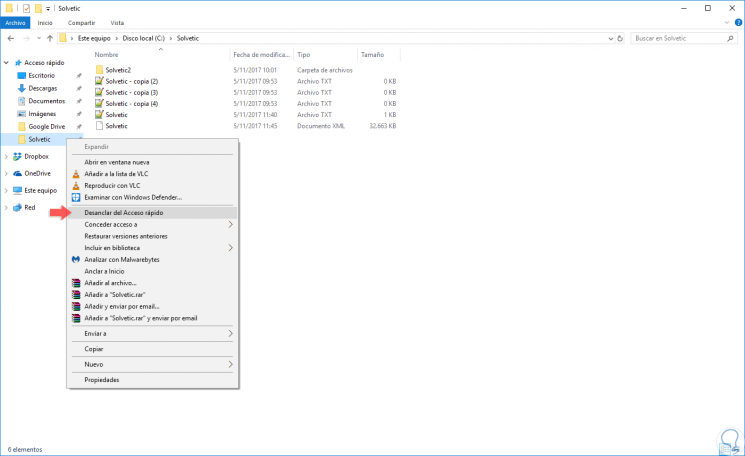
When we do not want to have a folder in the Windows 10 Quick Access, we must right click on the folder in the Quick Access and select the option “Unpin from Quick Accessâ€:
4. Modify the location of the Quick Access toolbar in Windows 10
Step 1
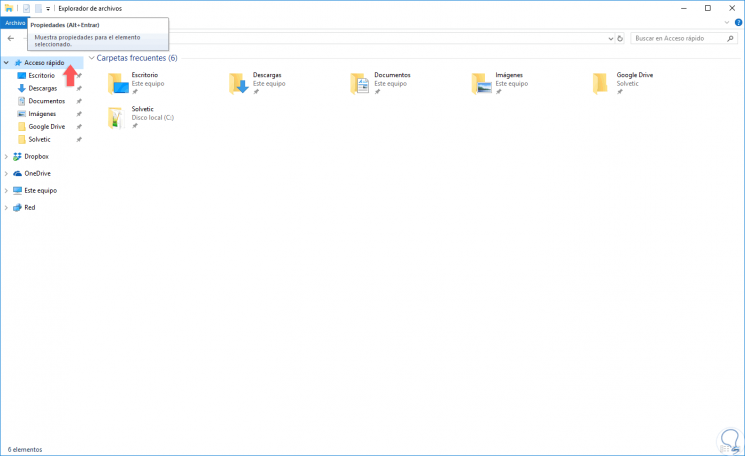
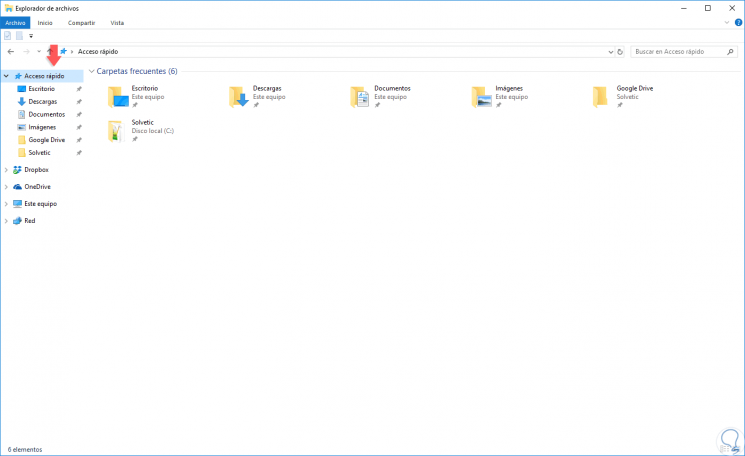
By default, the Quick Access toolbar, located on the back, offers three alternatives to use:
- A button to access the properties of the file or folder that we have selected.
- Another button to create a new folder.
- Another option to access a new configuration menu
Step 2
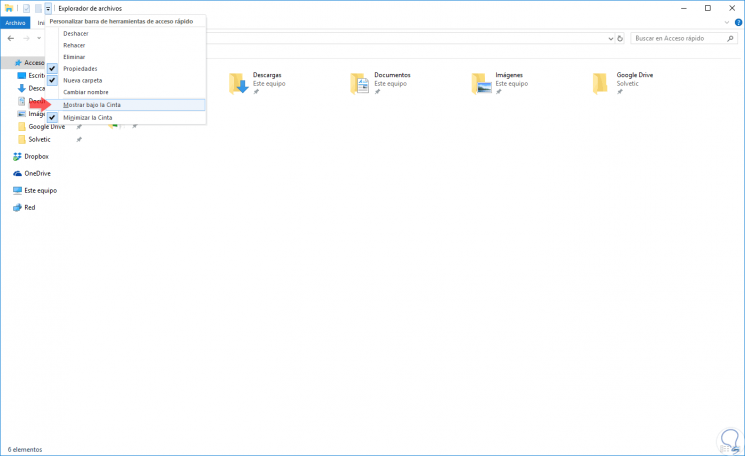
To adjust the new position of this toolbar, click on the last access and in the options displayed select "Show under the ribbon":
Step 3
This way this will be the new look of the Quick Access toolbar:
5. Add more buttons to the Quick Access toolbar in Windows 10
Step 1
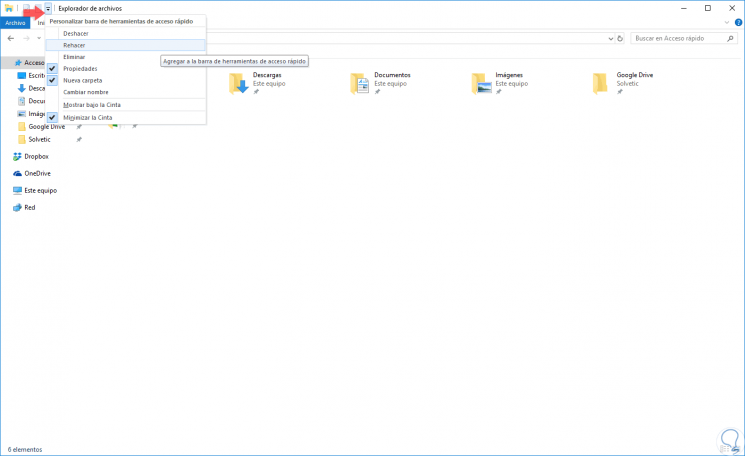
As we have said, by default only three access options are displayed, but we can add more configuration options if necessary. For this we click on the last icon and we will have the opportunity to add more options such as:
Step 2
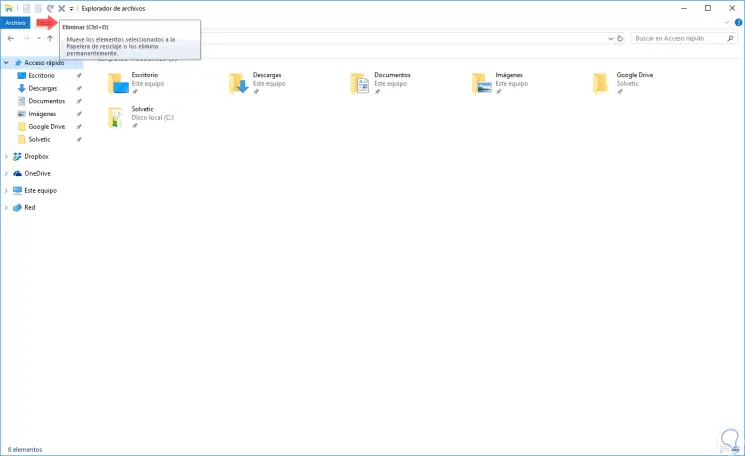
Simply click on the desired option or options for these to be added to the Quick Access toolbar:
It's that simple to use and customize Quick Access in Windows 10 for better file management..