One of the great advantages of using Microsoft Word is its hundreds of integrated options for editing, adjustments and formats of both text and multimedia elements (audio, images, etc.), which seeks to highlight the impression and visual impact that These elements will have on users. The images are one of the most used elements in many files created in Microsoft Word 2016 0 2019 , since they give a touch of elegance and better information on the subject to be treated in the context of the file, so it is useful to pay attention to certain important details that Microsoft Word offers us for work on these..
It is not always enough to insert an image and voila, sometimes we can edit that image to change two essential aspects that are:
Although they seem similar terms, the size only allows us to edit the dimensions of the selected image while with the shape it will be possible to modify its appearance . To extend, contract or modify the size of an image or shape, we must use the size controllers or, well, to obtain a much more accurate control of the image. Word offers us the Size tools. TechnoWikis will explain how we can modify both the size and shape of an image in Microsoft Word 2019 but this process is identical if we use Word 2016.
To keep up, remember to subscribe to our YouTube channel! SUBSCRIBE
1. How to change the shape of an image in Microsoft Word 2019, 2016
As we have mentioned, editing the shape of an image allows us to completely change its overall appearance. This can cause a better visual impact taking into account the space and context where the image has been inserted.
Step 1
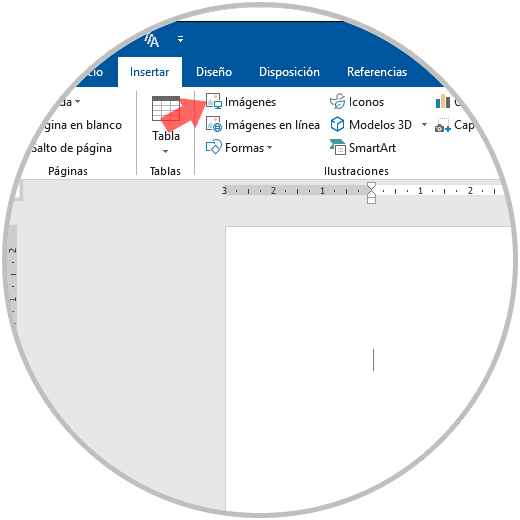
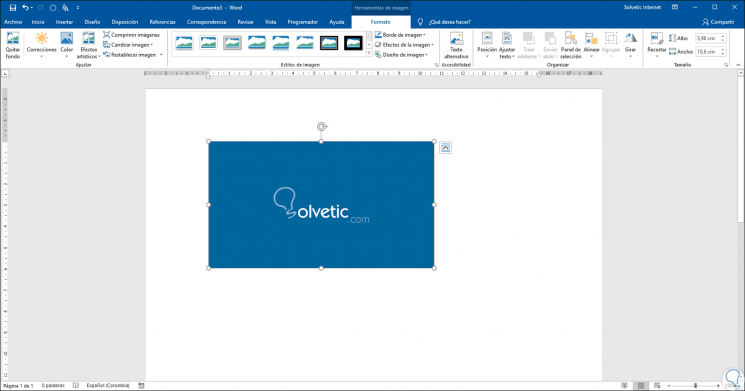
The first step to take is to insert the image in the Microsoft Word 2019 document, for this we go to the “Insert” menu and in the “Illustrations” group we find the option “Images”:
Step 2
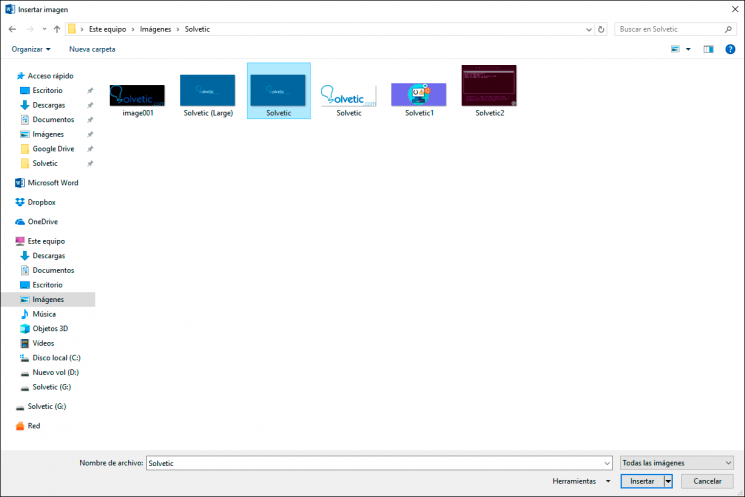
When clicking there we must go to the library where the image to be inserted is located. We click on the "Insert" button to add the image to the Word document.
Step 3
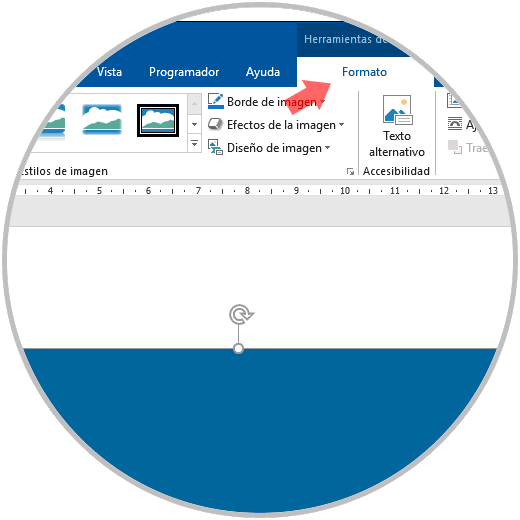
When the image is inserted into the Microsoft Word document, a new menu called “Image Tools” will be activated where we will have a submenu called “Format”:
Step 4
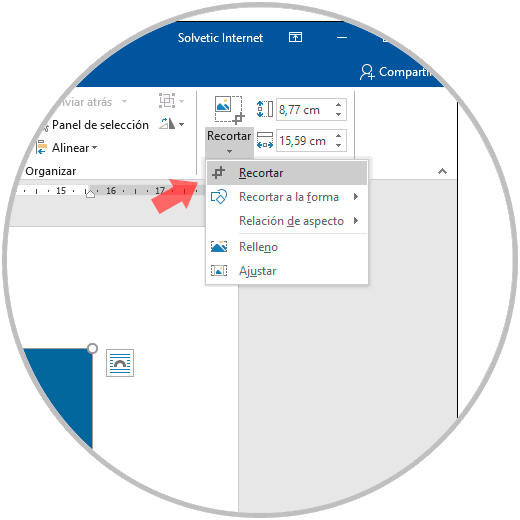
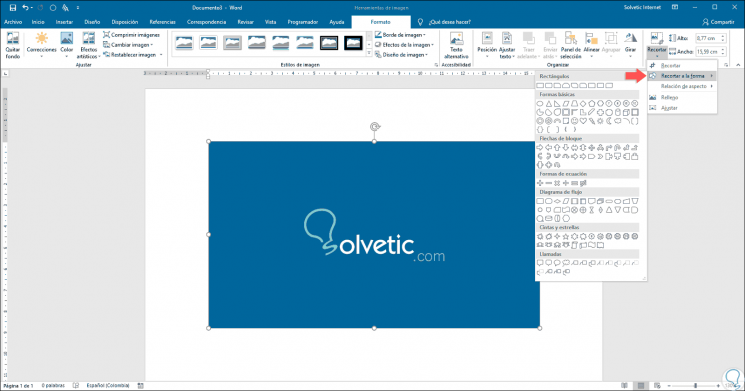
As we can see, there are housed a series of options to edit the selected image in Word, there we go to the “size” group and select the “Crop” option and in the options displayed again click on “Crop”:
Step 5
This option will activate a series of elements in the outline of the image to crop it, there we click on one of them and adjust the image to the desired size. This will trim the image as selected.

Step 5
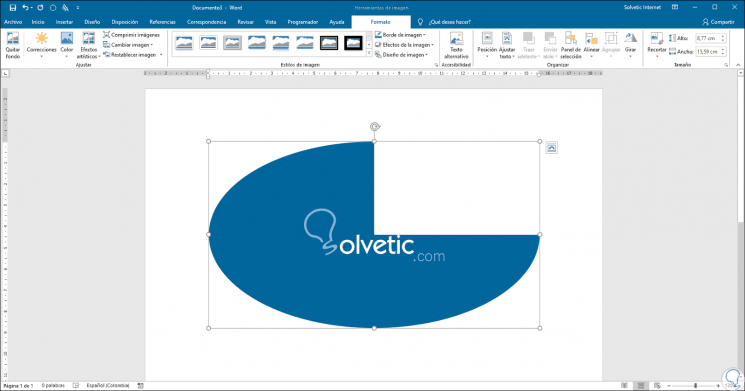
This is the traditional way of adjusting the shape of the image in Microsoft Word, but we have a more special option to crop the image to a different form than the default, for this we go back to the “Size” group and in the "Crop" option, this time we select the "Crop to form" option and a series of additional options will be displayed:
Step 6
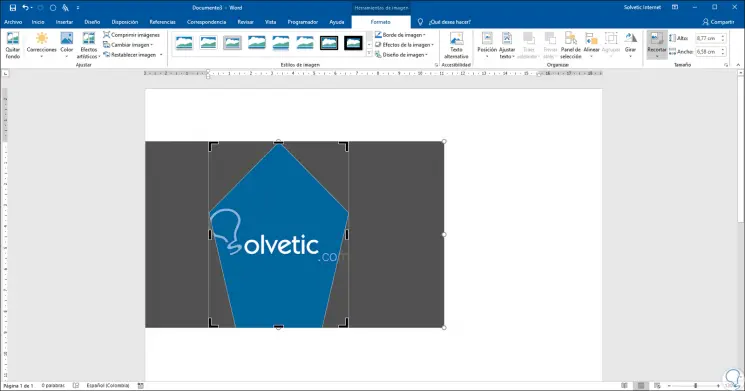
There we can select the desired shape and automatically our image in Word 2019, or 2016, will take that style:
Step 7
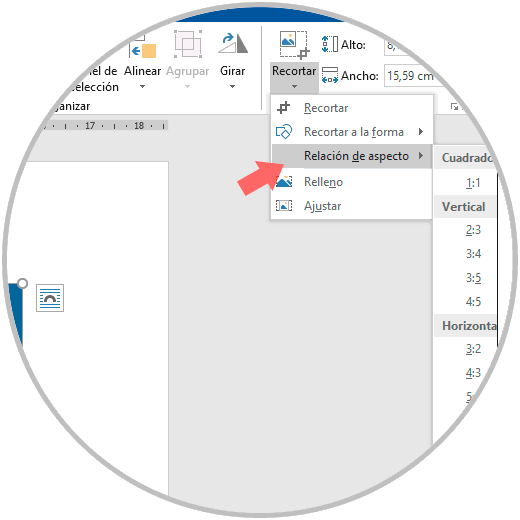
Within the Crop options we find a section called “Aspect Ratio”, this allows you to modify the original size of the image, but a logical proportion between the width and height of it is preserved.
For this, again we go to the “Size, Crop” group and this time we select the “Aspect Ratio” option where we will select the appropriate option for our image:
Step 8
Based on the proportion selected, we can move our image to find the perfect location for it:
Thus, Microsoft Word 2016 or 2019 gives us practical options to edit the shape of an image..
2. How to resize an image in Microsoft Word 2019, 2016
This is a simple process by which we can modify the size of our image.
Step 1
As in the previous process, the first step to take will be to insert the image in the Word document, after this it will be possible to increase or reduce the size in one or more directions of the image, just drag one of the controllers of size either moving it away or bringing it towards the center, in this process we have the following options:
- If we want to keep the center in the same place, we must press the Ctrl key while dragging the size controller.
- In order to maintain the proportions of the image without affecting its context, it will be necessary to press the Shift key while dragging the size controller.
- If the objective is to keep the proportions keeping the center in the same place, we will press the Ctrl and Shift keys while dragging the size controller.
Step 2
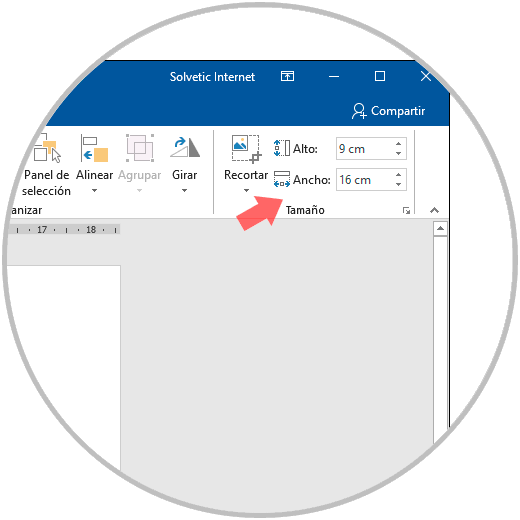
Another of the options available in Word 2016 or 2019 is to modify the size of the image in a specific height and widths, for this we will select the image to be edited and if it is several images, we must press the Ctrl key while selecting each object.
Once the image is selected, we go to the “Image Tools” menu and in the “Format” menu we will go to the “Size” group and there we enter the desired values ​​in centimeters in the “Height and Width” values. Automatically the image size will be modified to the values ​​we enter.
Step 3
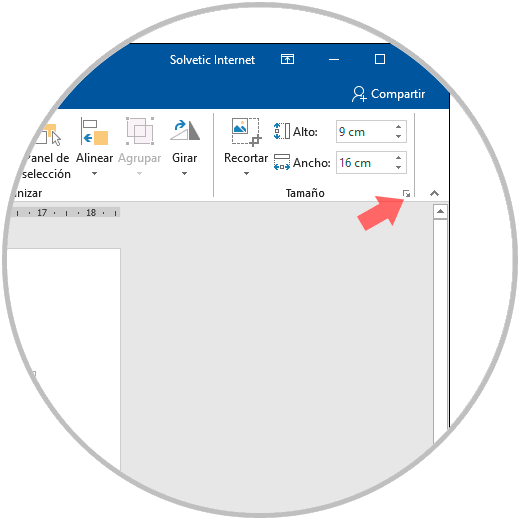
If it is not possible to change the height and width independently, we will need to unlock the aspect ratio, for this we will click on the dialog box selector of the icon located in the lower right corner of the “Size” group and then In the displayed format panel, we will deactivate the “Lock aspect ratio” box:
3. How to resize an image to an exact proportion in Microsoft Word 2019, 2016
Step 1
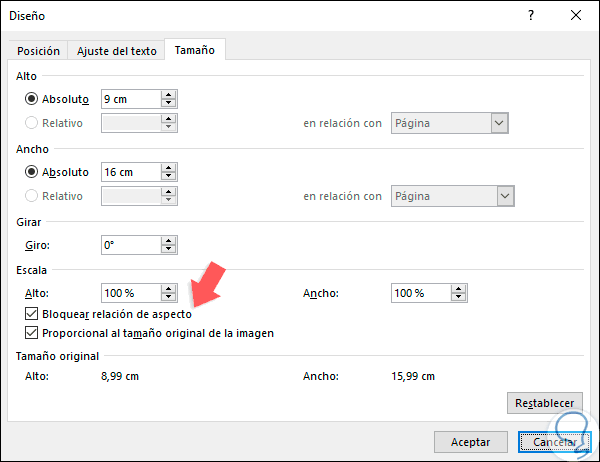
This option allows us to adjust the size in exact measurements, to achieve this, we go to the “Size” group and there we click on the icon located in the lower right corner:
Step 2
The following window will be displayed:
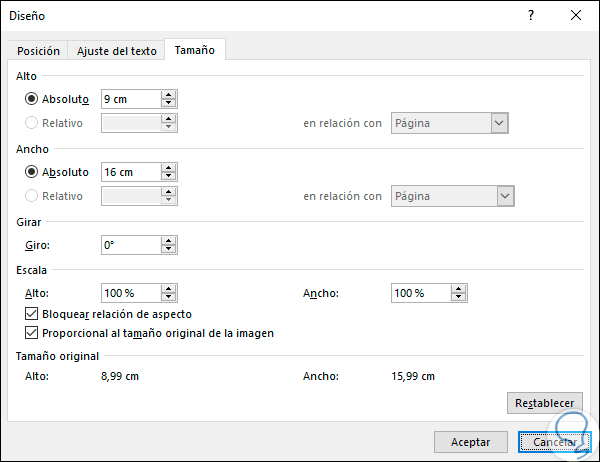
Step 3
There it will be possible to do the following. When these changes are made, click on the "Accept" button.
- If we want to keep the original proportion, we will activate the “Lock aspect ratio” box and enter a Scale percentage for Height or Width.
- To change the size of the image in a different proportion, it will be necessary to deactivate the “Lock aspect ratio” box and add the Scale percentages for Height and Width.
With any of these options that we have seen, it will be possible to modify both the shape and size in our images in Word 2016 or 2019..