Microsoft has developed the Office suite with various applications focused on the daily work of each user and therefore each has a special design, so, for users who handle large amounts of data Excel is the ideal solution, for those who must perform PowerPoint presentations is your ally as is Word for all file themes..
One of the applications that is part of the Office suite but not installed by default is SharePoint which we can obtain through various payment plans.
What is SharePoint?
SharePoint has been designed with a corporate approach to creating websites, by implementing SharePoint, it will be possible to use it as a safe and central place where we can store, organize or share information using different devices for access to information through a browser web like Microsoft Edge, Chrome or Firefox.
Tasks in SharePoint
Some of the tasks we can carry out in SharePoint are:
- Upload files to the SharePoint document library in order to access them from any place or device.
- Work with other users on the same document and simultaneously in real time.
- Open a document in a document library.
- Share documents with more users.
- Add a list or library to the group site and many more actions.
- One of the most executed tasks in SharePoint is the creation of workflows.
Here are the steps in full to create workflows within SharePoint 2019 online. We also leave this video tutorial as a complement to create a team or a communication page in SharePoint Online..
To keep up, remember to subscribe to our YouTube channel! SUBSCRIBE
1. What is a workflow in SharePoint Online
Workflows in SharePoint have been created in order to allow users to collaborate on documents and from there manage project tasks which facilitates the implementation of specific processes in the documents, files or elements of a SharePoint site . In this way the workflow acts as a set of automated tasks of both documents and elements using a sequence of actions or tasks that are related to a business process.
This in turn is associated with a business logic that forms a set of instructions where indications are given and all actions that can affect the document or the element integrated in the workflow are controlled. A workflow gives us solutions such as:
- Improvements in time to coordinate business processes.
- View, edit or reassign a workflow task to one or more users.
Uses for SharePoint
A SharePoint site is comprised of various workflows which have been designed to act in multiple common business scenarios:
- Collect comments: With this flow, a document or item is redirected to a group of people in order to give them and send their comments.
- Approval: When using this flow, the document or element is arranged for a group of people to give their approval.
- Collect signatures: This flow directs a Microsoft Office document to a group of people so that their digital signatures are collected.
- Three states: It is a special workflow since it can be implemented for administration processes where it is required to track one or more volumes of issues or elements, for example, technical assistance incidents, sales campaigns, etc.
- Publication approval: It is an identical flow to approval, because it automates the sending of content to expert users for review and approval.
SharePoint options
The availability of a flow is associated with the location of the site and depending on where it is added, some options are:
- If a flow is added to a list content type, this flow will only be enabled for items of that same content type in the associated list or library.
- If a flow is added directly to a list or library, it will only be available for items in that list or library in SharePoint
- If we add a flow to one type of site content, it will only be available for all elements of that type of content in the lists and libraries where an instance with that content has been added.
- If you want a workflow to be available in all the lists or libraries of a site, we must create a site flow.
How to create workflow in SharePoint
Now we will see how to create a workflow in SharePoint.
When a workflow is created in SharePoint, Microsoft Flow is integrated in order to configure workflows for lists and libraries in both the SharePoint Online and OneDrive for Business platform.
Microsoft Flow has been developed in order to automate tasks between SharePoint and other Office 365 as well as third-party services in order to receive notifications, synchronize files, collect data and more tasks. The SharePoint plan can be purchased at the following link. There we select the option that best suits our needs.
SharePoint
2. Create workflow in SharePoint Online
Step 1
To start this process, we will go to the following link and enter the credentials that were created when you purchased the SharePoint Online plan:
SharePoint access
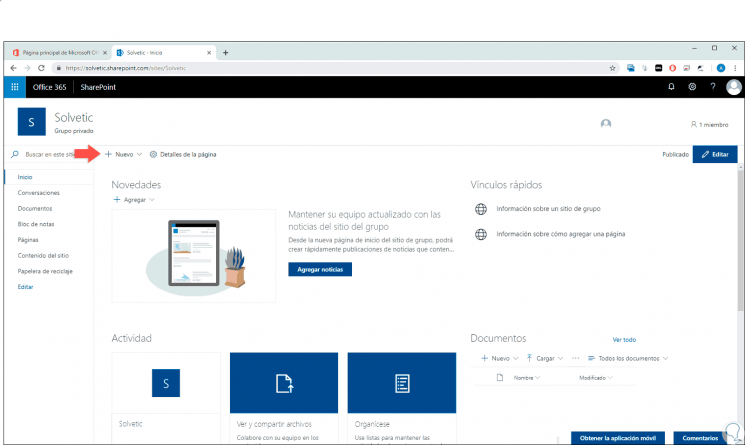
Step 2
We will see the following:
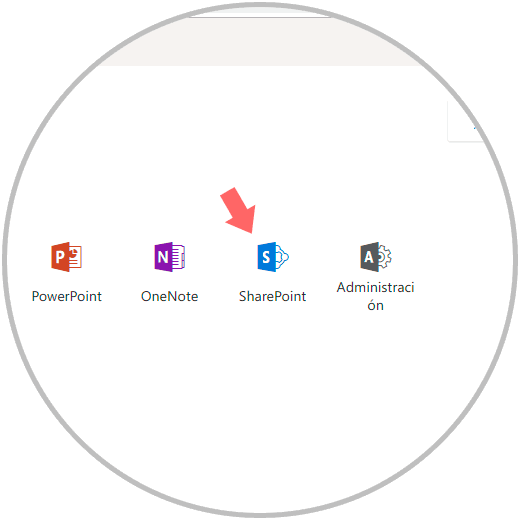
Step 3
There we select “SharePoint” and we will be redirected to the following window:
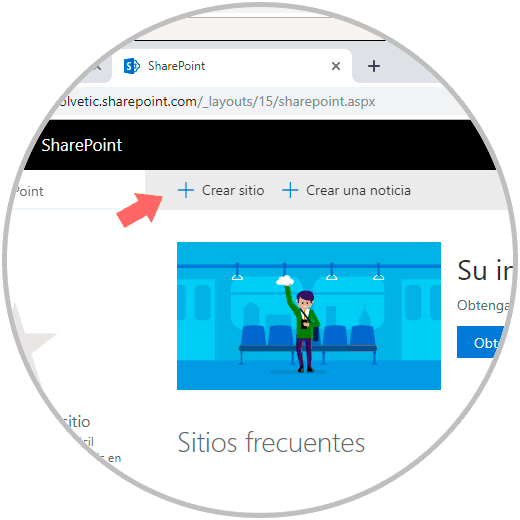
Step 4
There it will be necessary to create a site to be able to apply the workflow, for this we click on the “Create a site” button and we will see the following:
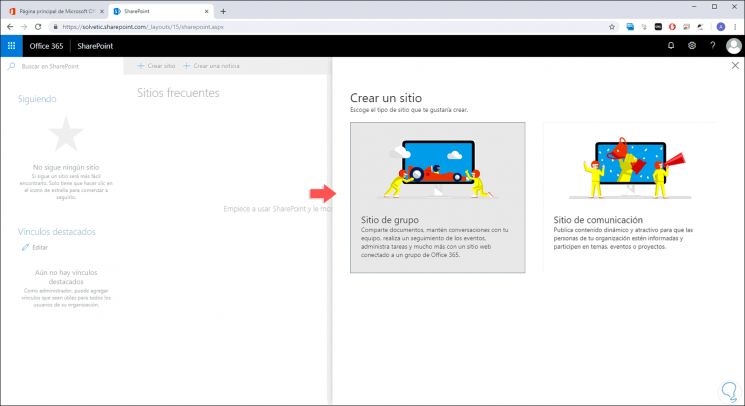
Step 5
There we define the type of site to be created, in this case we select “Group site” and in the following window we define its name and privacy settings:
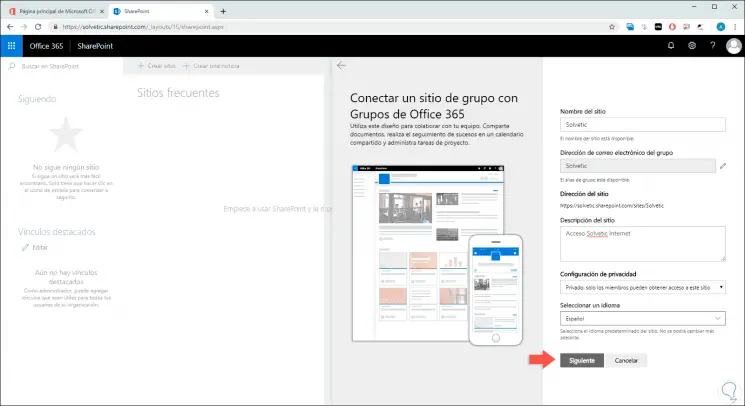
Step 6
Click on Next and it will be possible to add more owners, click on Finish to create the site:
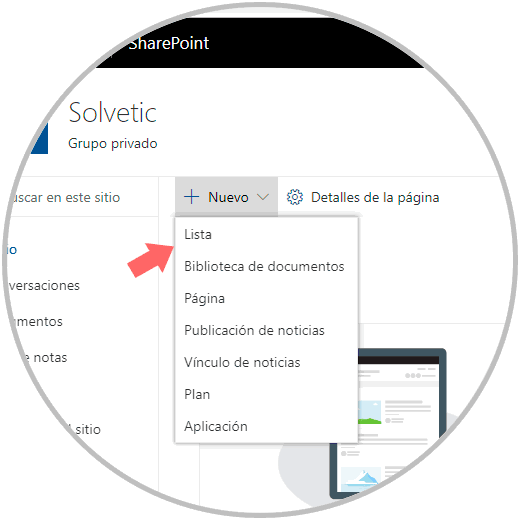
Step 7
Next, we will create a new list, for this we click on the New button and there we select List:
Step 8
In the following window we assign name and description of the list:
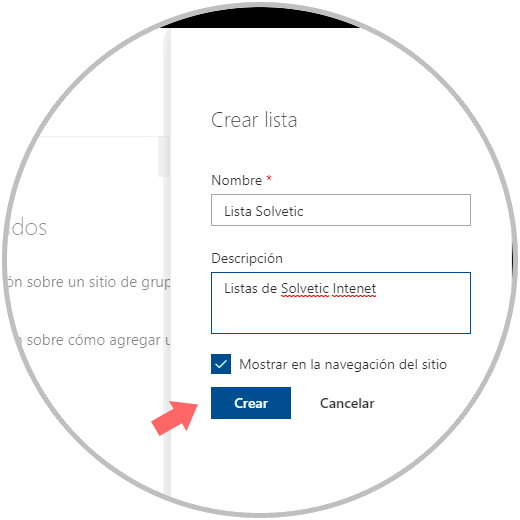
Step 9
Click on Create to complete the creation of our list and we will be redirected to this window where we will see the options of the created list:
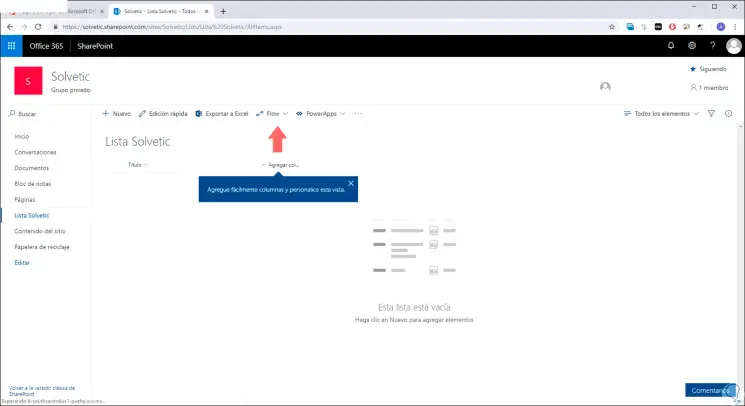
Step 10
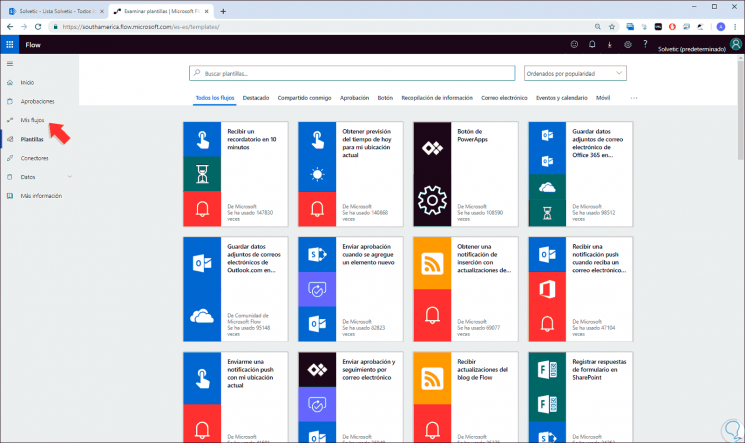
There, at the top of the list or library that we have created, we must click on the “Flow” option and then click on the “Create a flow” option:
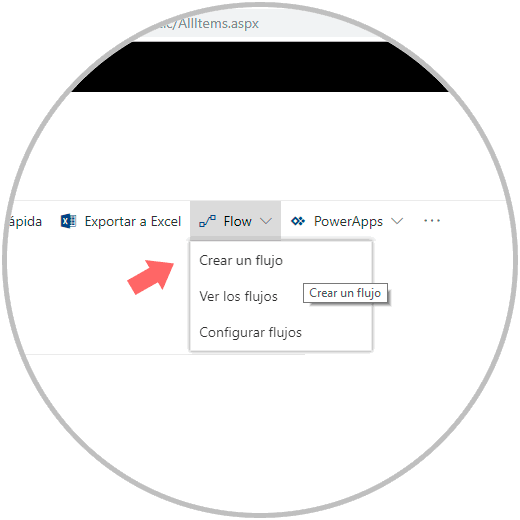
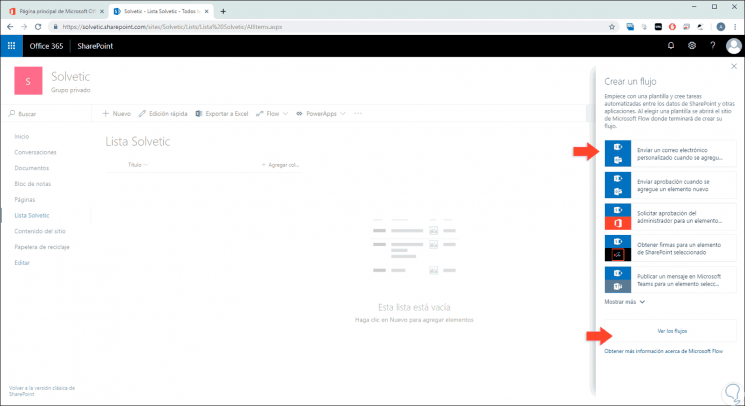
Step 11
Clicking there will display the following sidebar with various templates to use in the flow to be created. We can click on the “See the flows” line to access more options.
Note
We can select the custom action flow templates located at the bottom of the list to create a flow from scratch and according to our requirements.
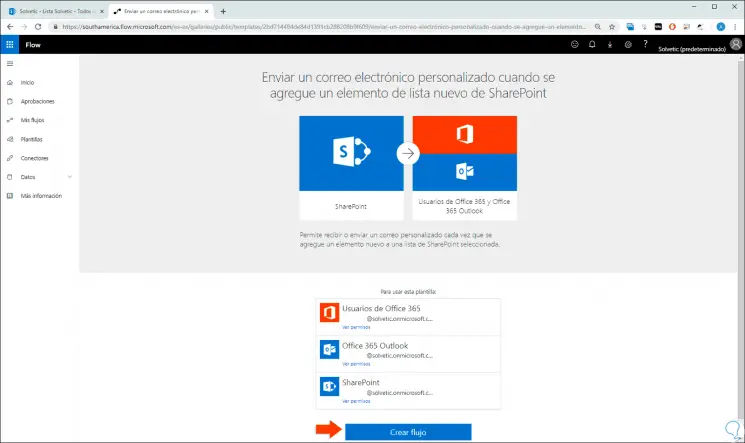
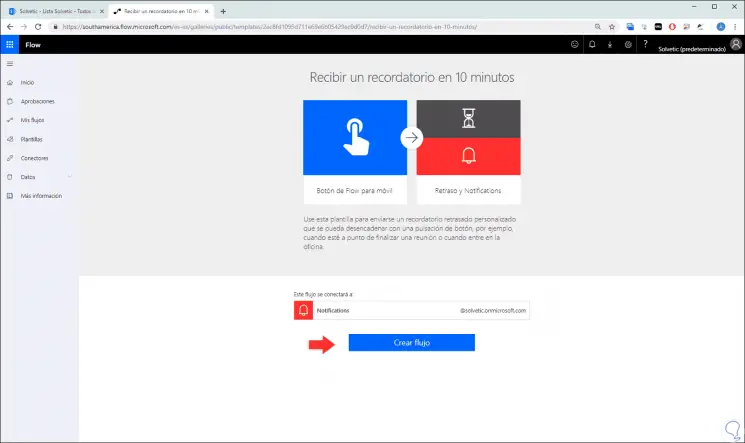
Step 12
In this case, we select the “Send an email” template and we will be redirected to the following window where we will see the Microsoft Flow wizard:
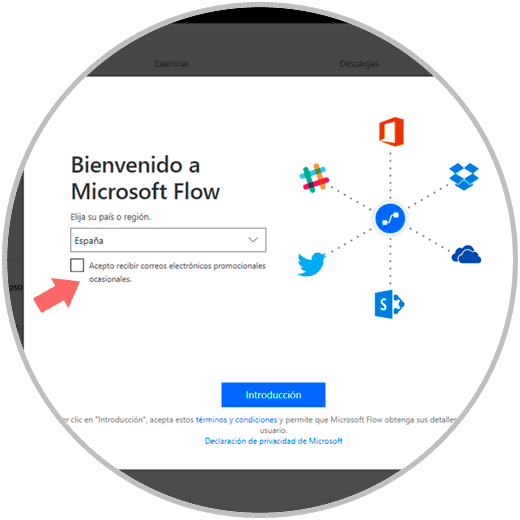
Step 13
There we click on the "Introduction" button to accept the terms of the license and access Microsoft Flow.
Note
Office 365 services, such as SharePoint and Outlook, automatically create the connections.
Step 14
We will see the following:
Step 15
Based on the selected flow, the options will be displayed, click on the “Create flow” button to start the configuration process. Another alternative we have is to go to the "Templates" section and from there access to all available options:
Step 16
There we can click on the desired template for the flow in SharePoint Online:
Step 17
Once the workflow is created, we can go to the “My flows” section to see its detail:
![image]()
Step 18
In some templates, it will be necessary to apply some type of action on these, for example, we have selected the template “Send me my location by mail”. Once we begin the process of creating the flow, the first step to take is known as a trigger, which will determine the way in which the flow is to be started:
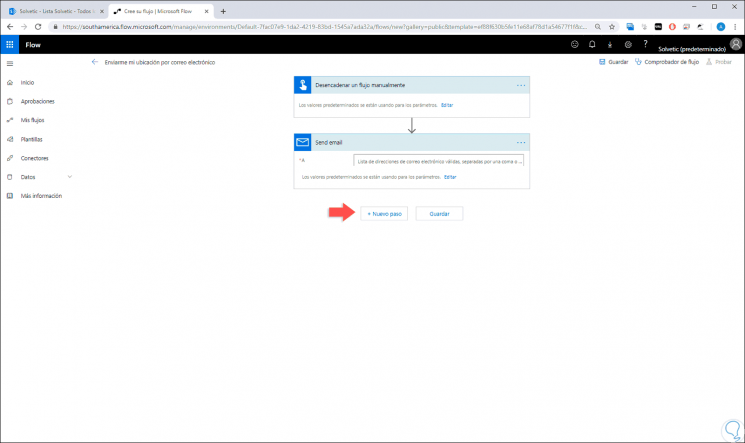
Step 19
In this case we enter an email in the “Send mail” field and then click on “New step” and we can define the action to be performed. Remember that the workflow will carry out these actions automatically according to the criteria that we indicate.
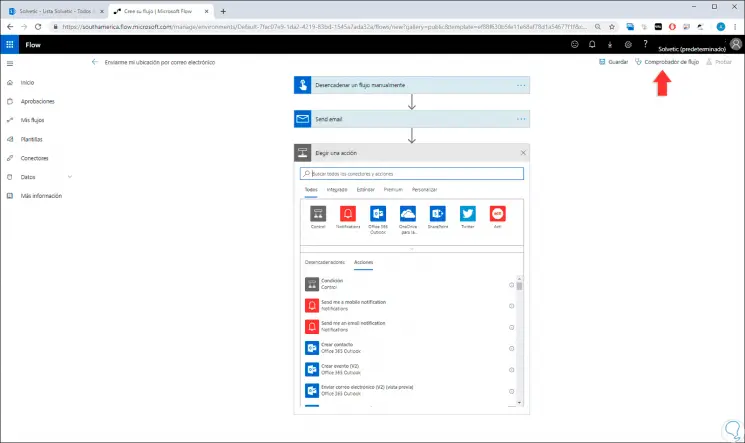
Step 20
A favorable point of SharePoint is that it will be possible to check the integrity of the flow, for this we click on the “Flow Checker” option and we can visualize both errors and warnings:
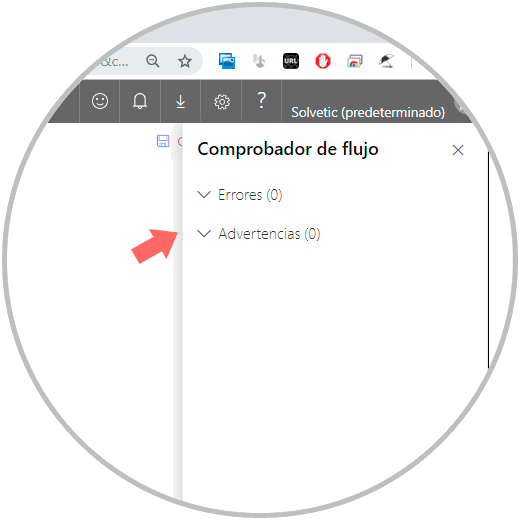
Step 21
Now, to validate that the flow works correctly, click on the "Execute" button and the following will be displayed:
![image]()
Step 22
There we see the type of template selected, as well as the action to be executed, we click on “Continue” and we will see some additional options:
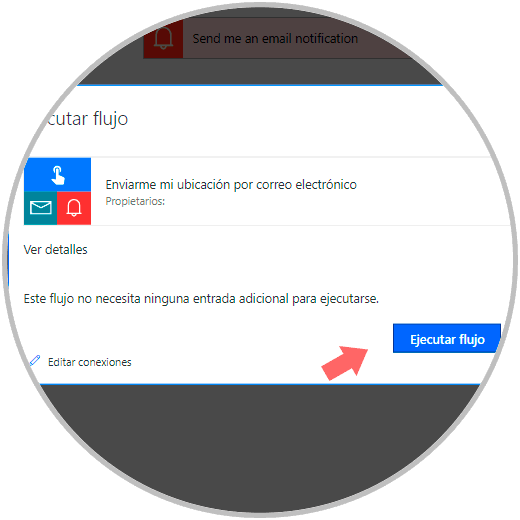
Step 23
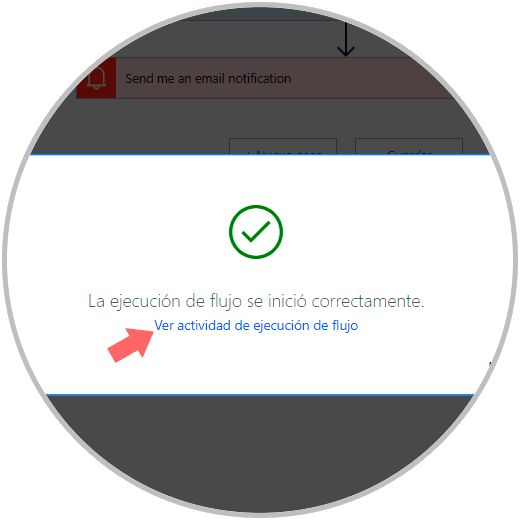
Click on "Execute flow" to carry out the tests and the result will be as follows:
Step 24
If we wish, we can click on the “See flow execution activity” line to access the history of the selected flow:
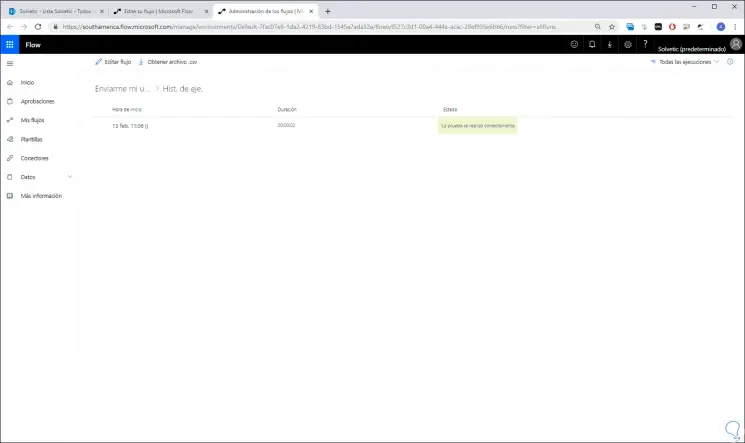
Step 25
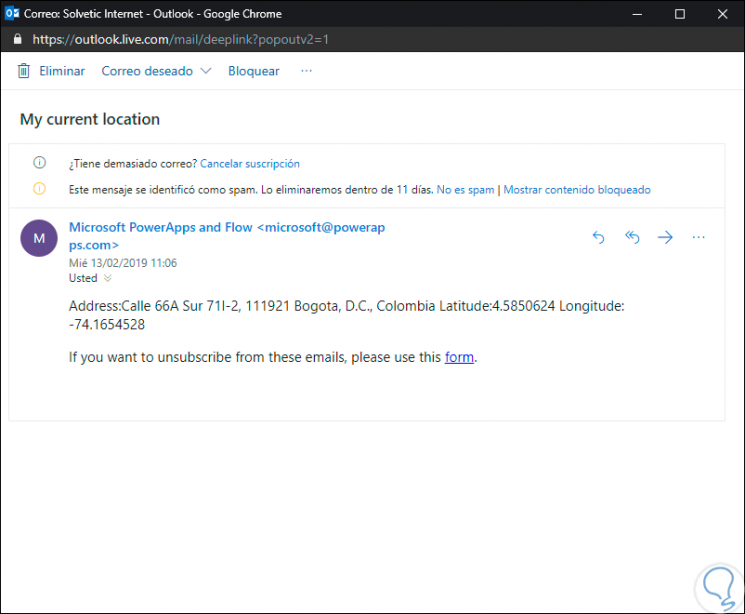
Now, this template is responsible for sending our location to the email address, therefore, at the address we indicate we will see the following:
3. Workflow options in SharePoint Online
Step 1
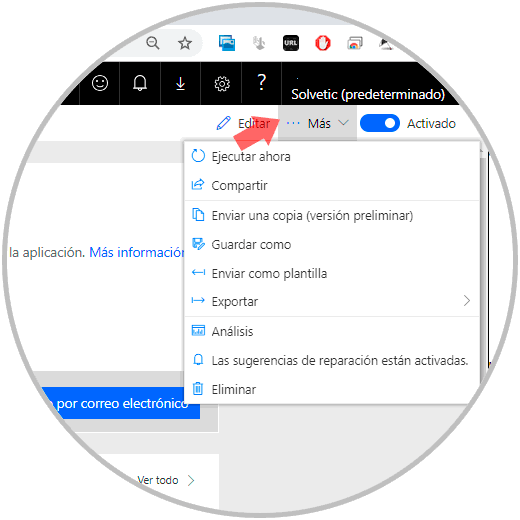
When we select a created flow, we can click on the “More” icon and perform actions such as:
- Execute the selected flow
- Share it with other users
Step 2
As we see, each option is complete and practical. Something to keep in mind essential to keep up with notifications, is the option to use our mobile device to receive notifications or edit some parameters, for this we can download the Microsoft Flow application in the following links. Once downloaded and installed, we must configure the account associated with SharePoint to receive notifications.
Android
iOS
With the SharePoint workflow integrated with Microsoft Flow, we have numerous management and control options on relevant aspects of group collaboration and each site or library that are created..