Calendar services such as the default iPhone or iPad with iOS, allows you to add events to it so that you do not forget anything on the day and time you are scheduled to do so. However, with the new updates, new functions have been added that have made the calendar app a very powerful tool that, among other things, also allows you to create events shared with other users with attendance settings.
Related: How to delete calendars from iPhone app (duplicate / not useful)
The iPhone and iPad calendar application is one of the most underrated. In general, many users prefer to use applications such as Google Calendar because they are unaware of the real capacity and functions of this default iOS calendar. The iPhone calendar app also allows you to add calendars from other services such as Google calendars..
This function is very useful since it allows you to unify all your calendars in a single application so you will be up to date with everything you have to do from the same app instead of several. Well, to this function we must add many others, such as the possibility of creating an event on a specific day and time that can be shared with any of your contacts with the option of confirming that event.
If you are a Facebook user, surely at some point you have received an invitation to an event in which various assistance configuration options are displayed. This same function is what we can find and use in the calendar application of iPhone or iPad with iOS..
In this tutorial we want to show you step by step how to create and share events from the iPhone calendar and offer attendance confirmation options:
How to create events on the calendar of your iPhone or iPad and send invitations with confirmation options.
- Open the calendar app for iPhone or iPad (iOS)
- Click on the + icon in the upper right corner of the screen.
- This will bring up the Event editor. Here you will have to provide information such as: Title, Location, Start and end time, Repetition, Calendar in which you create it, Notices, URL, Notes and the option in which we are interested: Guests..
- When you have the event fully configured, you must click on the option that says Guests.
- This will take you to a new screen where you can choose which of the contacts on your iOS device you want to invite to the event.
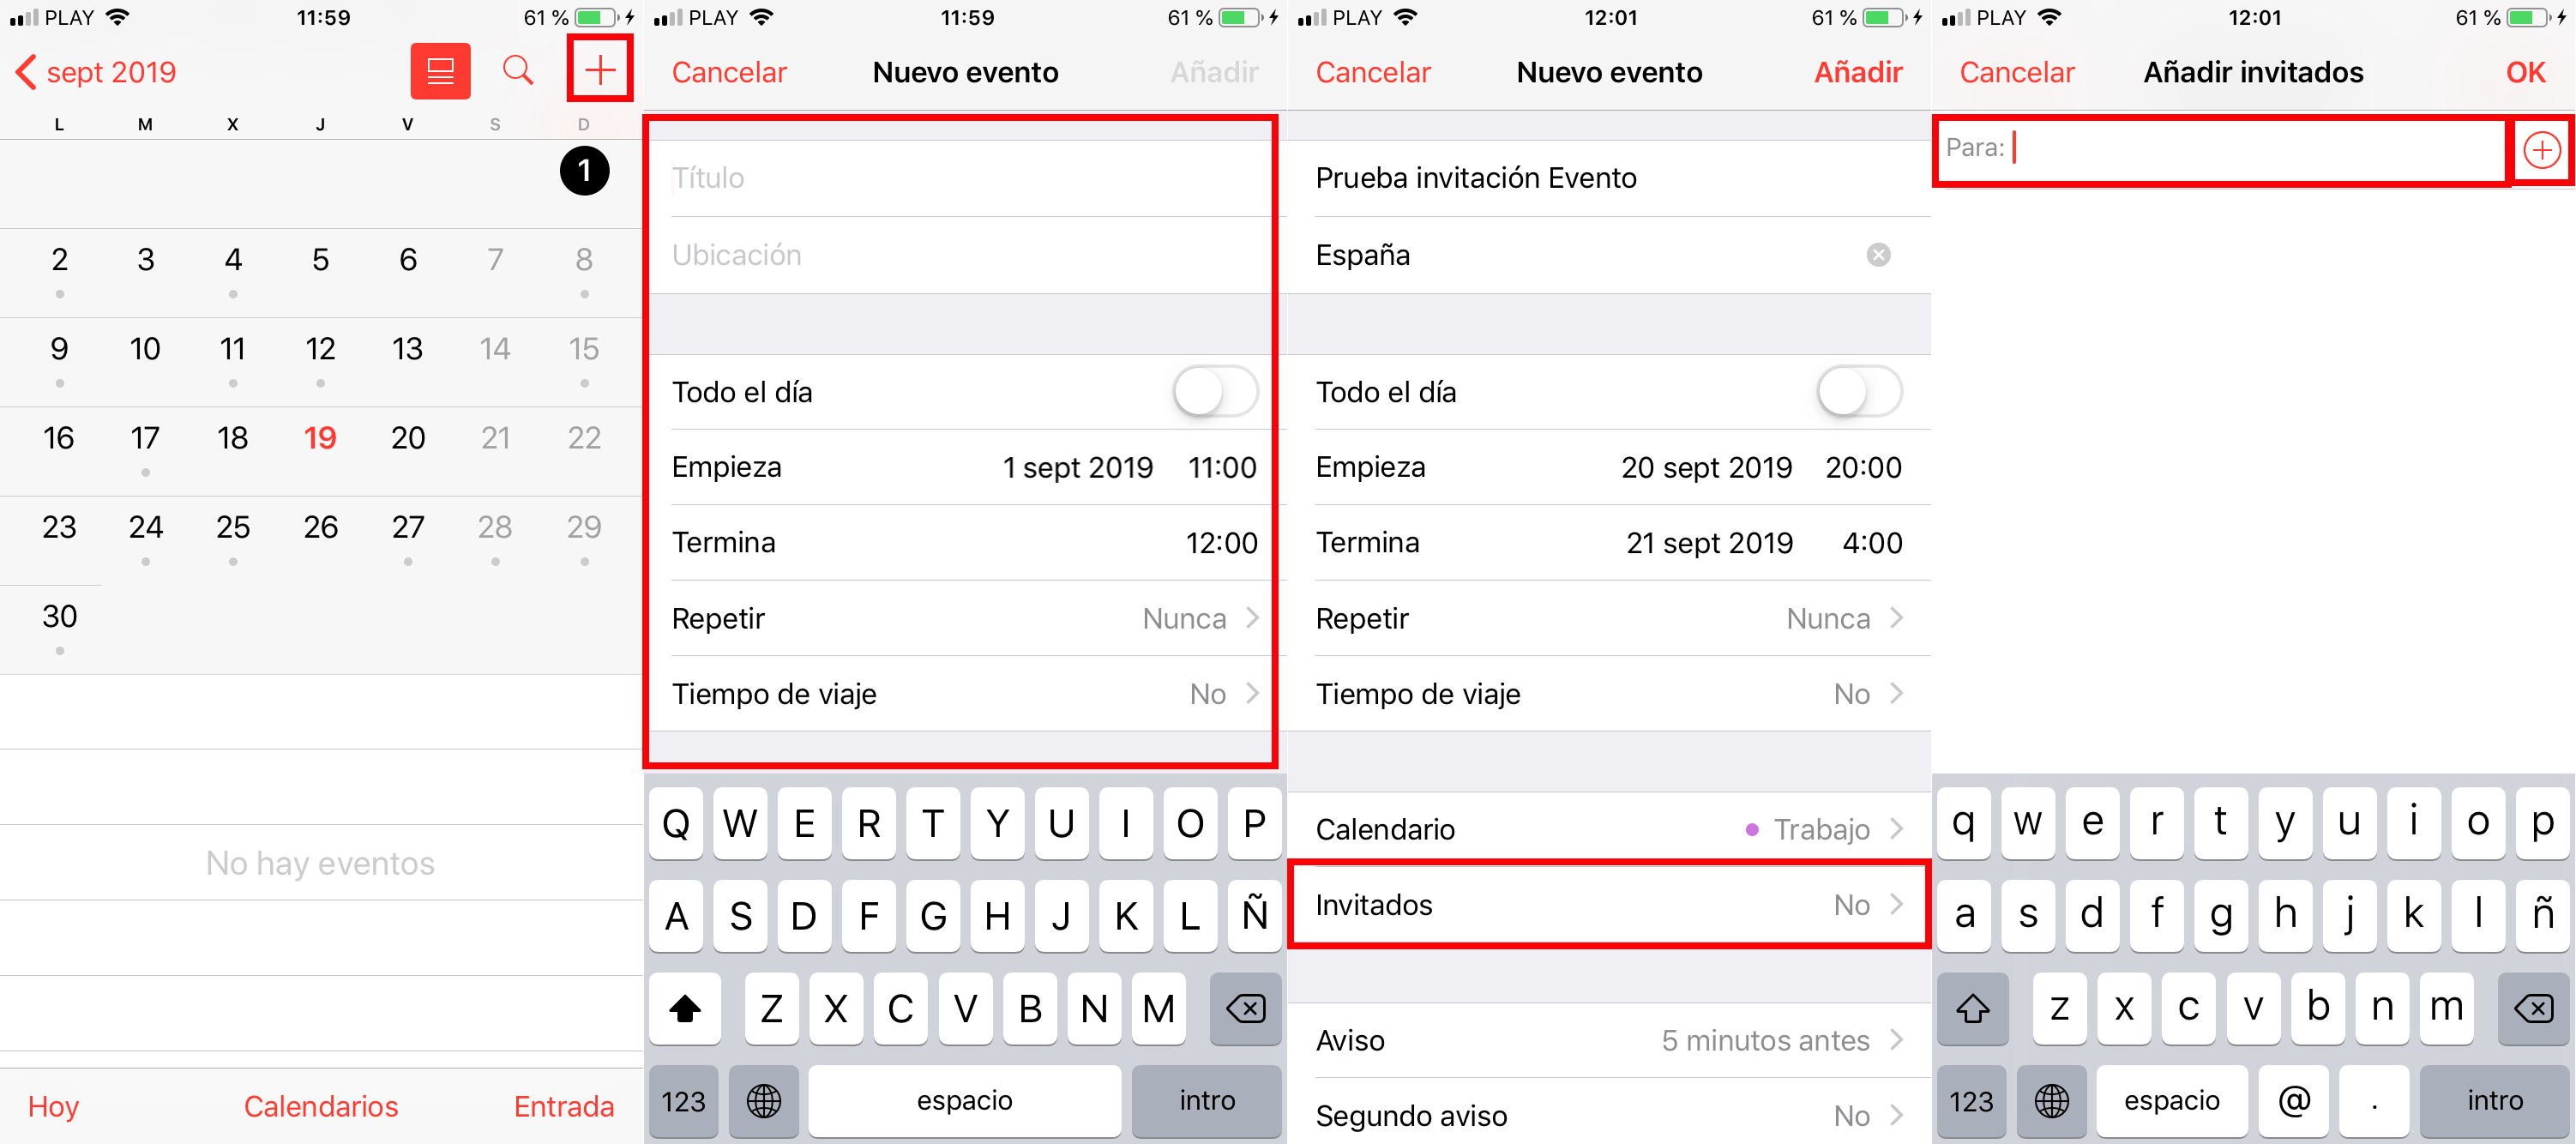
Note: It should be noted that you can only invite contacts to the event who have an email address linked.
- Once the contacts we want to invite have been added, you will only have to click on the OK button located in the upper right corner of the screen.
- Then click on the button: New Event . This will take you back to the event editing screen where you will have to publish the event by clicking on the Add option .
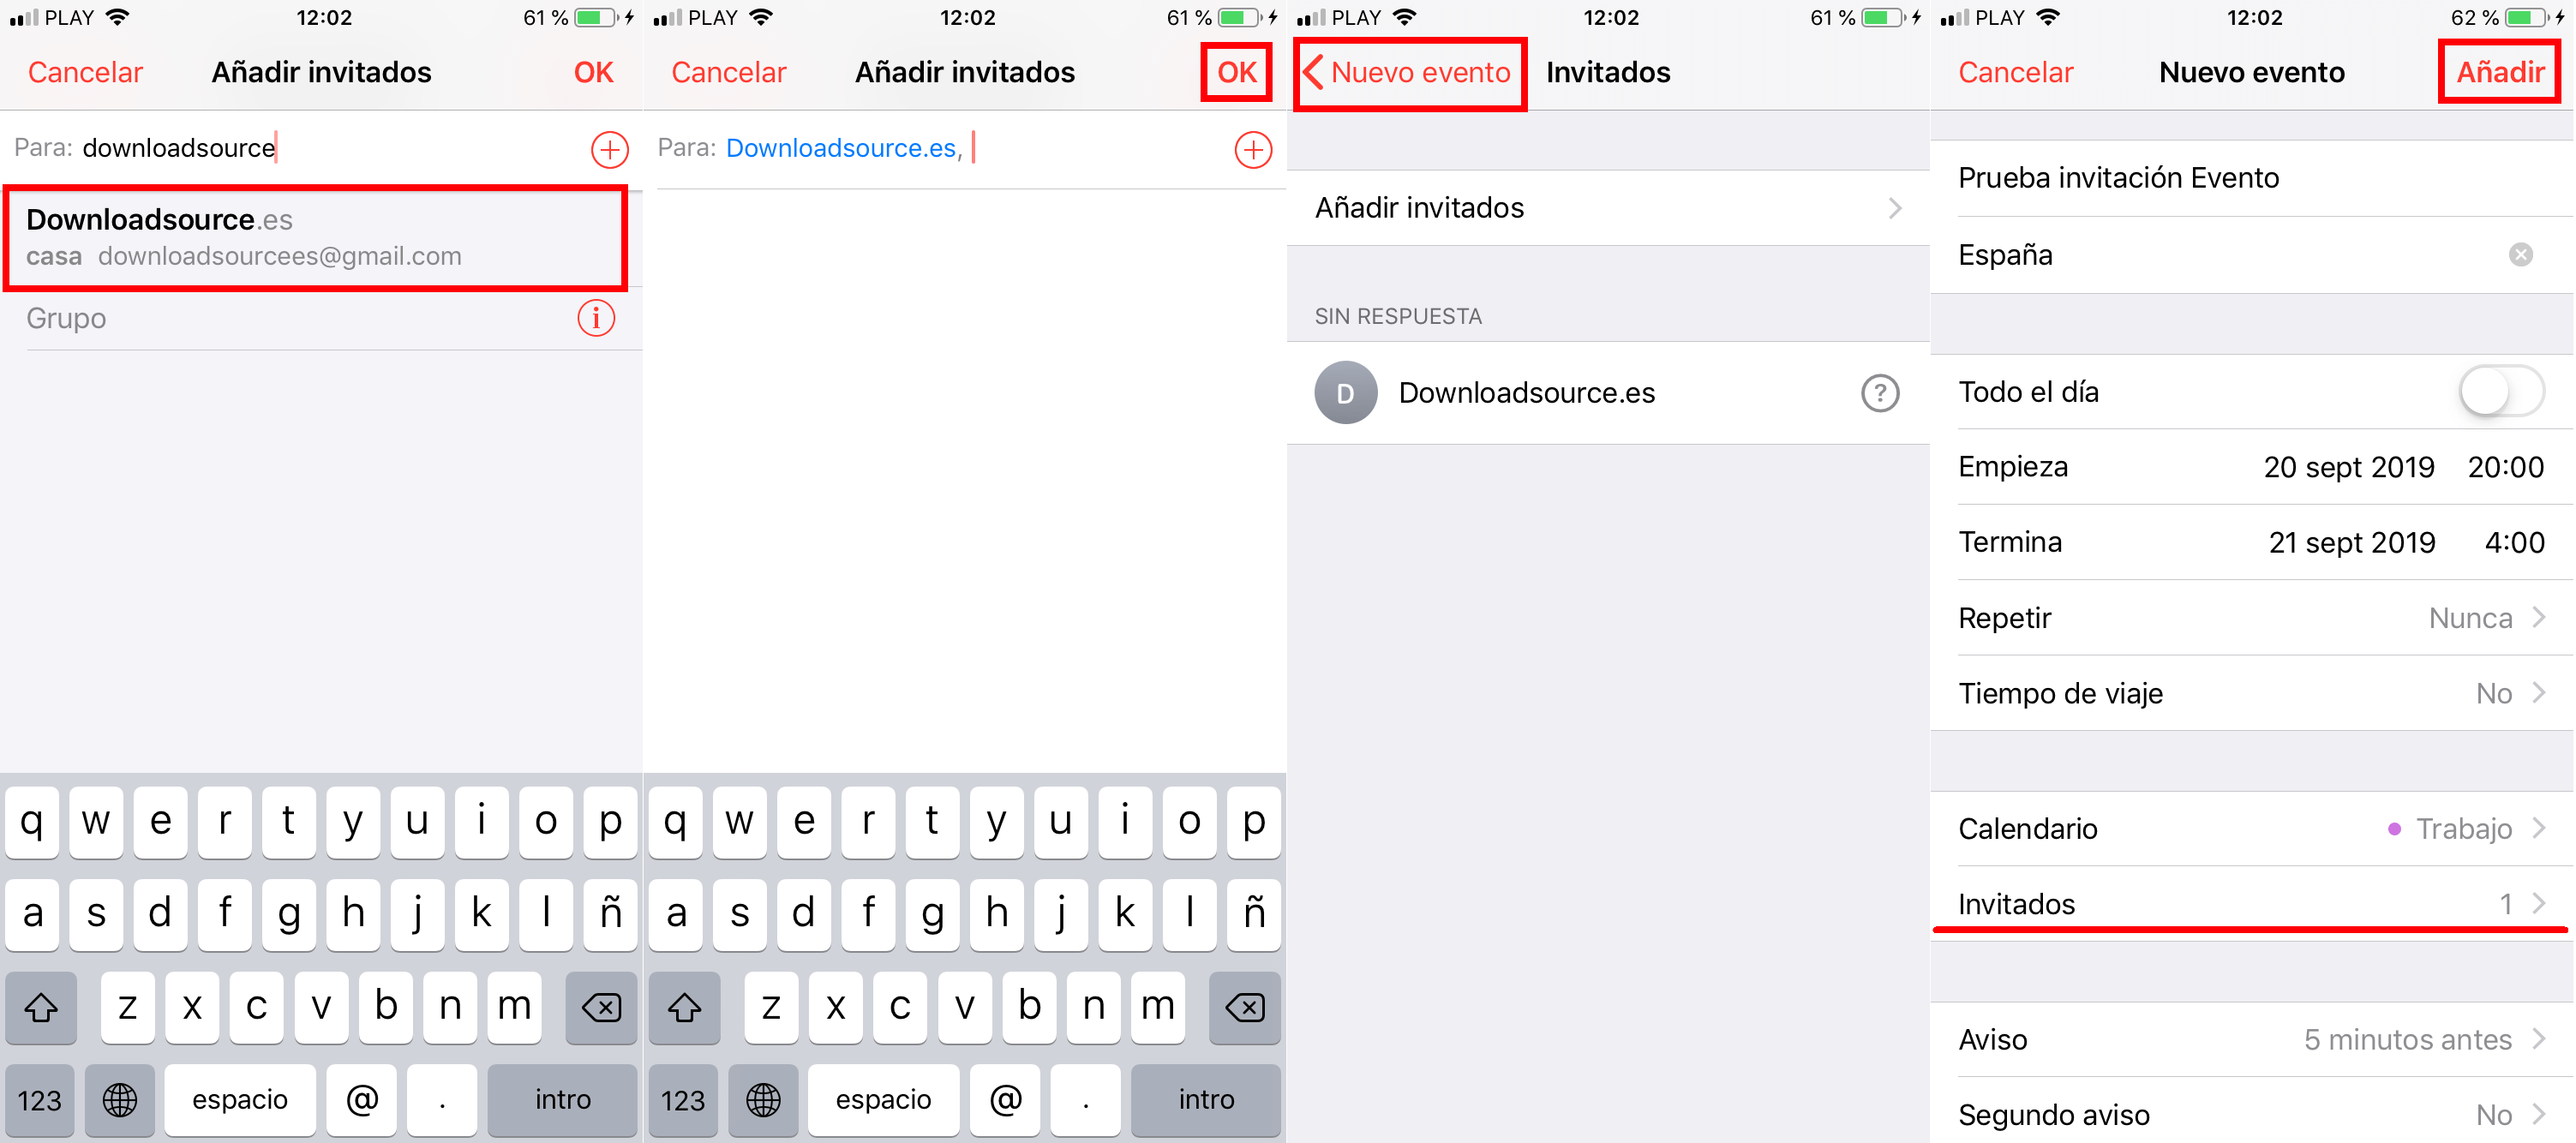
- From this moment, the created event will be fixed in your calendar, but an email will also be sent to each and every contact who has been invited to the event.
Note: the email from which you will send the invitation to the event will correspond to the email configured in the Calendar field of the event editor.
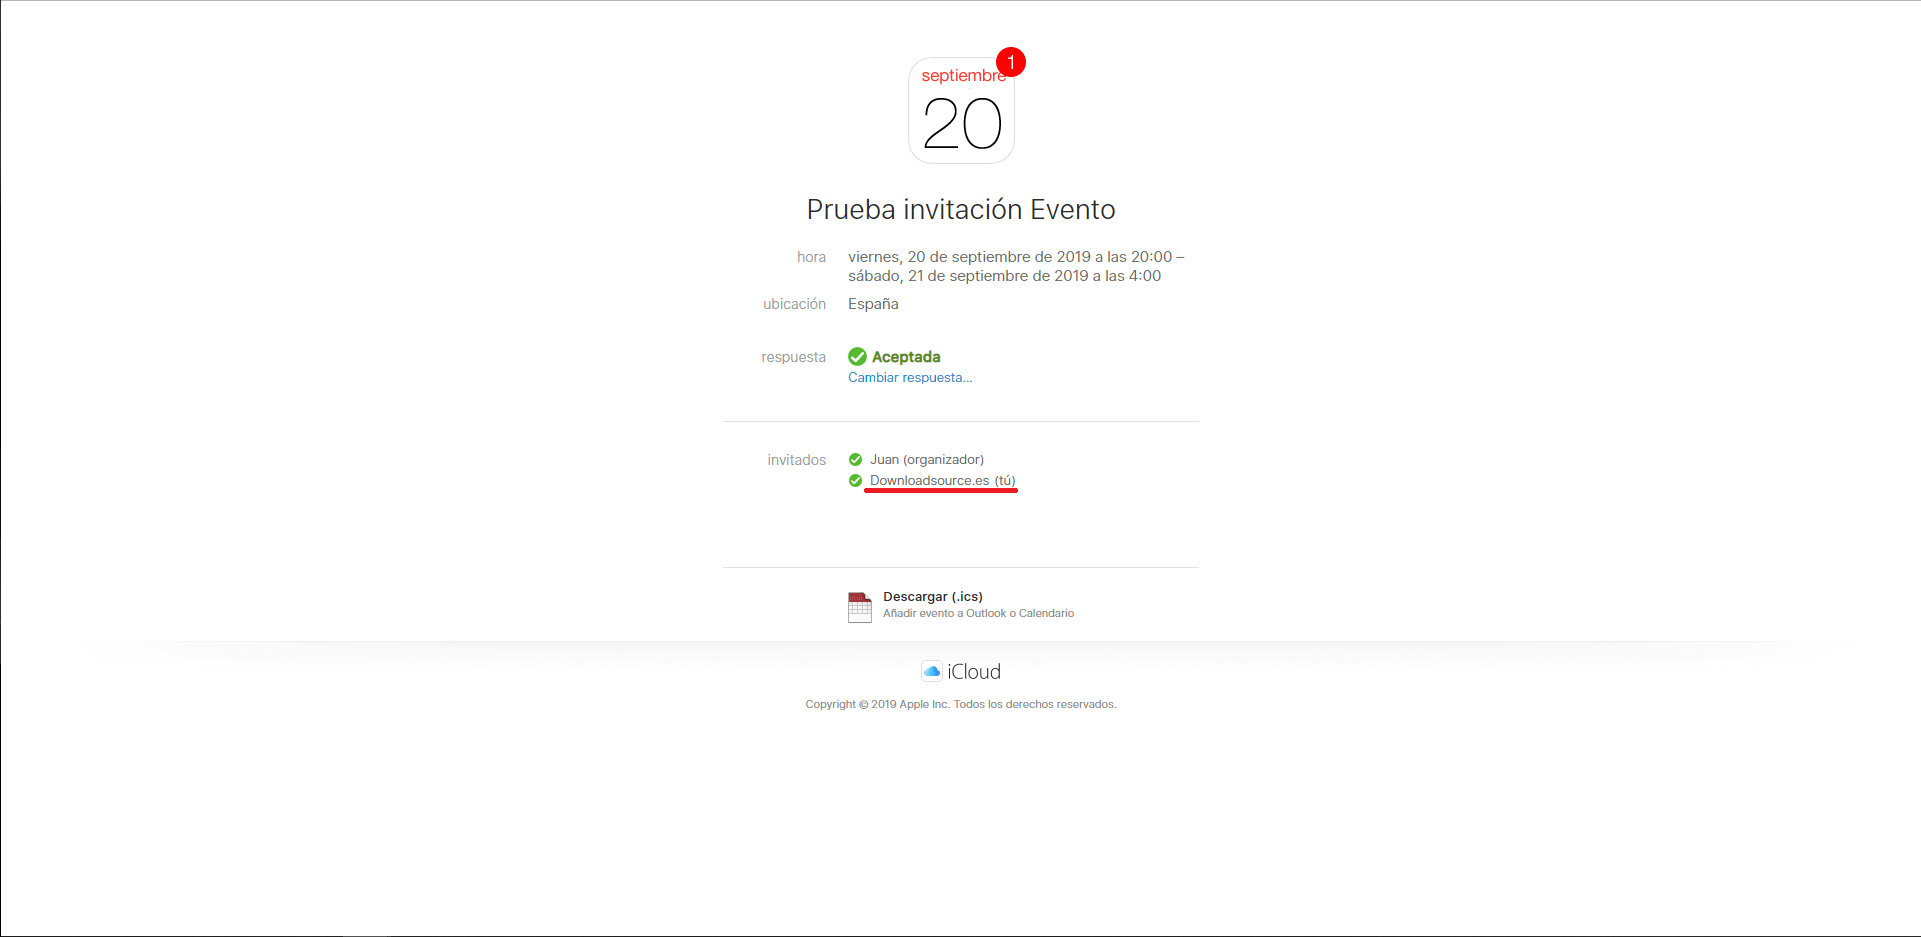
- When the invited user receives the email and accesses it, they will see all the information you added to the event as well as 3 attendance configuration options:
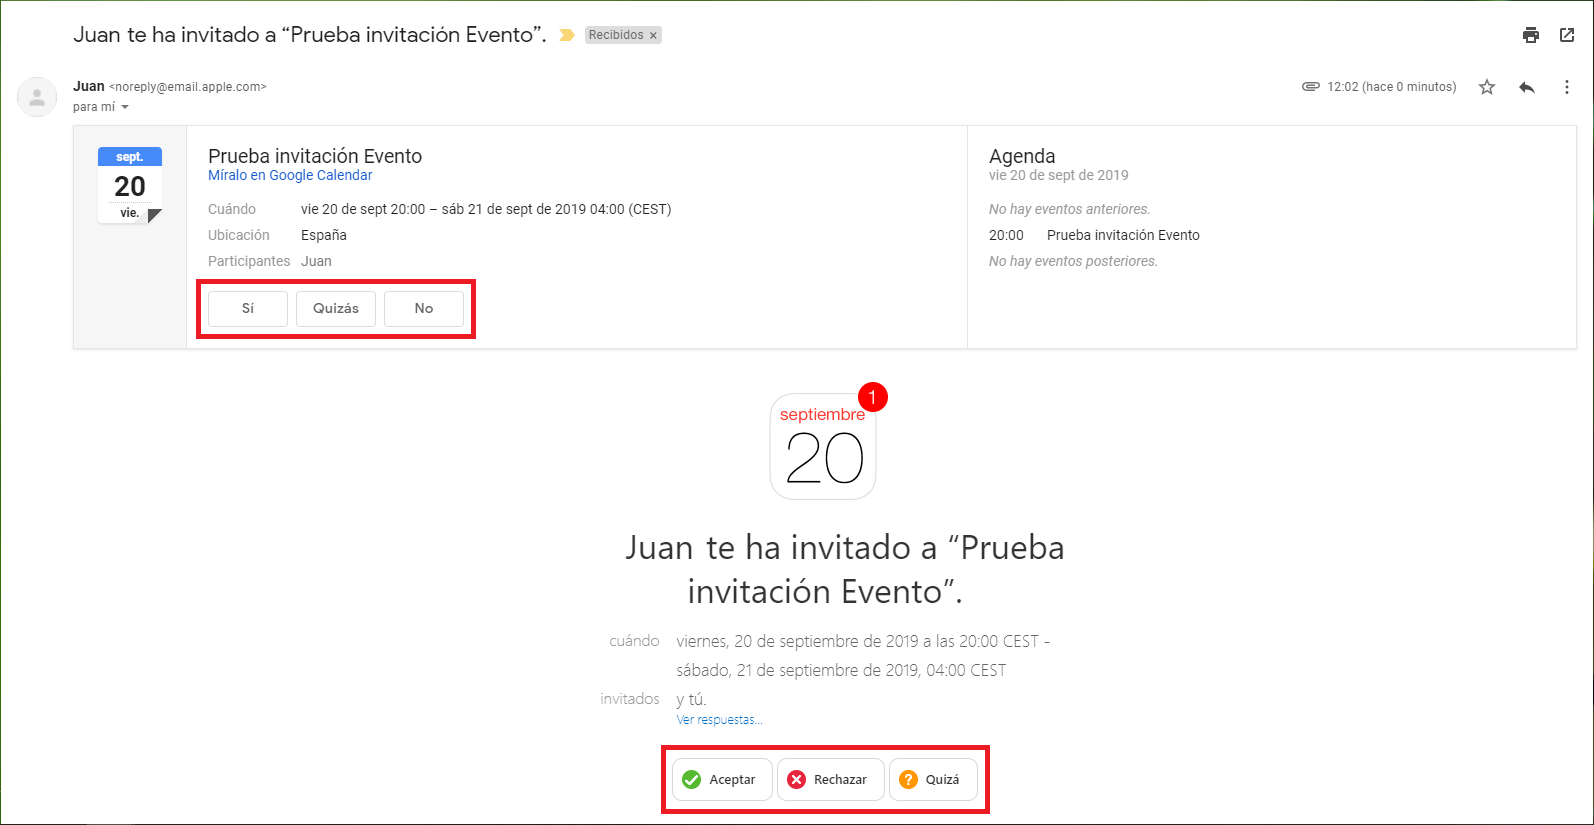
- When the guest selects one of the options, you will receive an email or notification with the response to your event invitation, whether affirmative, negative or hesitant.
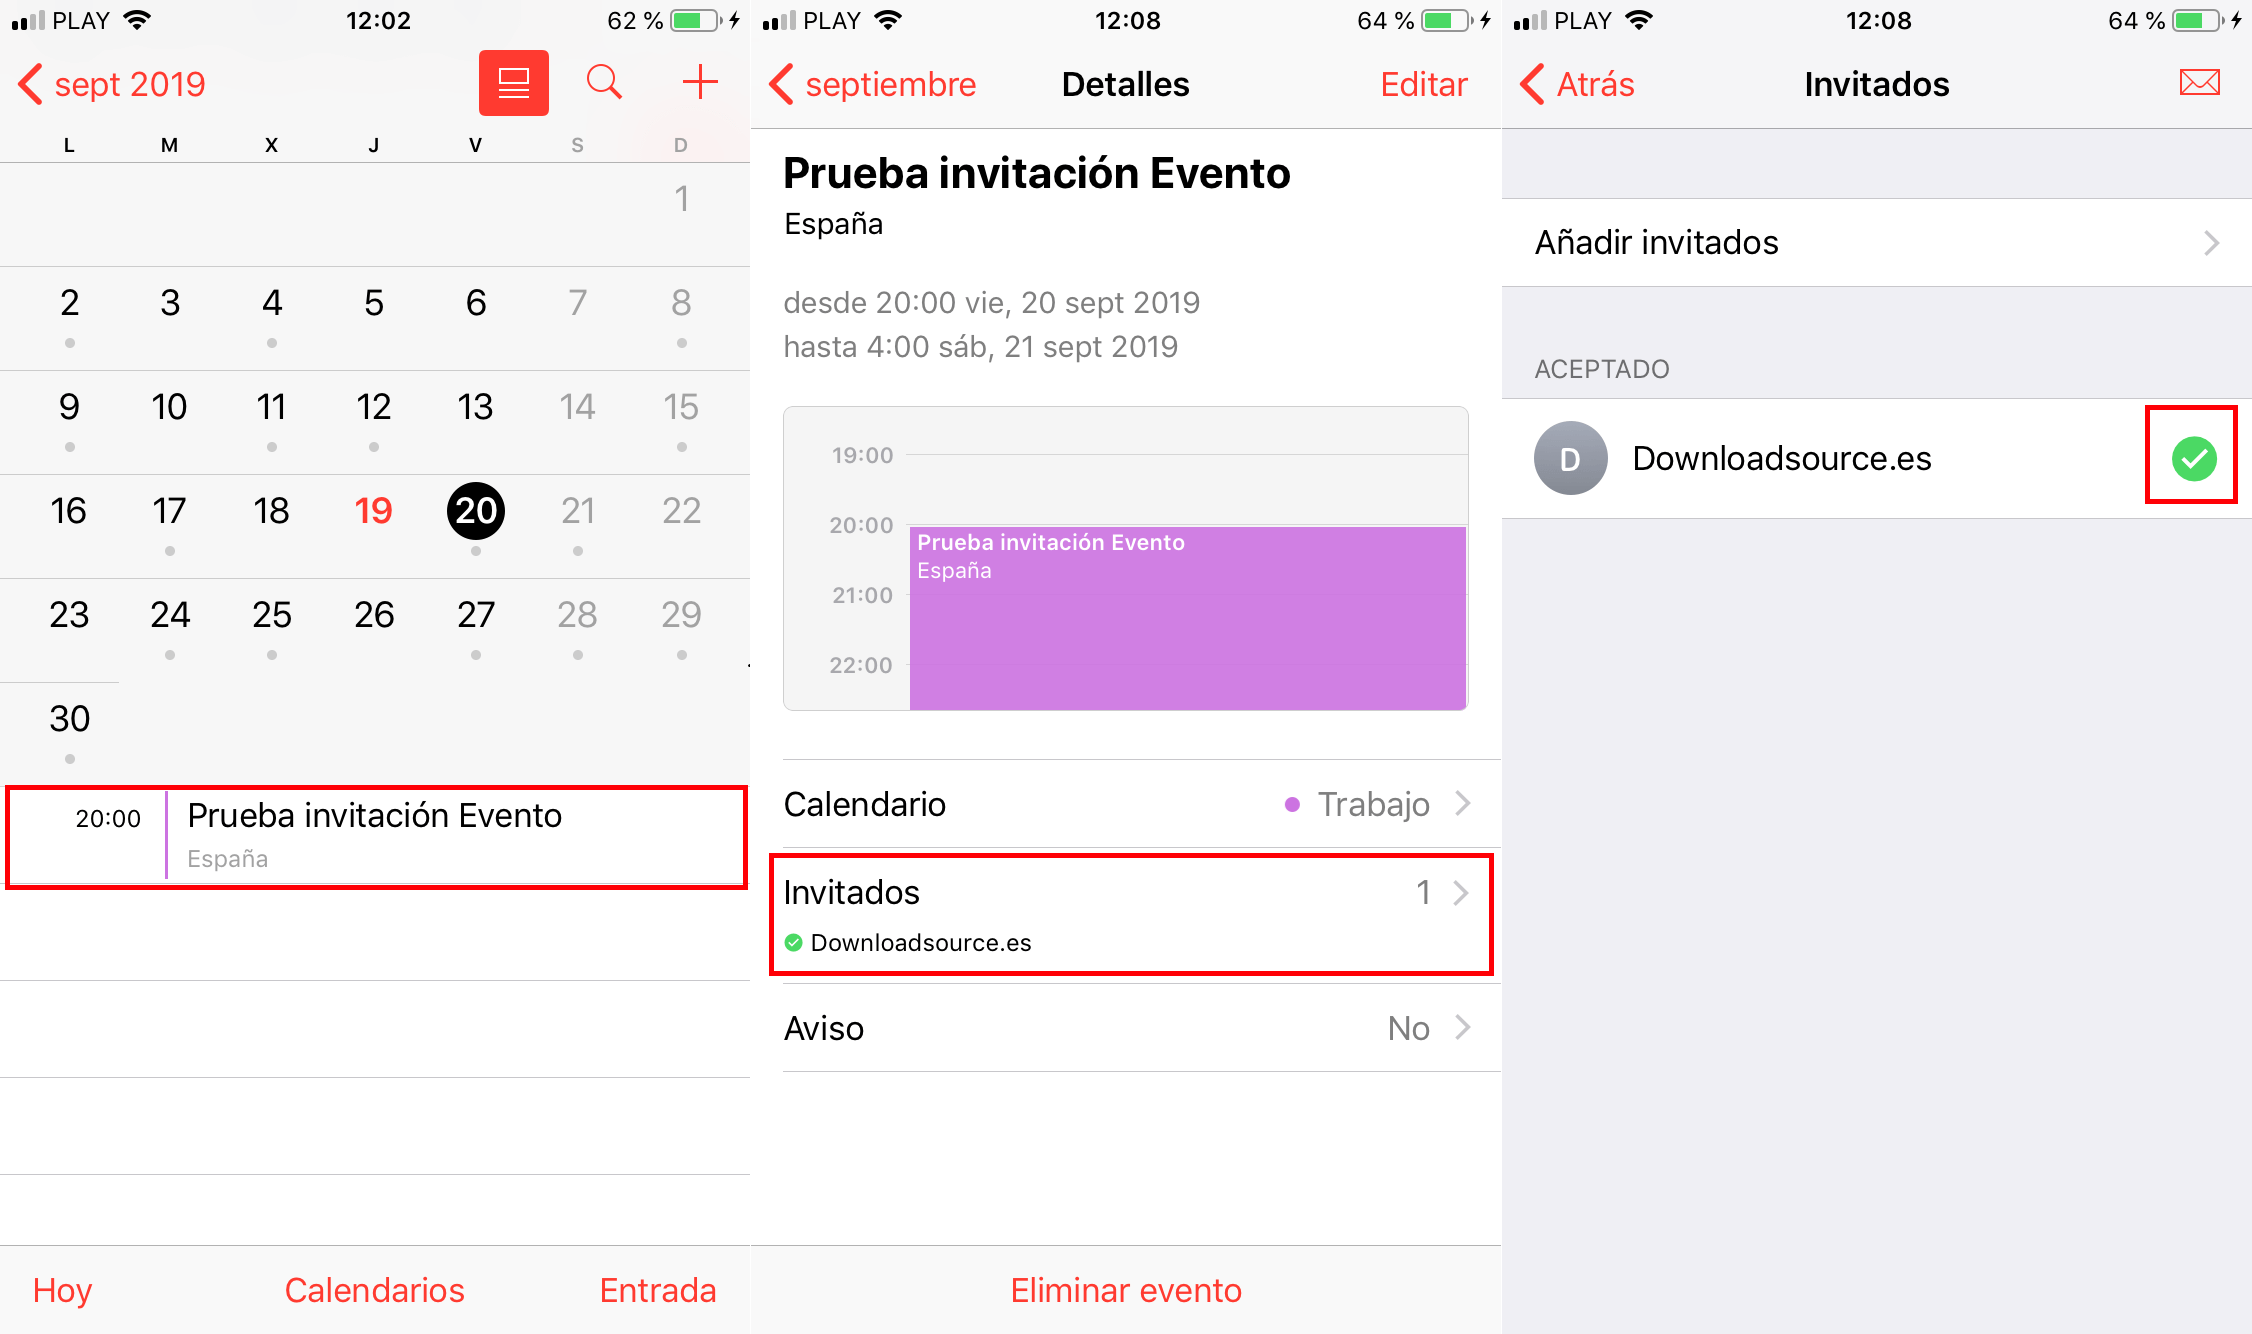
- You can also check the users who have confirmed attendance at your event by accessing the iPhone calendar and clicking on the day of the event. Here you will have to select the event so that when its details are displayed you can click on the Guests section that will show you the list of confirmed users.
Without a doubt, this function of inviting events from the iPhone or iPad calendar is of great help especially when you organize parties or birthdays since it allows you to invite all the people you want and at the same time know how many of them will finally attend. Another advantage of the function is that you can use it even if you make use of external calendars such as Google Calendar.