IPhone mobile devices have always incorporated the possibility of taking HDR (High Dynamic Range Images) photos. As its name implies, HDR is a method by which we can add more "dynamic range" to our photographs. When we talk about dynamic range, it refers to the light / dark ratio in a photograph. When we take an HDR photo, instead of taking a single photo, this mode will take 3 with different exposures.
Related: How to transfer photos and videos from iPhone or Android to Windows 10 without USB cable.
Subsequently, you can use these three images through third-party software to merge them and thus be able to highlight the best parts of each of the photos. However, iOS devices such as iPhone incorporate the automatic HDR mode, which means that the use of a third-party program is not necessary, but rather that the device will show you the final result of the fusion of those three photos..
What is often sought with HDR photos is to get the photos to be displayed in a much more real way and similar to how your eyes see in real life instead of what your camera or device sees.
In the case of iPhone when we take an HDR photo, it will take 3 photos and combine them into one to get a much more realistic look. However, if you want to import HDR photos from your iPhone to your Windows 10 computer, you will notice that your photos will be imported in JPG format..
Before you can import HDR photos from your iPhone, the first thing you should do is make sure that the HDR function is activated before taking the photo. To do this you just have to click on the HDR option located at the top of the camera screen. There is an automatic HDR mode, this mode will leave it up to iOS to decide when HDR should be activated or not when not, depending on the lighting conditions in your environment.
How to import HDR photos from iPhone
There are two relatively simple methods to import HDR photos from your iPhone. The first consists of simply copying the photo from your camera roll. The second method is to use the import function of the Windows 10 Photos application. There are a lot of other applications that you can use to import these photos such as sending by email, however these two options are the simplest and the photos are not. will be
Copy HDR photos from iPhone photo reel.
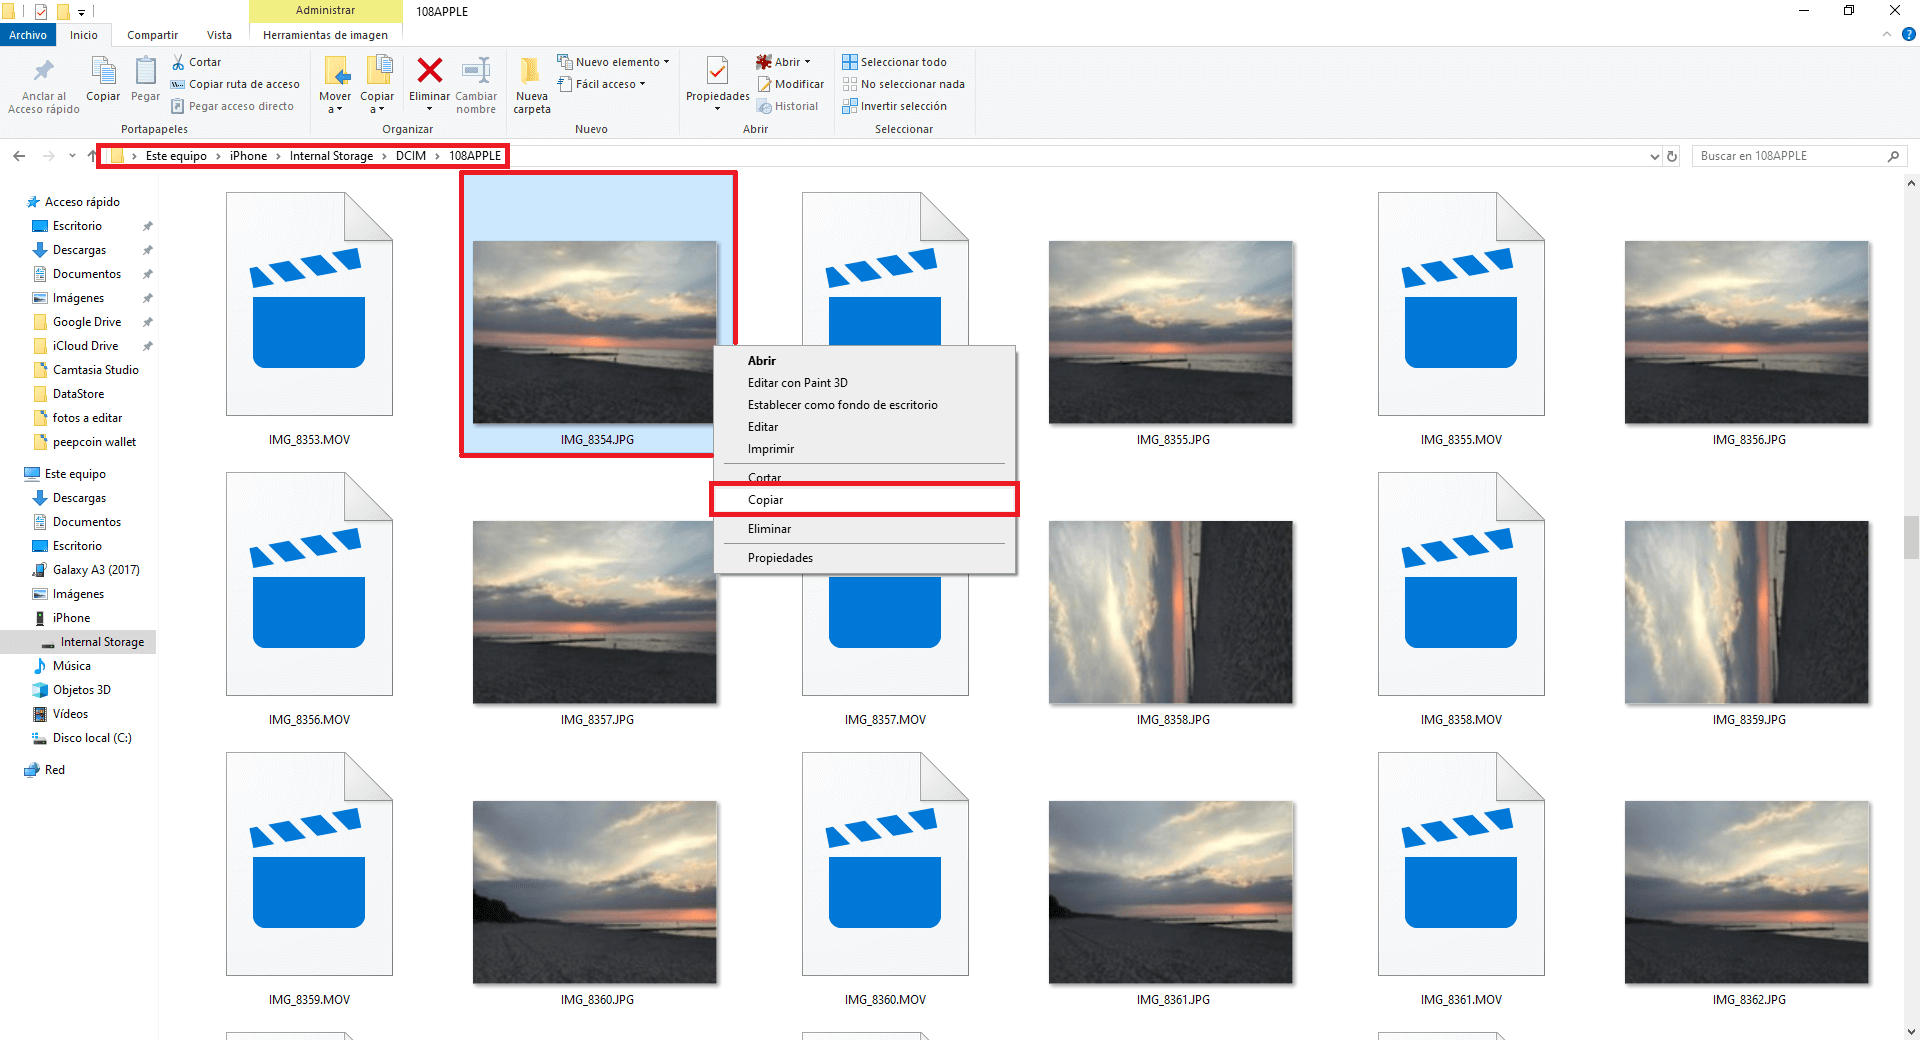
- Connect your iPhone with the computer and open the Windows 10 file explorer..
- Search the reel until you find the HDR image you want to import to your computer.
- Copy and paste this image into any of the folders on your computer.
How to import into iPhone HDR Photos using the Windows 10 Photos app
- Open the photo application and unlock your iPhone.
- Connect it to your Windows 10 computer.
- Open the Windows 10 Photos app and click on the Import option located at the top right of the interface.
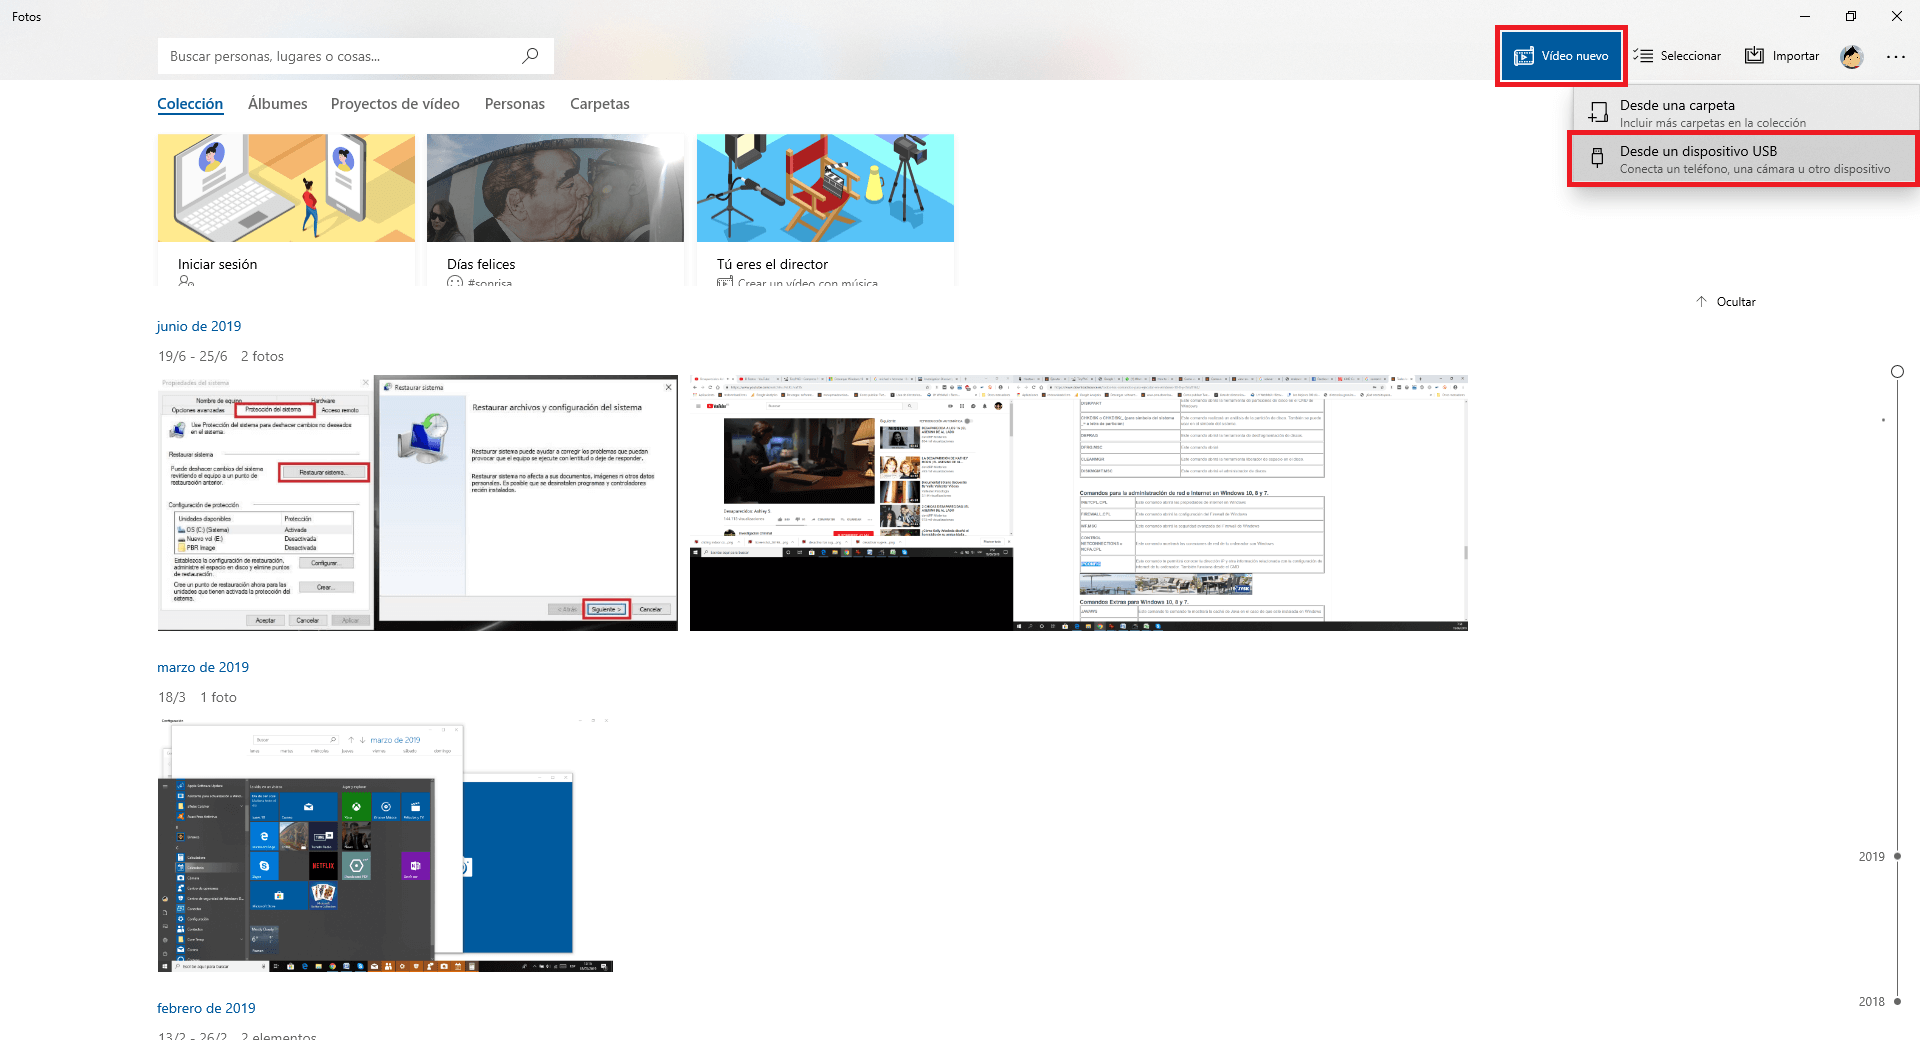
- Select your iPhone in the list of connected devices.
- This will cause a window to be displayed in which you can see all the photos stored on your iPhone.
- Select all the HDR photos that you want to import to your computer and to proceed with said import you will have to click on the button: Import the selected elements .
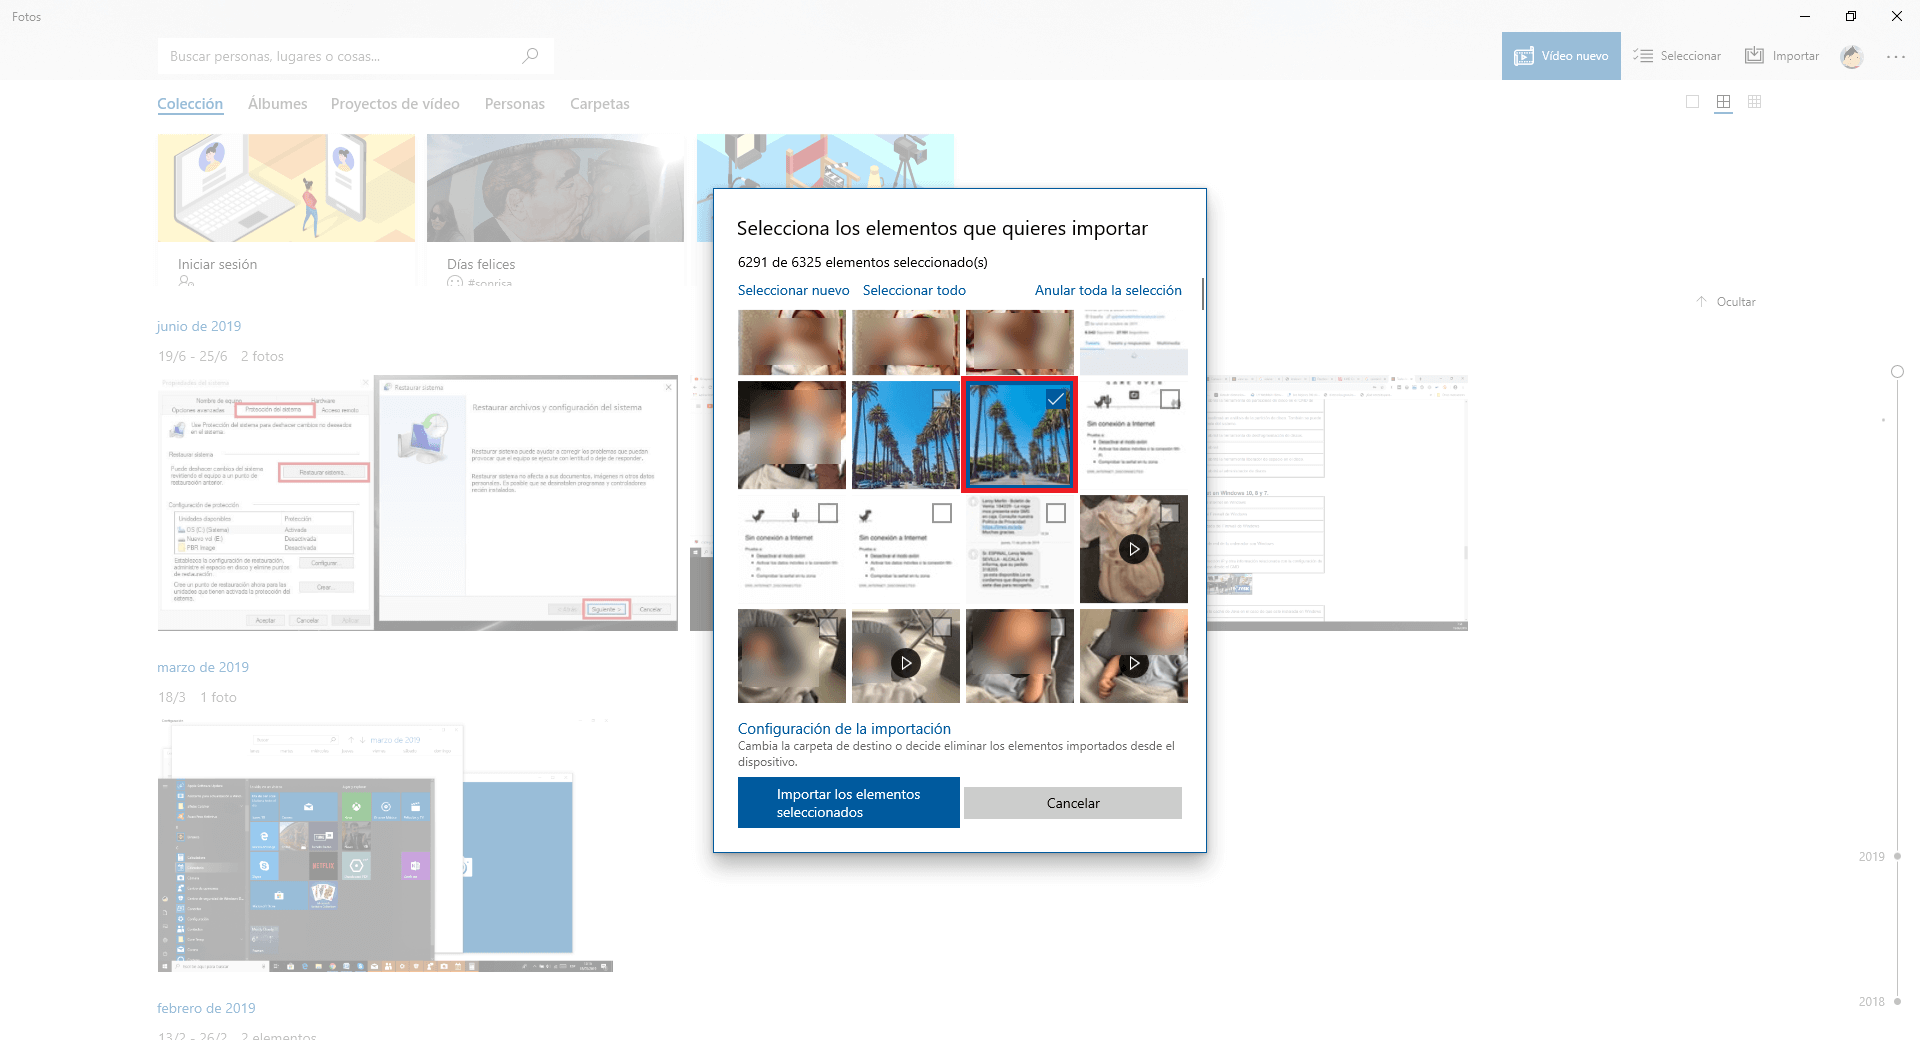
- This will make said HDR photos be saved locally on your computer.
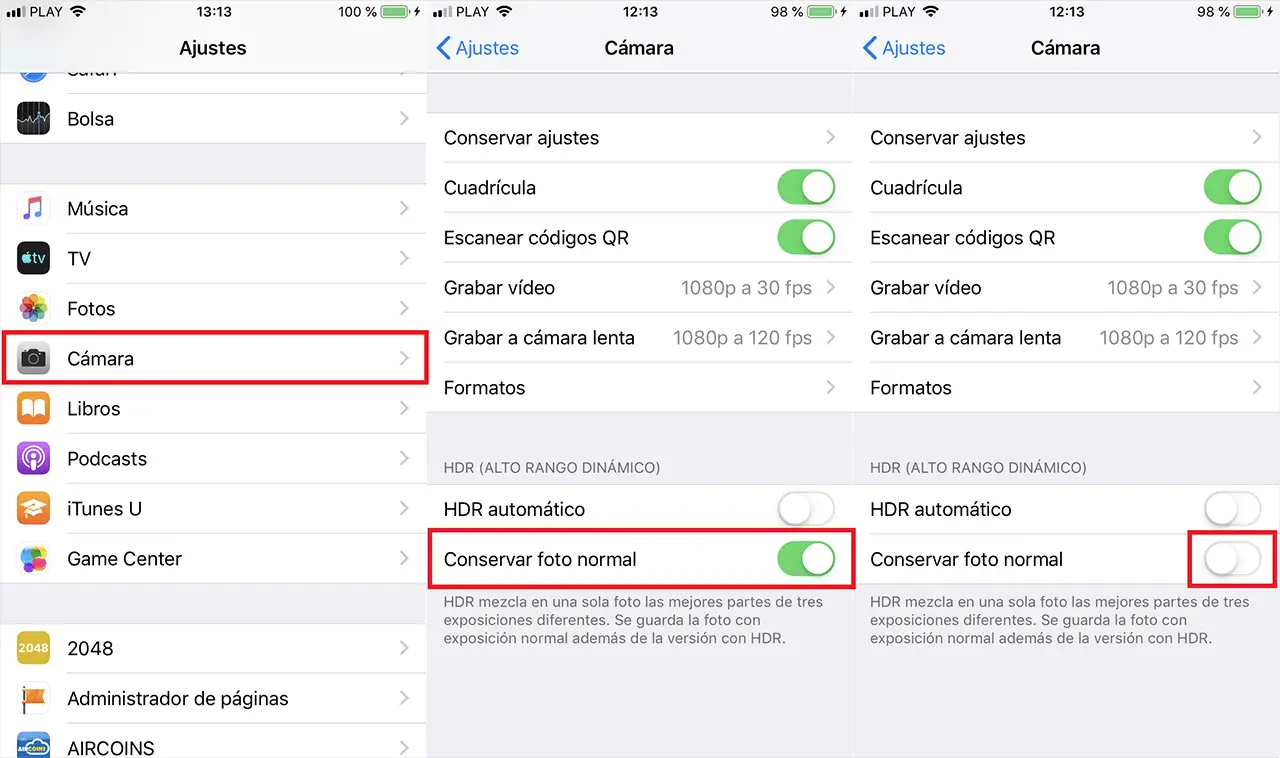
IMPORTANT NOTE: you must bear in mind that when we import the HDR photos from our iPhone to our computer with the Windows 10 operating system, it will not highlight or show any identifier that said photos have been taken in HDR mode. This is why it might be a good idea to disable the option: Keep normal photo. In this way, your iPhone will only save the HDR version of the photo and not the normal version. This will avoid confusion when it comes to identifying which in the HDR, since the only one that exists on the reel will be the one with high dynamic range.
