Today we use a number of different types of data and content management programs , since we are used to saving all this information in different files and documents that we can later share or manage and retrieve the stored information..
When it comes to collecting and managing data, there is no doubt that one of the best options when it comes to spreadsheets is Excel. Thanks to this Microsoft Office program, we have the possibility to carry out a number of procedures and carry out different formulas directly from the document automatically.
Excel offers us a wide portfolio of options to work with the recorded data, these range from logical functions to dynamic tables, but these have an advantage and it is the preview function with which it is possible to see in advance the behavior that a formula or function will have on the data, it is possible to activate or deactivate it in a simple but functional way..
To stay up to date, remember to subscribe to our YouTube channel! SUBSCRIBE
How to turn preview on or off in Excel
Step 1
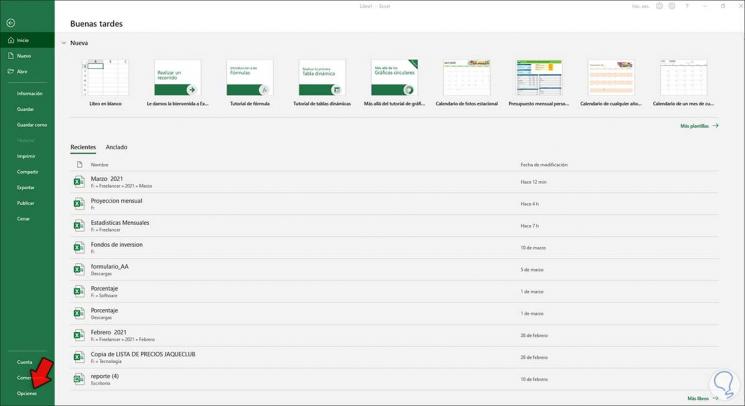
This process applies to the different versions of Excel, for this we open Excel and go to the File menu and there we select "Options":

Step 2
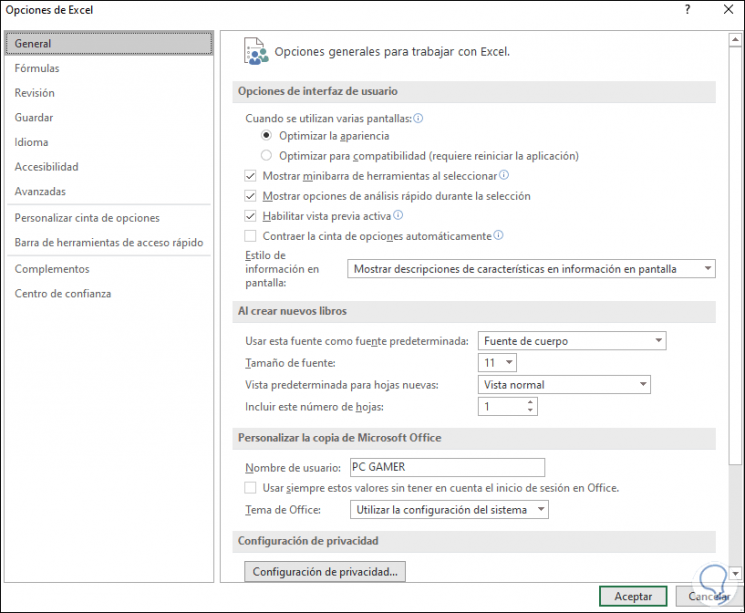
Clicking there will display a new window like this:

Step 3
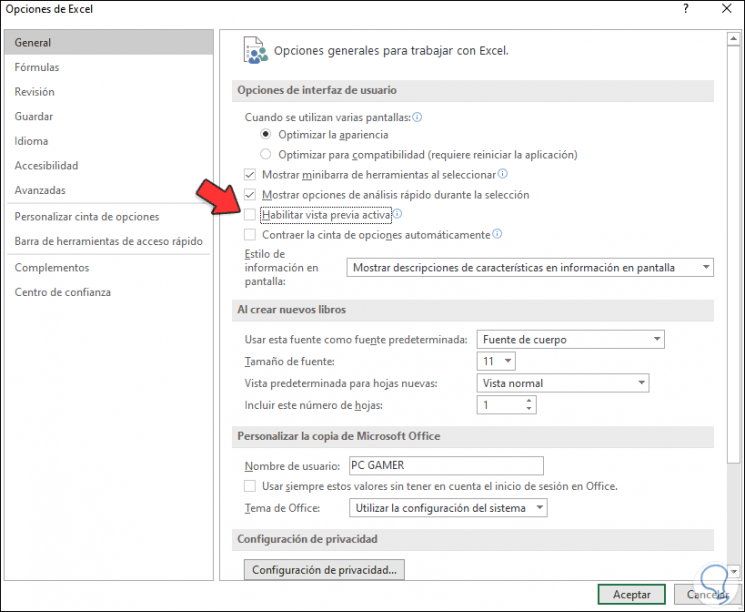
In the "General" section we activate or deactivate the "Enable active preview" box as the case may be:

Apply the changes and it will be that simple to activate or not this function in Excel. In this way you will be able to activate or deactivate the preview in Excel from Windows 10. It is a simple process that we can carry out whenever we need it.