Ubuntu is one of the most versatile and popular Linux distributions for its simplicity of use, great options for compatibility and scalability of applications, security and much more, what many did not know (until today), is that Ubuntu has developed a special segment called flavors which are distributions based on Ubuntu but with a specific focus, one of these is Ubuntu Studio. Ubuntu Studio is still a free and open source operating system, being an official version of Ubuntu so we should not worry about support or something similar..
Ubuntu Studio has been developed as a multimedia-oriented operating system, thus avoiding the local installation of various popular programs , which is why it already has a selection of multimedia applications pre-installed in audio, graphics, video, photography and publication segments and directing resources the system so that these applications perform in the best possible way.
Audio Ubuntu Studio
At the audio level Ubuntu Studio offers us recording, mixing, mastering, live processing and encoding applications with applications such as:
- Synth and sequence applications such as Audacity Audio Wave Editor, Qtractor - midi capable DAW, Hydrogen - Drum machine / Sequencer, Yoshimi - Software Synthesizer.
Graphics Ubuntu Studio
At the graphics level, we find graphic design and modeling applications in programs such as:
Ubuntu Studio Applications
In the advertising area we find some pre-installed applications and many more available to install from the repository in the Software Center, in this case we will find in Ubuntu Studio:
- Free Office
- Caliber
- Scribus
Photography Ubuntu Studio
For photography lovers, Ubuntu Studio has some applications for managing these, such as:
Ubuntu Studio video
One of the most desired areas is video in all its forms, creation and editing, for this reason in Ubuntu Studio we find apps for 3D modeling, animation, composition and more such as:
Without further ado, we are going to see how to install Ubuntu Studio and for this we will do it in VirtualBox which is one of the best known applications for virtualization issues, this prevents the real system from being affected, but we are able to get the most out of it. Taking advantage of the system to be virtualized, VirtualBox can be downloaded for free at the following link:
VirtualBox
Ubuntu Studio is available at the following link:
Ubuntu Studio
To stay up to date, remember to subscribe to our YouTube channel! SUBSCRIBE
1. How to install Ubuntu Studio 20.10 in VirtualBox
Step 1
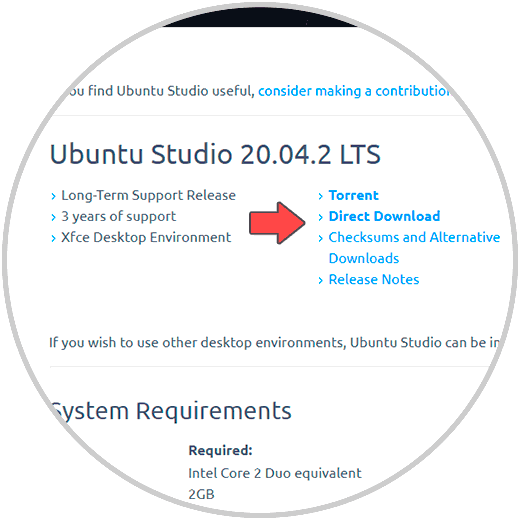
We go to the mentioned Ubuntu Studio URL and there we download the desired version:
Step 2
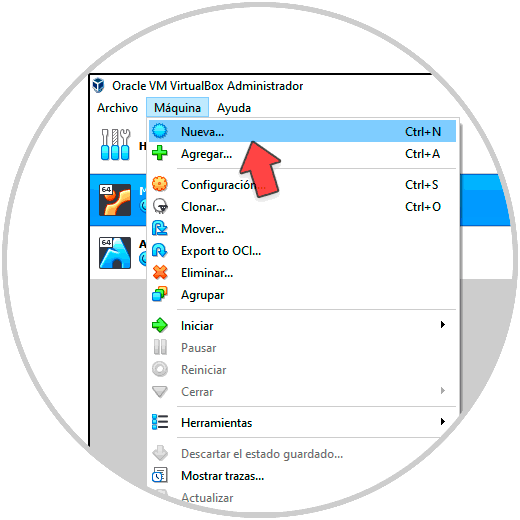
Once downloaded, we open VirtualBox and create a new virtual machine using one of the following options:
Ctrl + N
- In the menu Machine - New
Step 3
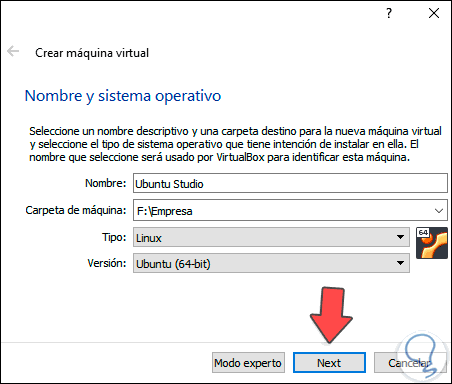
The following window will be displayed where we will assign the name, location, type and version of the system to use:
Step 4
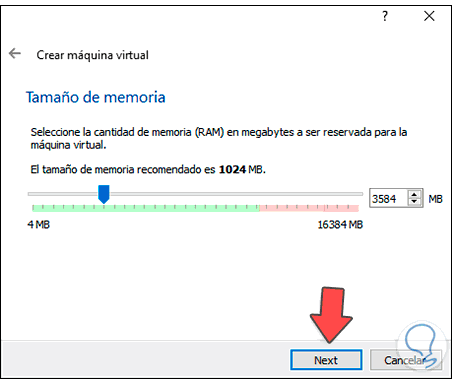
We click Next and now we assign the RAM memory:
Step 5
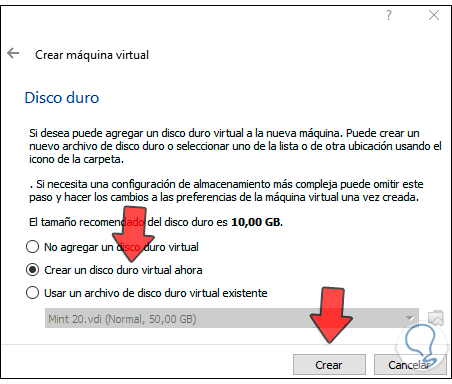
In the next window we configure the virtual hard disk:
Step 6
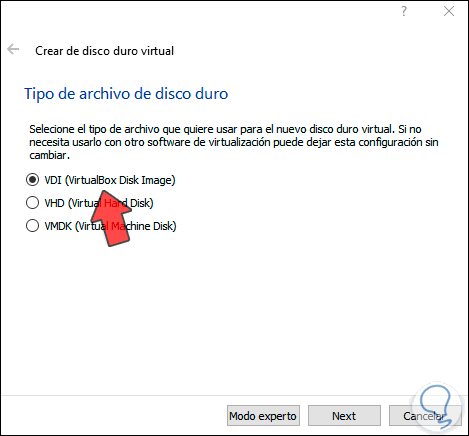
In this case we leave the default option and then define the type of disk to create:
Step 7
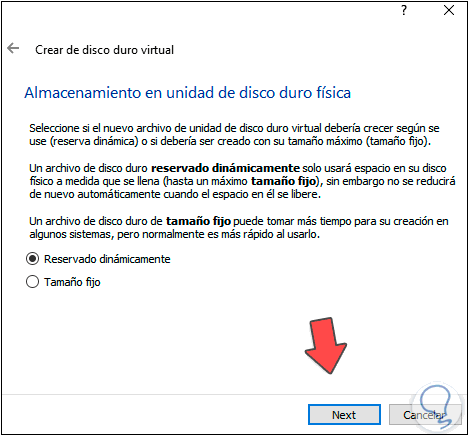
Then we define the way the space will be managed:
Step 8
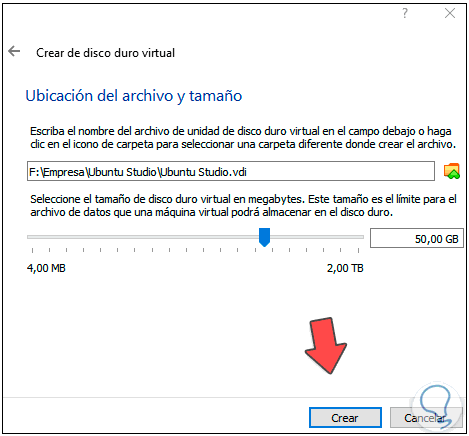
We click Next and define the size of the virtual disk and its location:
Step 9
We click on Create to complete the process:
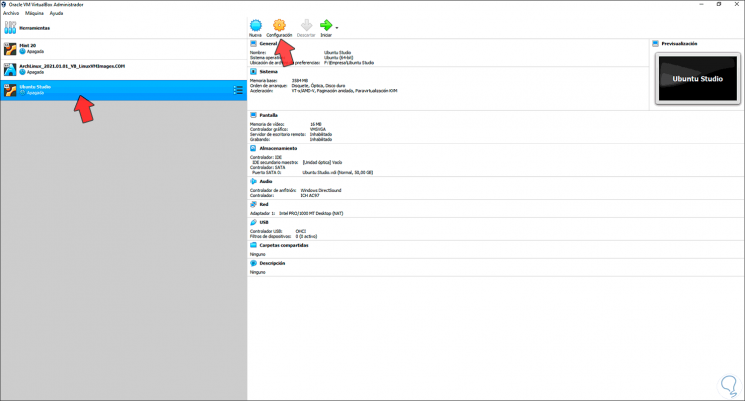
Step 10
We open the virtual machine configuration and activate the network adapter. We click OK to save the changes.
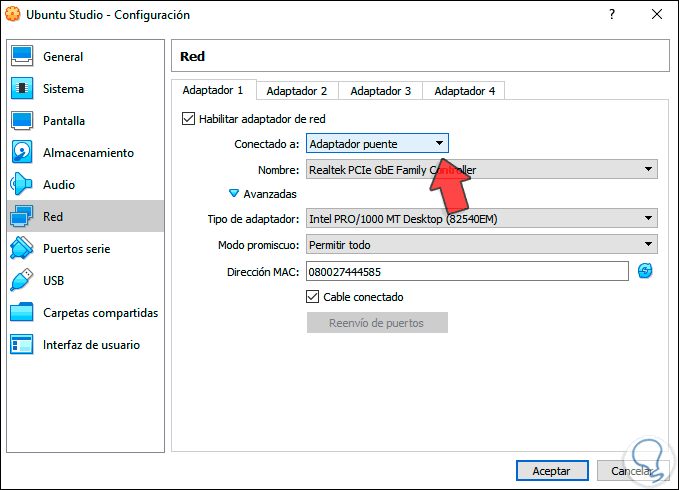
Step 11
We start the virtual machine and we will see the following:
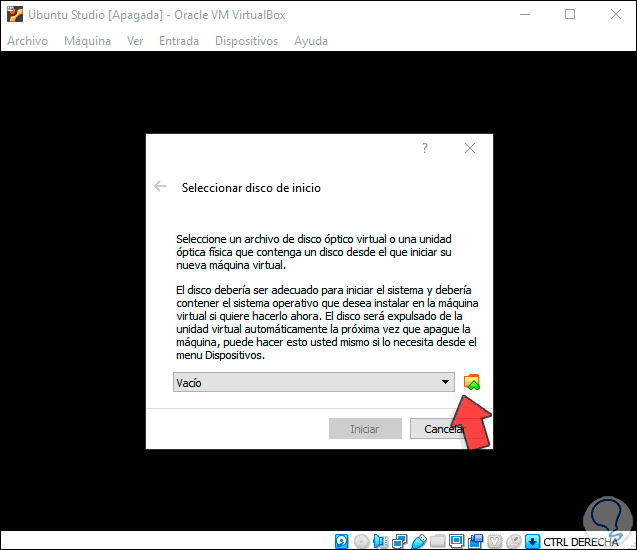
Step 12
We click on Browse to select the Ubuntu Studio 20.10 ISO image:
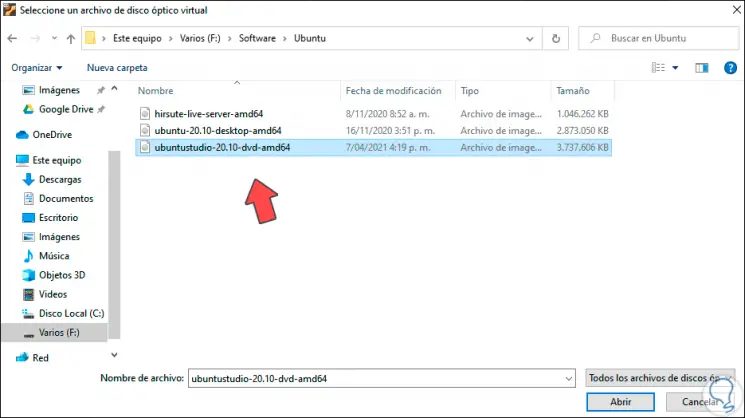
Step 13
We click on Open and we will see it added:
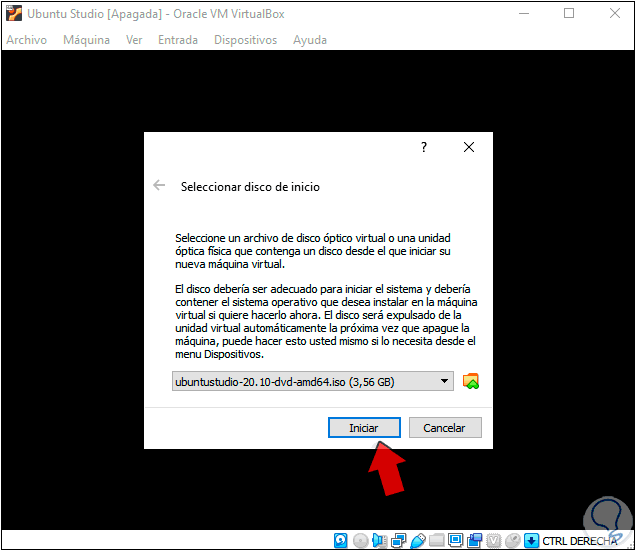
Step 14
We click on Start and the following menu will be displayed:
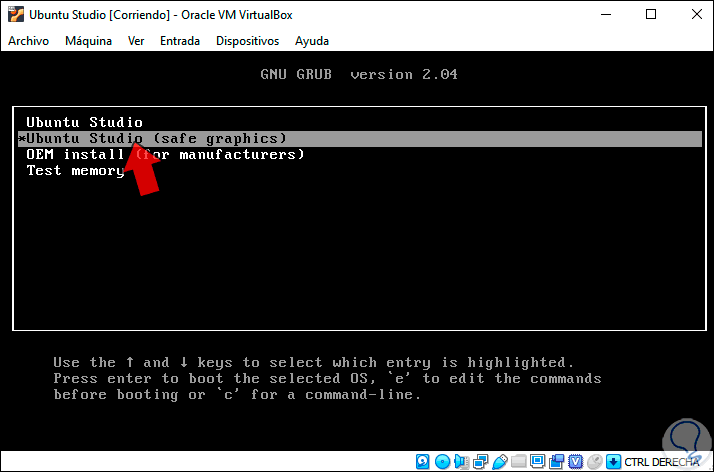
Step 15
There it is possible:
- Boot Ubuntu Studio 20.10 installation
- Install it with safe graphics mode
- Install it under the OEM factory model
Step 16
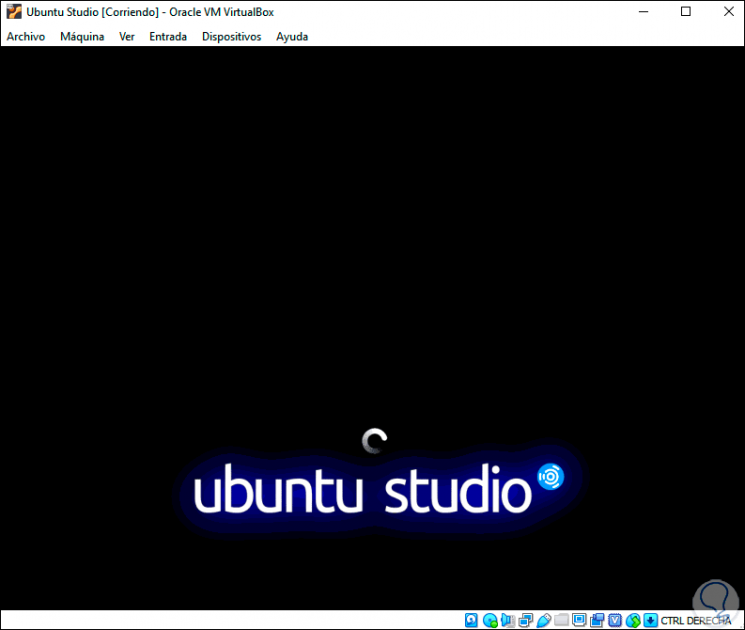
In this case we select "Ubuntu Studio", the system will start:
Step 17
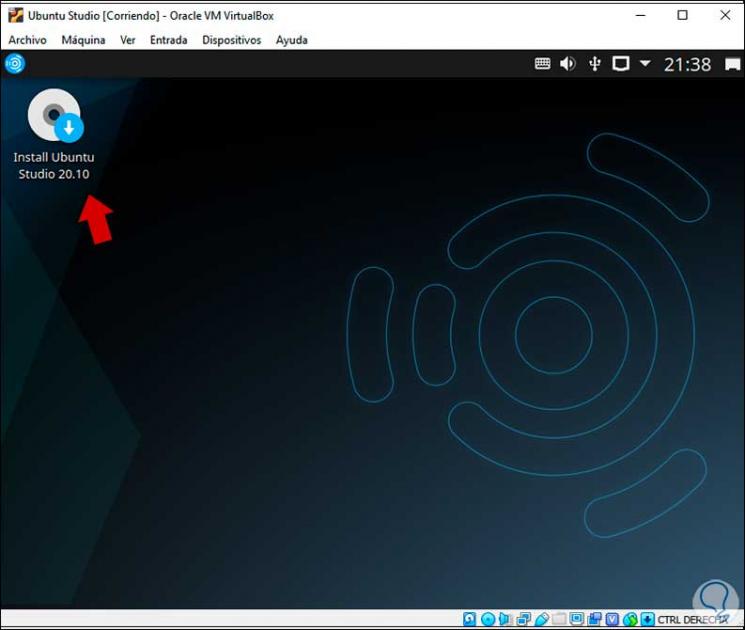
Being a live version (live) we will see this:
Step 18
There we can navigate and use the system without installing it, but nothing will be saved when closing session, in this case to install it we will click on "Install Ubuntu Studio 20.10", first, select the system language:
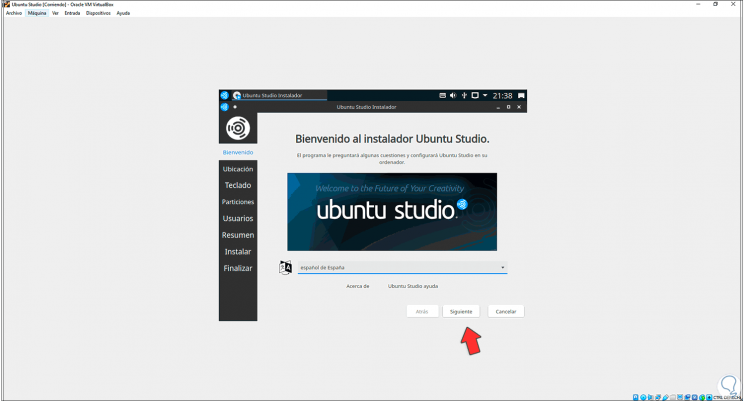
Step 19
After this we define the physical location:
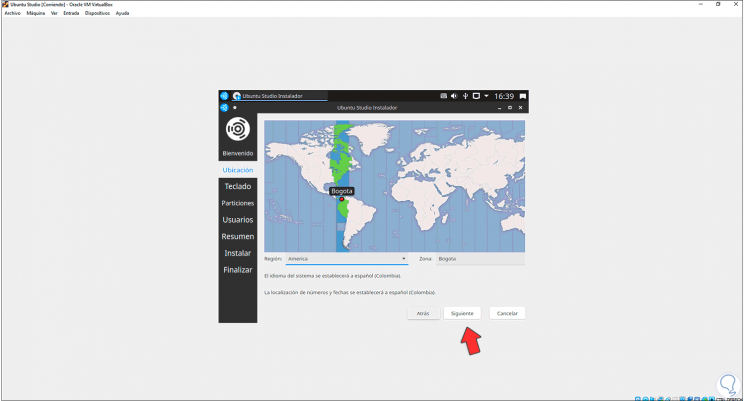
Step 20
Then we set the keyboard language:
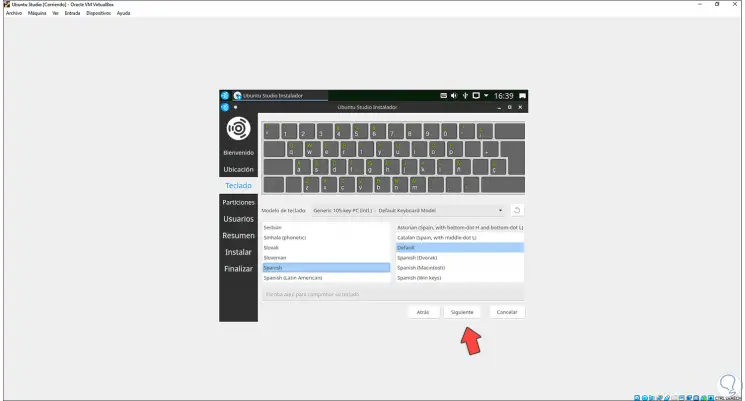
Step 21
Click Next to select the type of partitioning to use:
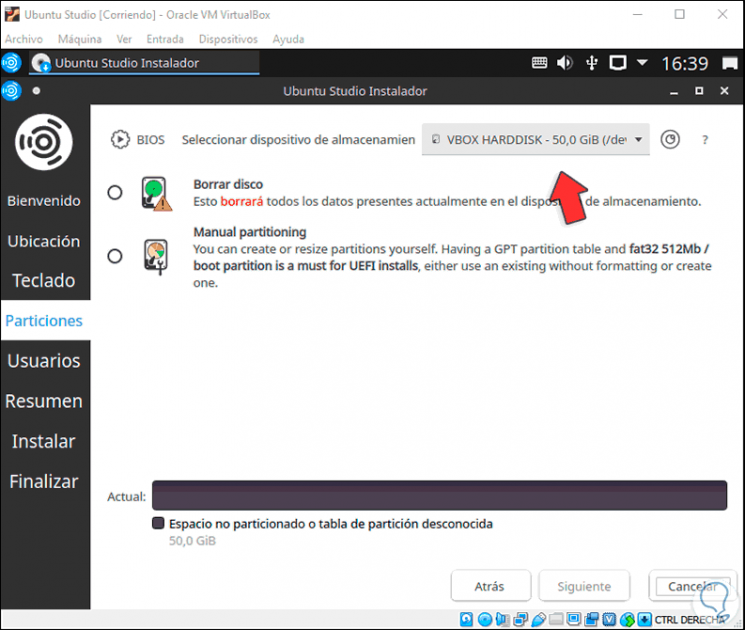
Step 22
There it is possible:
- Erase the disk and allow automatic configuration
- Select manual mode to create the partitions
Step 23
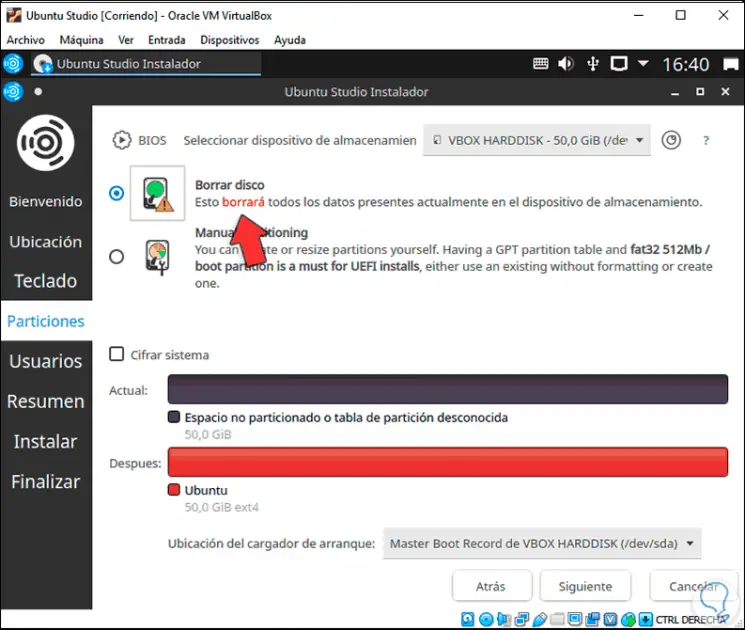
In this case we activate the option "Erase disk" and we will see how it will be structured:
Note
we can encrypt the system for more security
Step 24
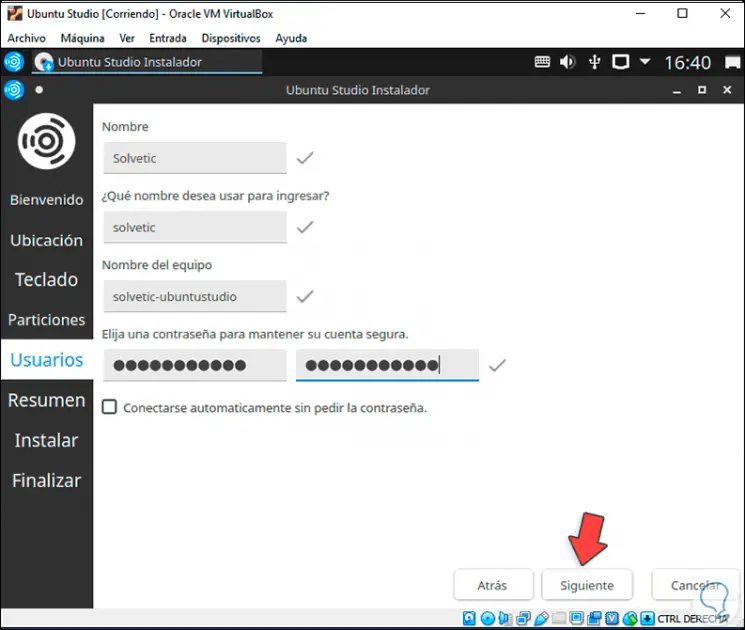
We click Next and now we enter the user credentials and computer name:
Step 25
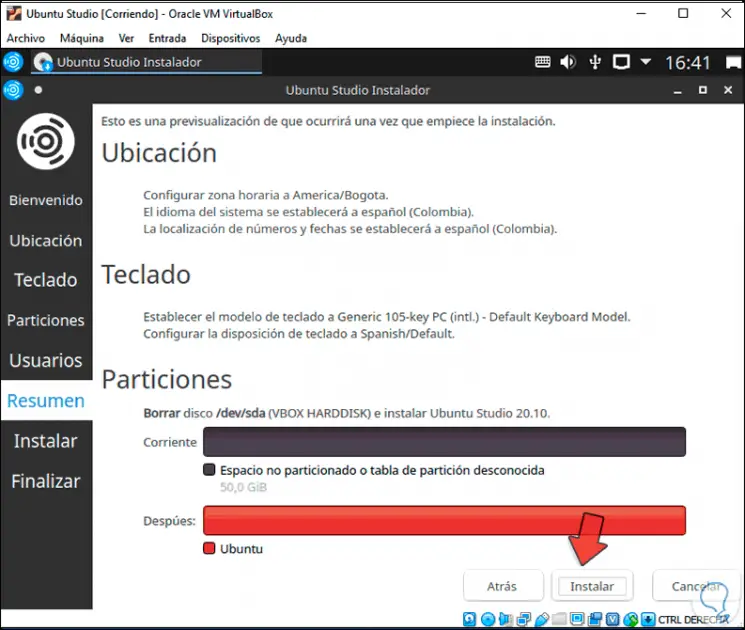
Click Next and we will see a summary of the Ubuntu Studio 20.10 installation in VirtualBox:
Step 26
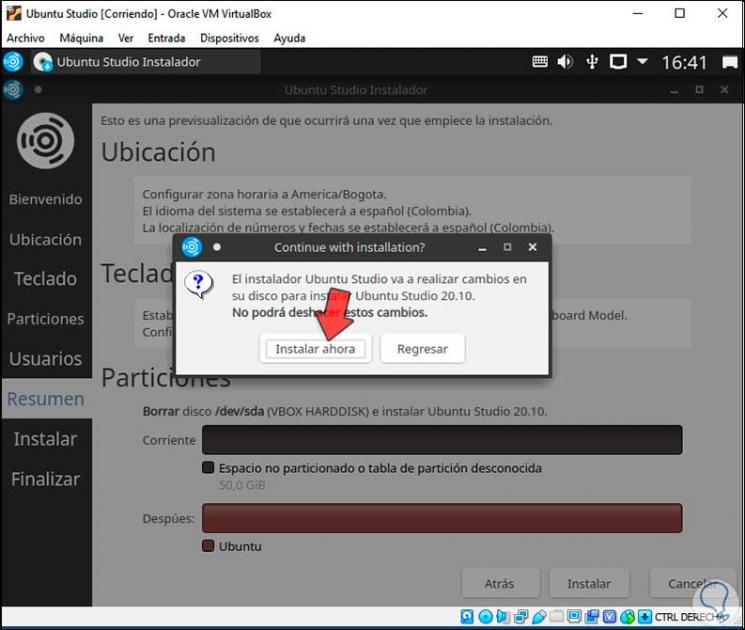
We click on Install and the following message will be displayed:
Step 27
Click "Install Now" to start the Ubuntu Studio 20.10 installation process:
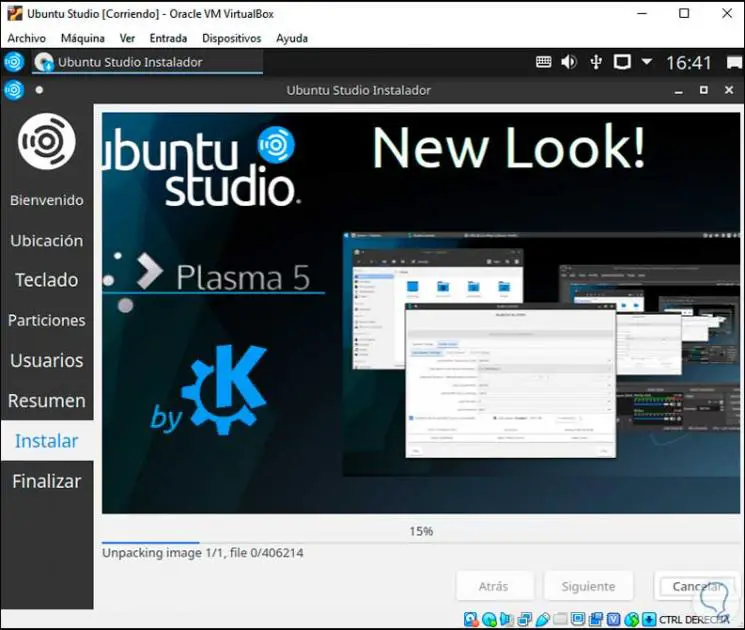
Step 28
At the end of the installation we will see the following:
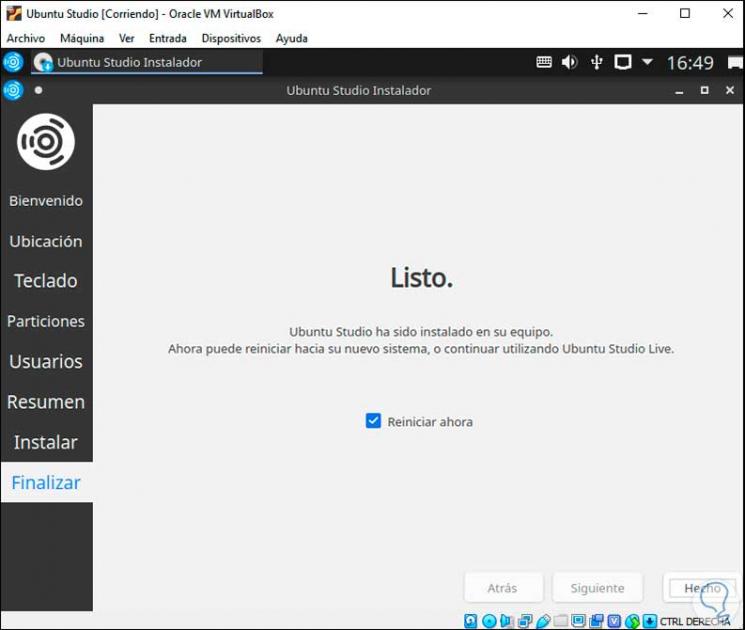
Step 29
Click Done to reboot the system:
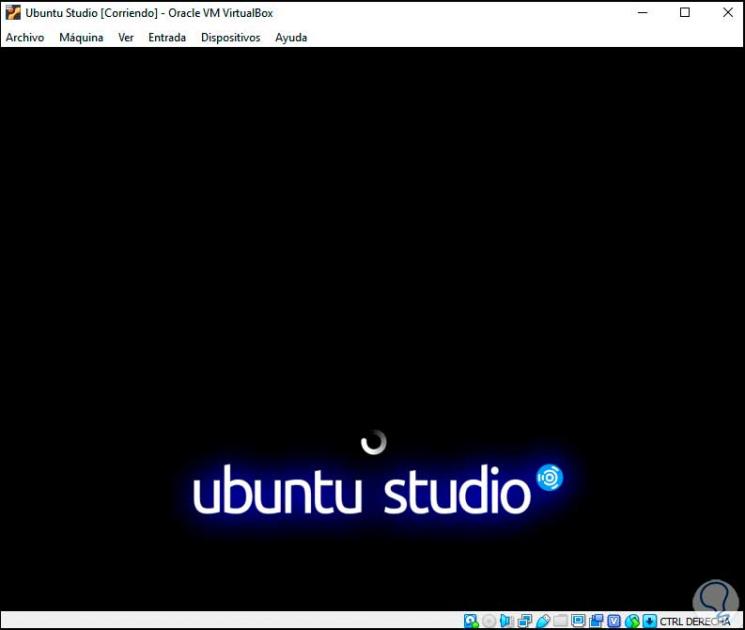
Step 30
After this we log in:
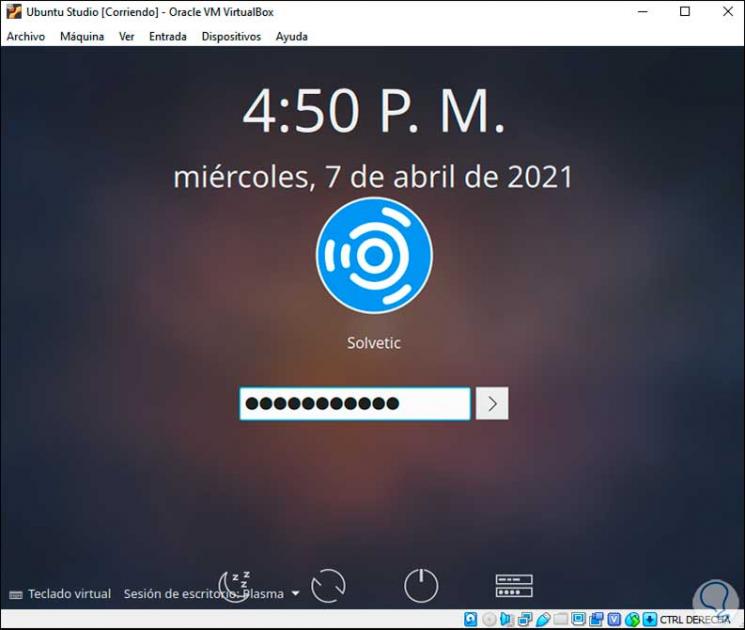
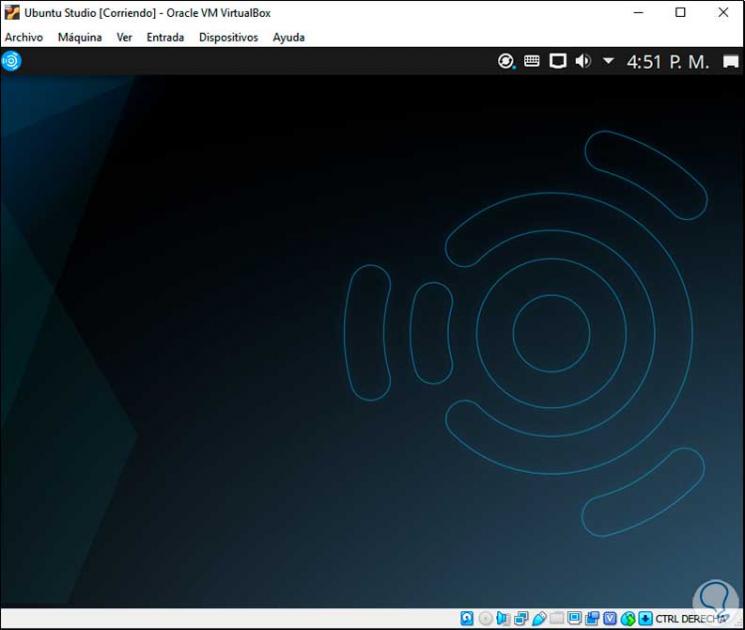
Step 31
When logging in we will see the following:
2. Install VirtualBox Guest Additions on Ubuntu Studio 20.10
Step 1
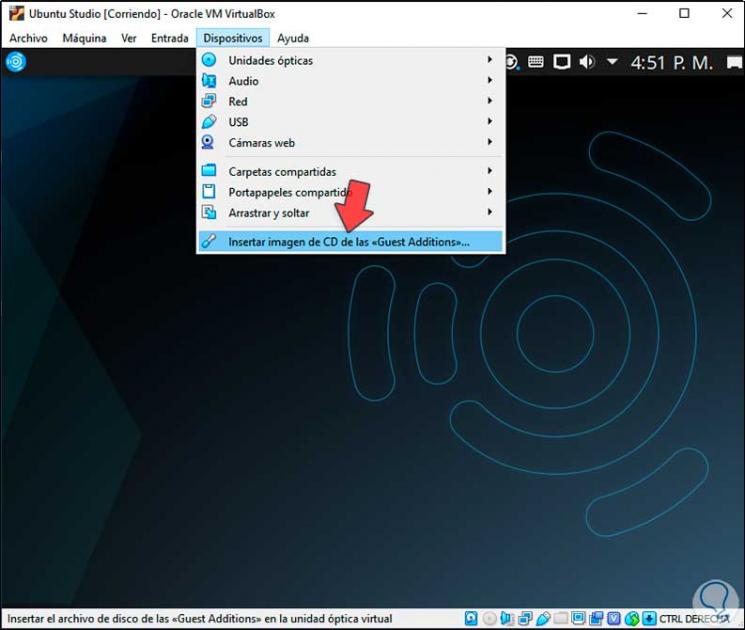
It is time to install the VirtualBox Guest Additions to create a better interaction between the physical and virtual equipment, for this we go to the "Devices - Insert CD image of the Guest Additions" menu:
Step 2
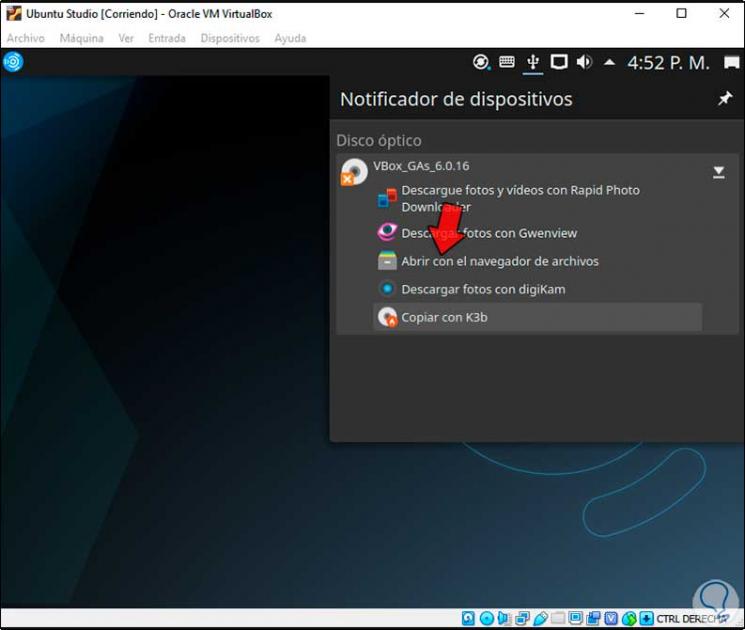
The following will be displayed:
Step 3
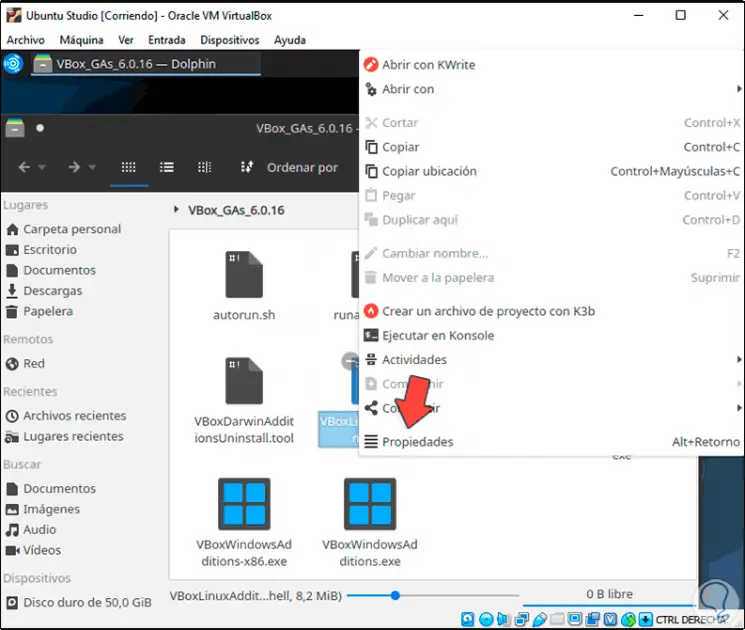
Select "Open with the file browser", after this we right click on "VBoxLinuxAdditions.run", select Properties:
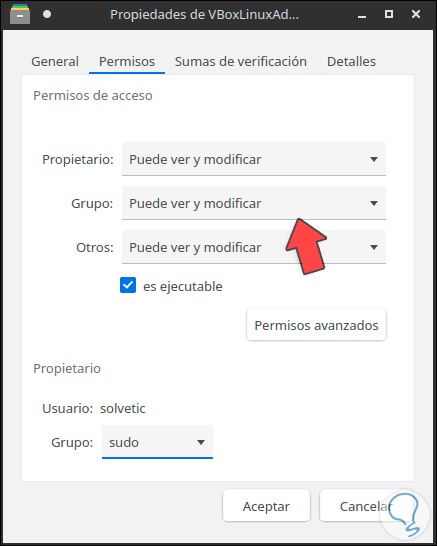
Step 4
In the displayed window we go to the Permissions tab and grant write permissions. We apply the changes.
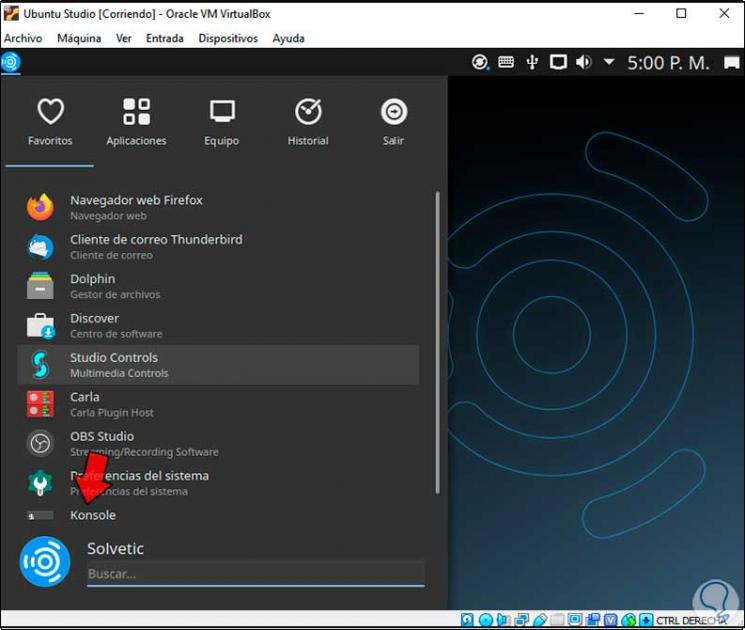
Step 5
Now we access konsole which is the terminal in Ubuntu Studio 20.10:
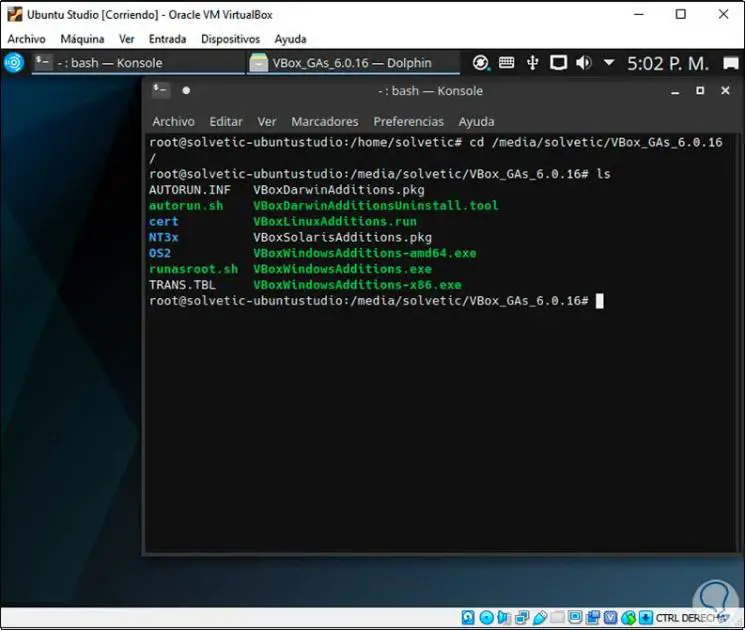
Step 6
There we log in as root using "su" and go to the VirtualBox DVD path:
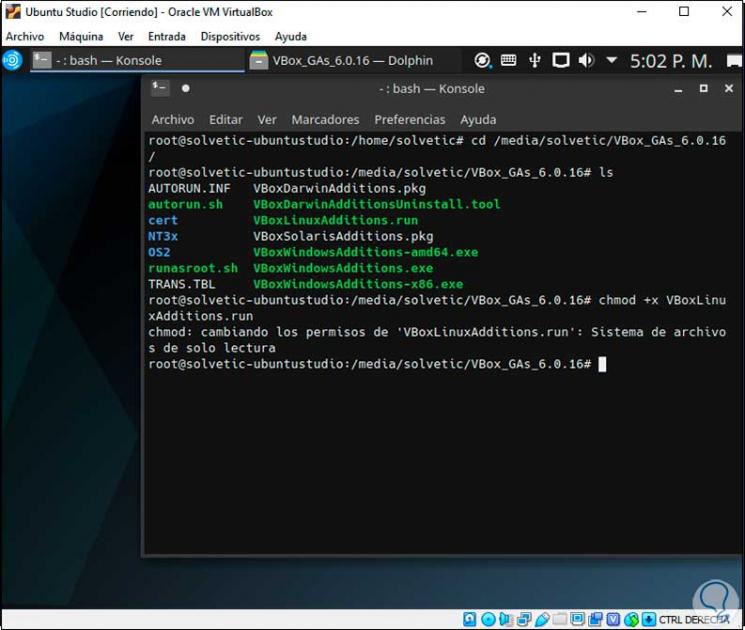
Step 7
We are going to grant permissions to the file with "chmod + x file.run":
chmod + x file.run
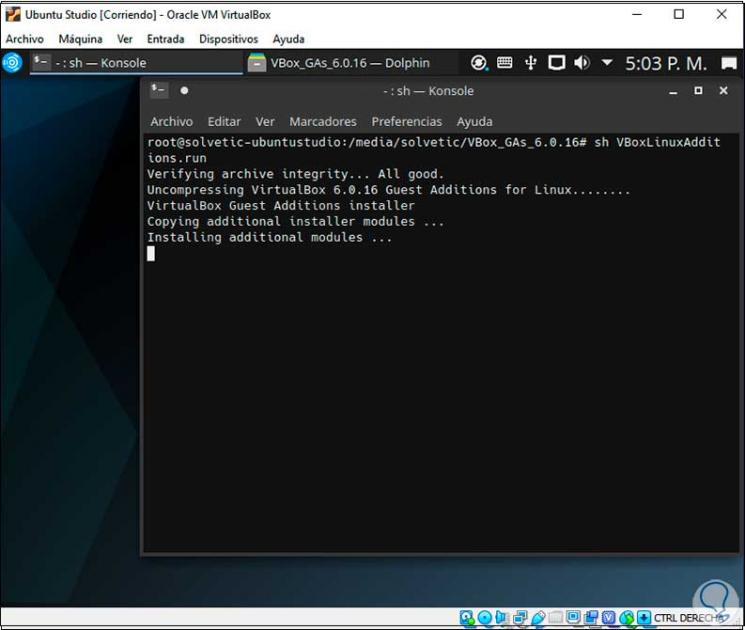
Step 8
We execute the syntax "sh file.run" to carry out the installation:
sh file.run
Step 9
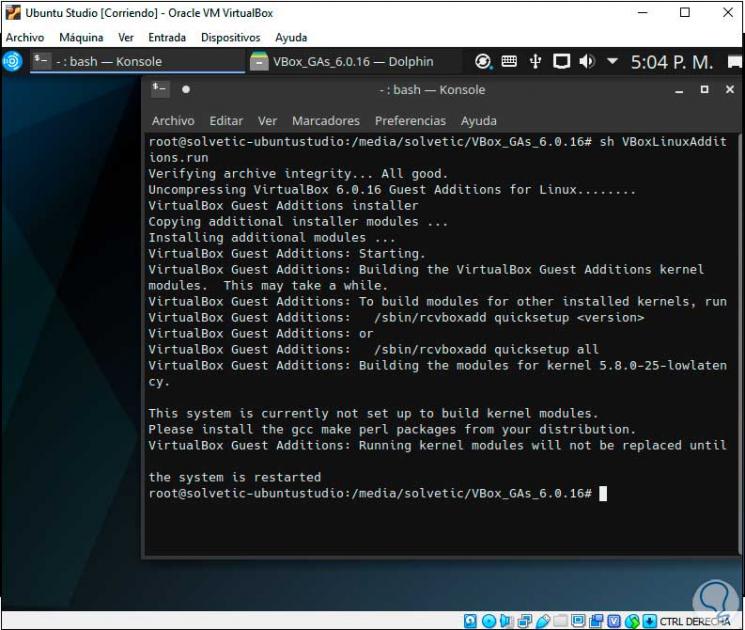
At the end we will see the following:
Step 10
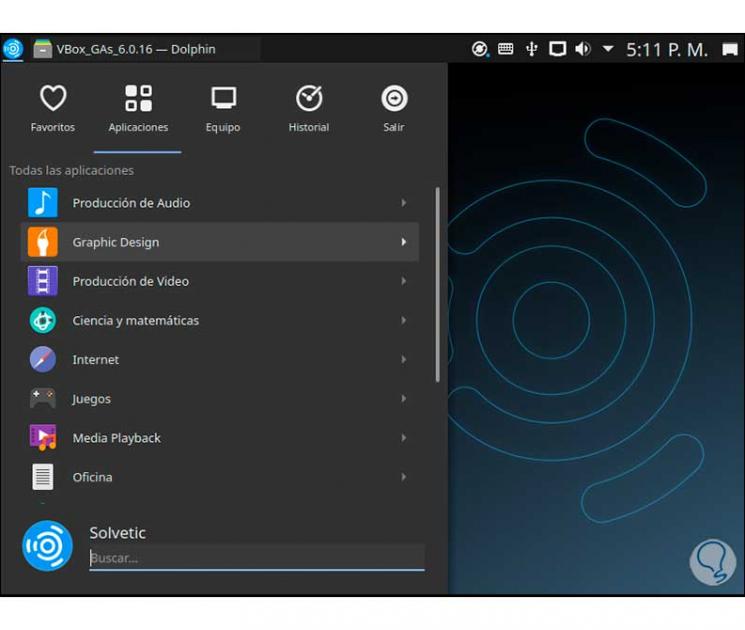
We restart the virtual machine and after logging in we will be able to see the different applications integrated in Ubuntu Studio 20.10:
Step 11
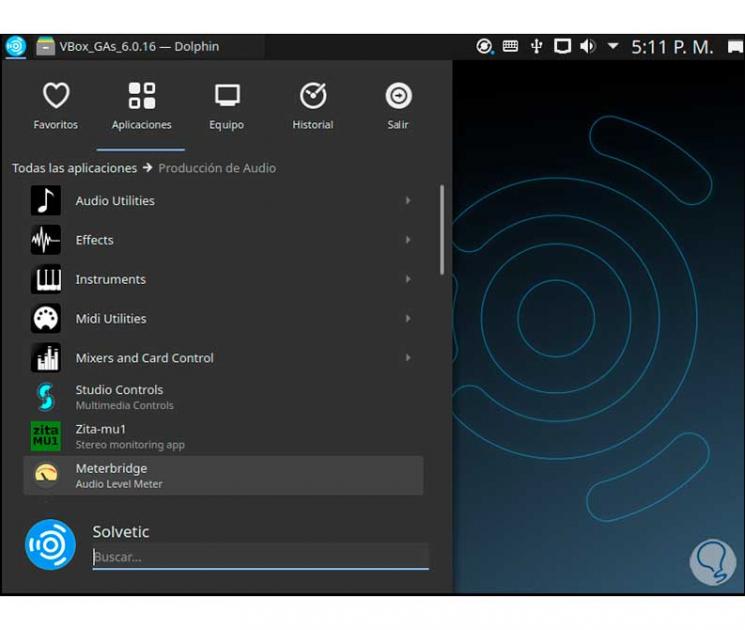
We see the segments that it handles:
This is how the installation process of this system has been, which brings very interesting things to this type of user and all with the versatility of Ubuntu..