Ubuntu is characterized by being one of the most dynamic, safe, simple to use Linux distributions and which offers the user various options to be used and we talk about its environment (desktop) since Ubuntu has more than 5 flavors (editions special) focused on a special audience and one of these is Ubuntu MATE which is currently in its version 20.10..
Ubuntu Mate objectives
Ubuntu MATE integrates approaches like:
- Increase user integration of Ubuntu and MATE Desktop
- Provide a lightweight system on computers without many hardware resources
- Ubuntu platform available to be a remote workstation solution like LTSP and X2Go
- Includes Ubuntu themes and illustrations
- Add software selection to increase its capabilities
Ubuntu MATE has a desktop environment in which we find a file manager to manage local and network files, a text editor, calculator, file manager, image viewer, document viewer, tools to monitor the system, as well as the popular terminal for executing commands and commands.
Ubuntu Mate features
Among the characteristics of Ubuntu MATE we highlight:
- Availability of various themes and backgrounds
- Tools of the desktop environment such as Cashier, Calculator, Screenshot, Terminal, Statistics, etc.
- Pre-installed apps like Redshift, Plank, Firefox, Celluloid, Webcamoid, GParted *, Magnus, Orca Screen Reader
- Ubuntu base services available like apt, snapd, bash, systemd, Plymouth, or grub2
- View documents in multiple formats, such as document format files
-
- portable (PDF), PostScript files and e-book files (EPUB)
- Integration of a MATE disk usage analyzer
- Create, view, modify and decompress compressed files
- Ability to access a UNIX shell in the MATE environment to execute commands
One of the best ways to know in depth everything that Ubuntu MATE 20.10 offers us is in a virtual environment, in this way we avoid that the real environment can be affected, VirtualBox is available for download at the following link for free:
VirtualBox
We are going to see the step by step to install Ubuntu MATE 20.10 in VirtualBox and thus know this edition of Ubuntu..
How to install Ubuntu MATE 20.10 in VirtualBox
Step 1
To start we will go to the URL of Ubuntu Mate in the following link:
Ubuntu MATE 20.10
Step 2
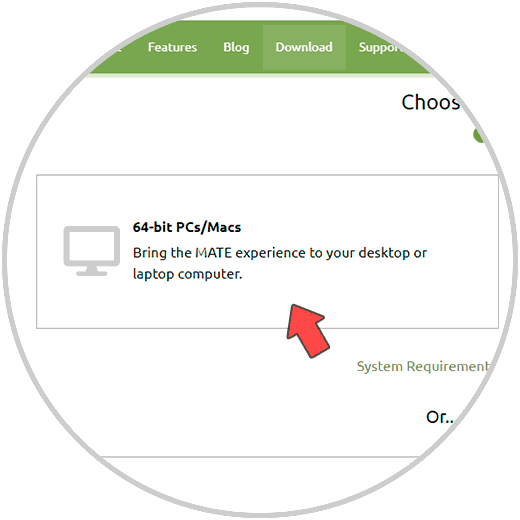
There we select the desired architecture, in this case 64-bit, then we will see the following:
Step 3
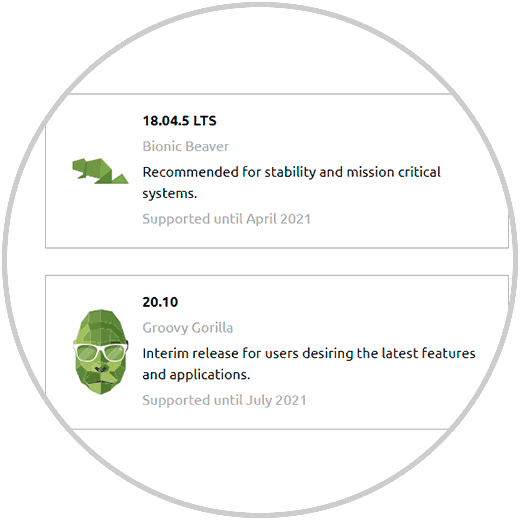
There we click on the edition that we are going to download, in this case it will be 20.10, after that we select the download method:
Step 4
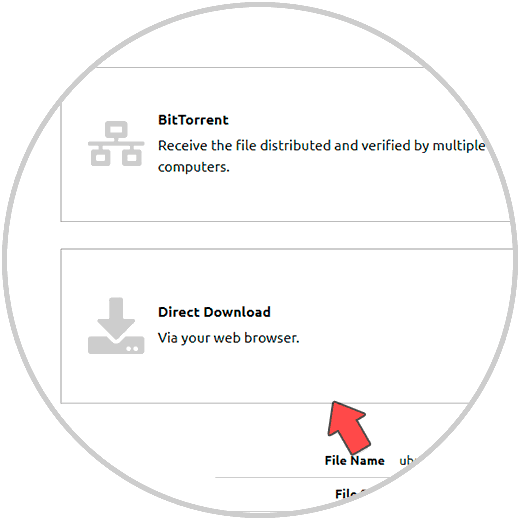
For this case it will be the option "Direct Download", after this we are already in the possibility of downloading Ubuntu MATE 20.10:

Step 5
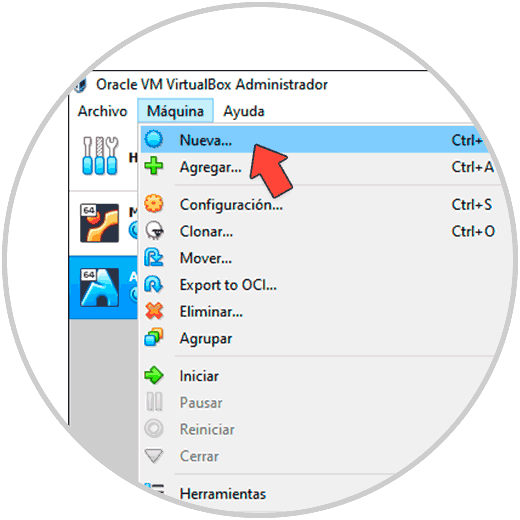
After downloading, we open VirtualBox and create the virtual machine using one of the following options:
- From the menu Machine - New
Ctrl + N
Step 6
After this, the following window will be displayed where we enter the name, location, type and version of the system:
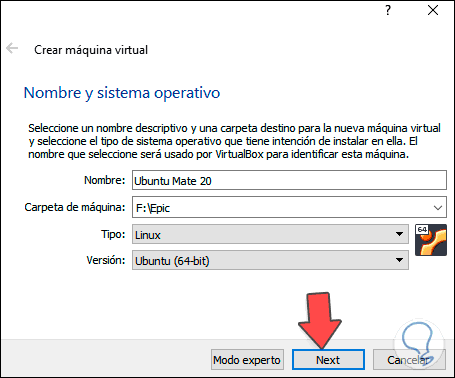
Step 7
After this we assign the RAM to use in the virtual machine:
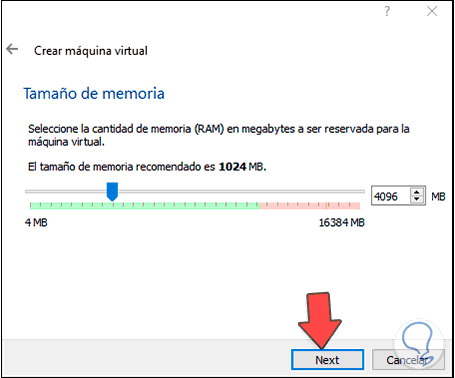
Step 8
After that, we select the creation of the virtual hard disk:
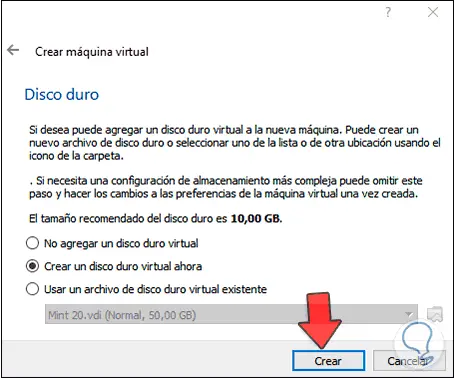
Step 9
We click on Create and choose the type of hard drive:
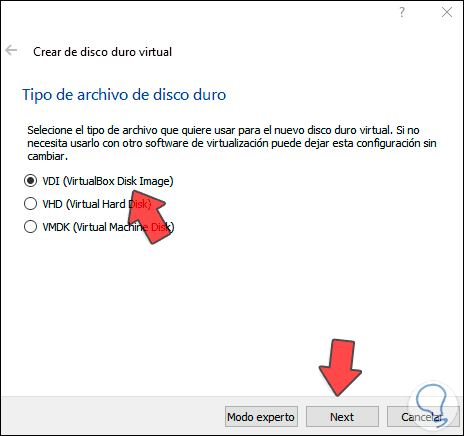
Step 10
After this we select the way the storage will be managed:
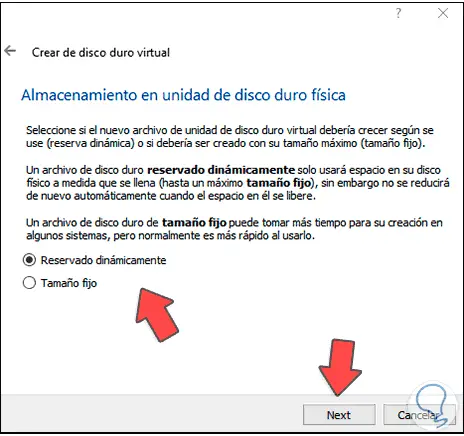
Step 11
Click on Next and assign the size of the disk, it is possible to change its location if we wish:
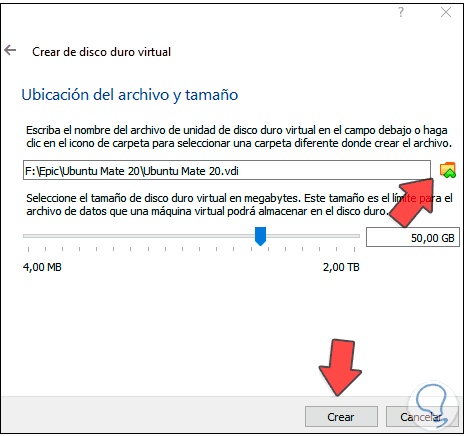
Step 12
Click Create to see the created virtual machine:
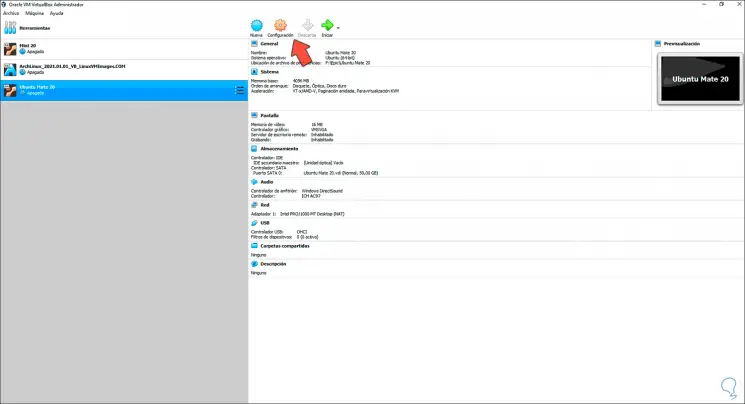
Step 13
We access the configuration of the machine and activate the network adapter:
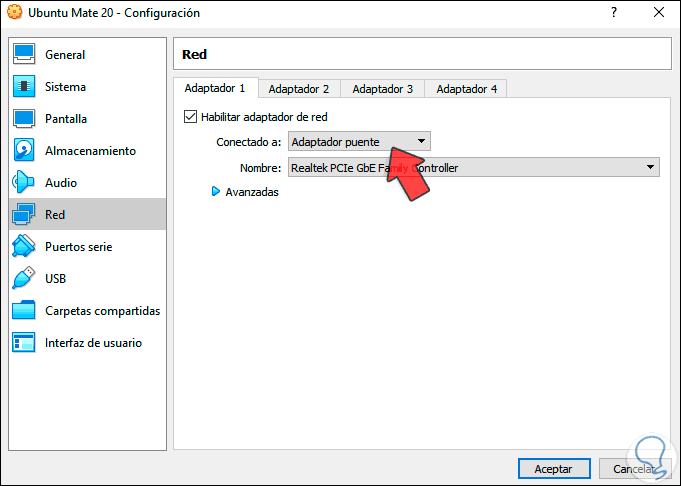
It is possible to configure additional parameters depending on the case.
Step 14
We start the virtual machine and we will see the following:
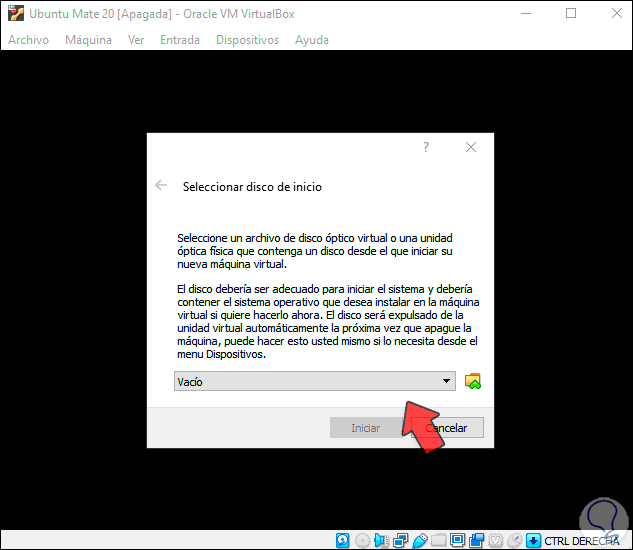
Step 15
We click on Browse and select the ISO image of Ubuntu Mate 20.10:
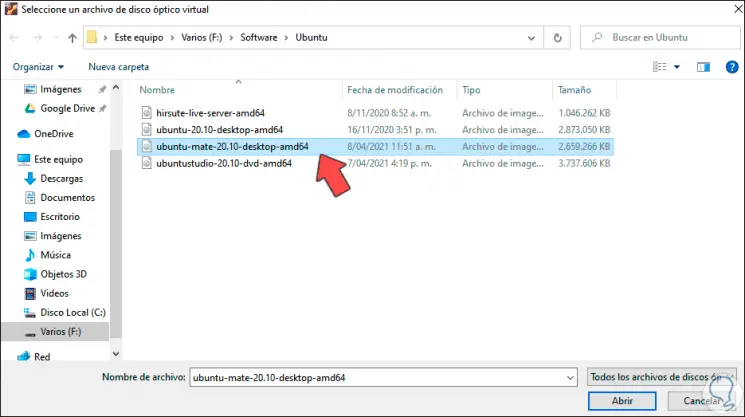
Step 16
We click Open and we will see it integrated:
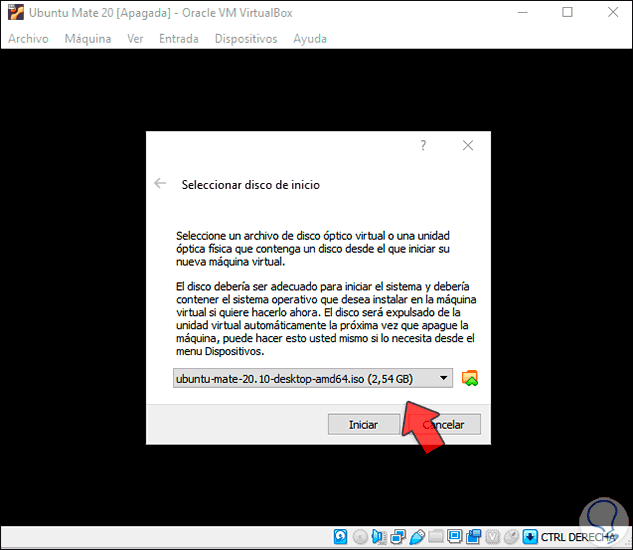
Step 17
We click on Start and in the displayed window we select Ubuntu MATE:
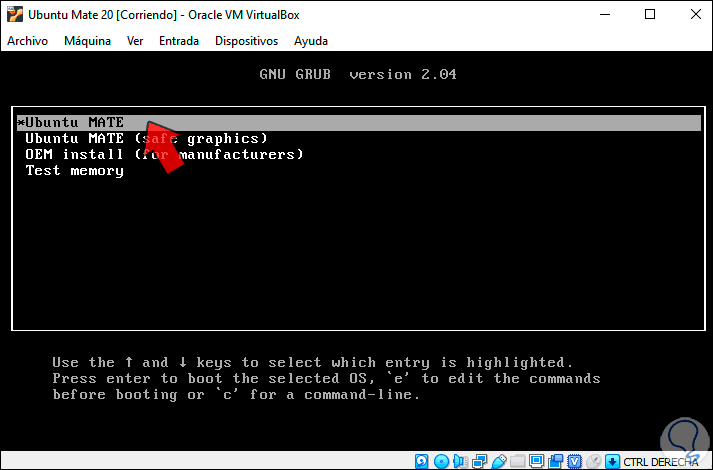
Step 18
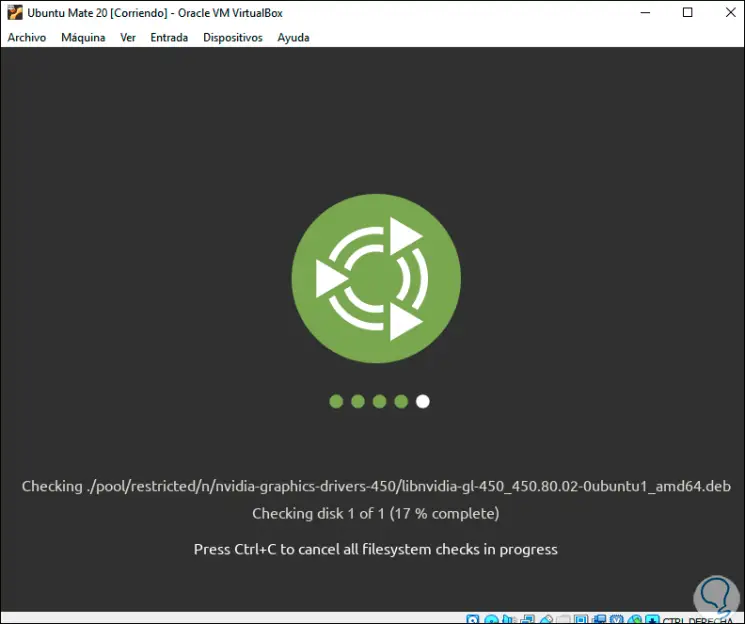
It will proceed to checking the disk for errors:
Step 19
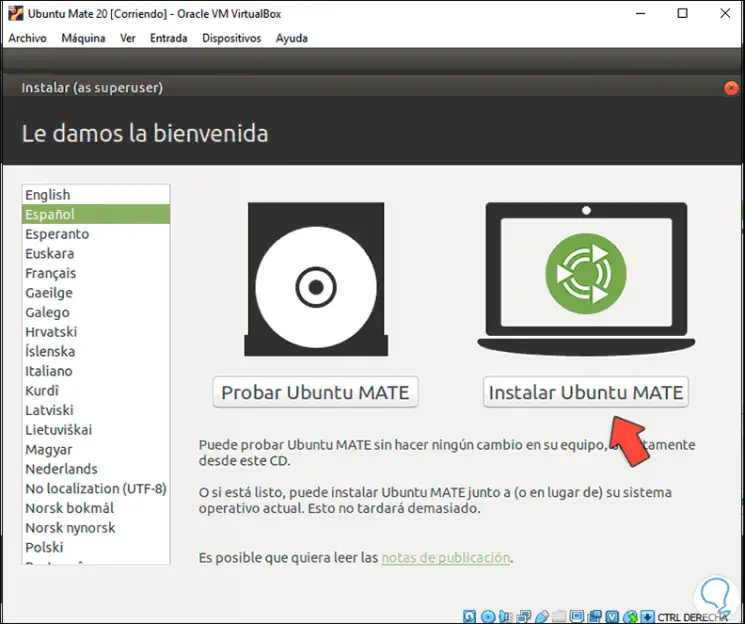
When this process comes to an end we will see the following where we select the installation language of Ubuntu MATE:
Step 20
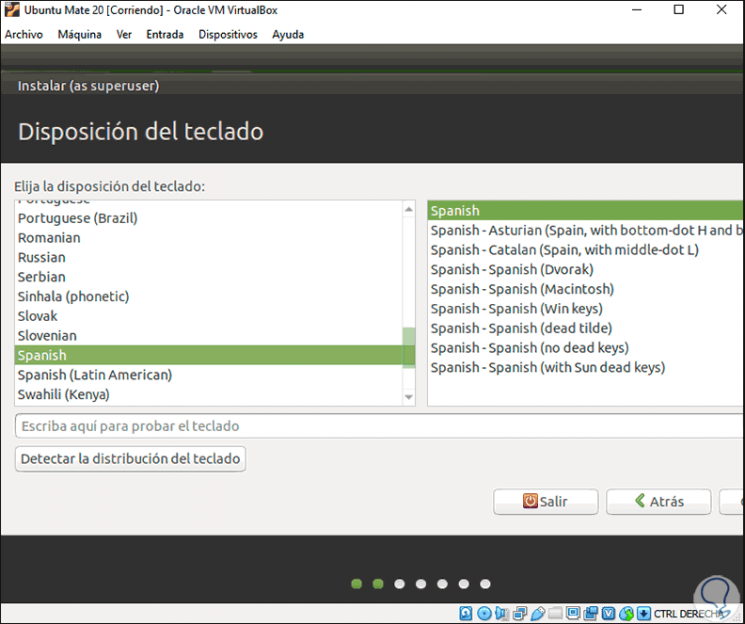
We click on "Install Ubuntu MATE" and then define the keyboard language:
Step 21
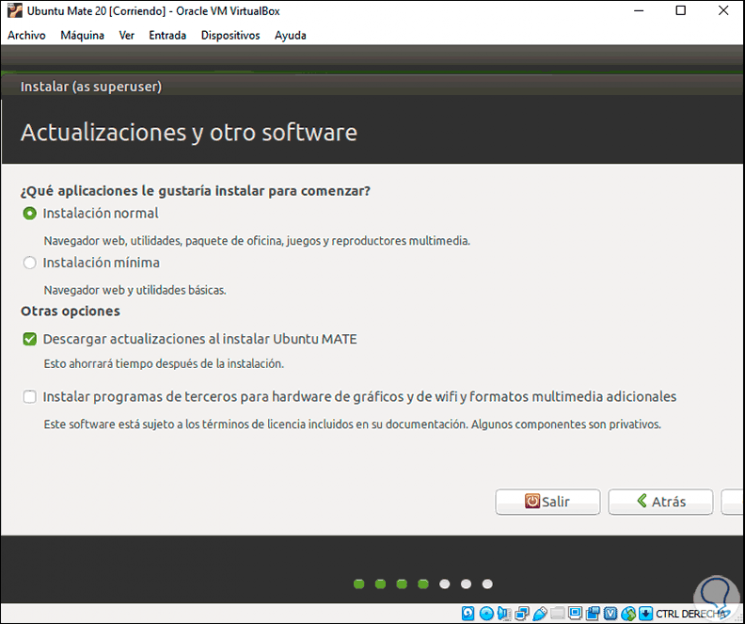
After this we will choose the type of installation:
Step 22
We click Next to select the local installation of Ubuntu MATE:
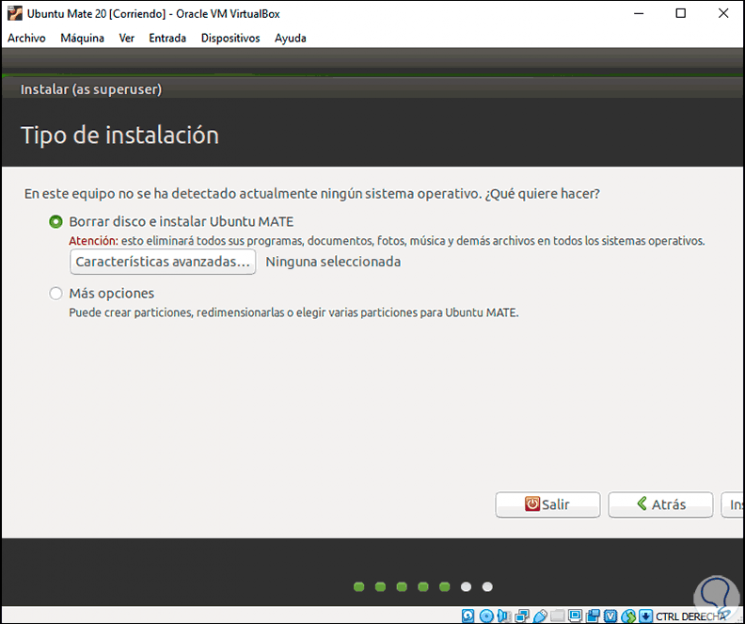
Step 23
There it is possible:
- Allow Ubuntu MATE to perform the partitioning process automatically
- Do it manually by clicking on "More options"
In this case we leave the default option, click on "Install" and the following warning will be displayed:
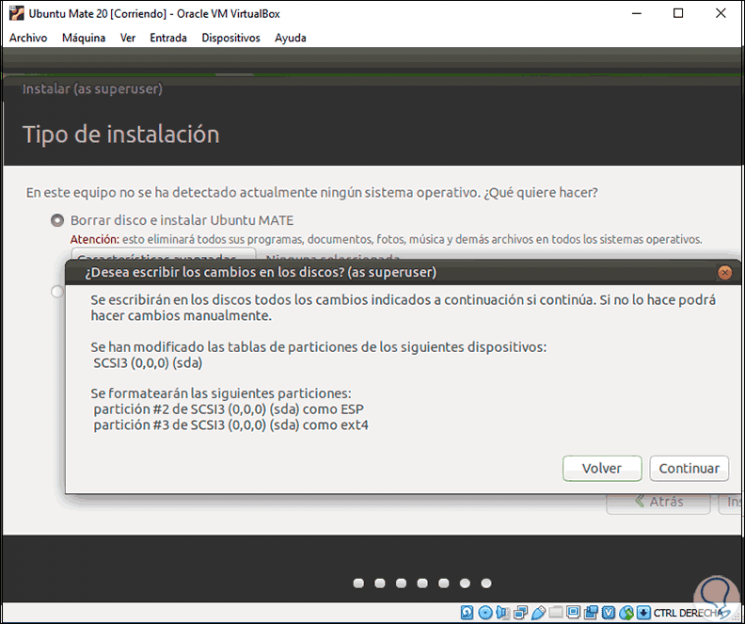
Step 24
We click on Continue and now we select the location:
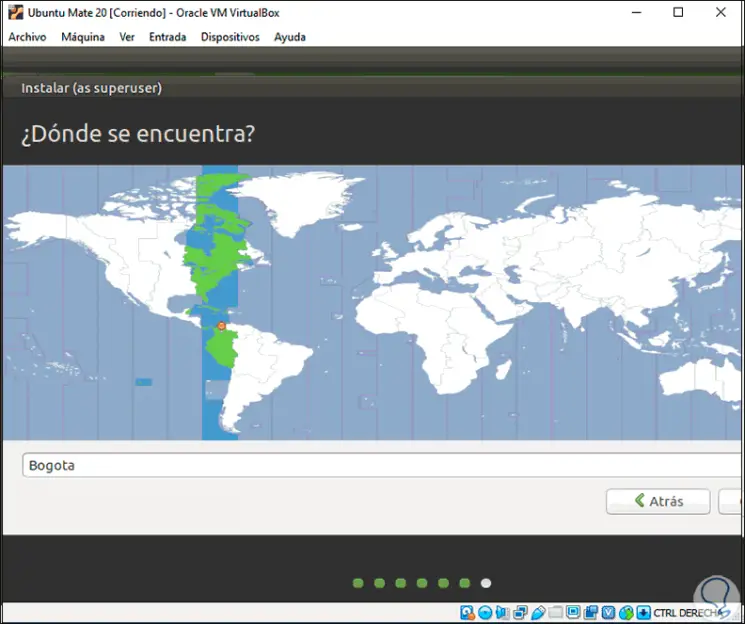
Step 25
Click Next to enter the user credentials:
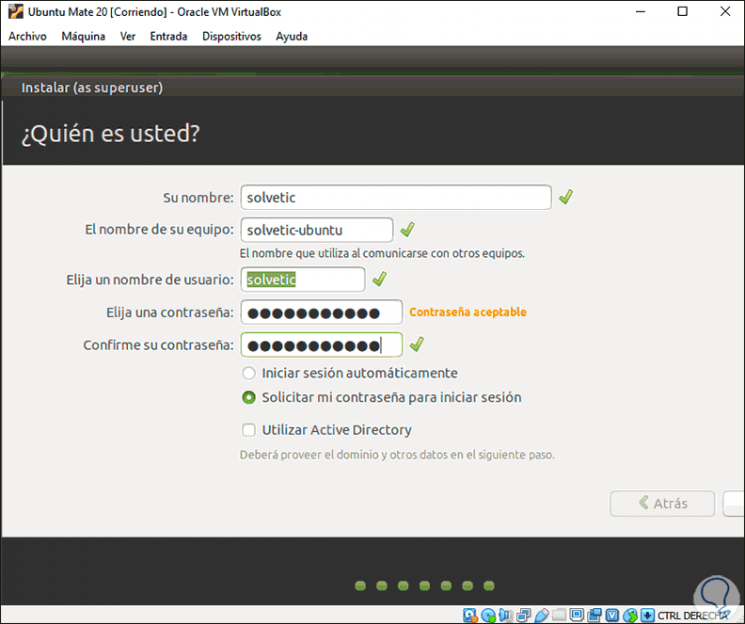
Step 26
Click Install to install Ubuntu Mate 20.10 in VirtualBox:
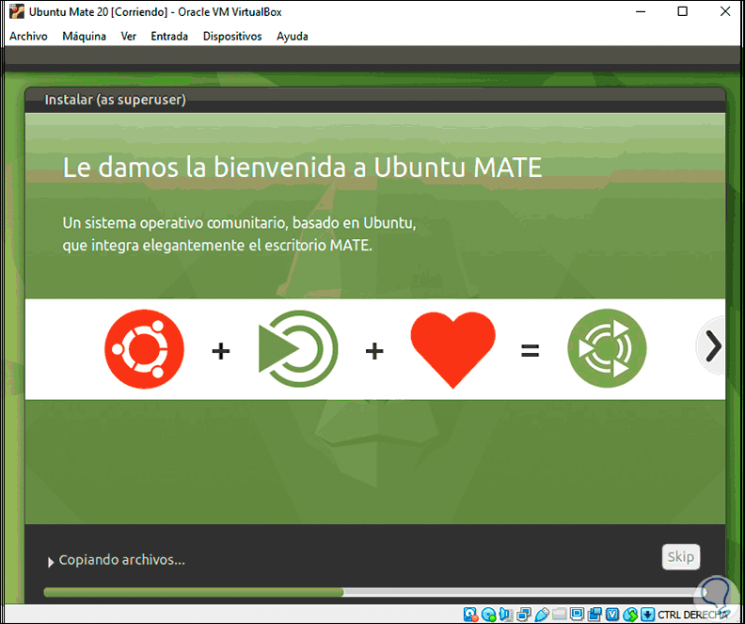
Step 27
When this process comes to an end we will see the following:
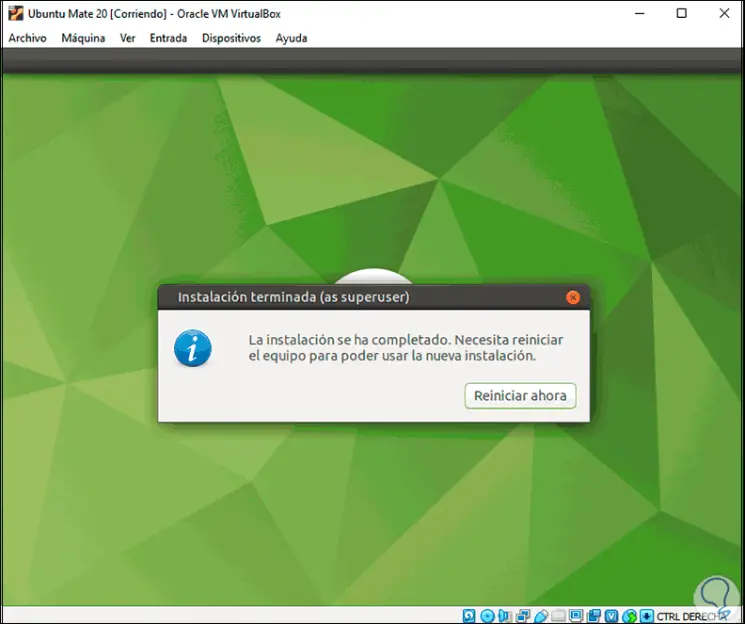
Step 28
We restart the system:
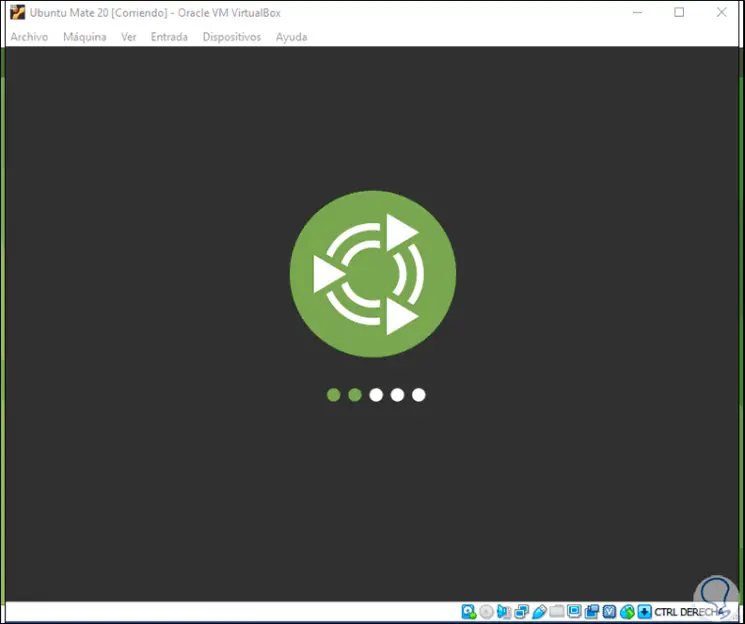
Step 29
After this we log in:
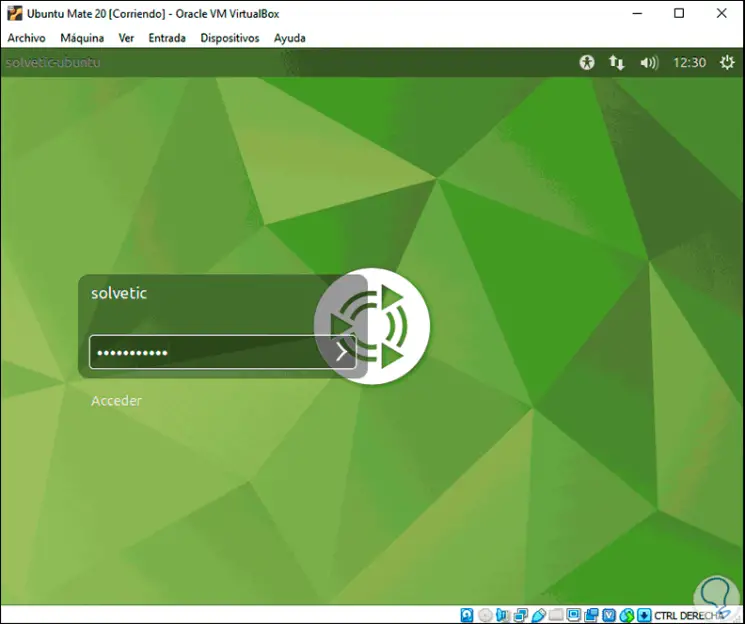
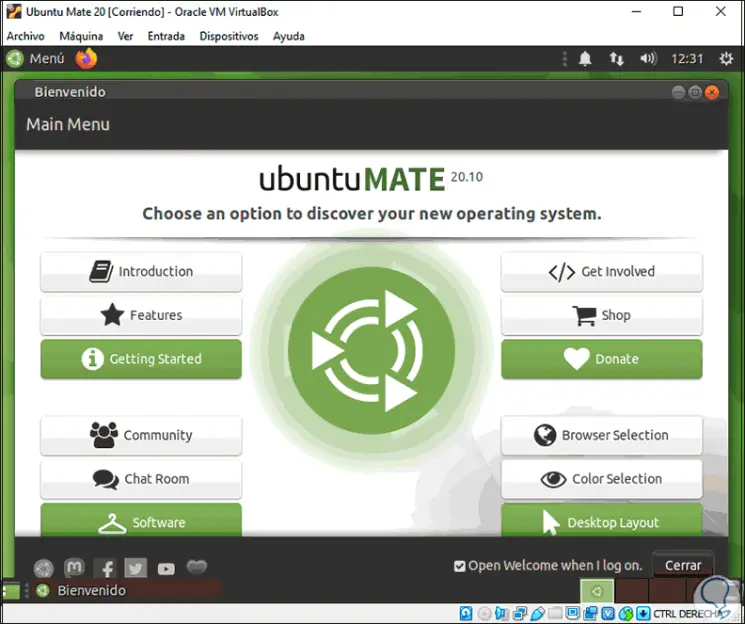
Step 30
When accessing we will see the following:
Step 31
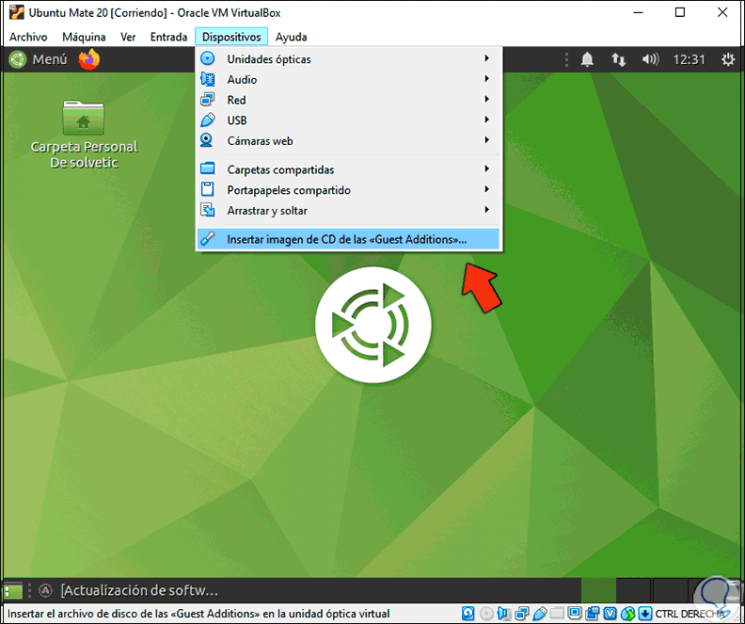
Now it is time to install the VirtualBox Guest Additions, they allow a more complete interaction with the real equipment and system, for their installation, we go to the menu "Devices - Insert CD image of Guest Additions":
Step 32
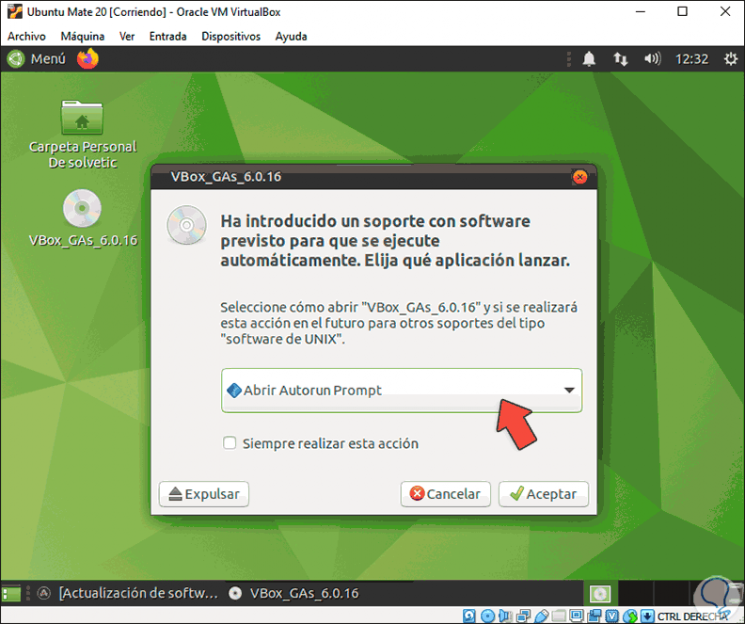
The following window will be displayed:
Step 33
We click OK to see the following:
Step 34
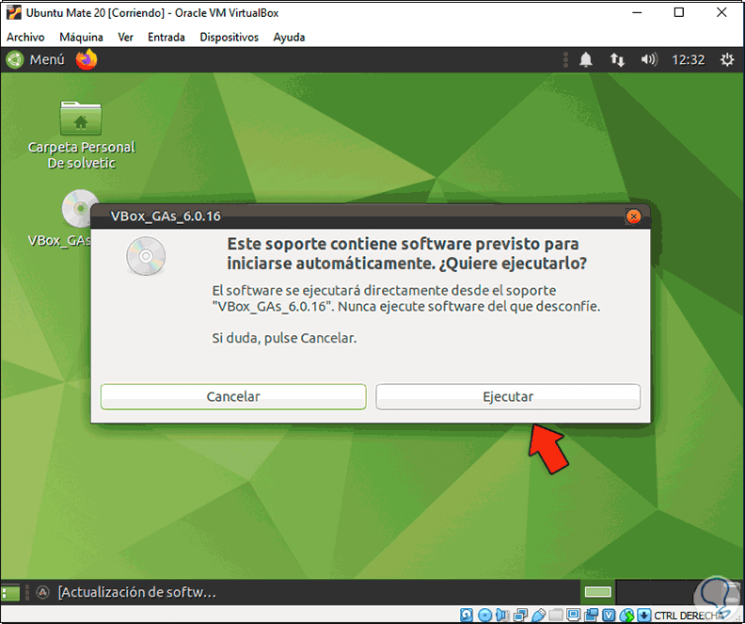
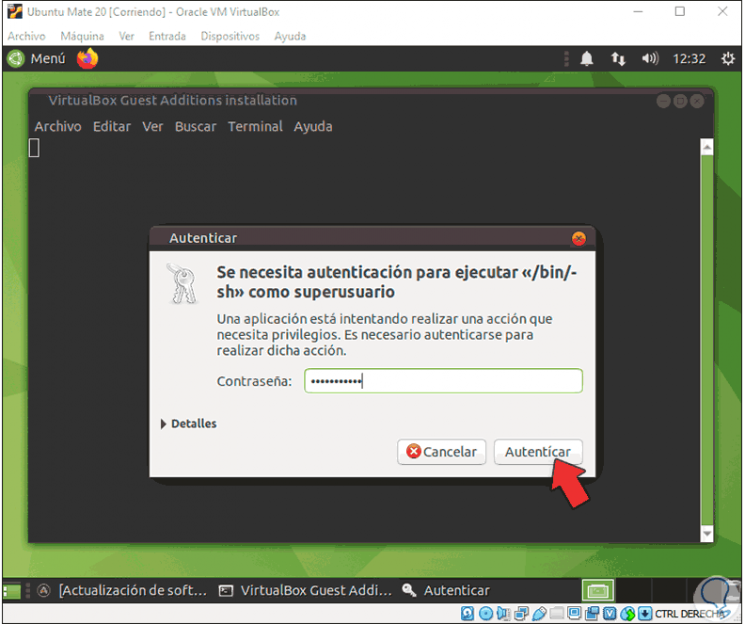
We click on Run and now we enter the administrator password:
Step 35
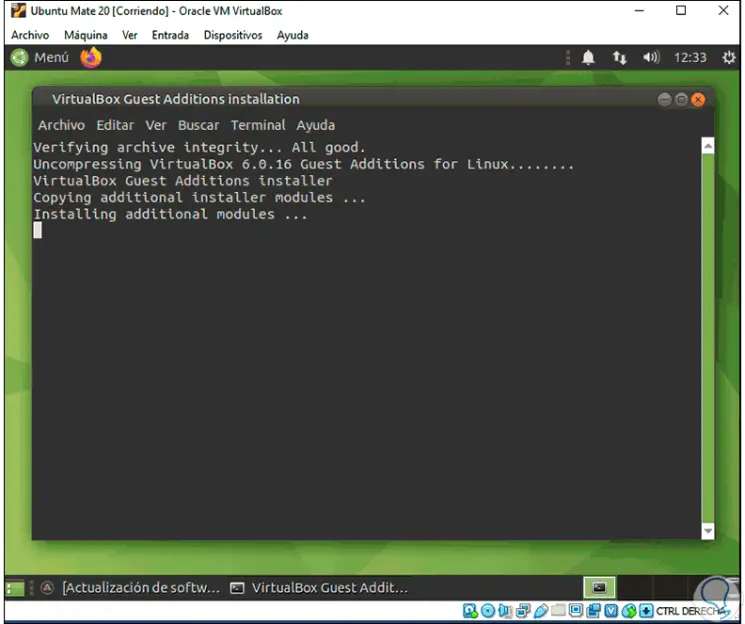
We click on Authenticate to launch the terminal with the installation of Guest Additions:
Step 36
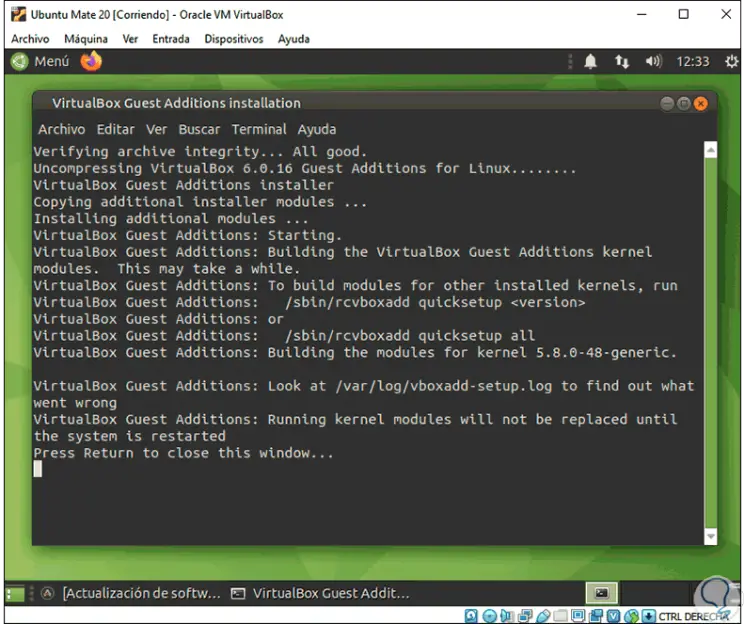
At the end we will see the following:
Step 37
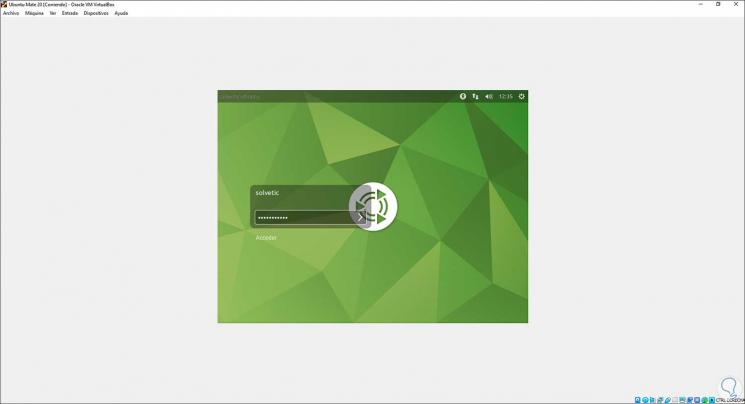
We close the window and restart the system to log in:
Step 38
By accessing we can use Ubuntu MATE 20.10 to the maximum:
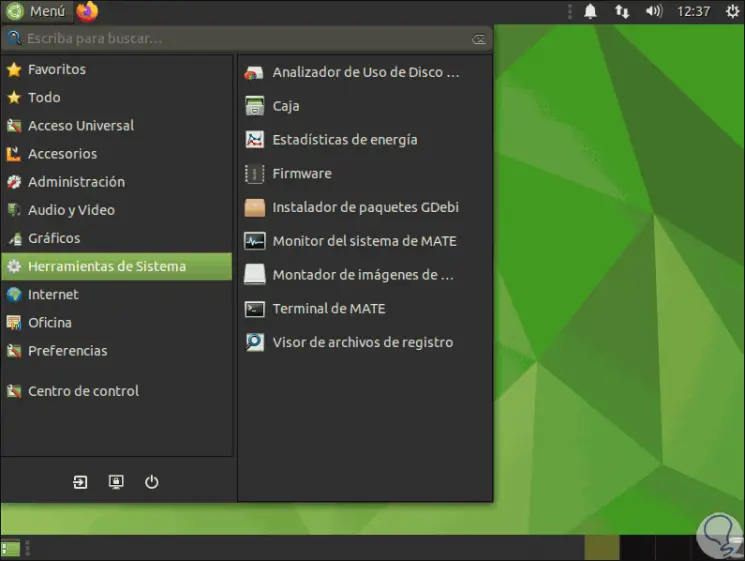
With these steps we are in the possibility of knowing in depth all the characteristics of Ubuntu MATE 20.10 in a safe environment..