The desktop environment Ubuntu allow users dispongamos us as a different option to work, these environments we offer special menus, icons with unique designs, themes and exclusive and more funds. In the case of Ubuntu 20.04 we can find different options such as XFCE, MATE, XORG, etc, each one with its own approach and by default Ubuntu integrates the XORG environment, but TechnoWikis will explain in this tutorial how to install the MATE environment in Ubuntu 20.04 and thus have an additional work option..
What is MATE in Ubuntu 20.04
It is a desktop environment in which different unique characteristics are integrated so that the end user feels comfortable with daily work, MATE offers us functions or characteristics such as:
- Engrampa has support for multiple formats
- Eye of MATE has support for Wayland
- Added support for webp files
- The System Monitor panel applet supports NVMe drives
- Alt + Tab and Workspace Switcher pop-ups have been redesigned for better viewing
- Tiling windows with keyboard
- The calculator now allows the use of "pi" or "π".
- Control Center better displays icons on HiDPI screens
- New Time And Date Manager application
- Mouse app now supports acceleration profiles
- The network manager applet icons have been updated
- In the MATE Panel the blocking errors have been corrected
- Status icons are compatible with HiDPI displays
- The Window List applet now supports window thumbnails when hovering over it
- Accessibility improvements
- Mozo, which is the menu editor, now supports Undo and Redo actions
With all these features we will learn how to install this environment in Ubuntu 20.04.
To stay up to date, remember to subscribe to our YouTube channel! SUBSCRIBE
How to install MATE on Ubuntu 20.04
Step 1
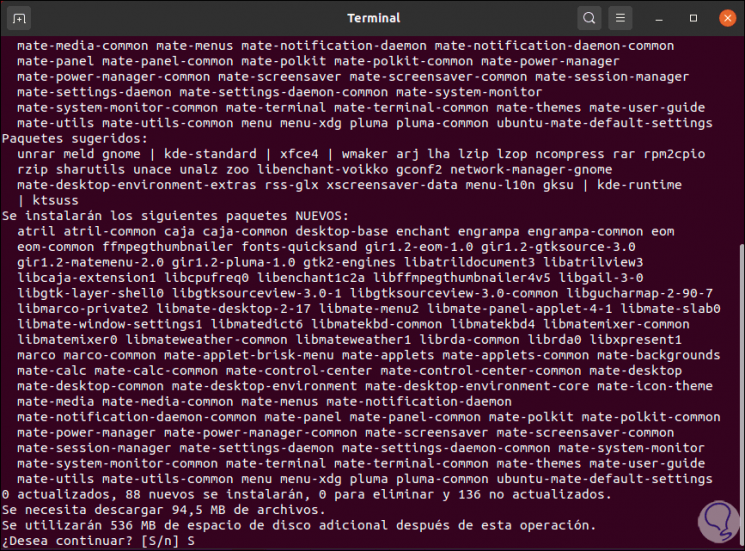
We access the terminal and there we execute:
sudo apt install mate
Step 2
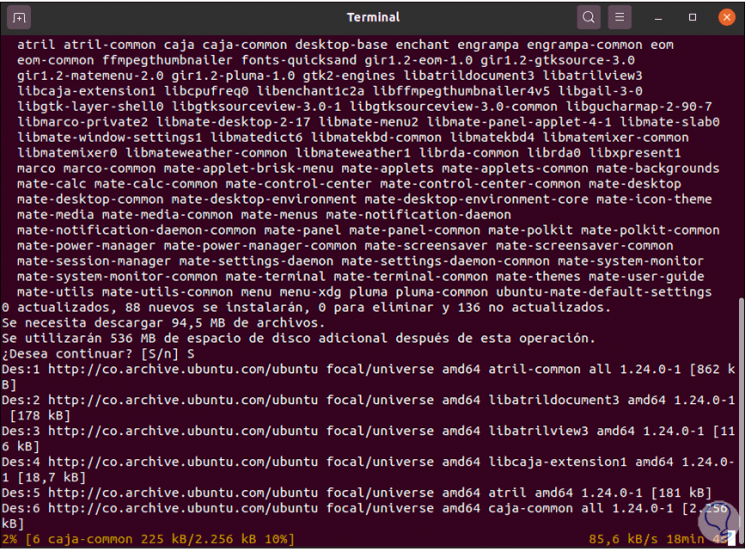
We enter the letter S to confirm the download and installation of the environment:
Step 3
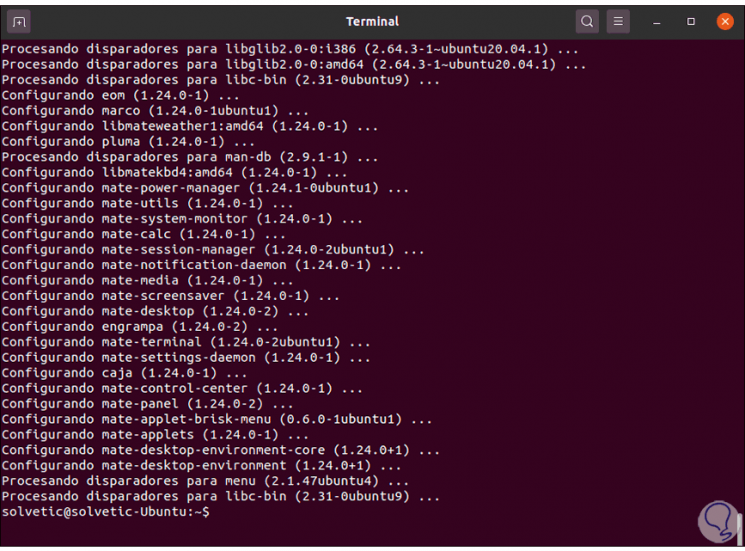
When this process comes to an end we will see the following:
Step 4
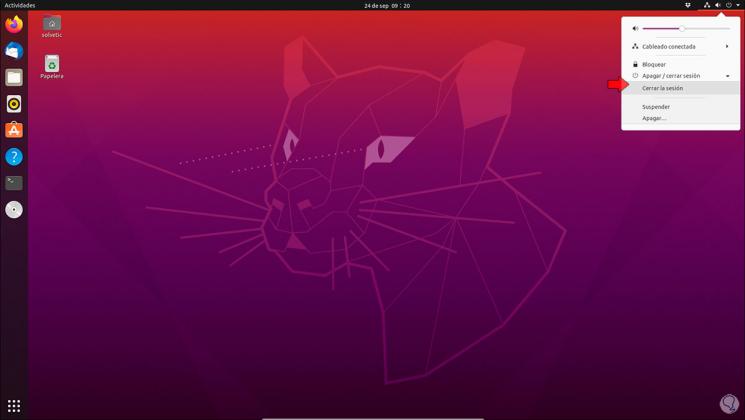
Once MATE is downloaded, we must close the session, for this we go to the manager located in the upper right corner and select "Close session":
Step 5
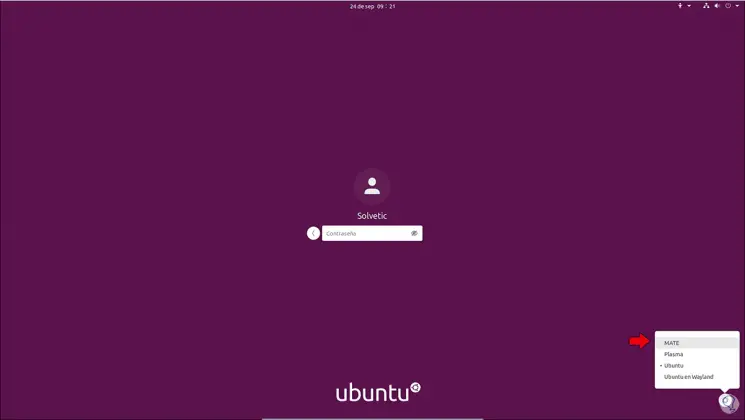
Then we select the user with which we will access the system, in the environment manager located in the lower right corner we select MATE:
Step 6
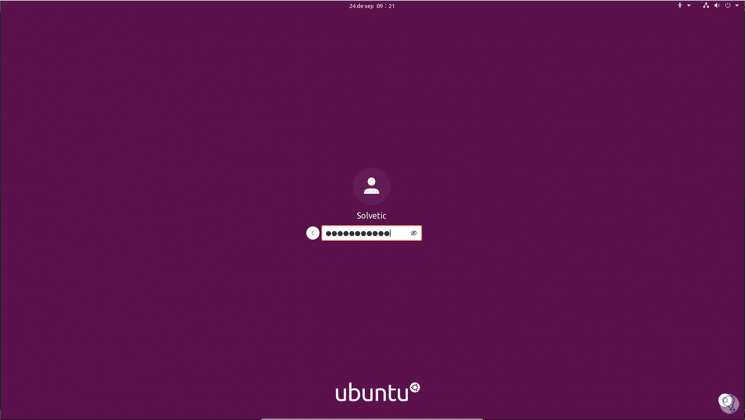
We enter the access password:
Step 7
We press Enter and we will be in the MATE environment in Ubuntu 20.04:

Step 8
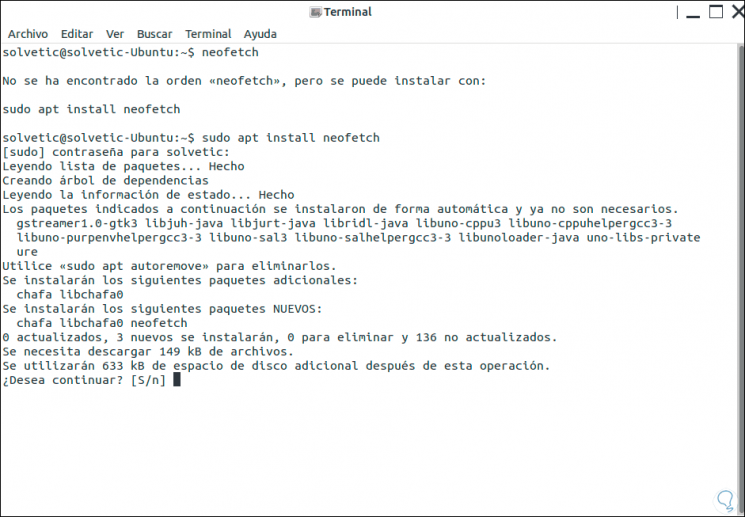
We go to the terminal and execute the following:
Neofetch
Note
in case of not having this utility, we install it with "sudo apt install neofetch":
Step 9
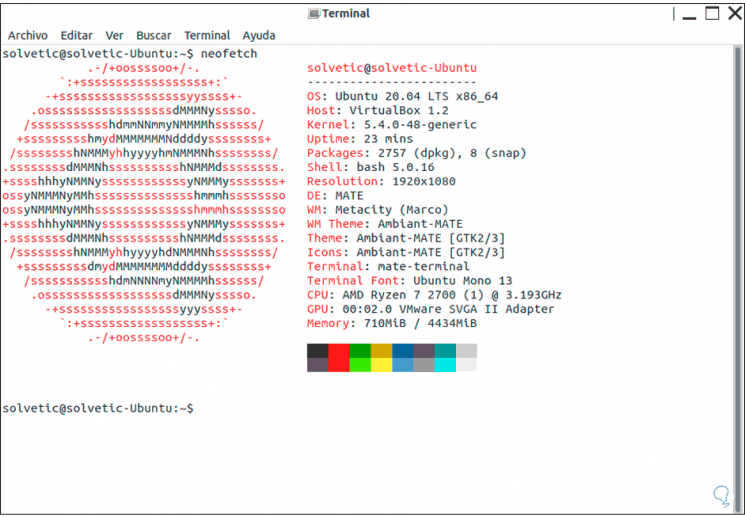
After this when executed we will see the details of Ubuntu 20.04 where it is validated that we are using MATE:
With this simple process we have established a new environment for Ubuntu 20.04..