Computers with Windows 10 give us different ways to connect to the network such as the wired network (Ethernet) or the Wi-Fi network, every day the use of Wi-Fi is more latent due to its various benefits and advantages, but it can It happens that even with the adapter enabled, with available Wi-Fi networks and good coverage, our Windows 10 computer does not detect the Wi-Fi network..
Internet and its use are practically always linked when we use mobile or consumer equipment. In computers, the use of WiFi is widespread, especially in laptops, so when it fails we feel quite saturated since we need an Internet connection. There are several solutions to correct this and we will see them in detail.
To stay up to date, remember to subscribe to our YouTube channel! SUBSCRIBE
1. Configure Windows 10 WiFi service
Step 1
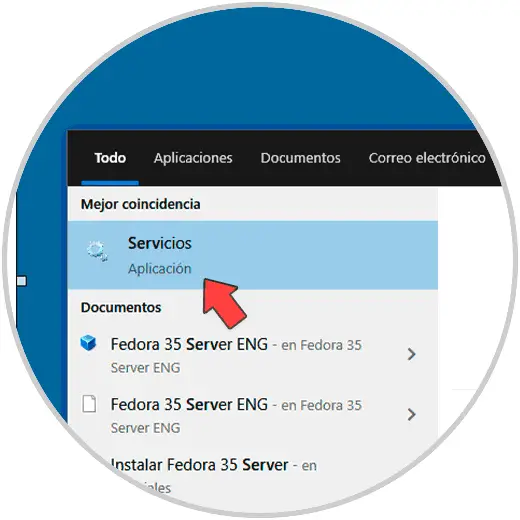
The Wi-Fi network is associated with the WLAN service in Windows 10, so that if this service has a fault or is incorrectly configured, the network will simply not be detected. For its solution, in the Start search engine we enter "services":
Step 2
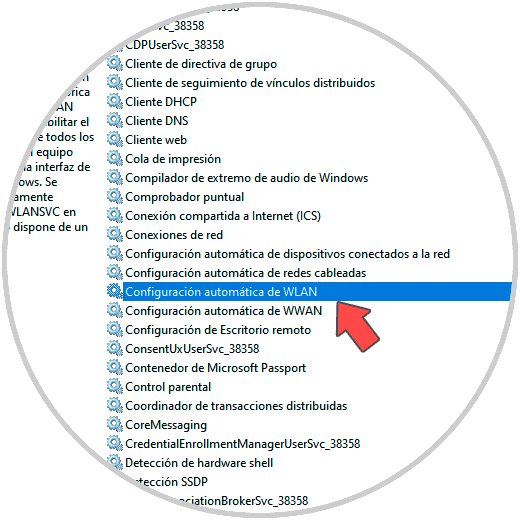
We open the local services, in the Windows 10 services window we locate the "Automatic WLAN configuration" service:
Step 3
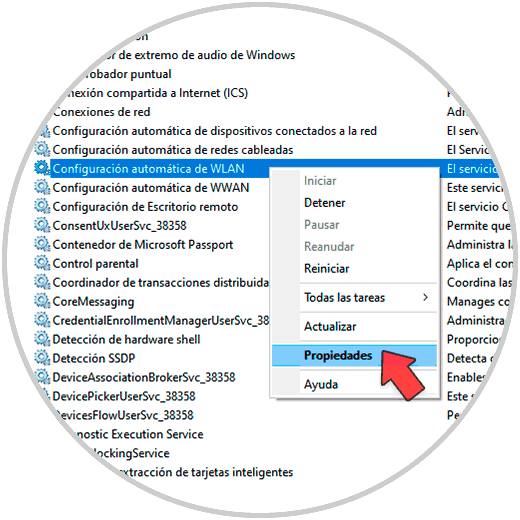
We right click on it and select Properties:
Step 4
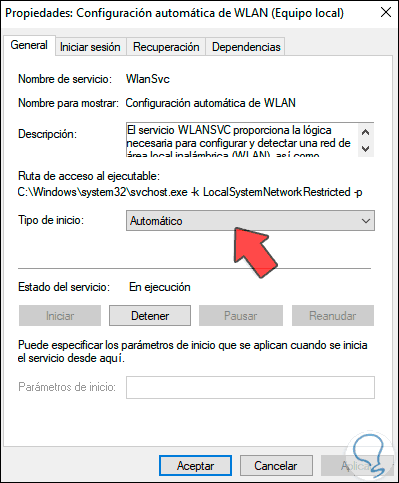
In the pop-up window we validate that its status is automatic and that it is running. Apply the changes.
2. Update Windows 10 WiFi driver
One of the common failures of this error is not having the updated adapter driver, this can undoubtedly have negative consequences on connectivity functions.
Step 1
To see if the driver is updated, we access the Device Manager from Start:
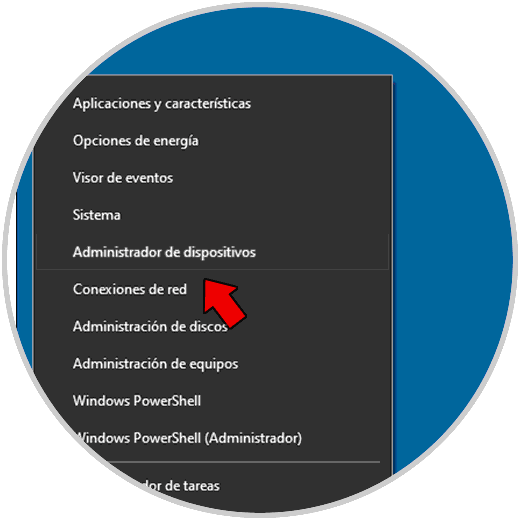
Step 2
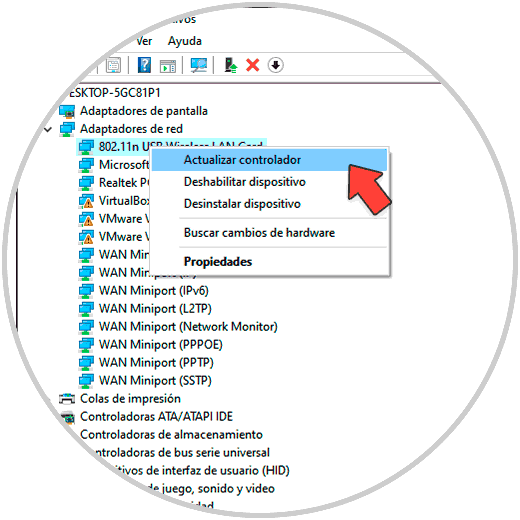
In the Device Manager window, go to the "Network adapters" section and right-click on the Wi-Fi adapter, select "Update driver":
Step 3
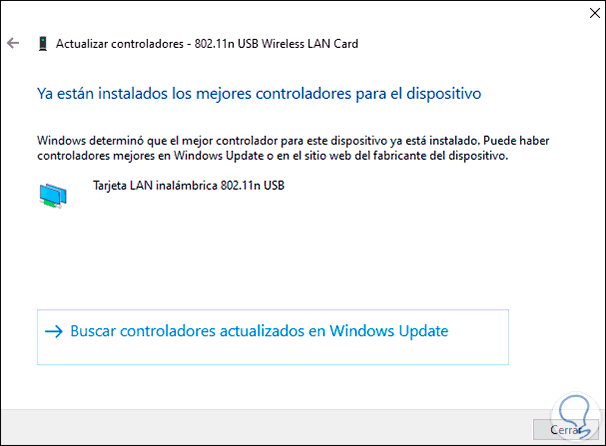
The following will be displayed:

Step 4
There it is possible to update the driver automatically or manually, for operational issues we recommend using the option "Search for drivers automatically", by clicking on it the system will update the driver if there is an update:
3. Uninstall WiFi driver Windows 10
This is a more drastic but functional method, in case the update does not work it is possible to uninstall the driver.
Step 1
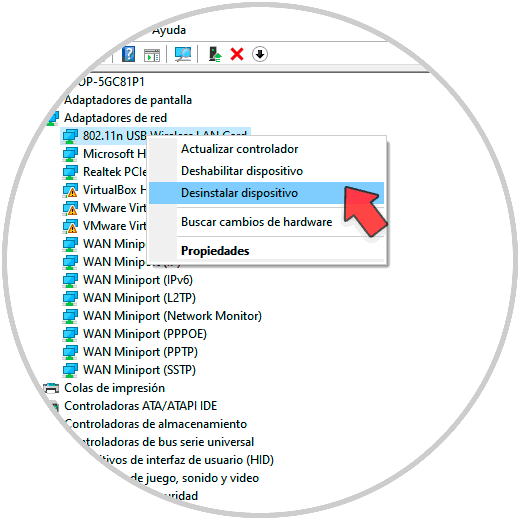
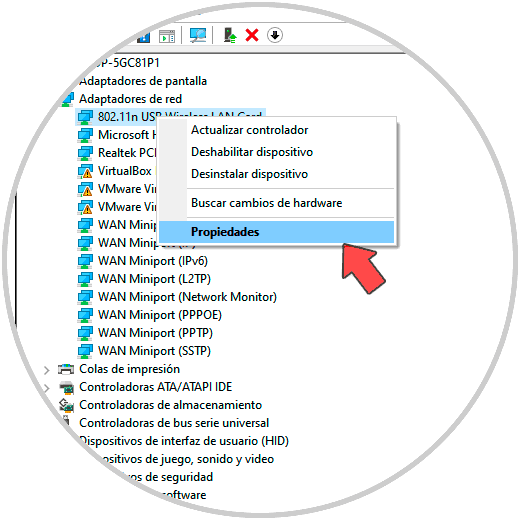
To do this we open the Device Manager from Start, then go to the "Network adapters" section, right click on the Wi-Fi adapter and select the "Uninstall device" option:
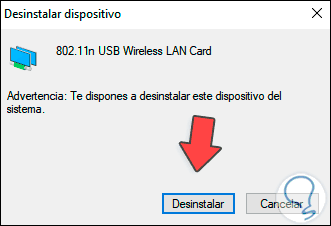
Step 2
The following pop-up window will be displayed. Confirm the operation and the system must be restarted to complete the action, when restarting, the most recent driver will be installed automatically so we should not worry.
4. Change WiFi properties Windows 10
The network controller has certain settings that are designed for its best autonomy but that can have the opposite effect on the behavior.
Step 1
To see what we're talking about, we access the Device Manager from Start, go to the "Network adapters" section, right-click on the Wi-Fi adapter and select Properties:
Step 2
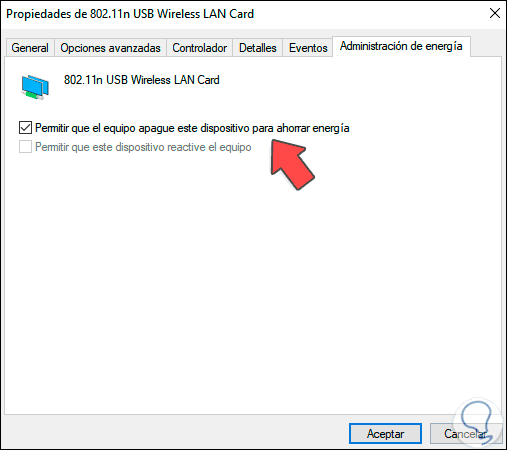
In the properties window we go to the "Power Management" tab:
Step 3
By default Windows 10 can turn off the network adapter to save energy, but if this happens it will simply be impossible to connect to a network since the adapter would be disabled, to rule out that this is the cause of the error, we will deactivate the box "Allow the computer turn off this device to save energy ":
We apply the changes..

5. Activate Windows 10 services
Step 1
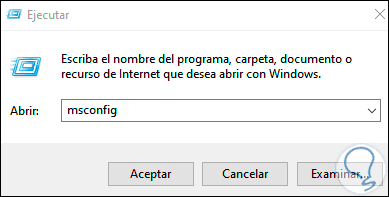
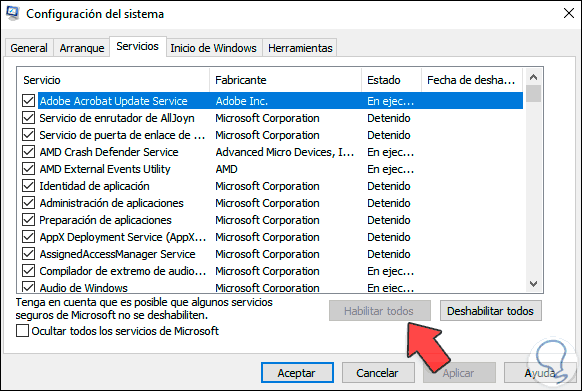
Finally we have the system configuration, for this step we open Run and enter the command "msconfig":
msconfig
Step 2
In the configuration window we go to the "Services" tab where we will see the following: We
validate that all the boxes are active and if it is not possible to click on "Enable all" to do so, apply the changes.
With any of these steps it is possible to allow the Wi-Fi network to function correctly.