In Windows 10 there are various protocols created so that the system and its components are able to interact with numerous extra functions and services. One of these protocols is NetBIOS. NetBIOS (Network Basic Input / Output System), is a protocol which allows applications that are on different computers to establish communication with each other within a local area network (LAN)..
This protocol is already enabled by default on network cards in Windows 10 systems and its mission is to provide session services that are integrated into layer 5 of the OSI model, that is, it allows sharing of network resources and enables the option to establish the session and keep network connections active.
Currently it is a protocol that has little use and it is for this reason that TechnoWikis will explain how to deactivate it or activate it if it is the case..
To stay up to date, remember to subscribe to our YouTube channel! SUBSCRIBE
How to enable or not NetBIOS in Windows 10
Step 1
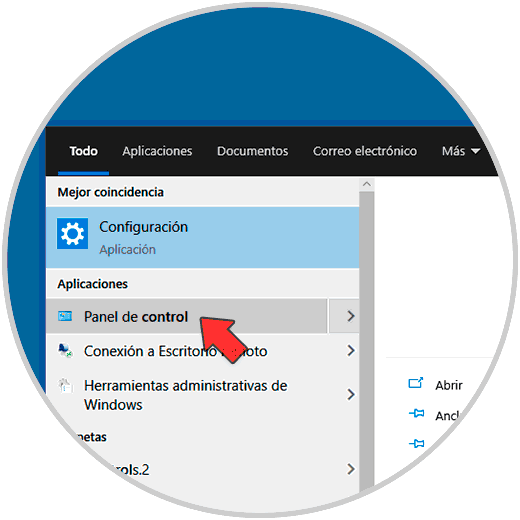
We open the Control Panel from Start:
Step 2
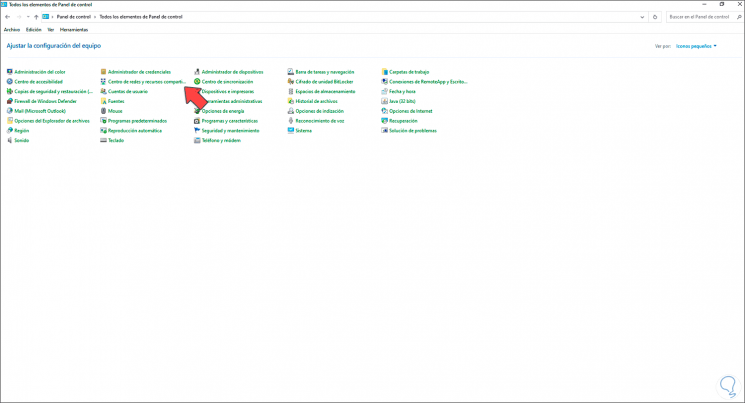
We will see the following:
Step 3
There we click on "Center of networks and shared resources":

Step 4
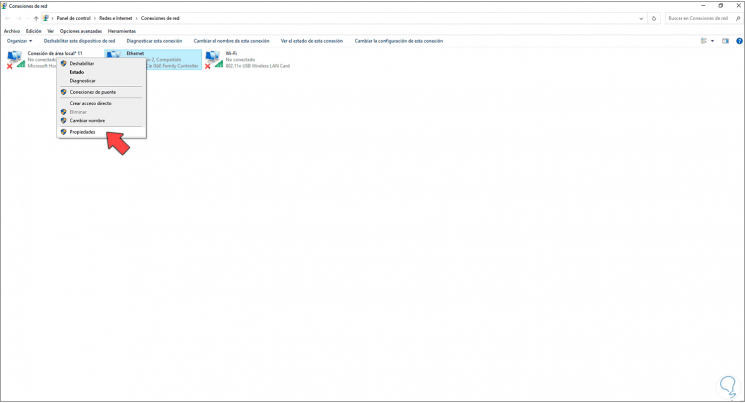
Now we click on "Change adapter settings" and then right click on the network adapter and select "Properties":
Step 5
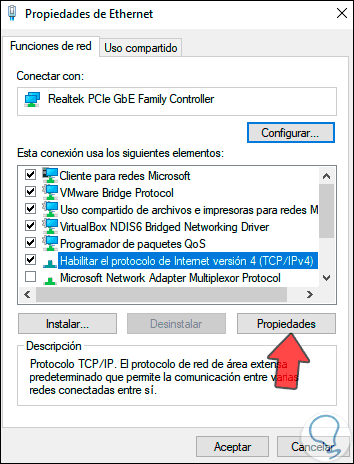
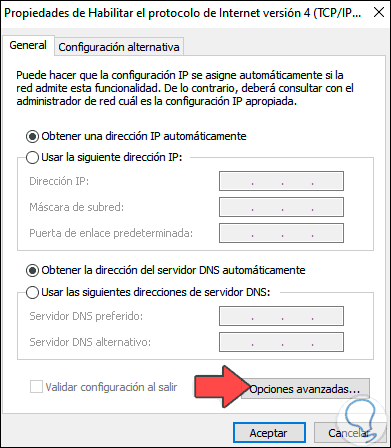
The following window will be displayed. We select the "Internet Protocol version 4" and click on "Properties", we will see this:
Step 6
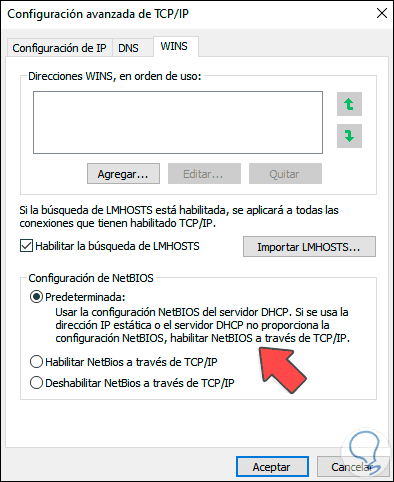
We click on "Advanced Options" and in the next window we go to the "WINS" tab where we will see the following.
Step 7
There it is possible to enable or disable NetBIOS, then apply the changes.
So simple we can activate or not the NetBIOS protocol in Windows 10..