Windows Server is an operating system of the business type which has been developed by Microsoft in order that as administrators we have at hand the possibility of managing in a centralized way various roles and services focused on each client having the best services ..
Windows Server has been developed as a safe, functional and practical system, but like every system developed by man, it is not free from failures and for this reason we can find errors in the drivers, services or parameters of both the system itself and others components and hence the importance of knowing how to fully manage the system.
For this type of administration and support, Microsoft has integrated the Safe Mode function into Windows Server 2016 or 2019. With the safe mode, the Windows operating system will boot into a basic state , that is, it will only use a limited set of files and drivers to perform administration tasks in a much more complete way..
This will give us better perspectives regarding the solution of the problems that the equipment may have, seen from this mode, it will be much simpler to rule out failures, for example, if the system works normally in this safe mode, we can rule out that both the default configuration As the basic device drivers are not the root cause of the problem and thus it will be possible to concentrate on other aspects of the system.
Safe Mode
Safe mode has two options that are:
- Safe mode: load basic drivers.
- Safe mode with network functions, this differs in that it includes the network drivers and the services necessary to access the Internet and other computers on the local network.
TechnoWikis will explain how we can start Windows Server, in this case 2019, in safe mode, but it is ideal to remember that this process applies equally to Windows Server 2016..
To keep up, remember to subscribe to our YouTube channel! SUBSCRIBE
To configure the safe mode in Windows Server 2019, we must start the system in advanced mode and for this we have several options that are:
- Use the Shift key and press the Windows Server shutdown button and select Restart there
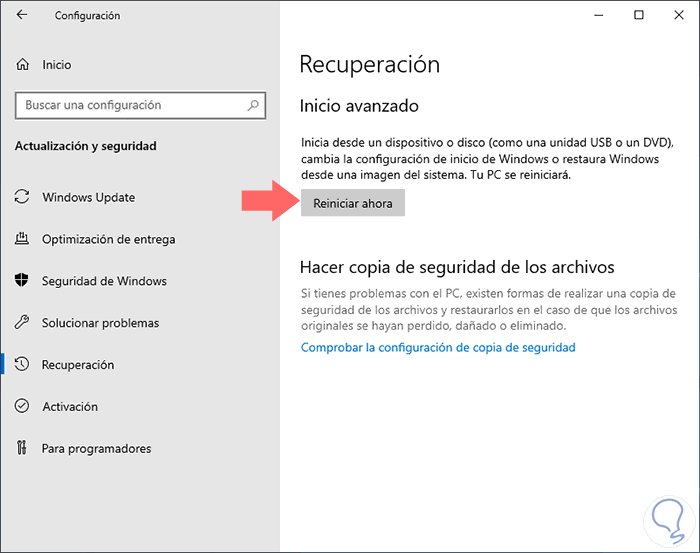
- Go to the Start / Configuration / Update and security / Recovery path and click on the Restart now button in the Advanced Start section
Step 1
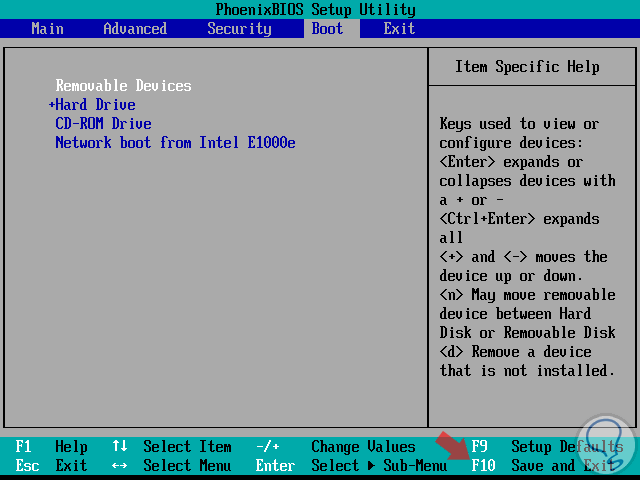
The third method, which we will use in this tutorial, is to use the ISO image of Windows Server 2019 or 2016 either through the DVD or a bootable USB. With this available, we must access the BIOS or UEFI of the computer and there configure the boot method in the Boot tab as well. Press the F10 key to save the changes.
- Removable Devices: USB Devices
Step 2
Once the boot process starts, press any key to configure Windows Server 2019 startup:
Step 3
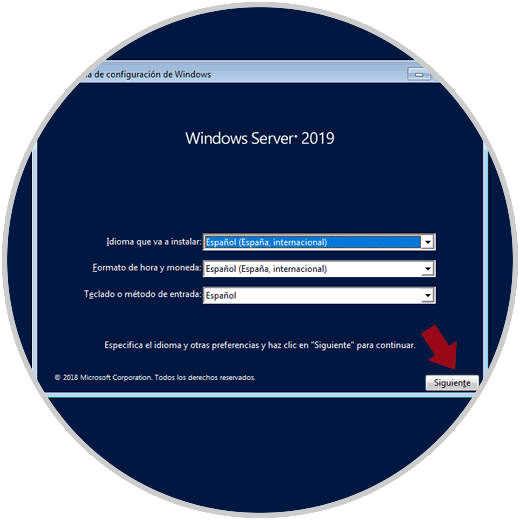
There we click on "Next" and we will see this:
Step 4
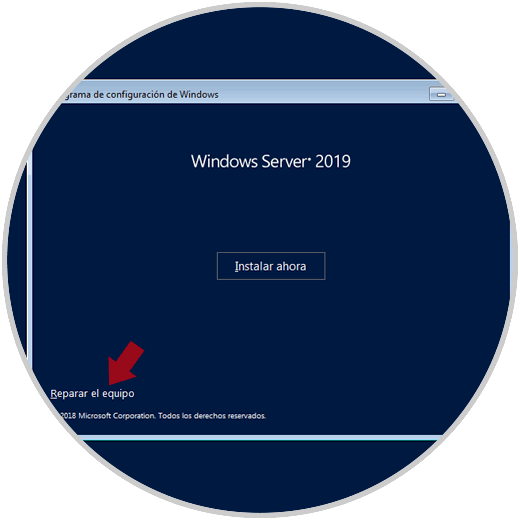
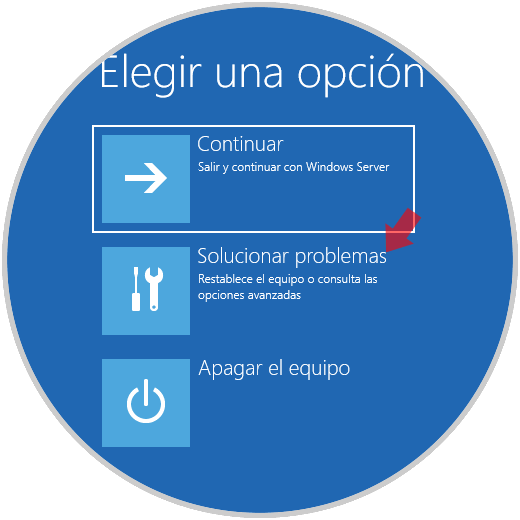
There we click on the "Repair the equipment" line and we will be redirected to the following window (the same one using one of the previous methods):
Step 5
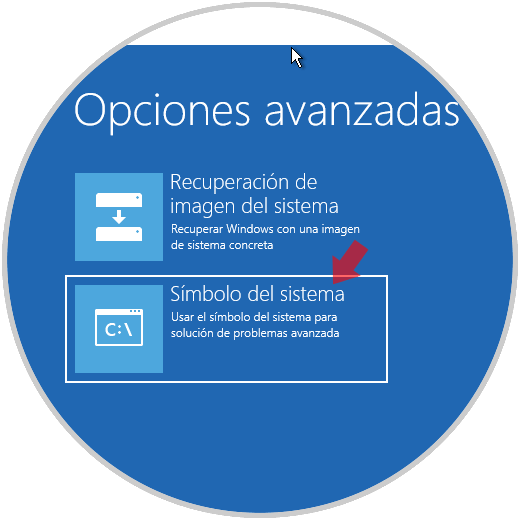
There we select the "Troubleshoot" option and in the next window we select the Command Prompt option:
Step 6
By selecting this option, we will access the command prompt of the Windows Server where we will enter the following line:
bcedit / set {bootmgr} displaybootmenu yes 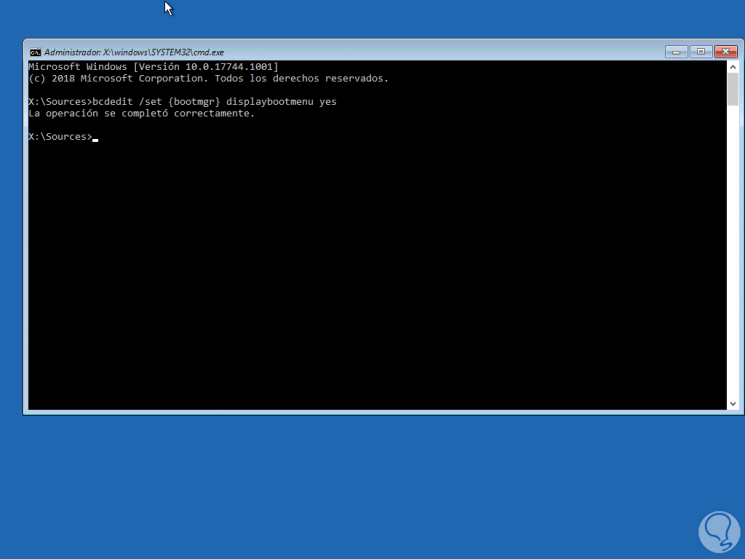
Step 7
Note
BCDEdit is a command line tool developed by Microsoft thanks to which it will be possible to manage the data associated with the system's boot configuration (BCD).
Once this line is executed, we will execute the following.
bcedit / set {bootmgr} timeout 15 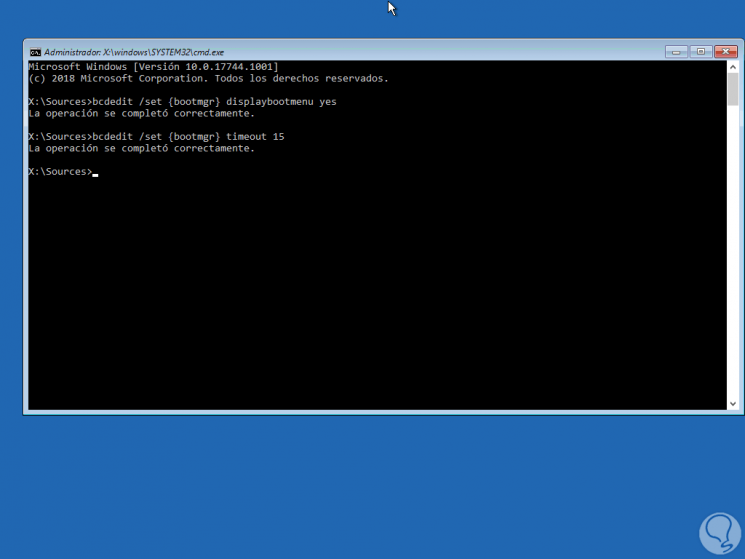
Note
Once this process is done, we execute the exit command to exit the command line and proceed to turn off the computer to eliminate it and to be able to configure the boot again from the hard disk.
Step 8
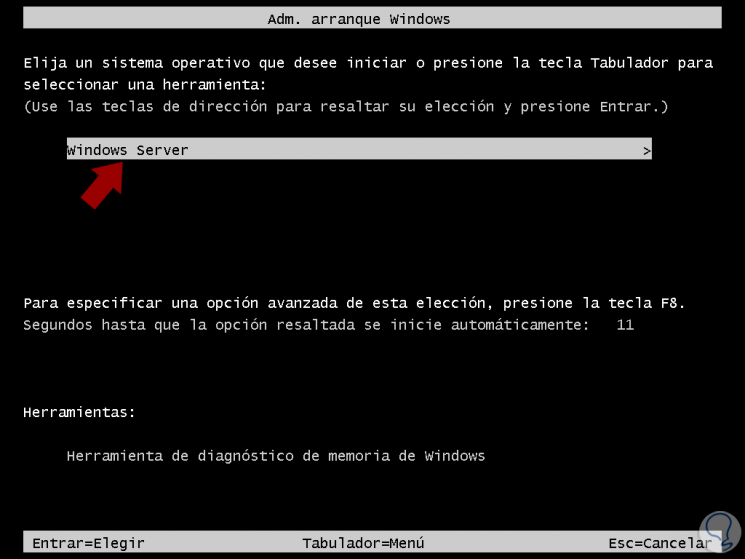
When starting the system, we will see the following:
Step 9
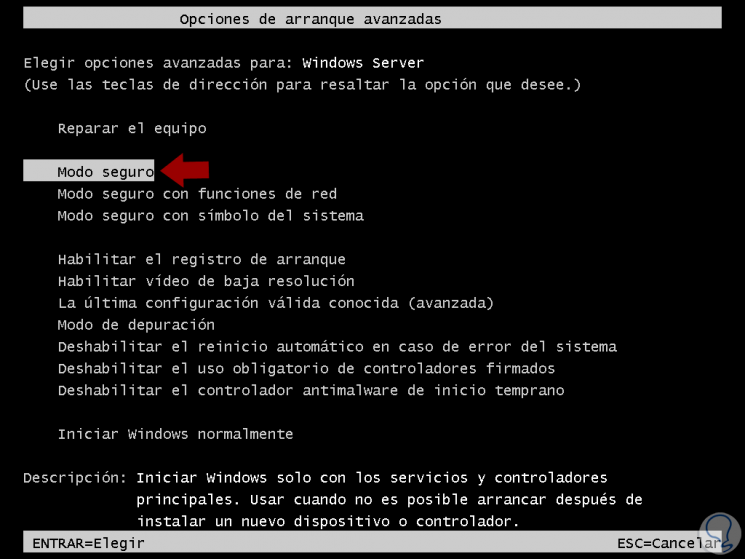
There we select our operating system and later it will be possible we will select the type of boot in safe mode that we want for Windows Server 2019:
Step 10
Press Enter and once we access the system it will be possible to perform the required administrative tasks:

Thus, we have learned to access in this practical and useful way in Windows Server 2016 or 2019 to perform the necessary administration tasks.