Hard drives, such a vital element of hardware since without them it would not be possible to install the operating system, our applications or perform other tasks such as file storage, backups and, if we talk about Windows Server 2016 , other more delicate actions such as replication , failover, disk mirrors or more..
Talking about a hard disk is synonymous with capacity or speed, taking into account the new SSD disks , but having hard drives in server environments requires going beyond and having the basic and advanced knowledge to manage these disks in full , without losing your information or activating new disks so that they can be used based on the required file system in the best way.
It is for this reason that today TechnoWikis will make a complete and detailed analysis of the various administrative activities that we can perform on hard drives in Windows Server 2016..
It is important to clarify that when working on hard drives we must be careful due to the information they contain and that bad manipulation can trigger a really critical problem throughout the system. There are different options for converting hard drives based on the partition style used, these are:

When we administer computers with Windows Server 2016, by default, disks that have been detected or connected new are established with read and write access and it does not indicate that any hard disk that is disconnected must be connected before it can be initialized, created volumes or carry out some task on it.
1. Start a hard disk in Windows Server 2016
When we physically connect a new hard disk to the computer where Windows Server 201 is, it will be necessary for us to start the hard disk in order to activate it and make efficient use of it.
Step 1
For this, we will access the disk manager using one of the following options:
Disk Manager
Step 2
When we have connected one or more hard drives for the first time, we will see the following when accessing the administrator:
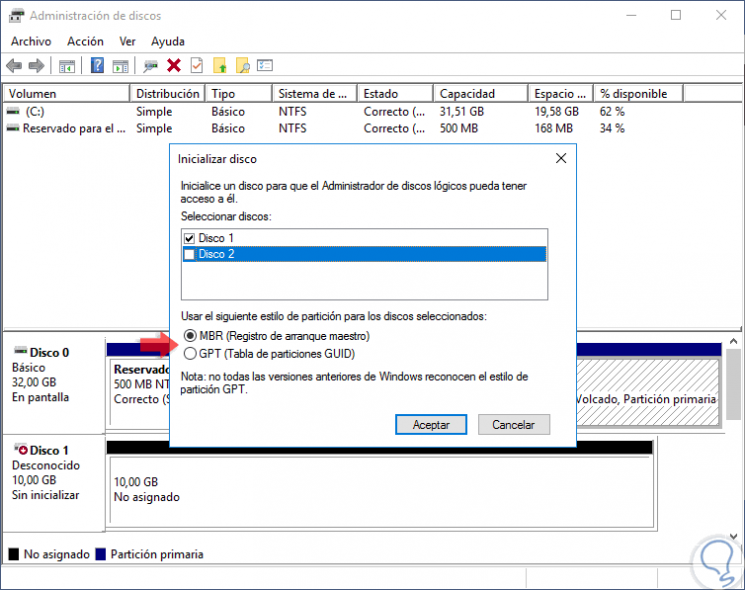
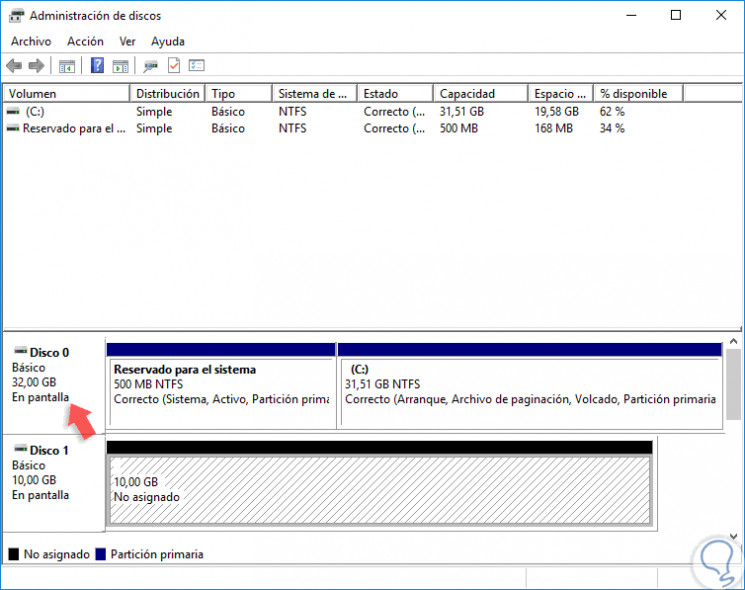
Step 3
As we see there we have the option to choose the master boot record partition (MBR or GUID partition table style (GPT). Once we click on OK, we can see that the selected disk has been initialized since it has the text “In screen â€on the left side:
Note
To carry out this process we must be part of the Backup Operators or Administrators group. The new hard disk starts as a basic disk.

Login Join up!