PowerPoint in its 2016 or 2019 versions have been developed with a large set of benefits so that each slide made in it has a touch of professionalism and innovation so that the visual impact at the time of presentation is as complete as possible..
When creating and editing presentations in PowerPoint 2016 or 2019, it is normal that we integrate multimedia elements such as audios, videos or external links within the slide which help us to significantly improve the presentation. But they can also dramatically increase the weight of the presentation which can affect if it is sent by email, USB medium or it can simply take longer than expected to run due to its large size, since it must load the multimedia content inserted there.
To prevent this, the most practical way is to compress the PowerPoint file and therefore TechnoWikis will give a series of tips on how to compress a file of this type and thus save space and improve the execution time of the presentation..
Note
We will perform this process in PowerPoint 2019 but apply the same process for PowerPoint 2016.
To keep up, remember to subscribe to our YouTube channel! SUBSCRIBE
1. Compress PowerPoint images 2019, 2016
One of the most used multimedia elements on any slide is undoubtedly the images which highlight the purpose of the presentation, but if these images are in a very high resolution, their size can be several megabytes, notably affecting the total size of the presentation. To correct this, PowerPoint integrates an image compression tool which will help us significantly reduce its weight.
Step 1
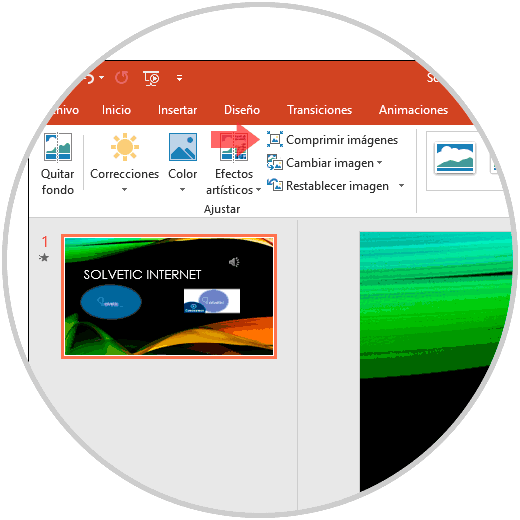
For this, we select the image on the slide and the “Image Tools†menu will be activated, there we go to the “Format†menu and in the “Adjust†group we will see the option “Compress imagesâ€:
Step 2
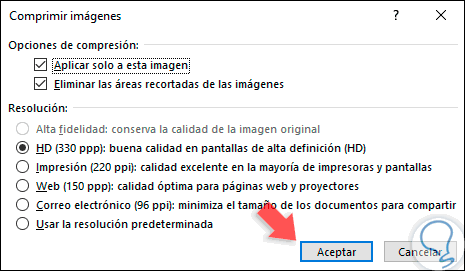
We click on this option and the following window will be displayed:
Step 3
There we have options such as:
- Apply compression only to the selected image.
- Delete the clippings that the image has.
- Define the resolution with which the selected image will be left in options such as 330 dpi, 220 dpi, 150 dpi, etc.
Step 4
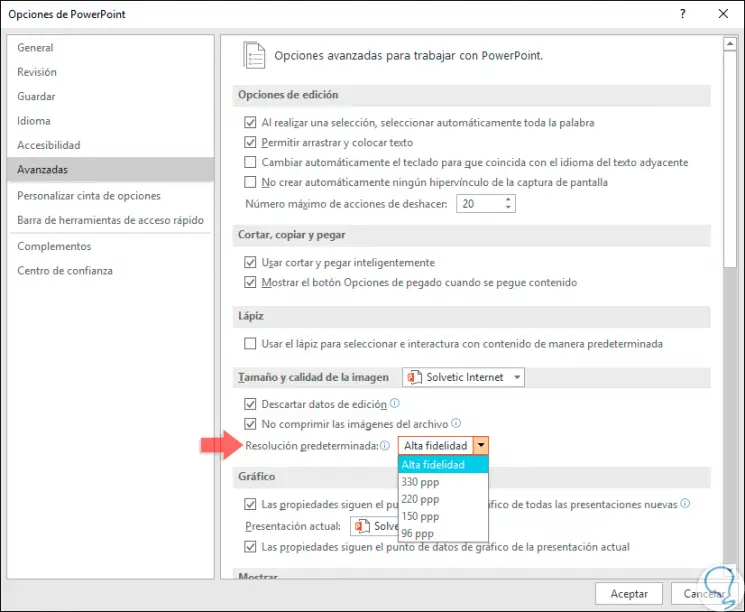
Once we select the most appropriate option, click on the "Accept" button to apply the changes. Once we make the changes, we must go to the “File†menu and there select the “Options†line, in the window we will go to the “Advanced†section and in the “Image size and quality†section we do the following. Once this is defined, click on OK to save the changes and thus we have reduced the original size of the image on the PowerPoint slide 2016/2019.
- Check the "Discard editing data" box.
- In the "Default resolution" field we can define the resolution that best suits the needs of the file.
2. Compress images using Compress Media feature of PowerPoint 2019, 2016
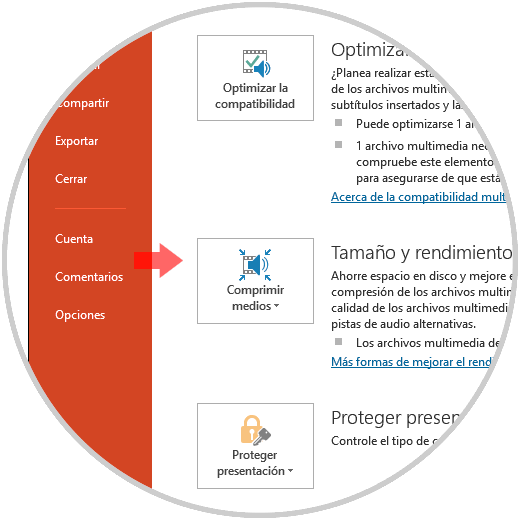
As we have mentioned, PowerPoint provides us with useful alternatives for the compression of the slides, one of these is the “Compress media†function which will only be activated when we have inserted audio or video elements into the presentation.
Step 1
To make use of this function, we must go to the "File" menu and in the "Information" section we find the option "Compress media":
Step 2
Clicking on it will display the following options:
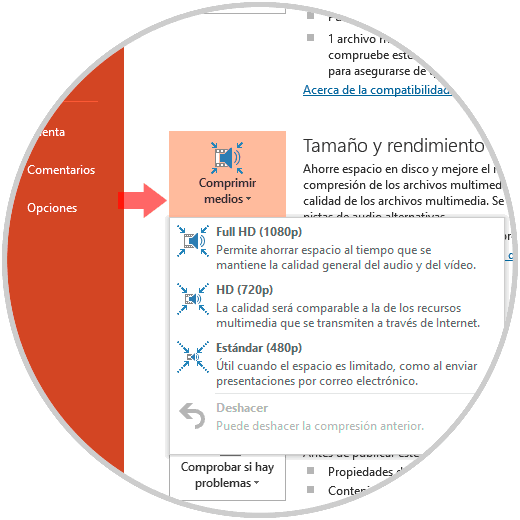
Step 3
The available options are:
Full HD (1080p)
Selecting this option will save disk space, but the overall quality of the audio and video files on the slide is preserved.
HD (720p)
With this option, the quality is similar to what we observe of the multimedia files that are transmitted through the Internet.
Standard (480p)
If we select this option, the size will be drastically reduced as well as the quality of the files, this option is useful when we lack enough space on the disk or when it is required to send the presentations by email which we know has a restriction of File size
Step 4
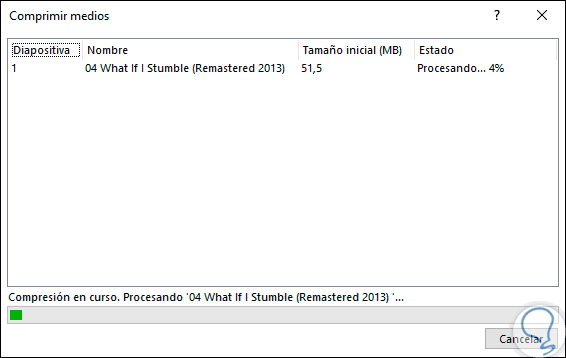
There we can select the option we consider appropriate and clicking on it will start the respective compression process:
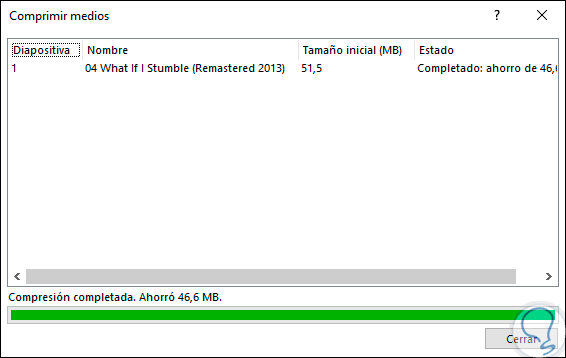
Step 5
Once this process is finished we will see the following. Click on "Close" to exit the wizard and thus verify that the presentation size has been reduced.
With any of these solutions, we will have the opportunity to reduce our presentations and thus allow a much more adequate work on these, remember that the more slides we insert, the larger the presentation size and we must be aware that multimedia files we add so as not to affect its size.